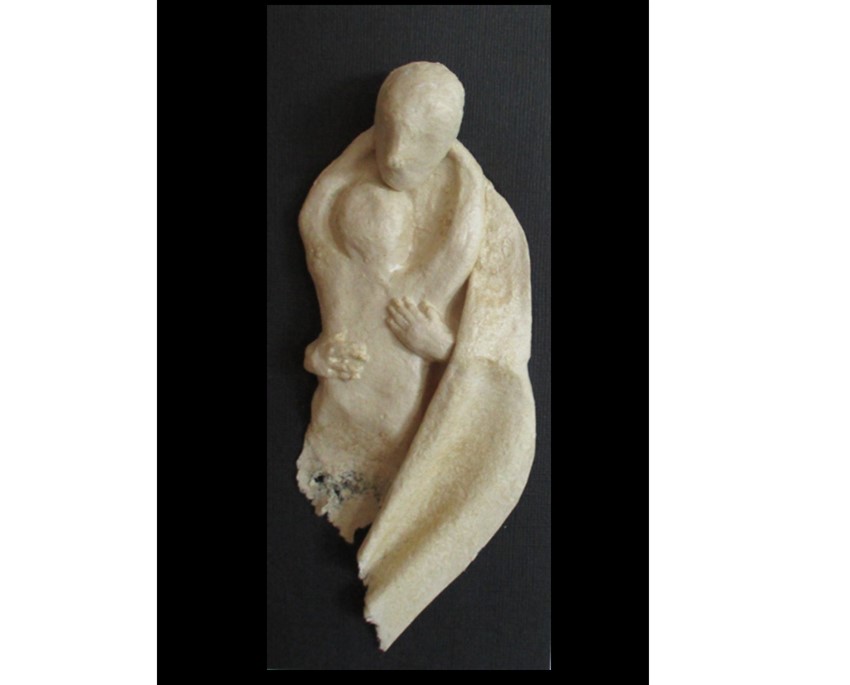
This sculpture was created in memory of a long time friend who died early this year. The Biblical story of the prodigal son (Luke 15) was one of his favourites, and this sculpture was inspired by a photo of a large clay rendition.
The image is small (180mm x 80mm), set on the front of a card. It was sculpted in two pieces with plasticine from which plaster moulds were made. Recycled paper pulp was pressed into the plaster cast and dried, then constructed and shaped. As the work is not behind glass, I’ve used several layers of sealant on the surface.
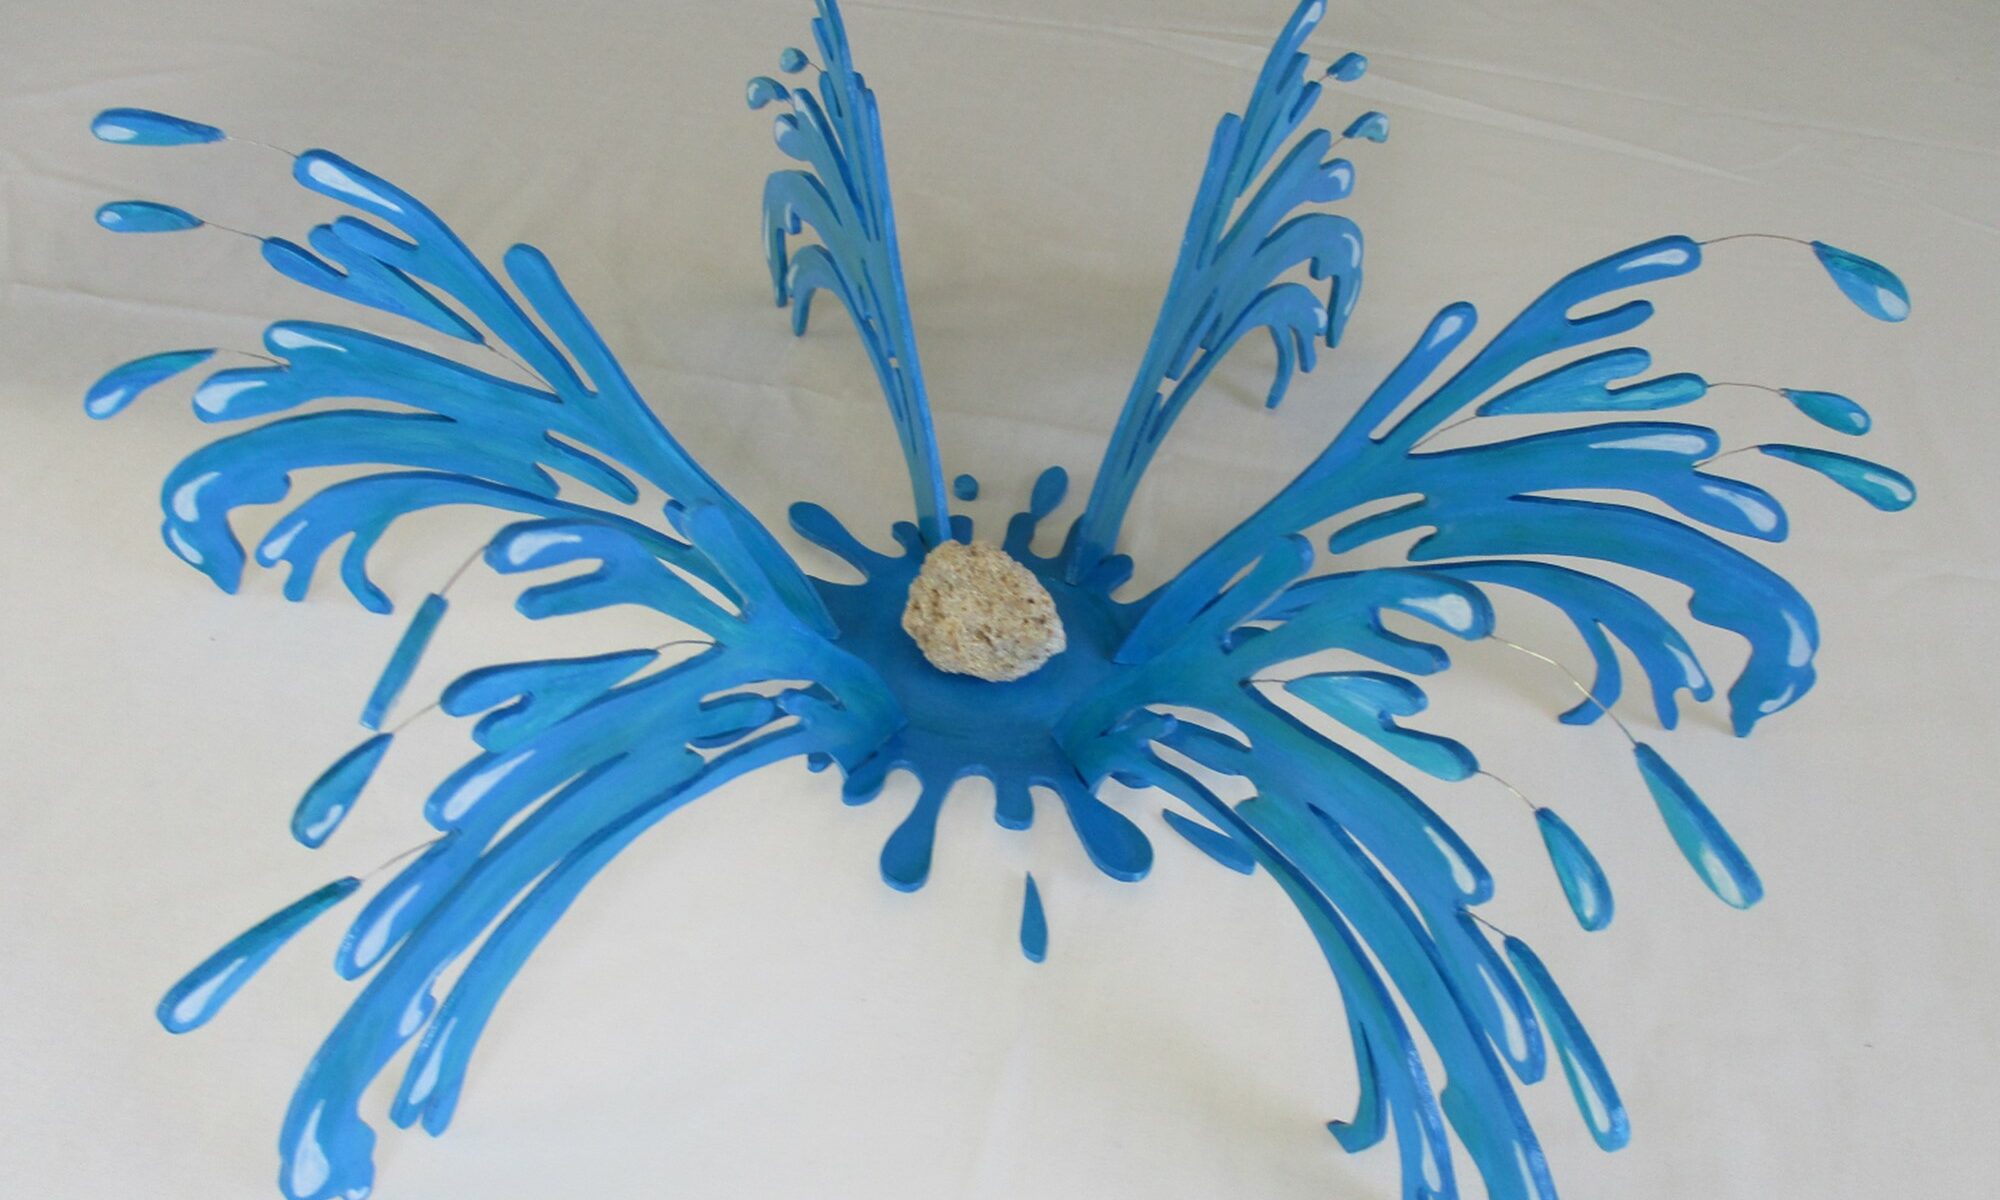
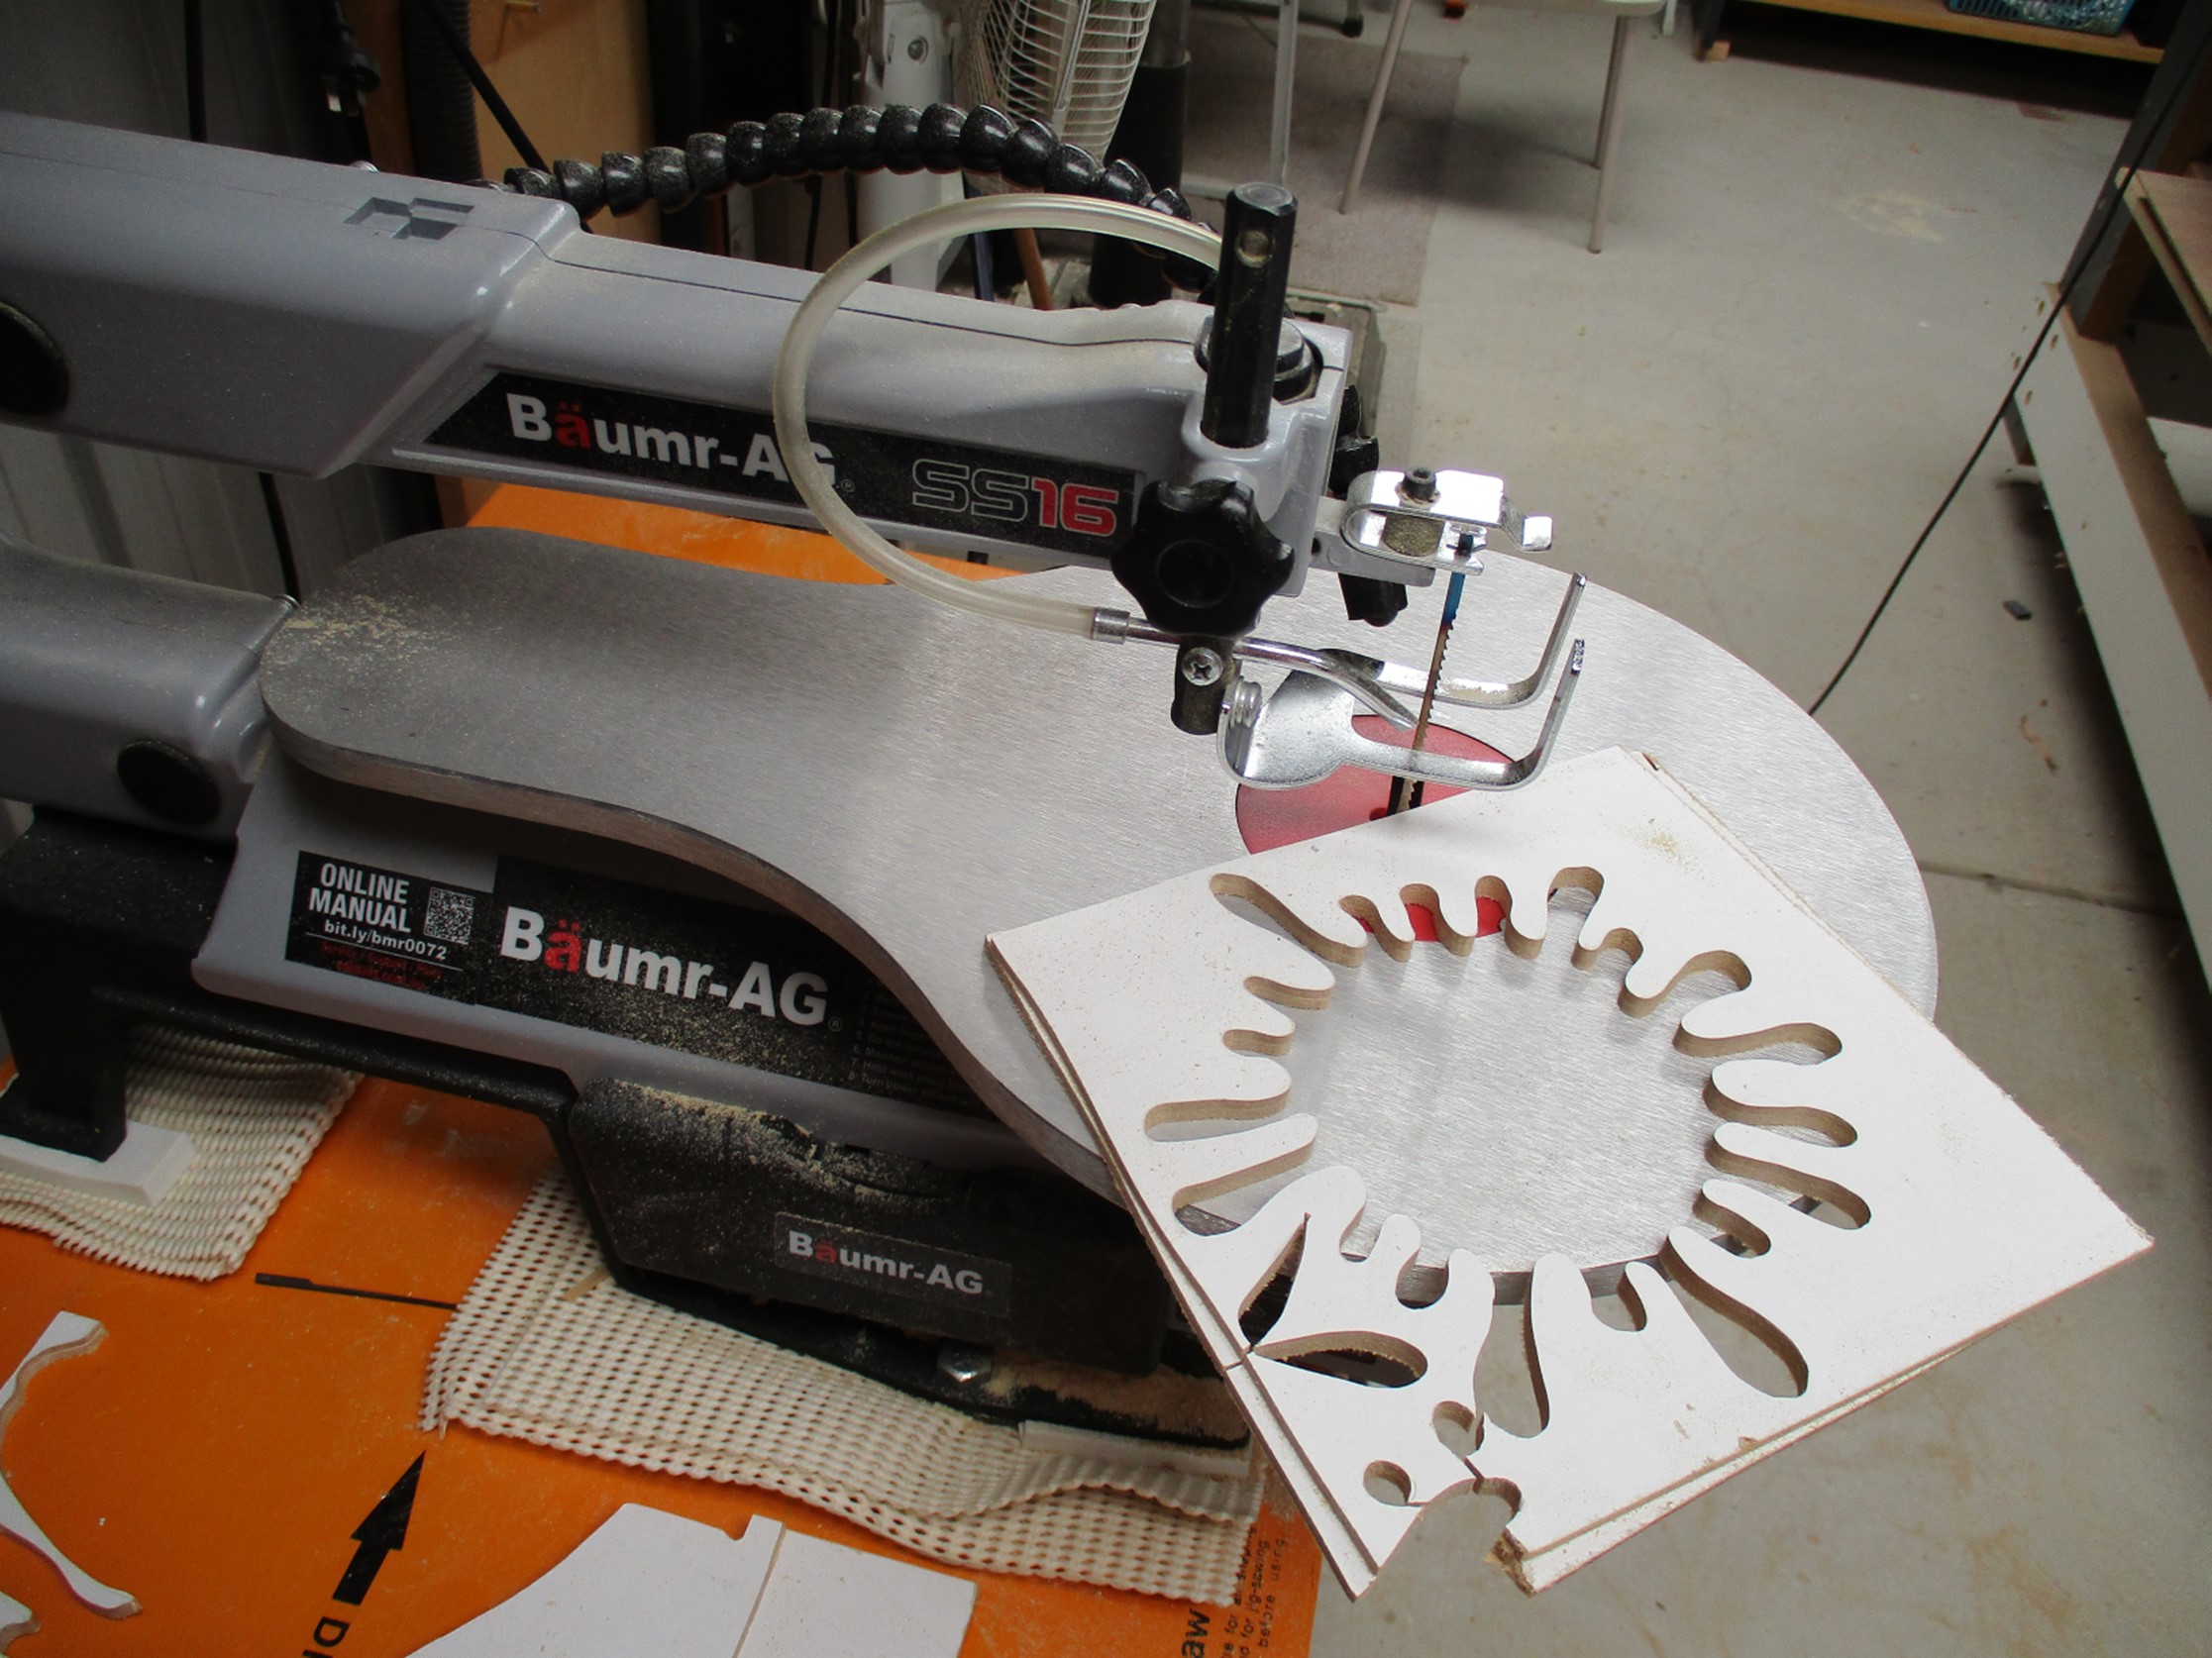
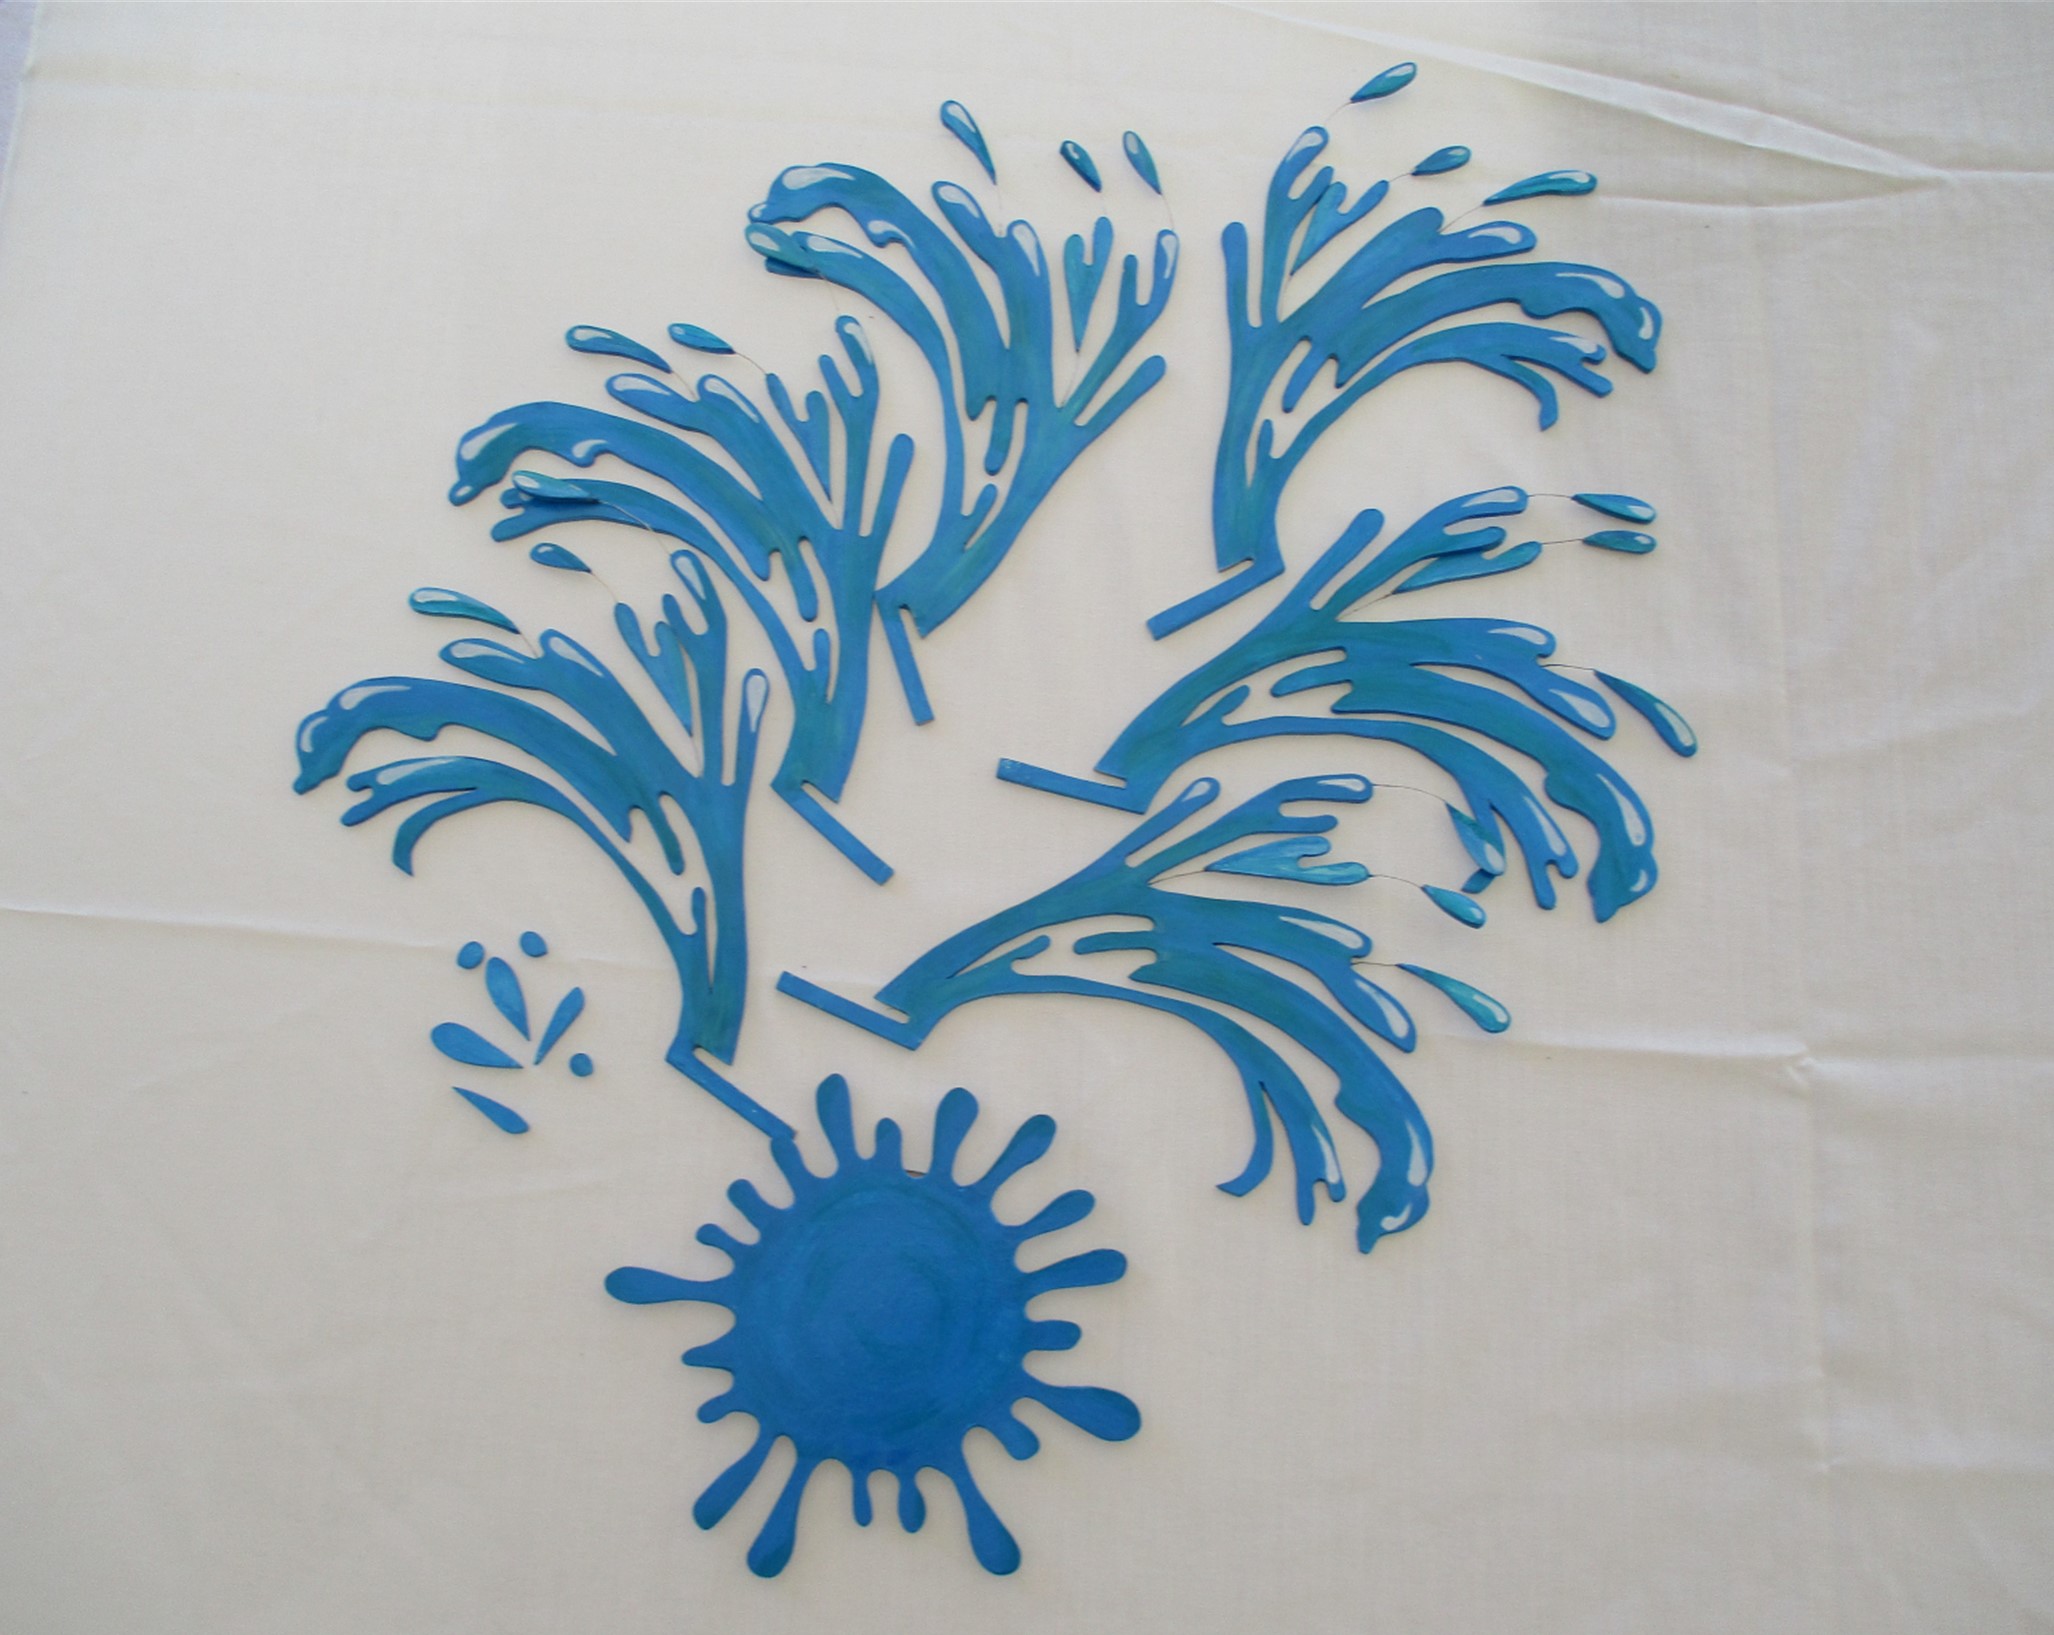
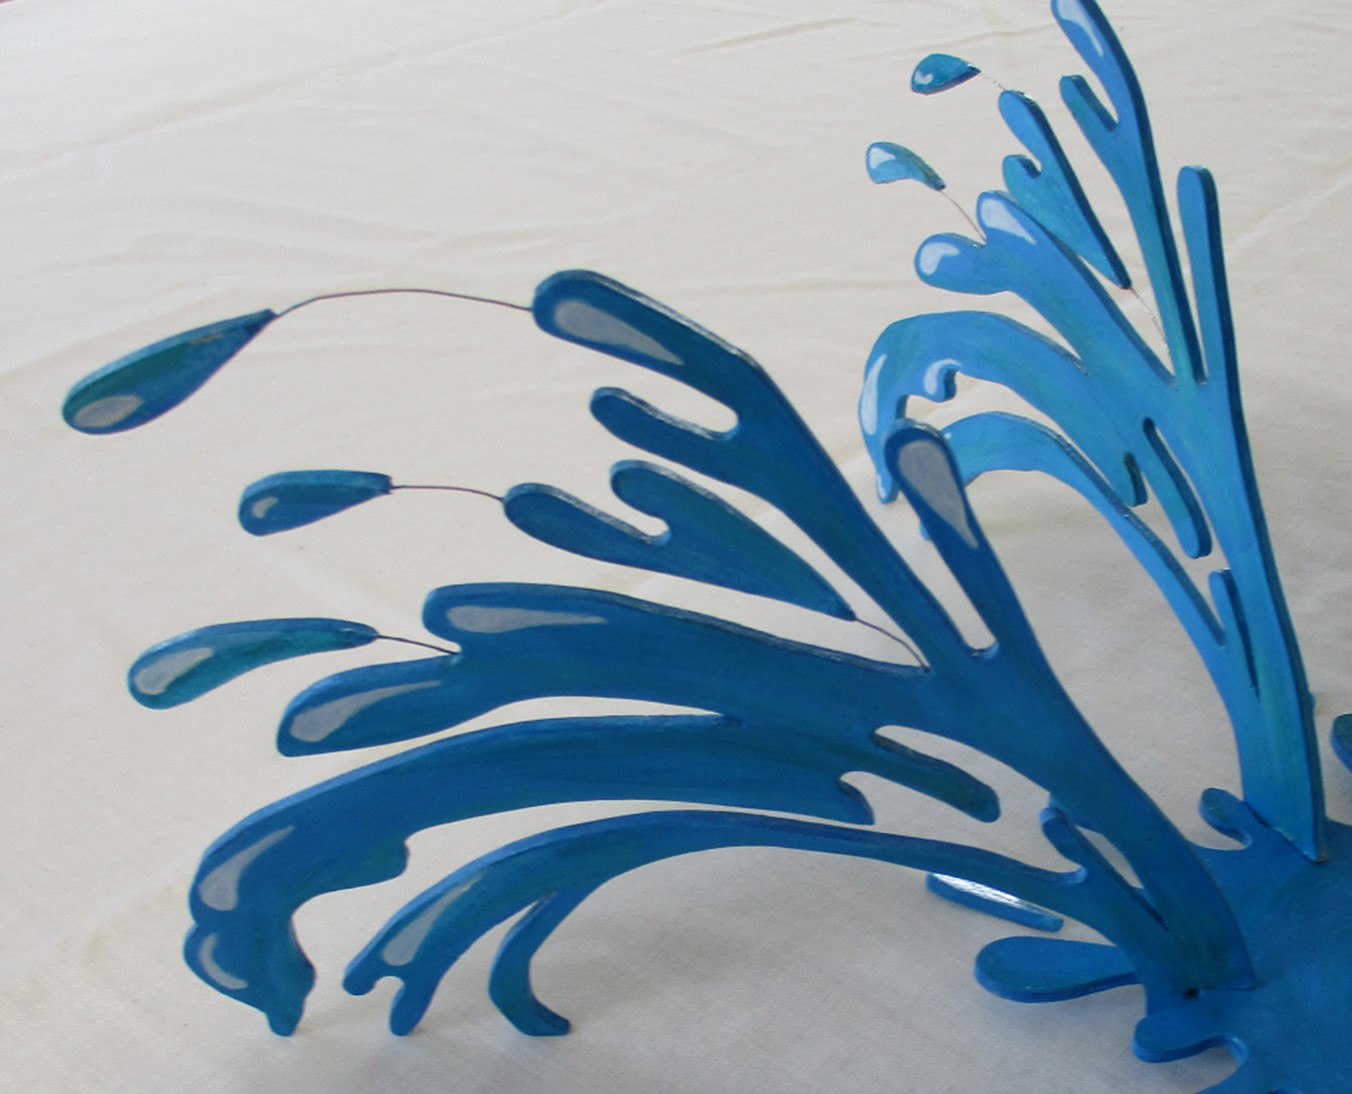
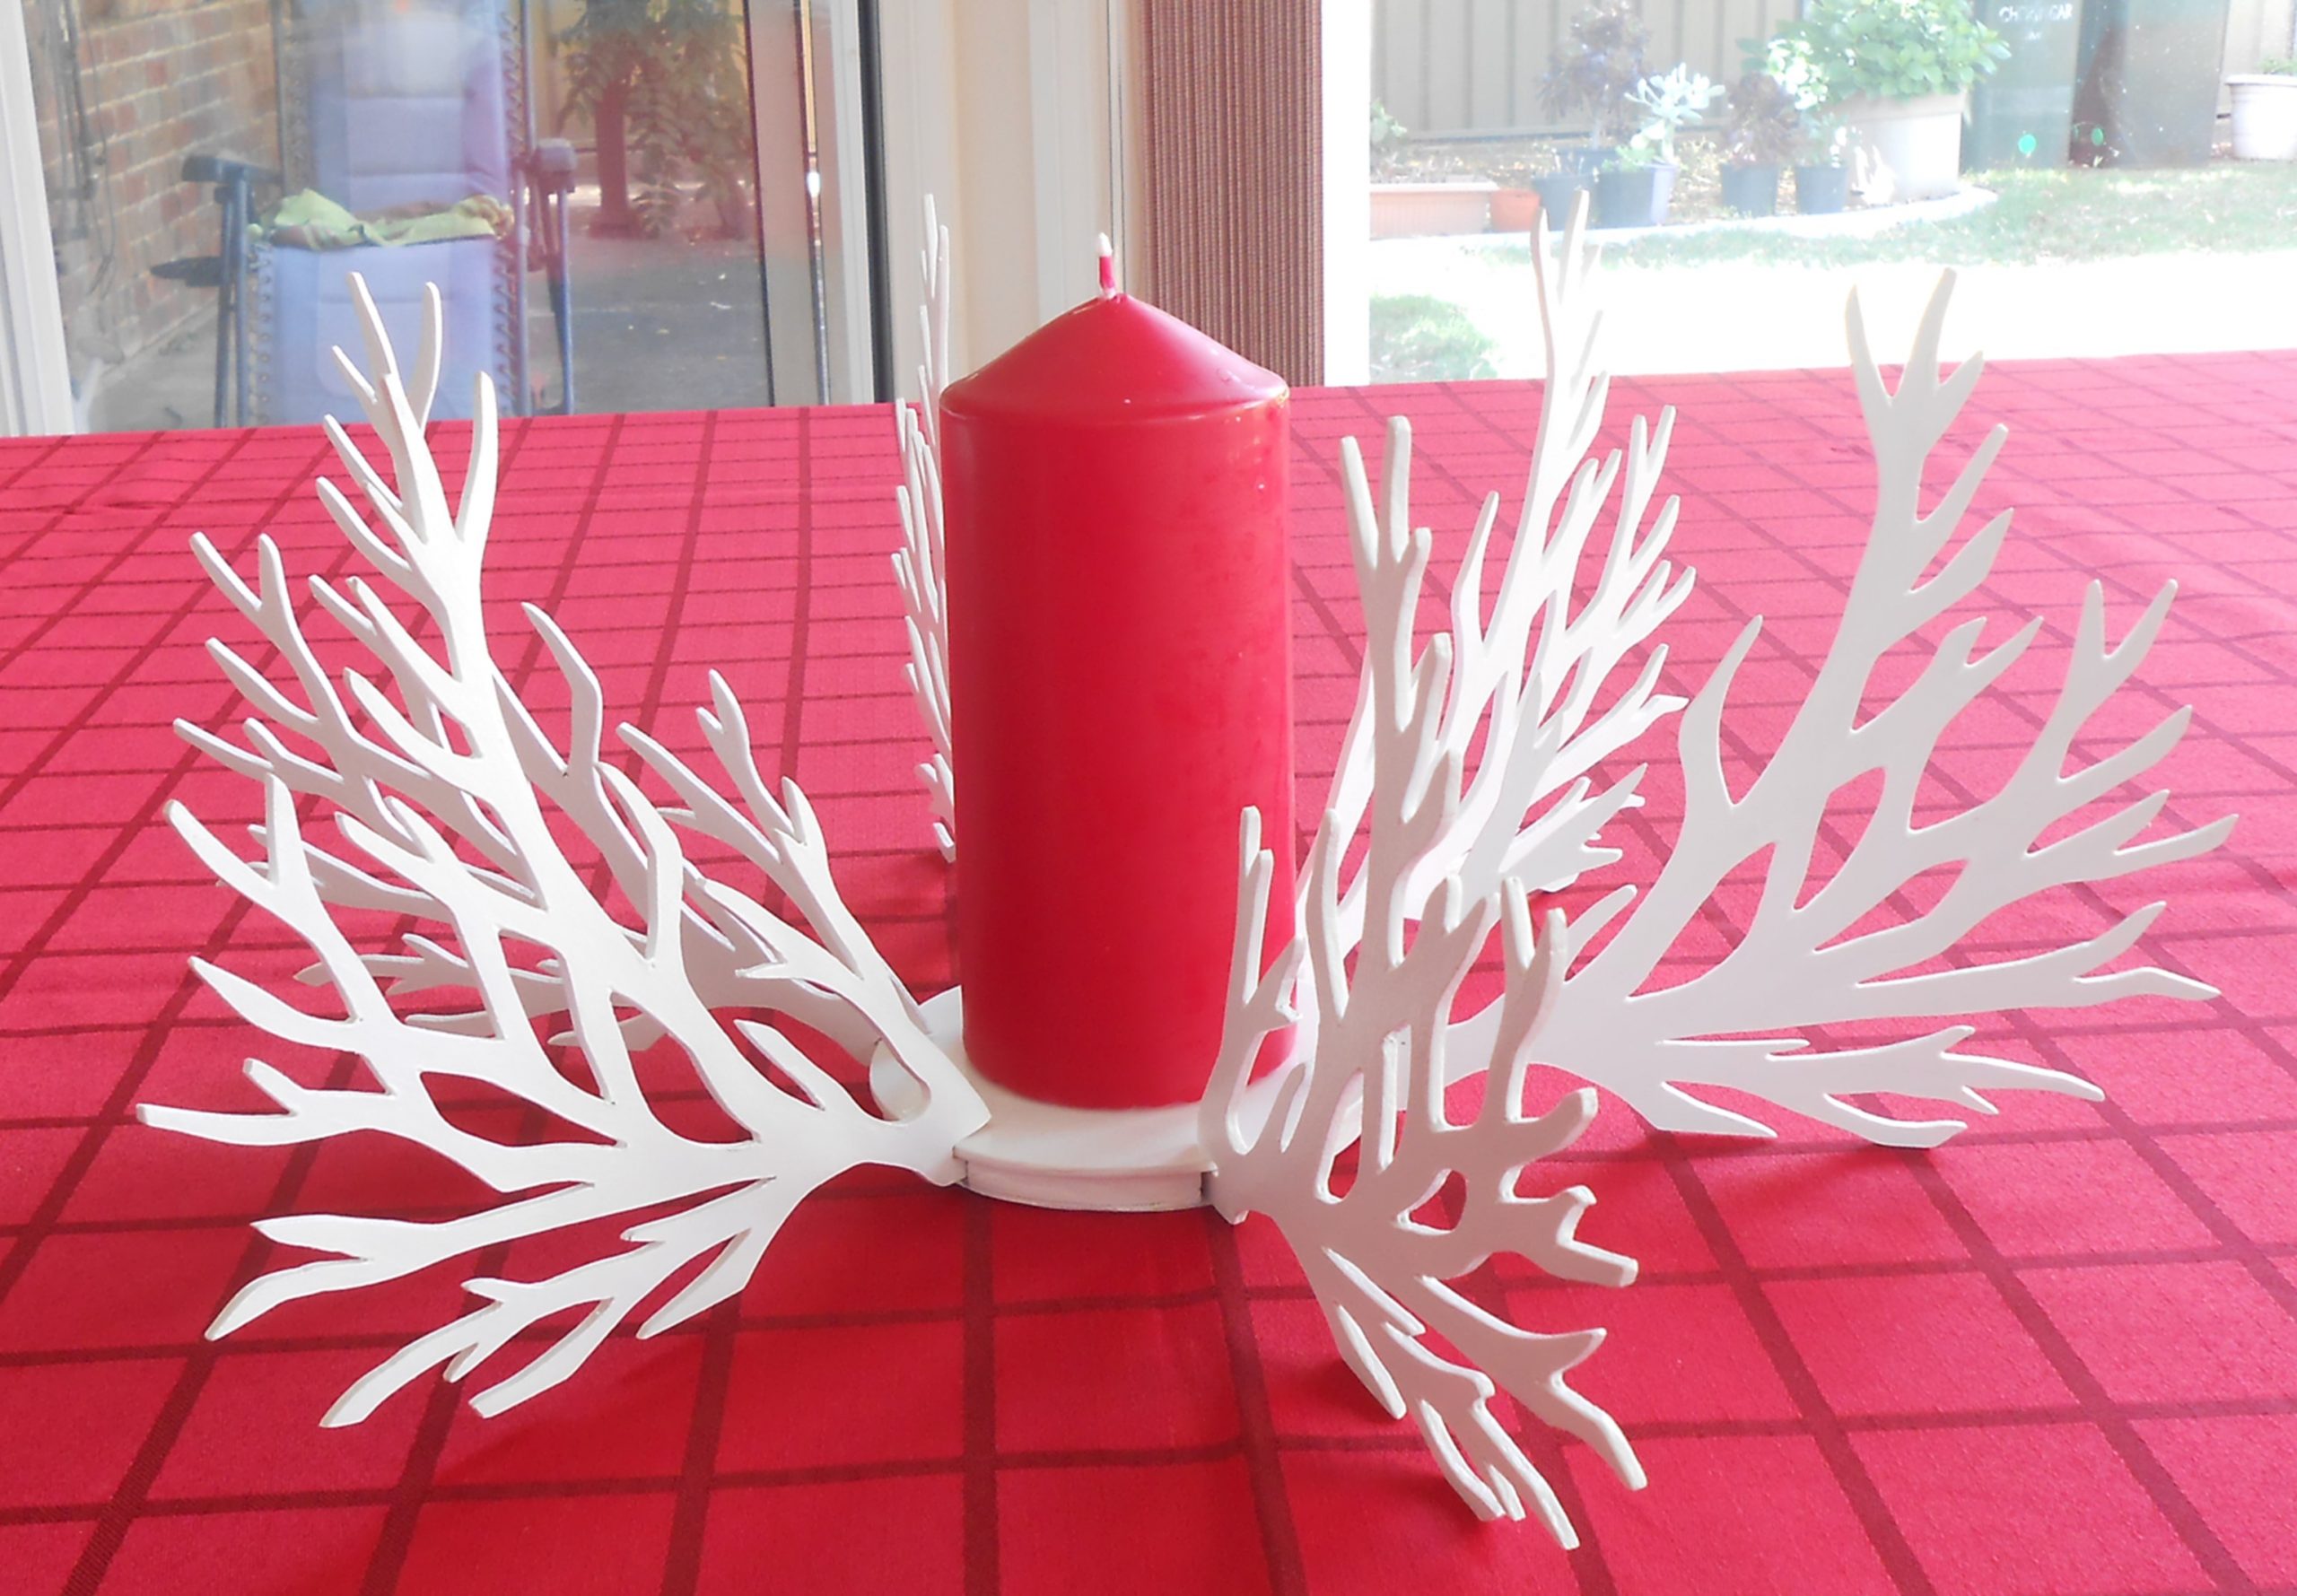
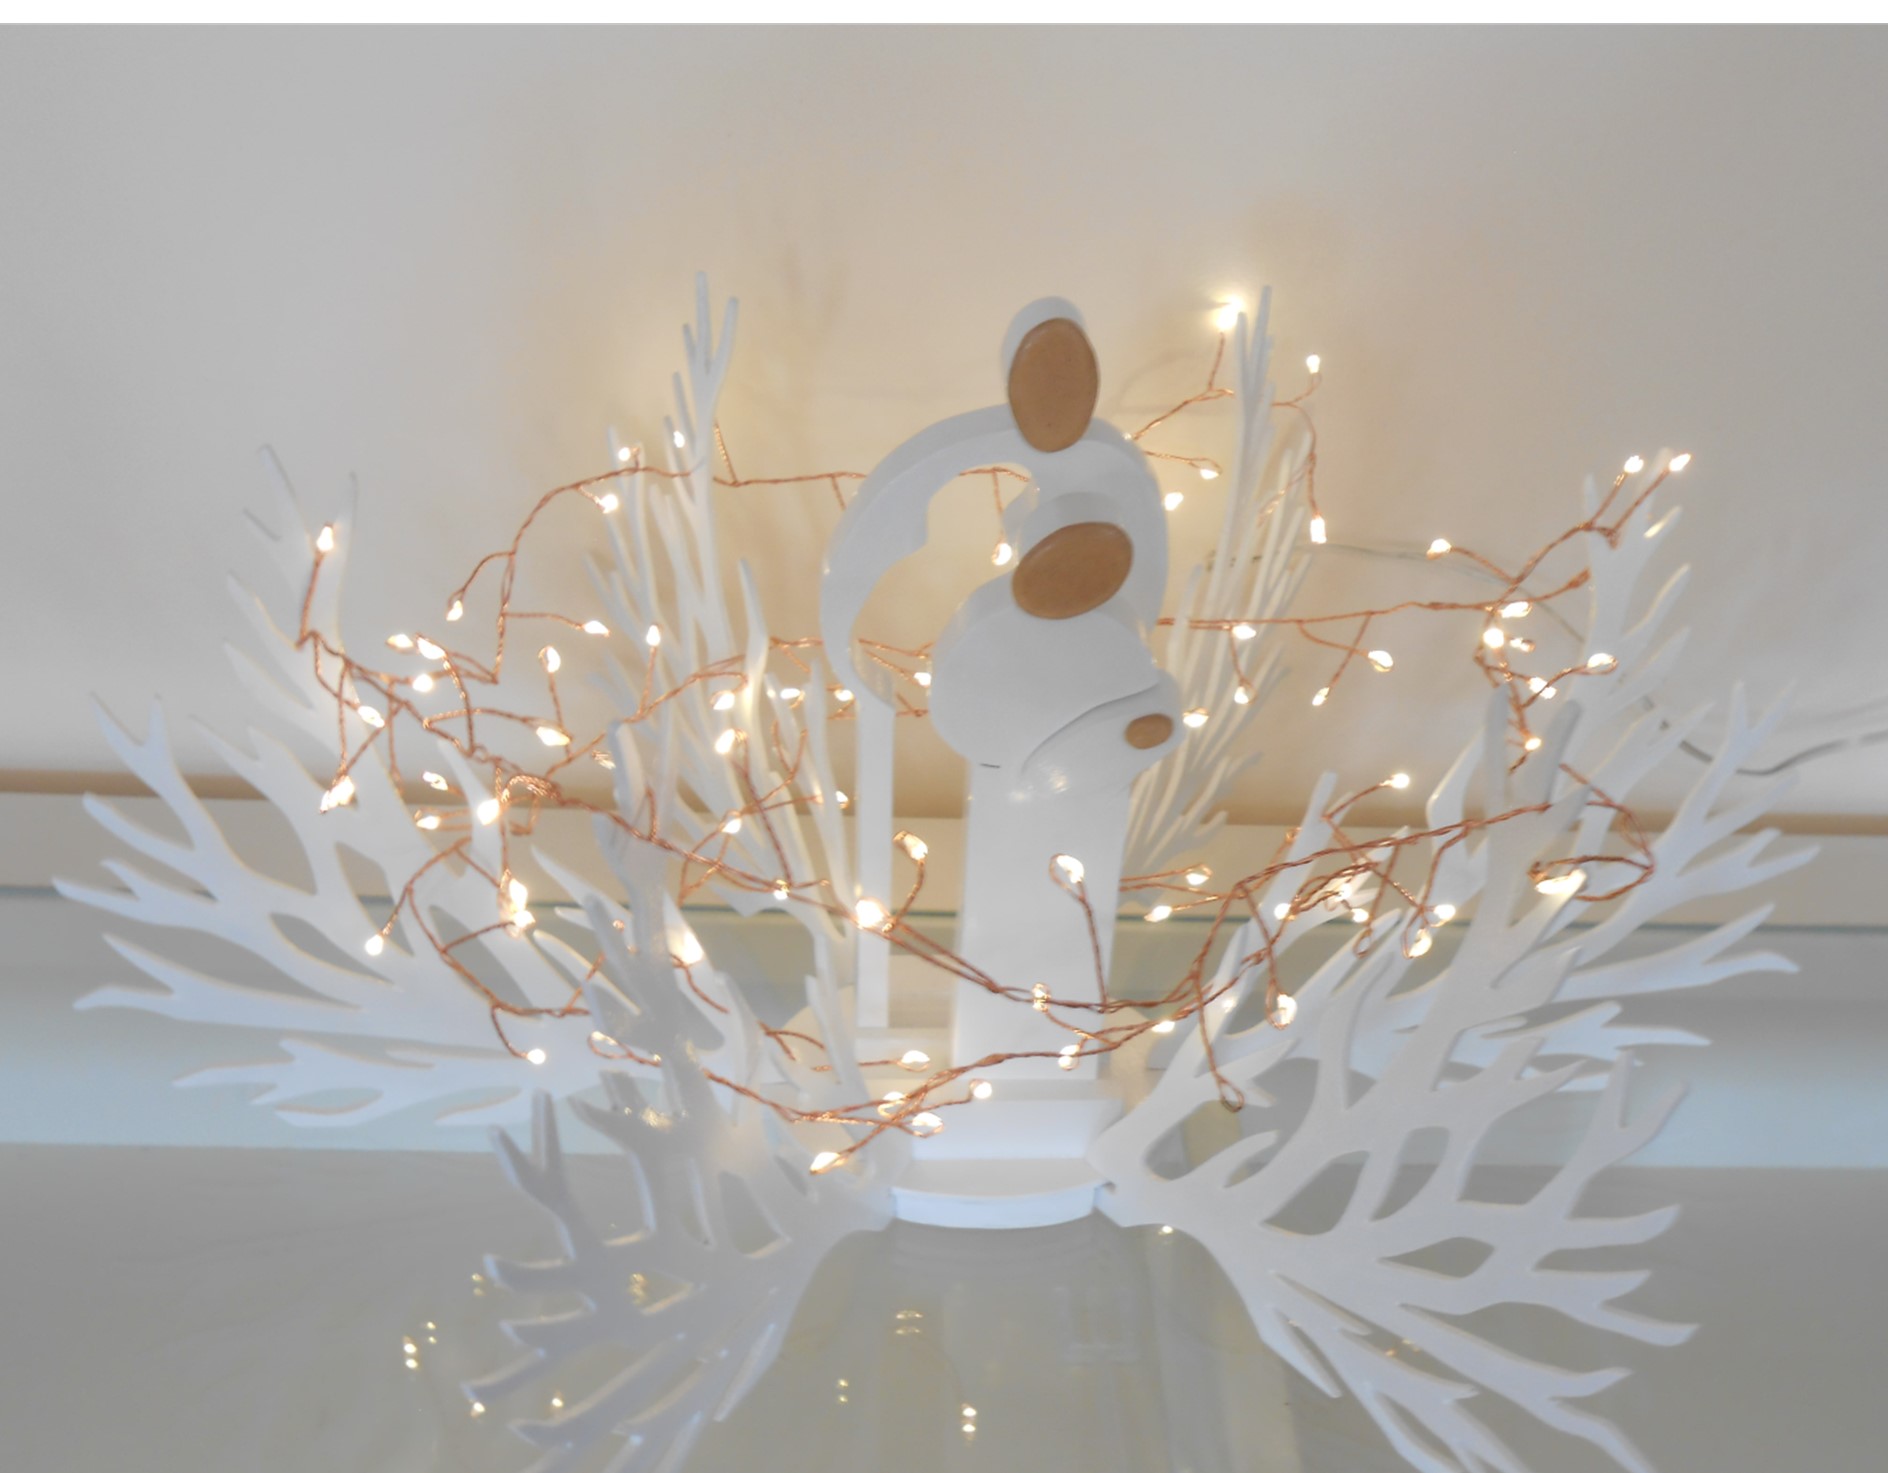
This table centrepiece is scroll-sawed from 3mm mdf (medium density fibreboard) and painted in vibrant blues. My aim was to create a striking design that embodied the movement and energy of a water splash.
One of the qualities of mdf is that it’s more like compacted cardboard than wood. I used this feature to insert tiny threads of wire glued into the edges, to support the external droplets, making them appear to be suspended in the air. Well, they do from a distance!
The piece comprises 6 ‘fins’ that slot into a base, so it’s easily dismantled to store in an envelope. It is painted with acrylic paint and finished with a high gloss varnish.
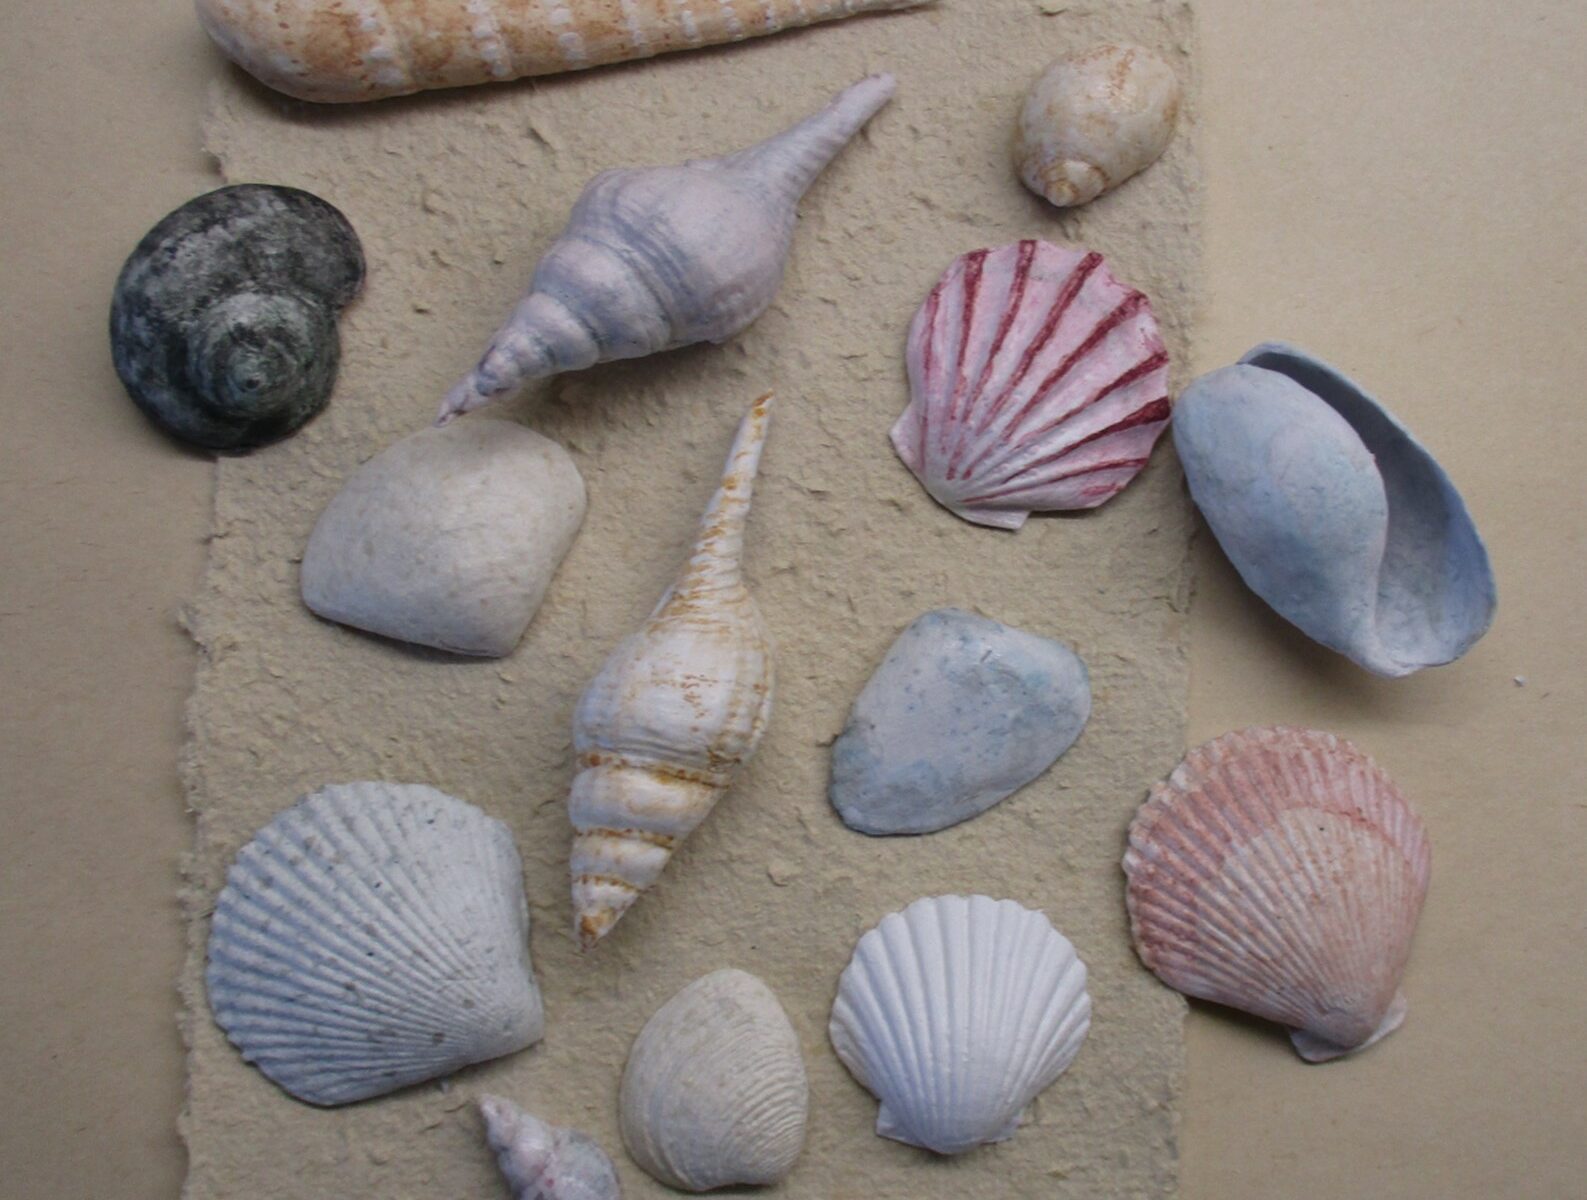
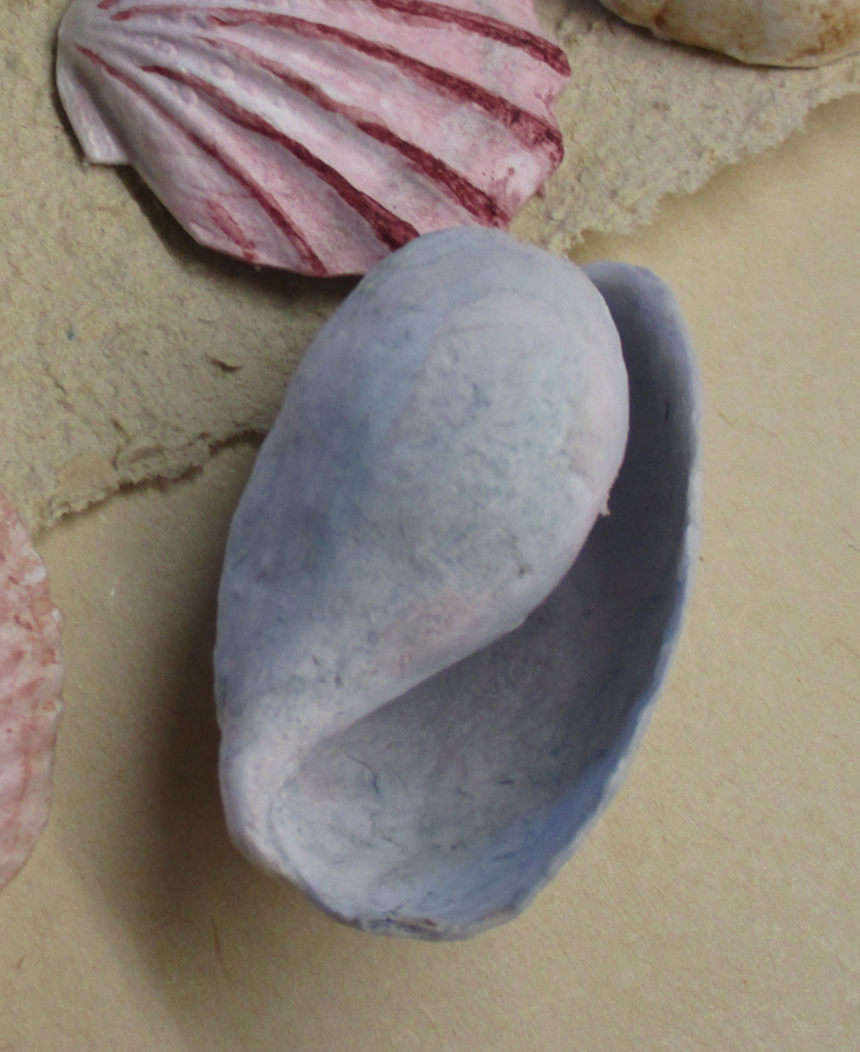
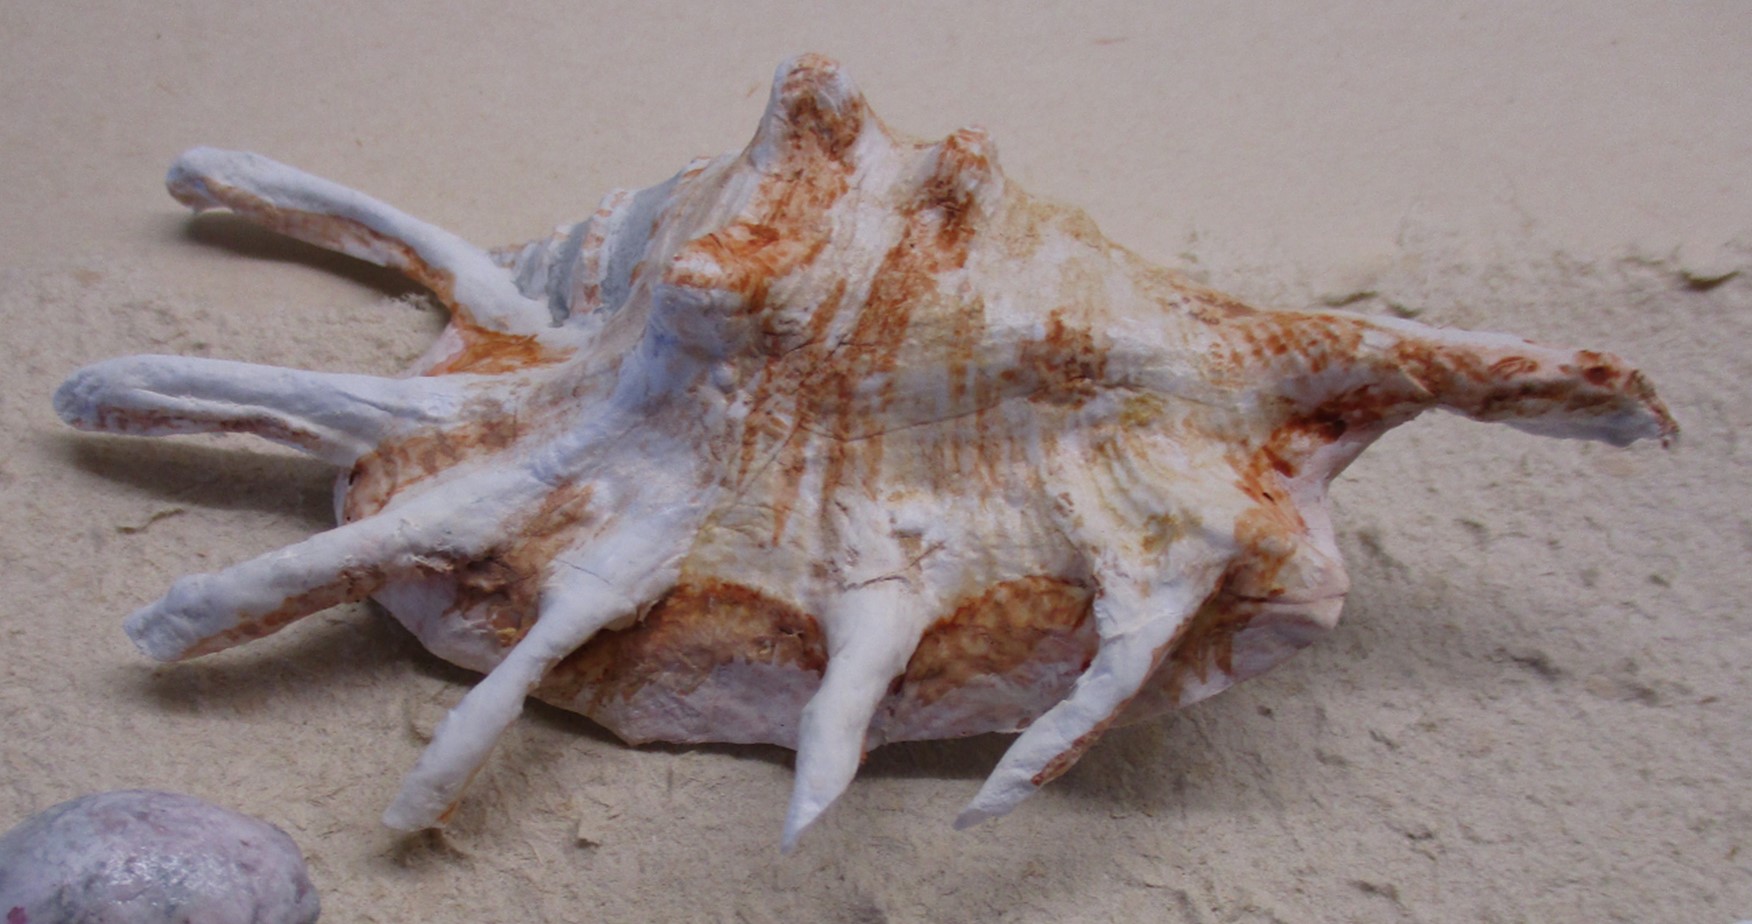
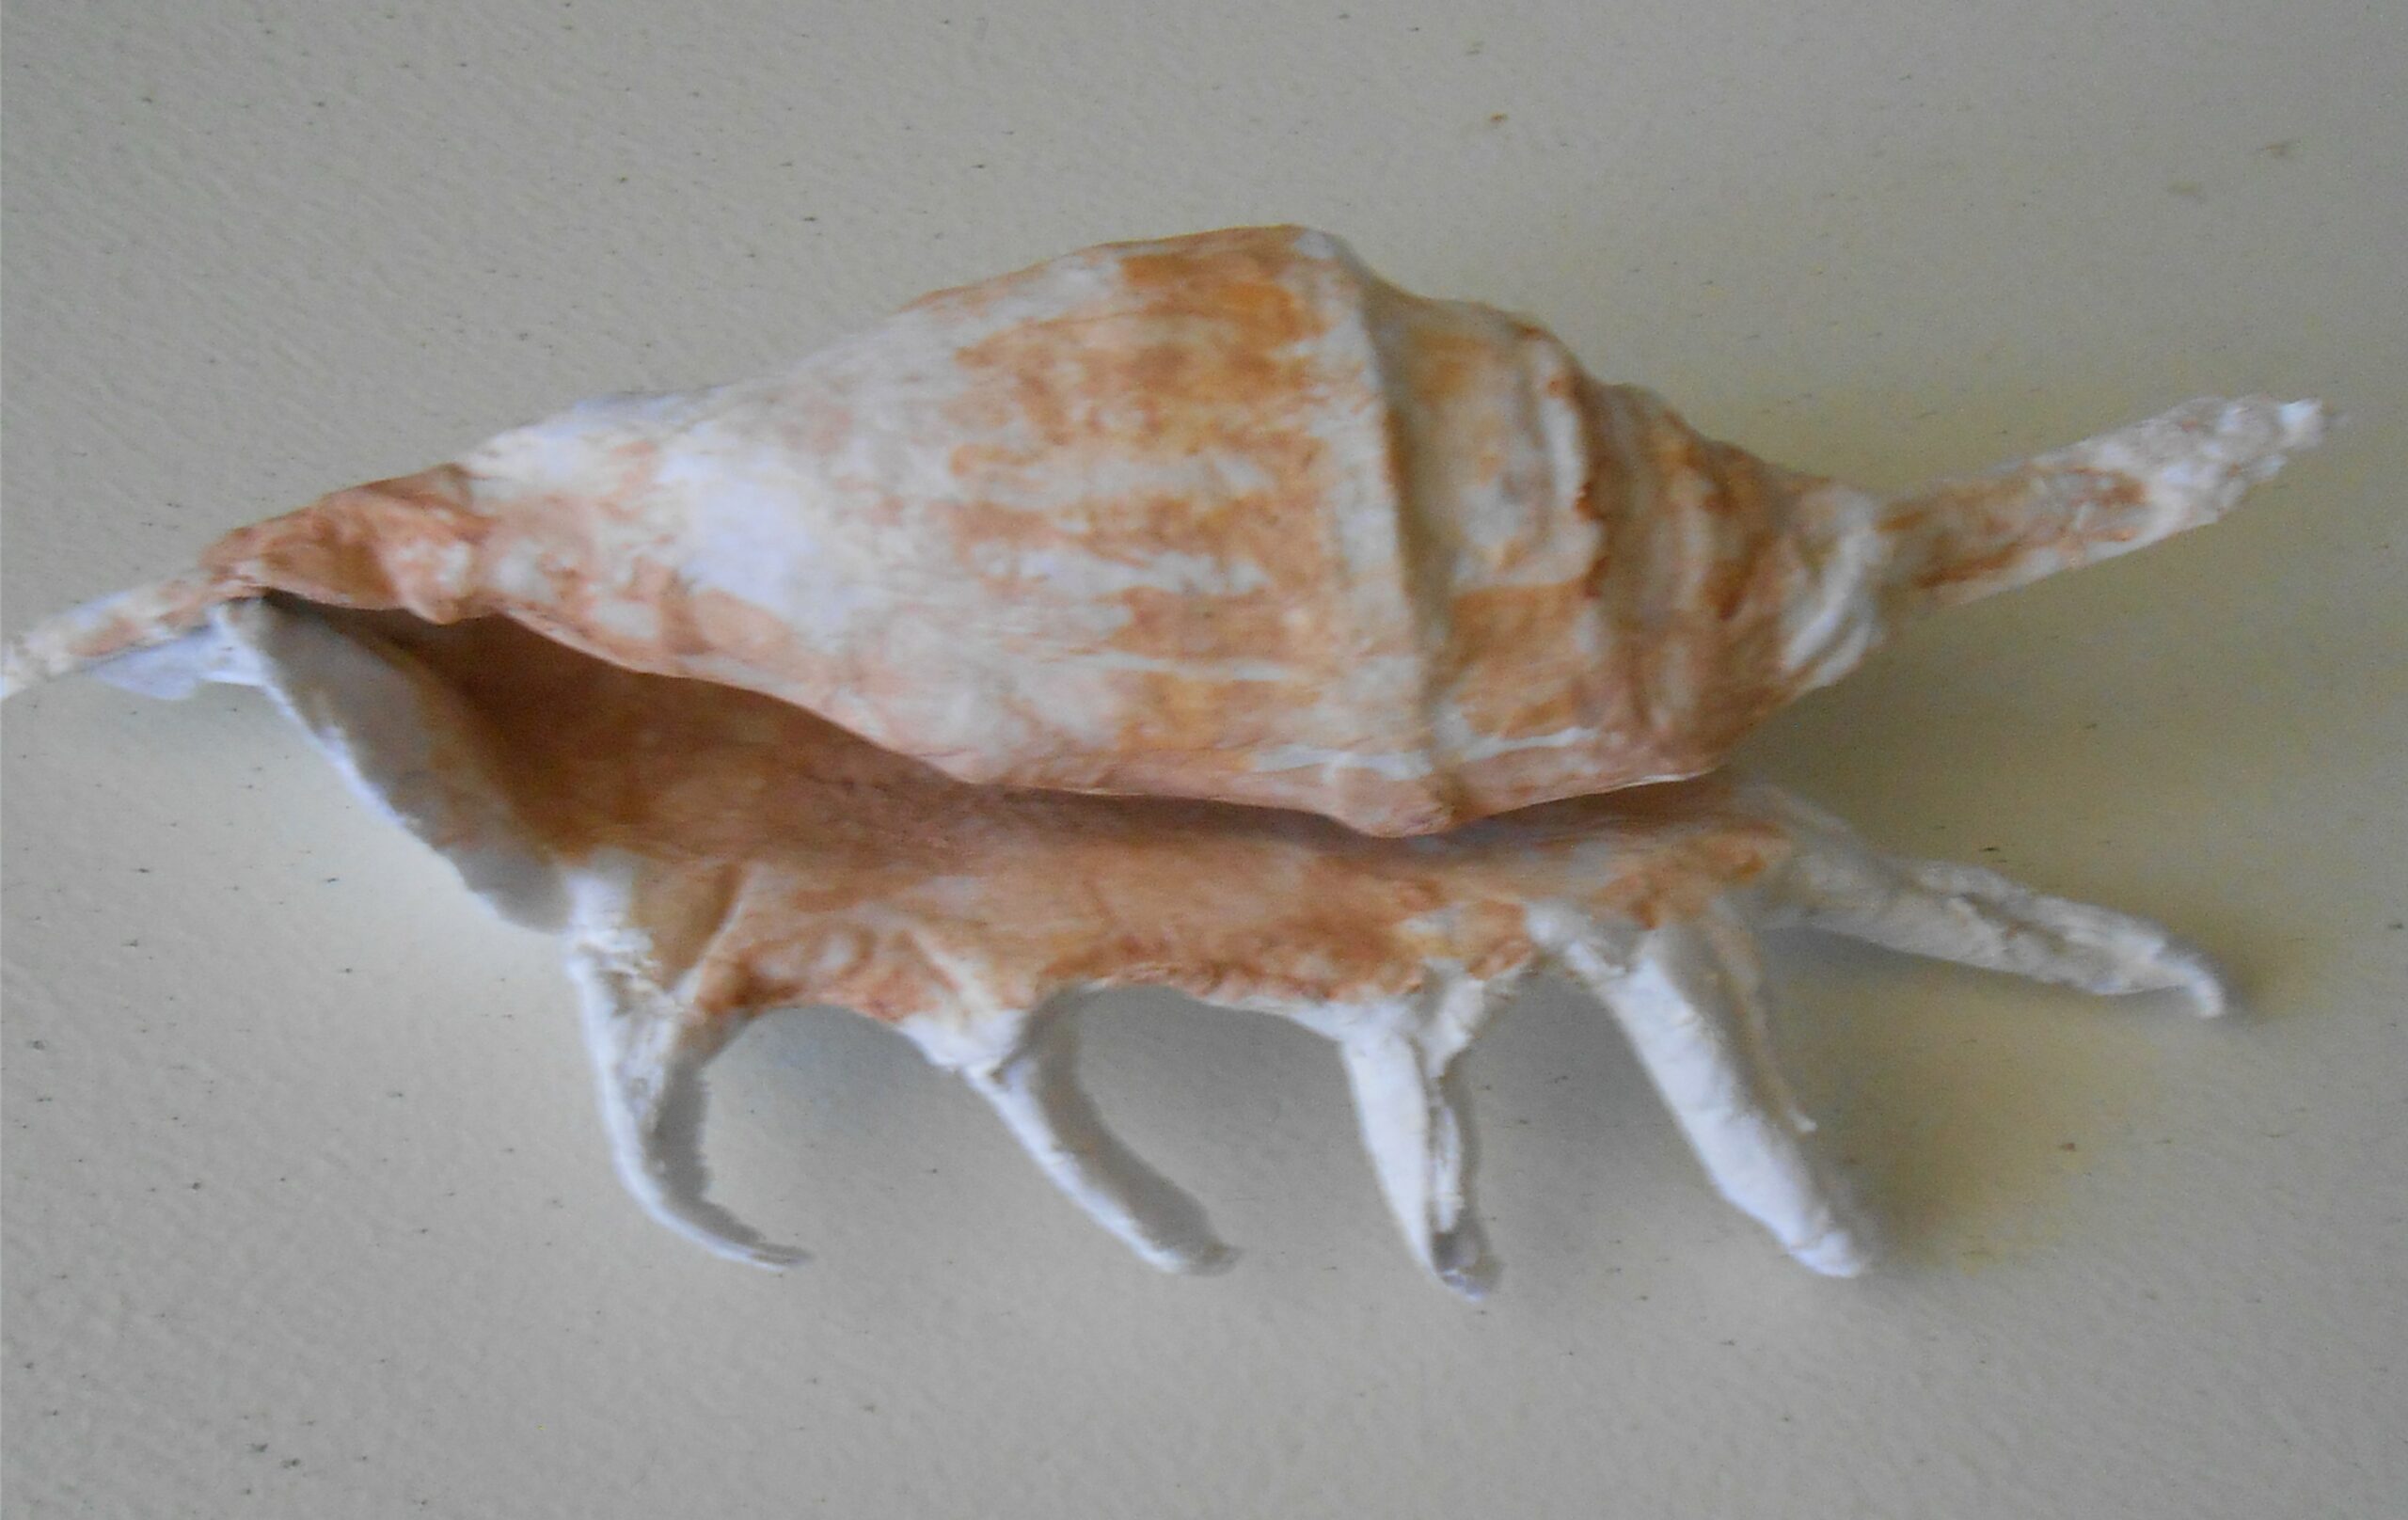
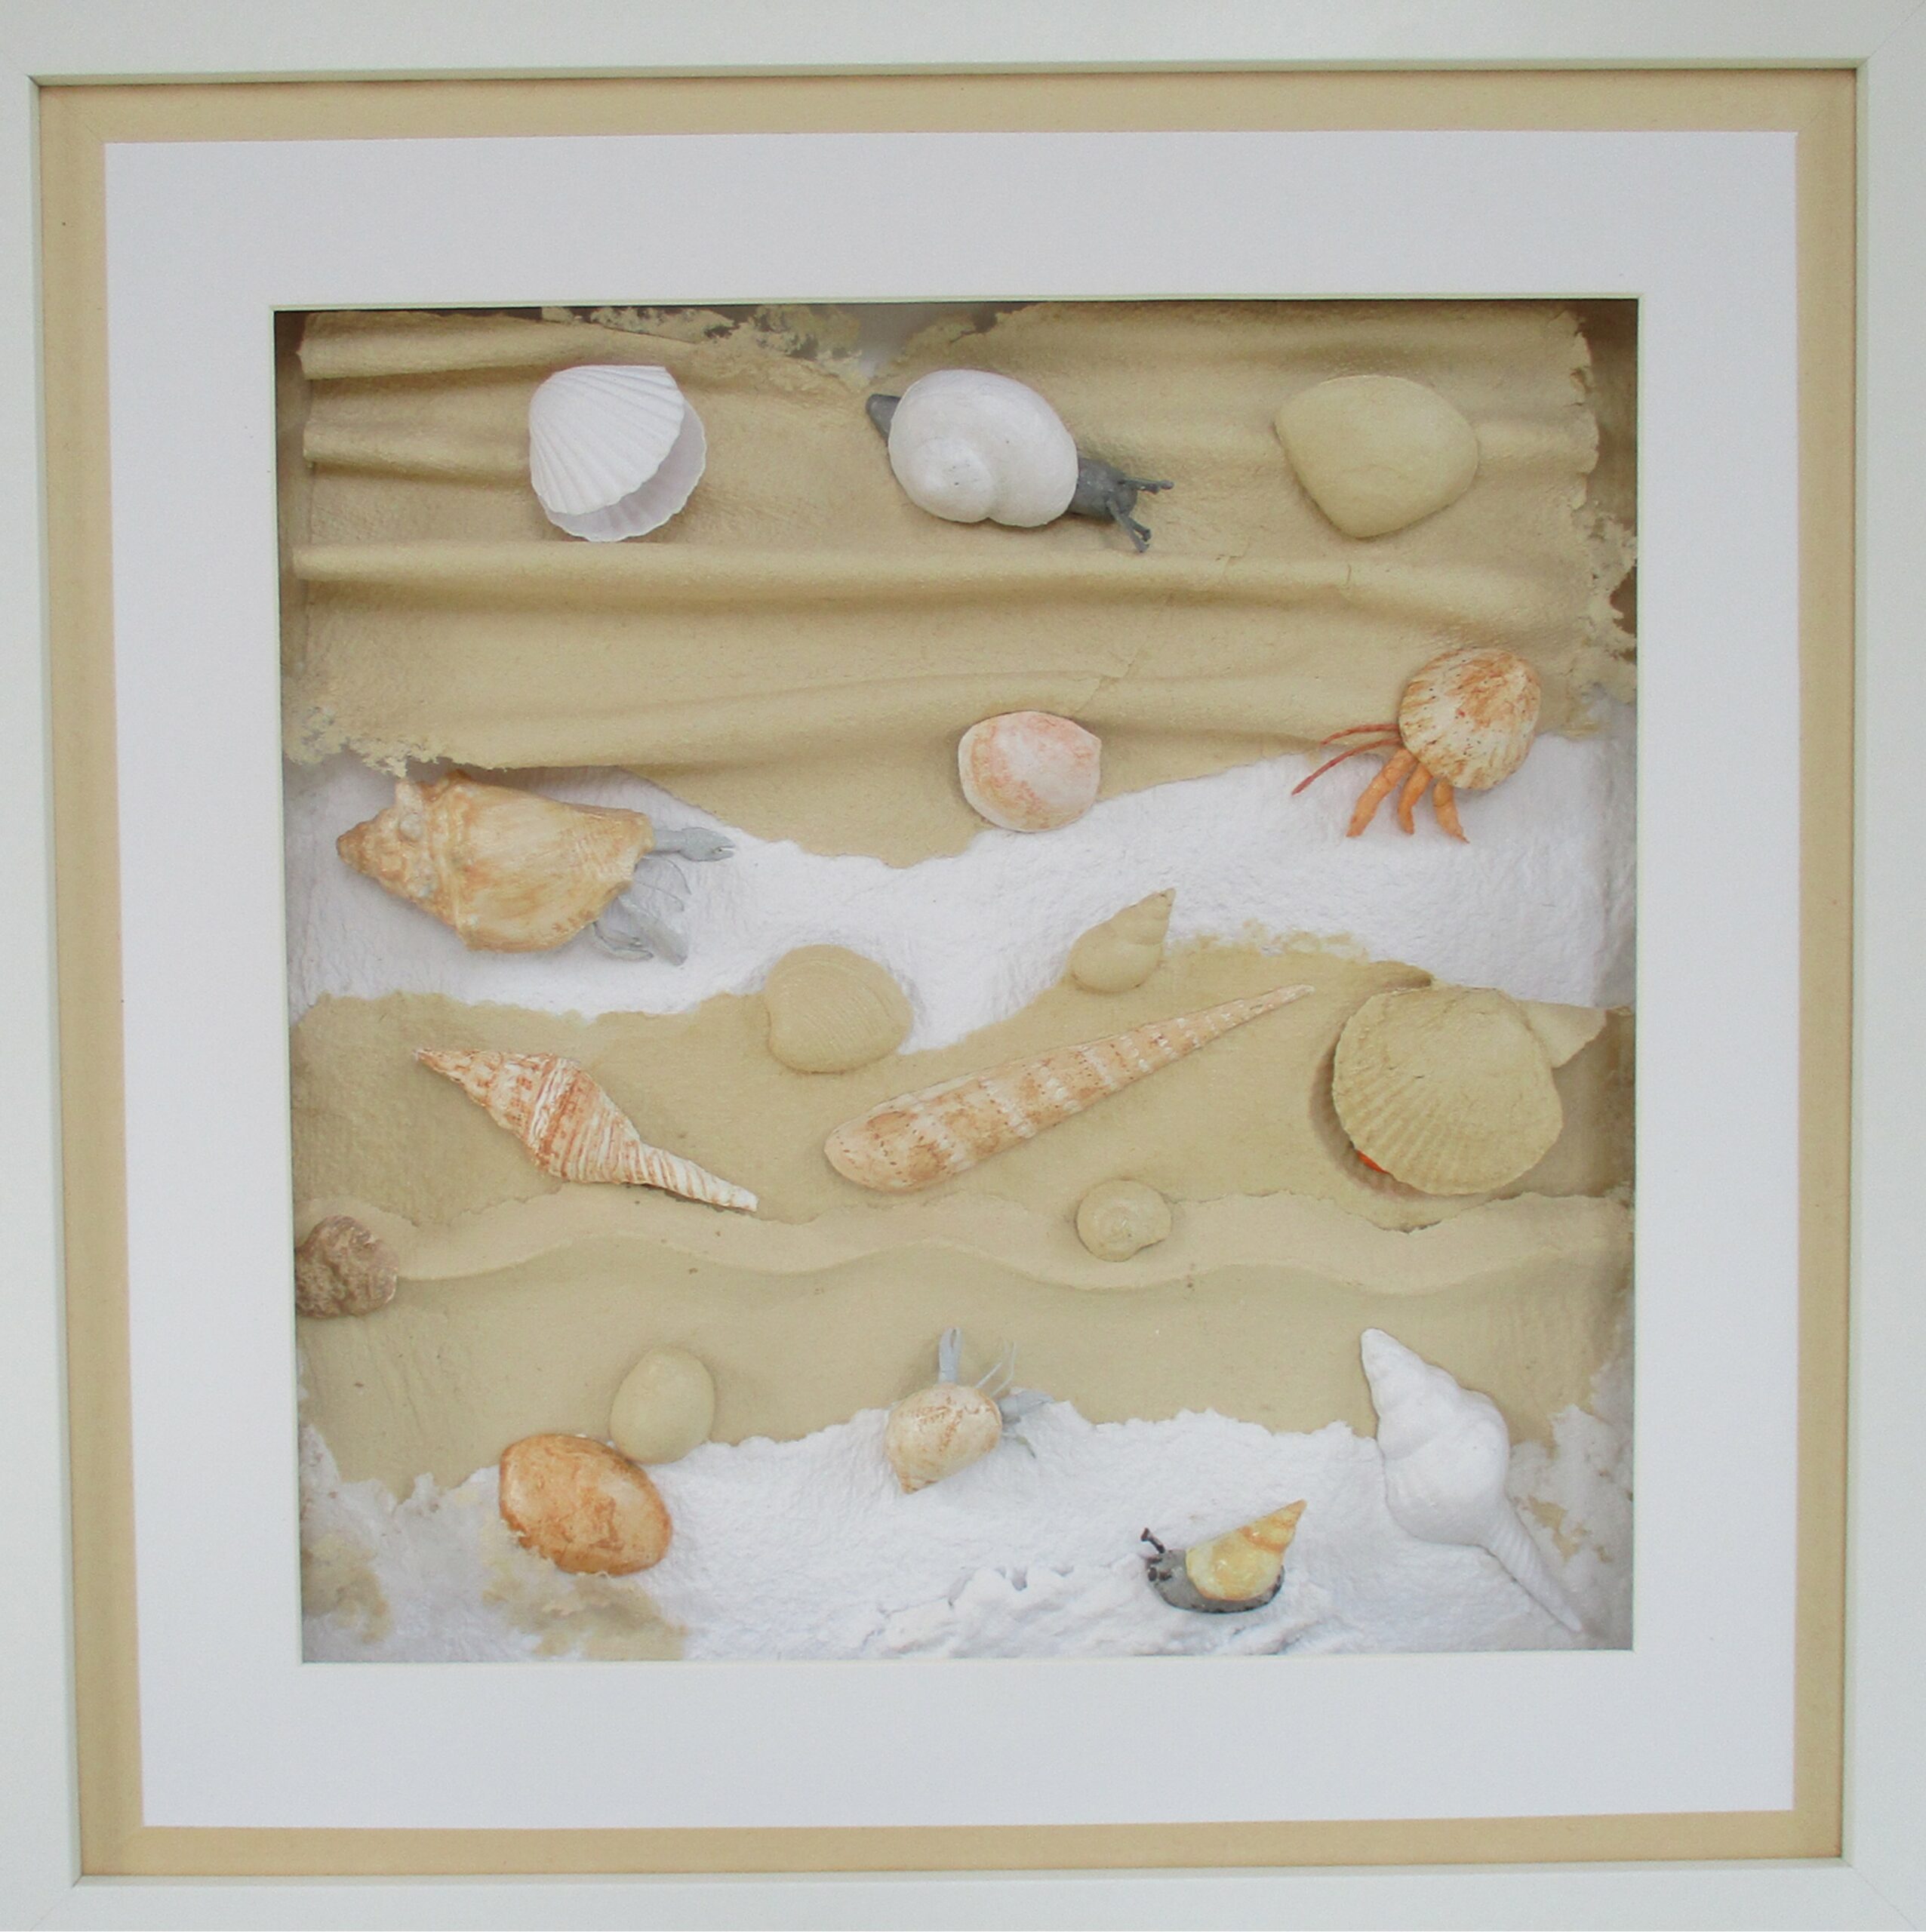
Over the years I’ve collected a number of shells and I’ve often wondered if they could be ReCreated in paper. Ultimately, my goal is to incorporate them into art pieces*, so this project is the first stage.
Q: Can you guess which of the shells in the image above are real and which are paper? (Answer is at the end of this post!)
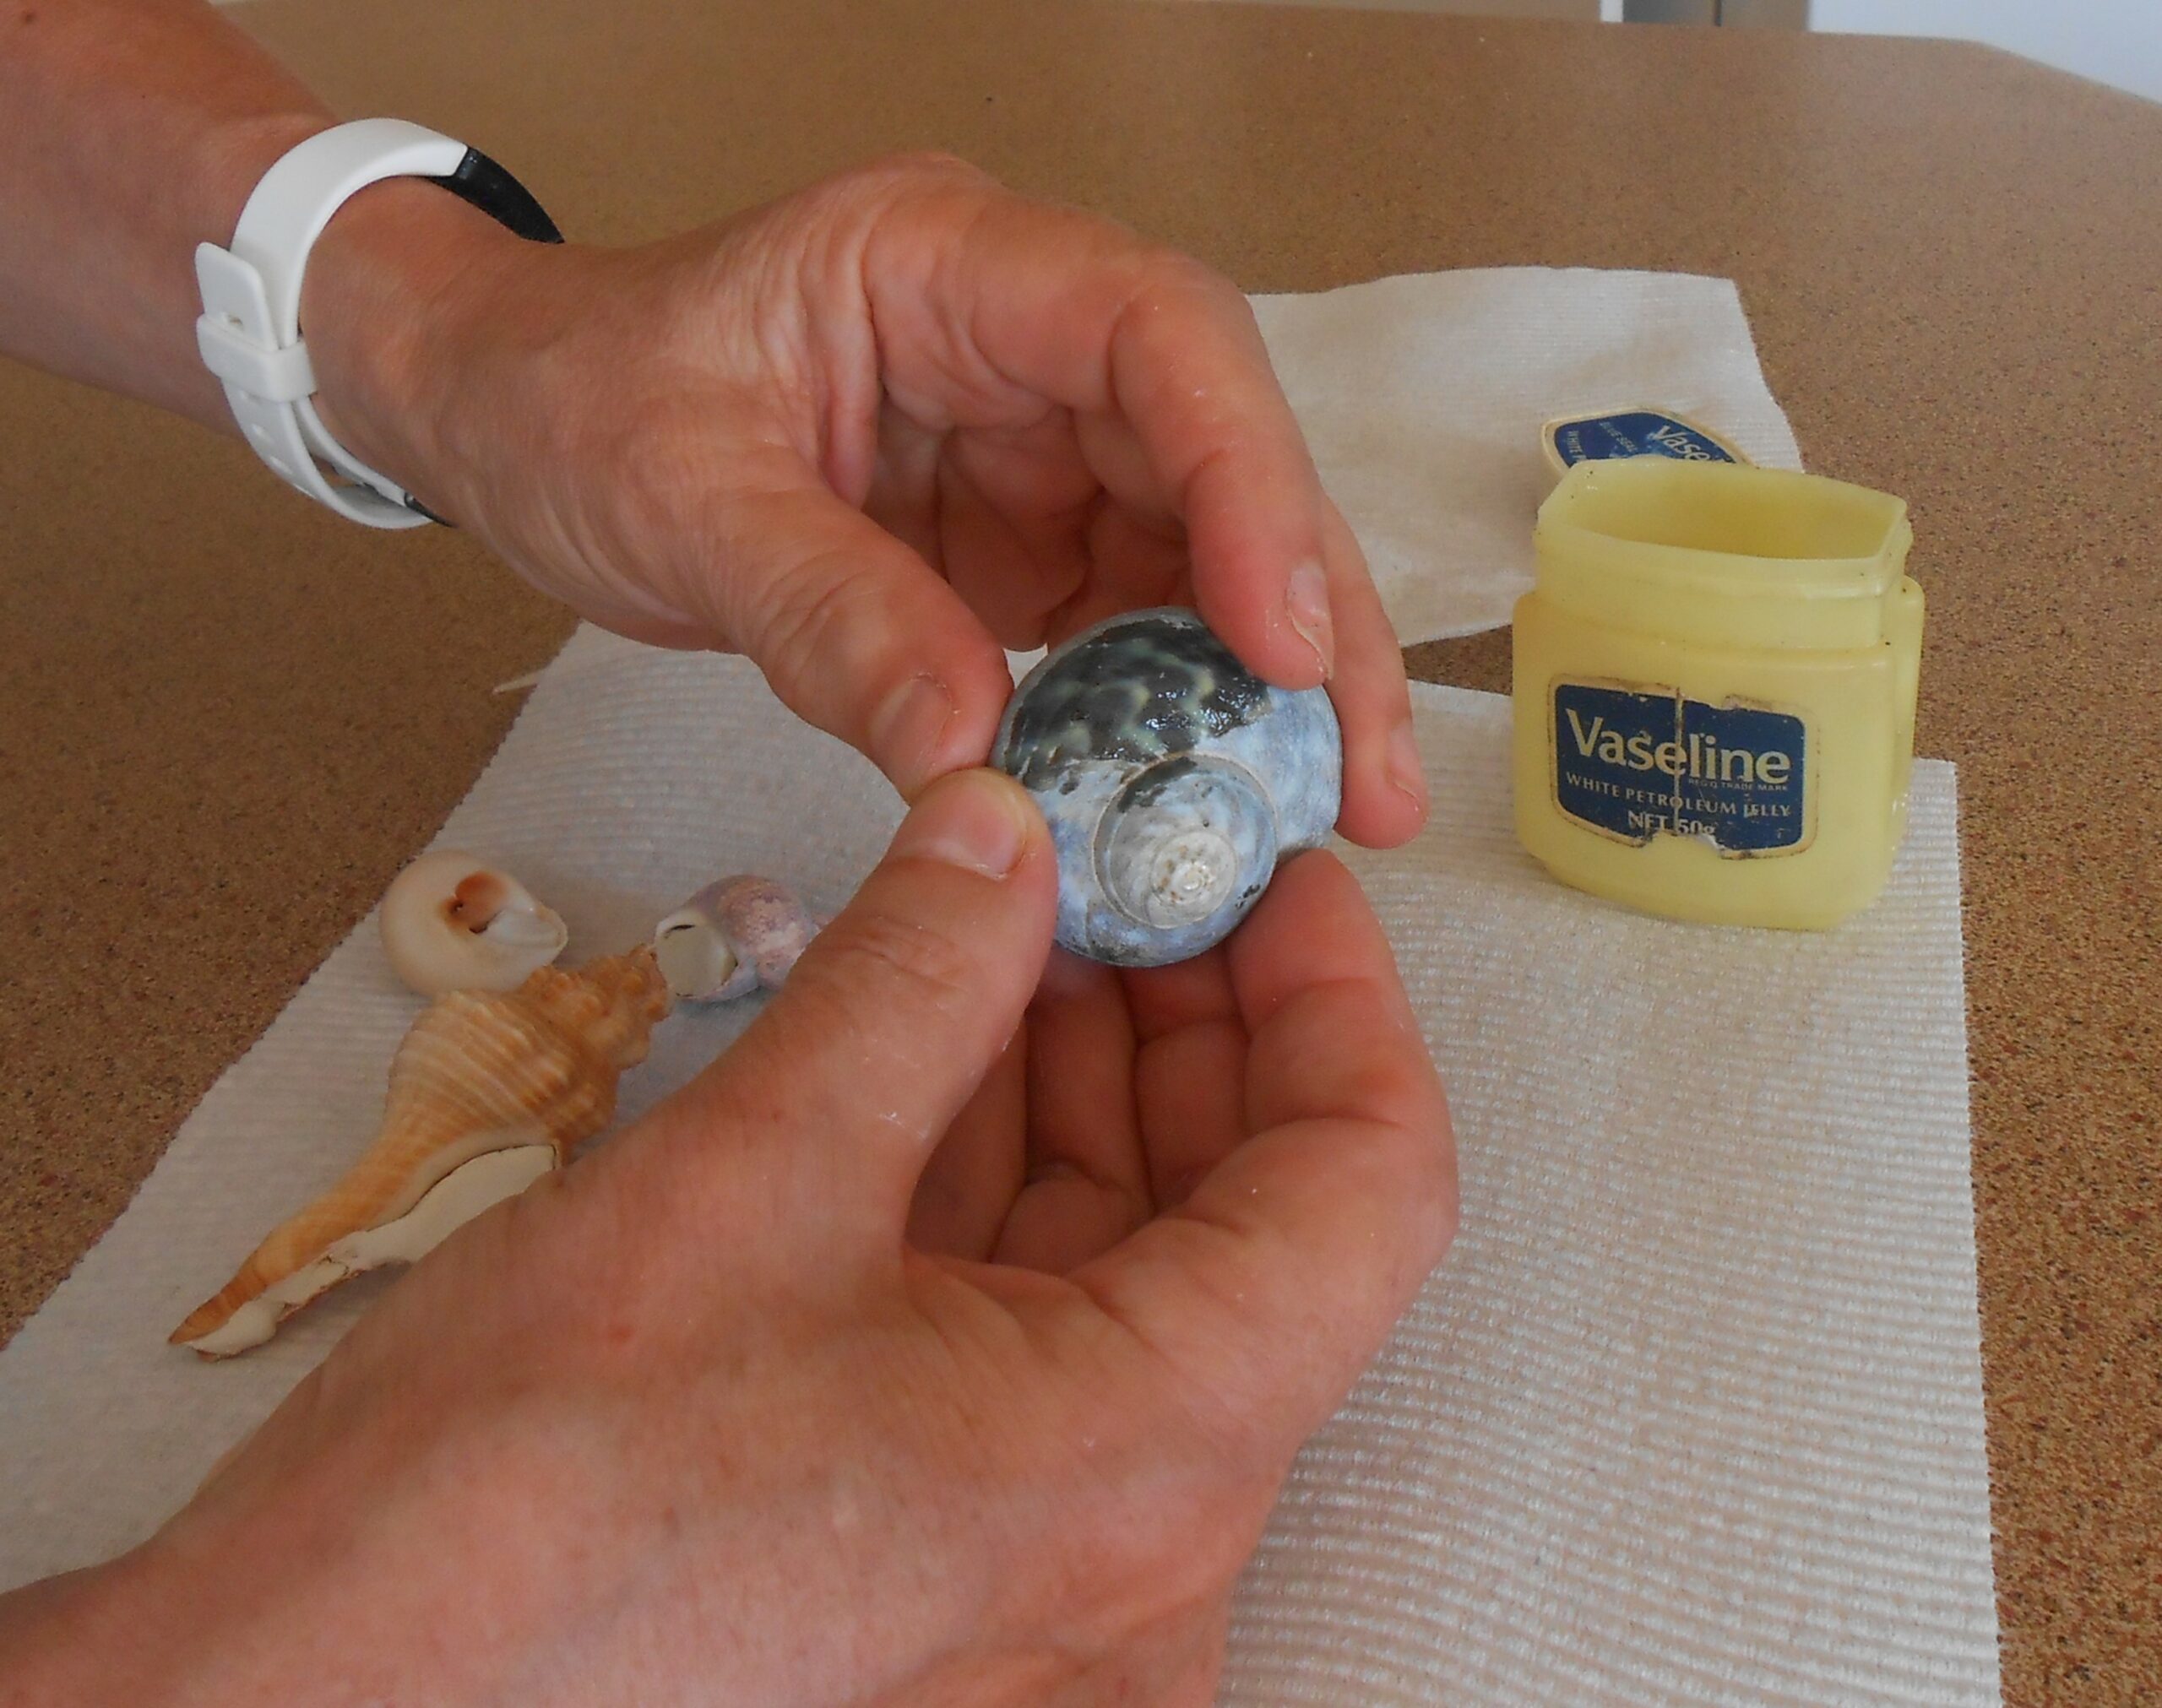
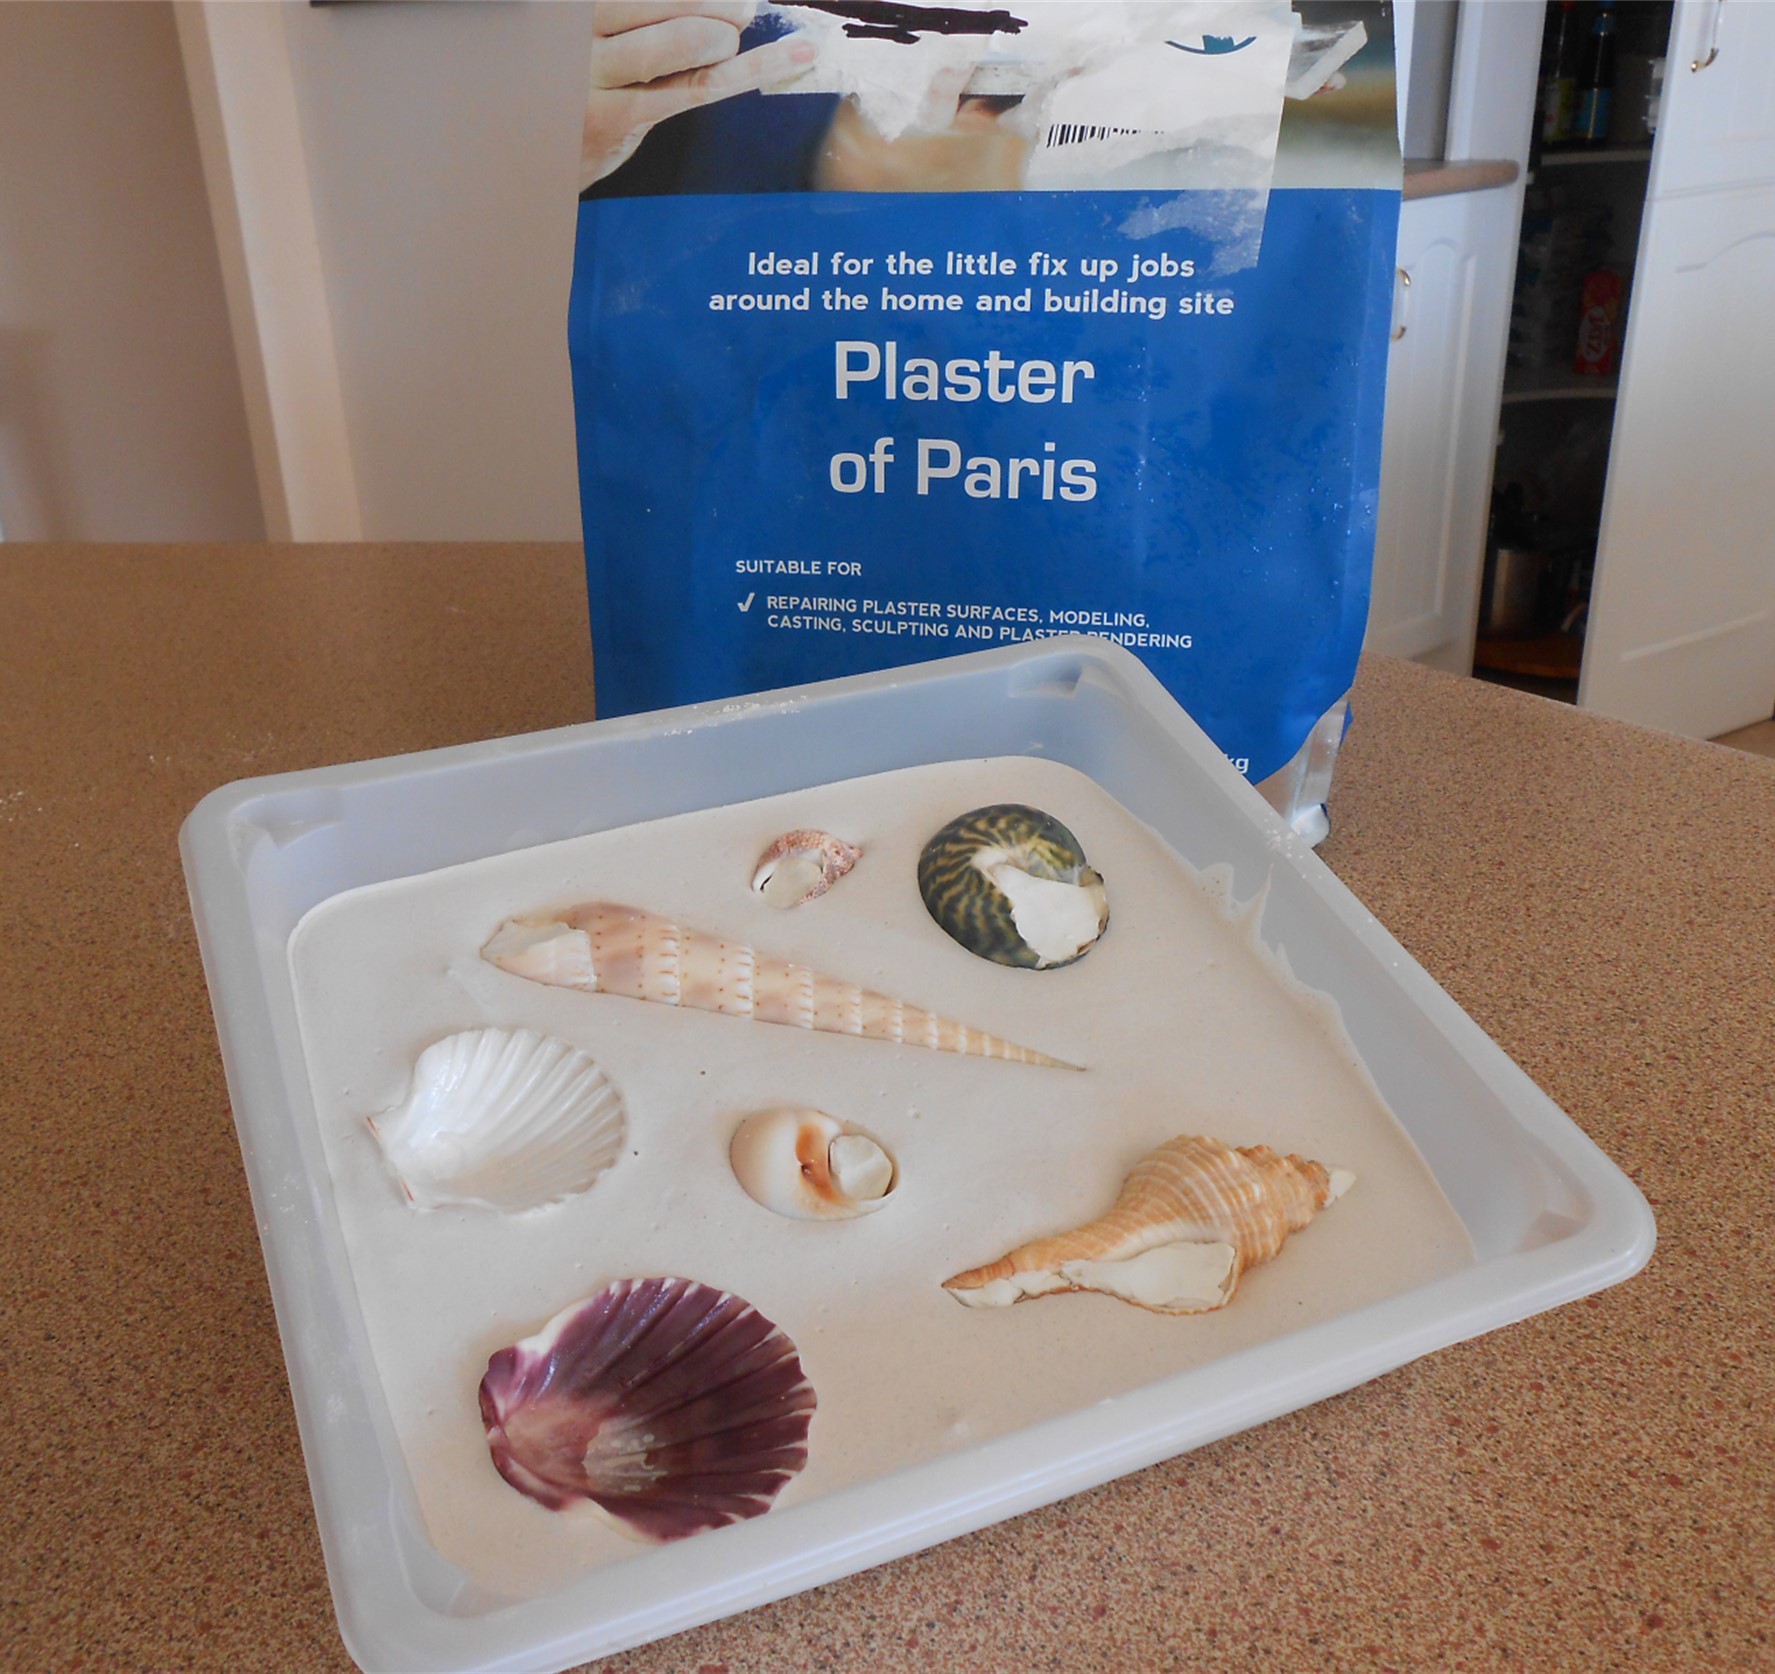
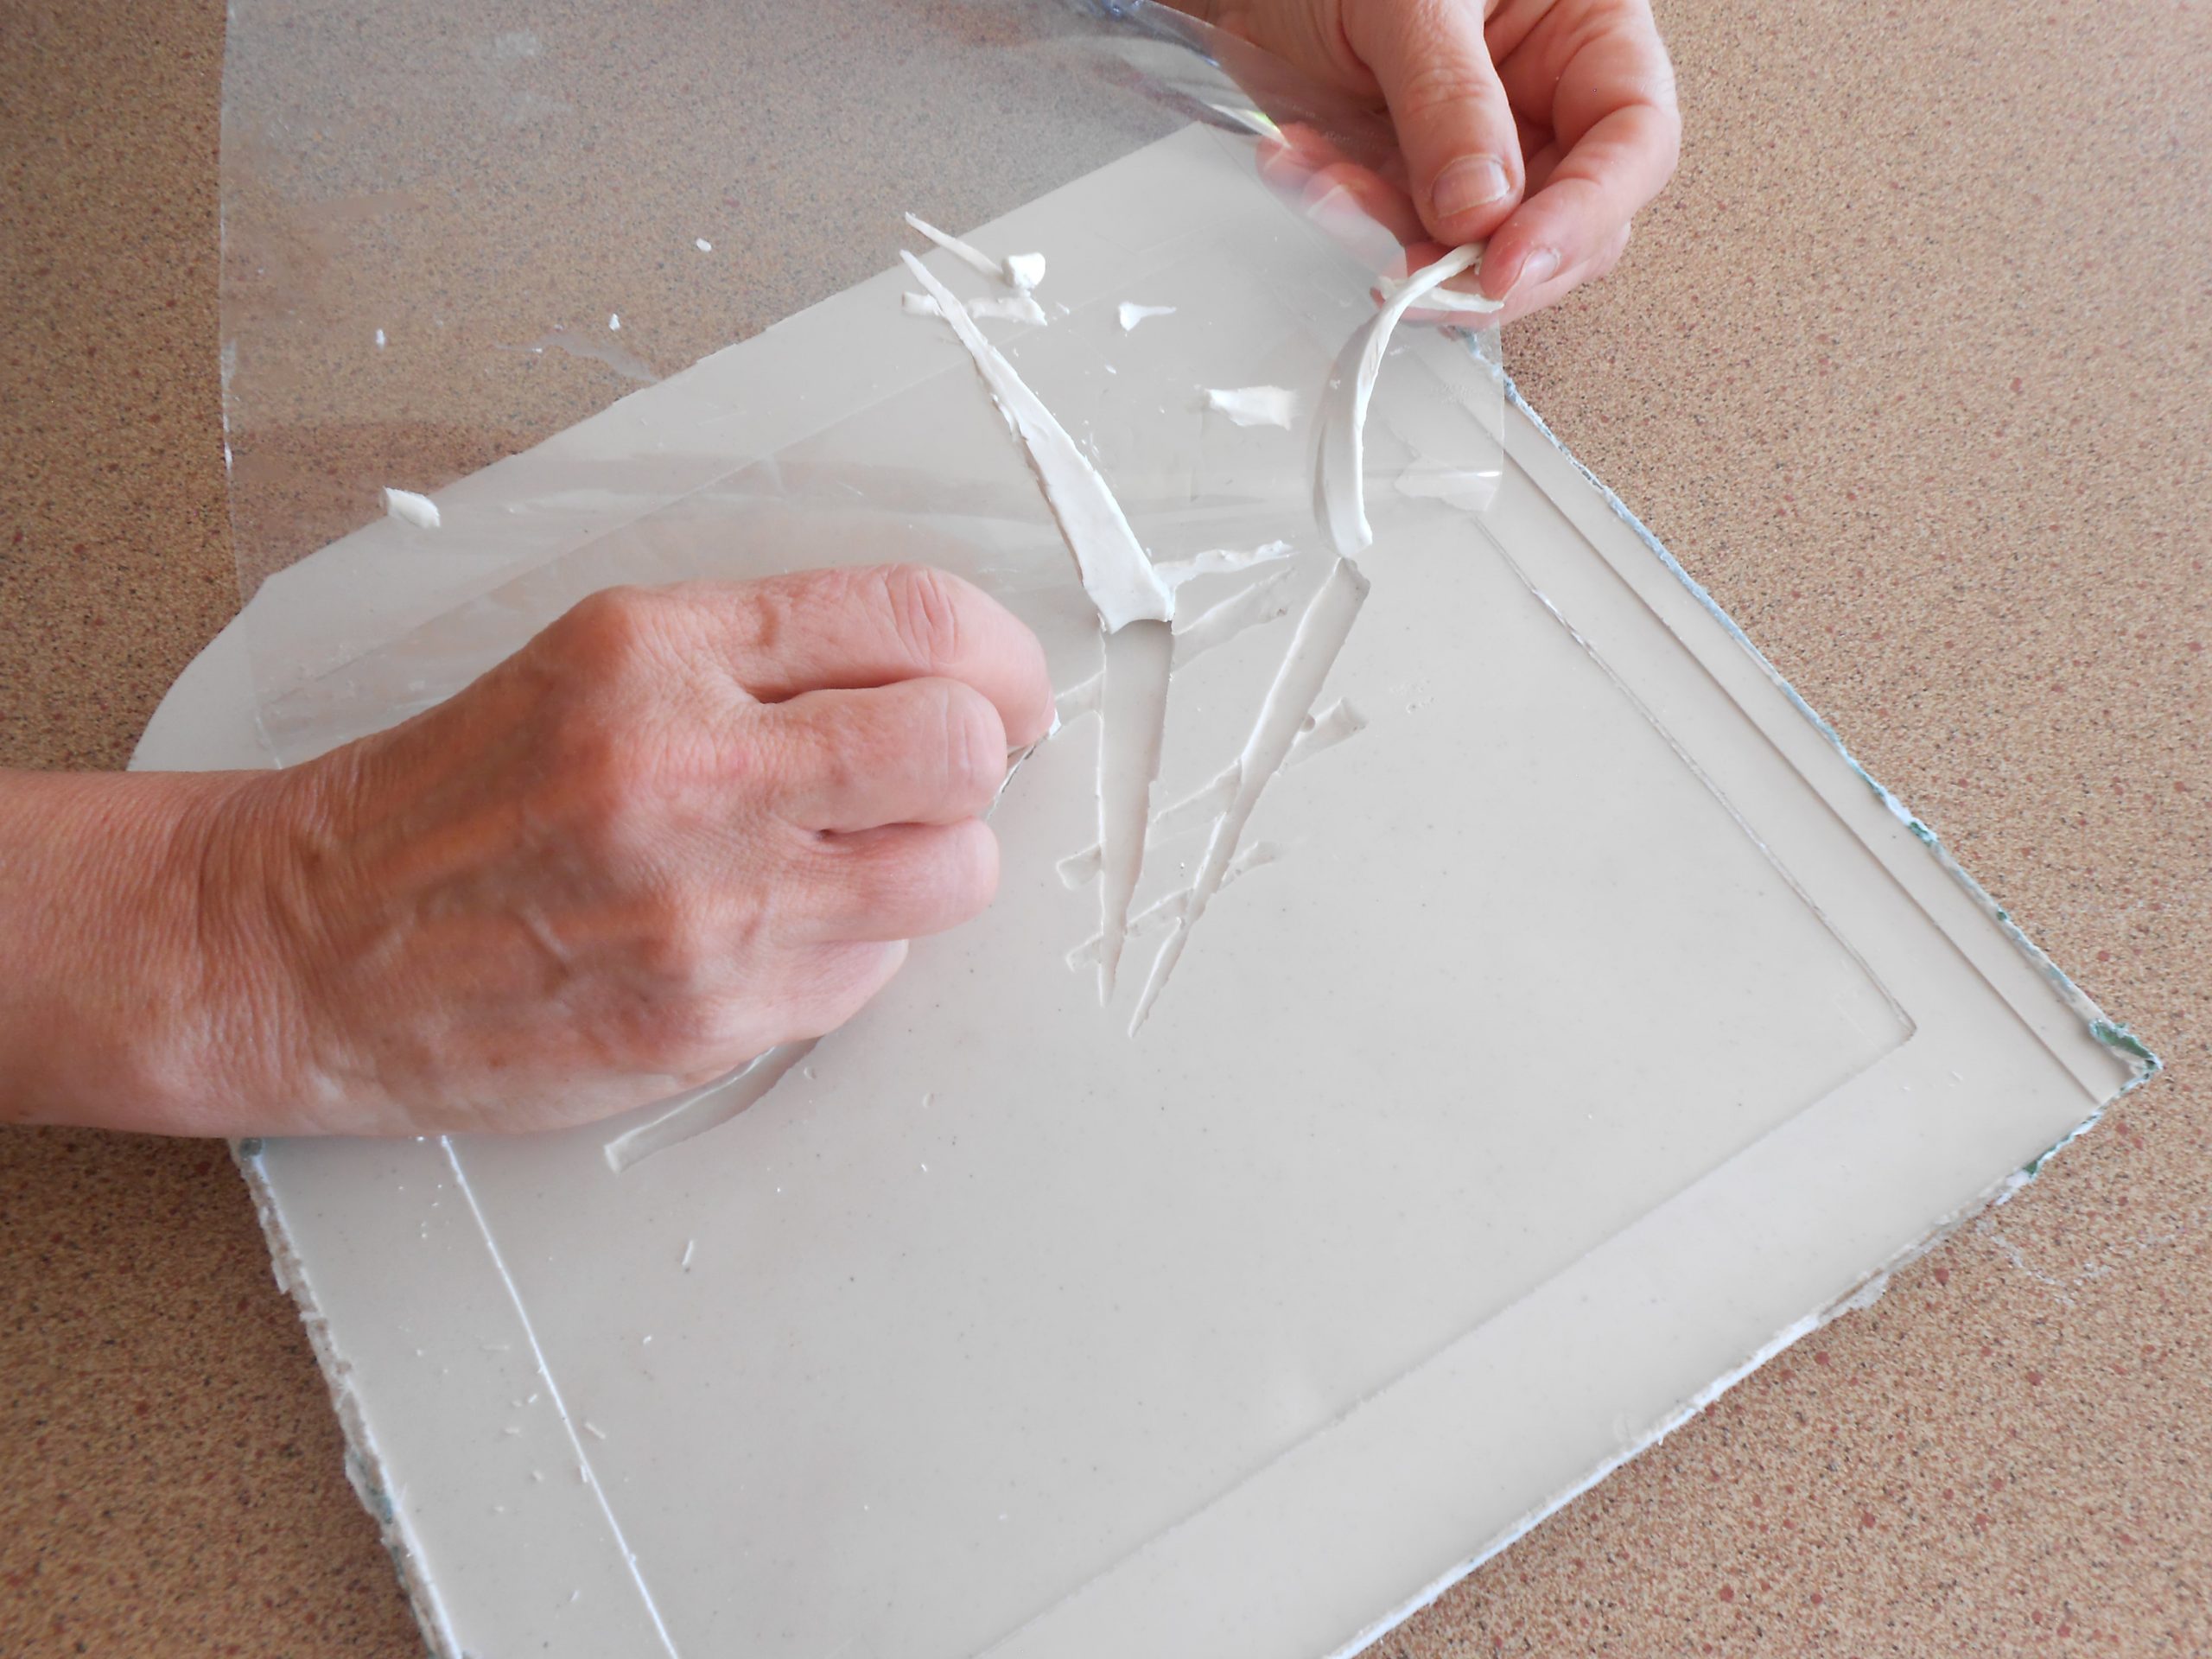
The shells are cast from recycled paper. I make a plaster cast by rubbing Vaseline over the surfaces of shells (cooking oil spray works too) and placing them into a bed of Plaster of Paris. It’s important to make the plaster thick enough so the shells don’t sink further than half way. It’s also important to choose shells that don’t have ridges or curves that will prevent the shell from being lifted when the plaster is dry. As a safeguard, I ‘plug’ the crevices where plaster may leak with plasticine – see image below.
Coating the shells
Plugging crevices
Creating the plaster cast
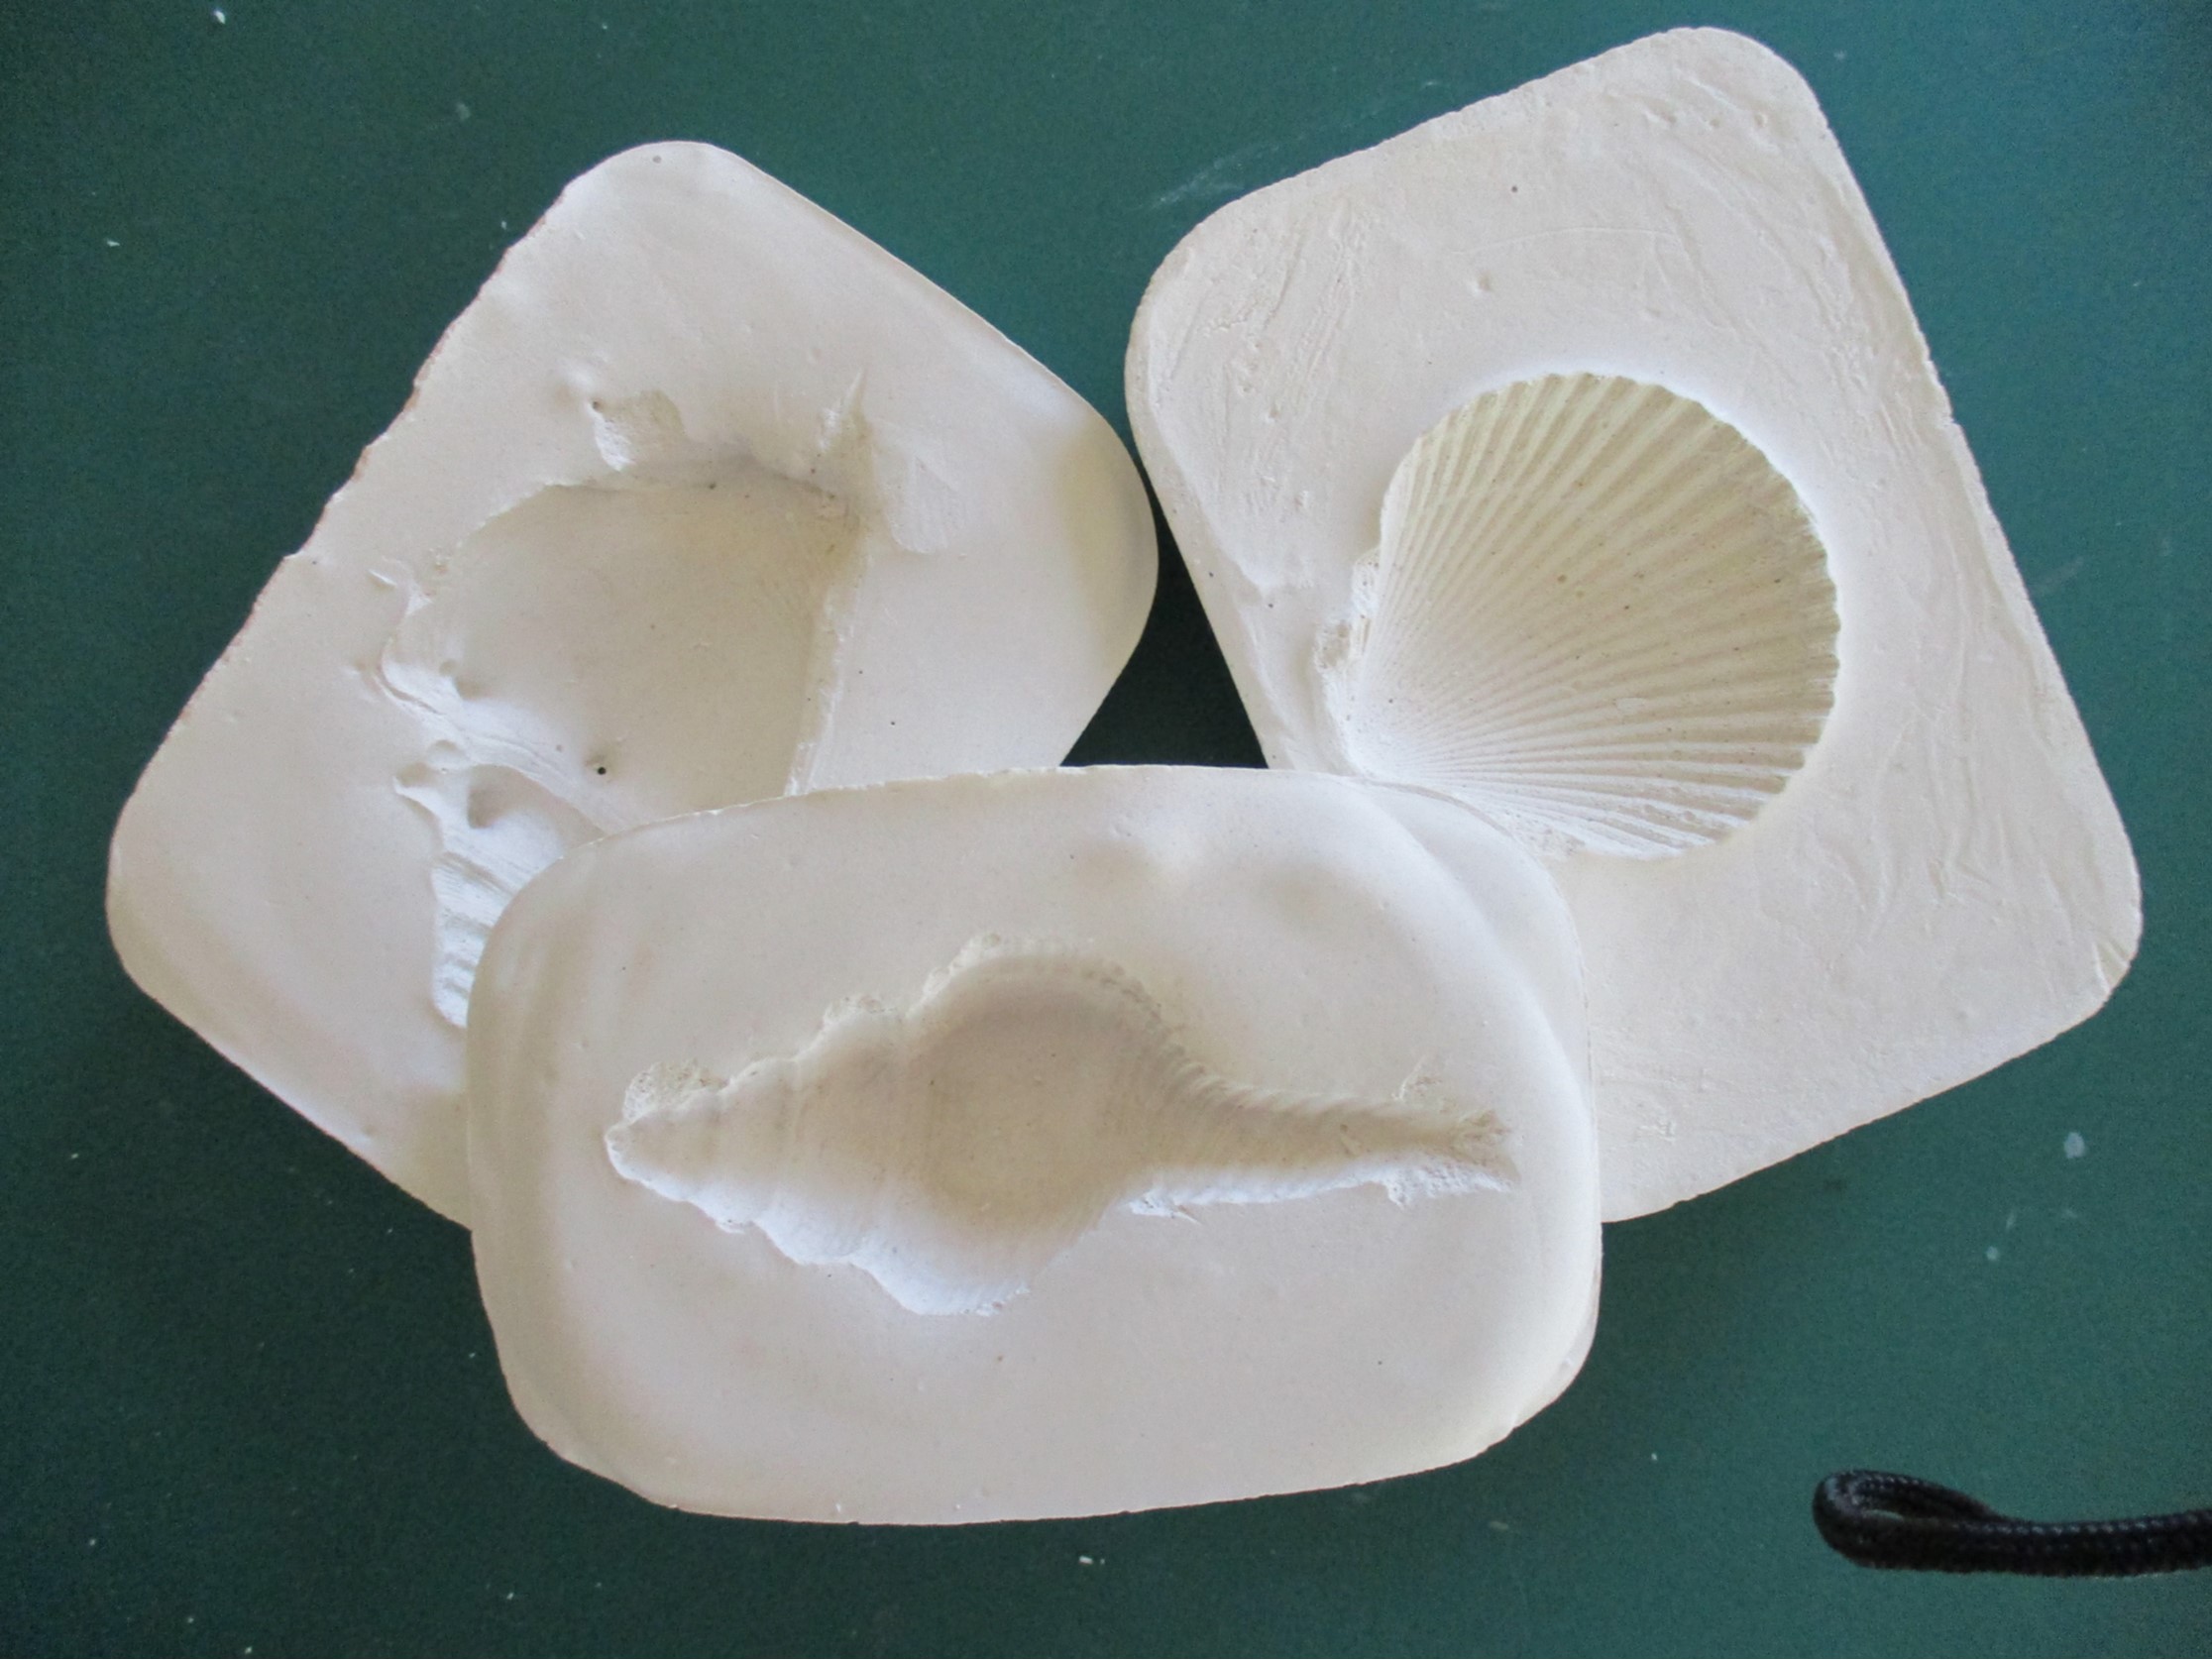
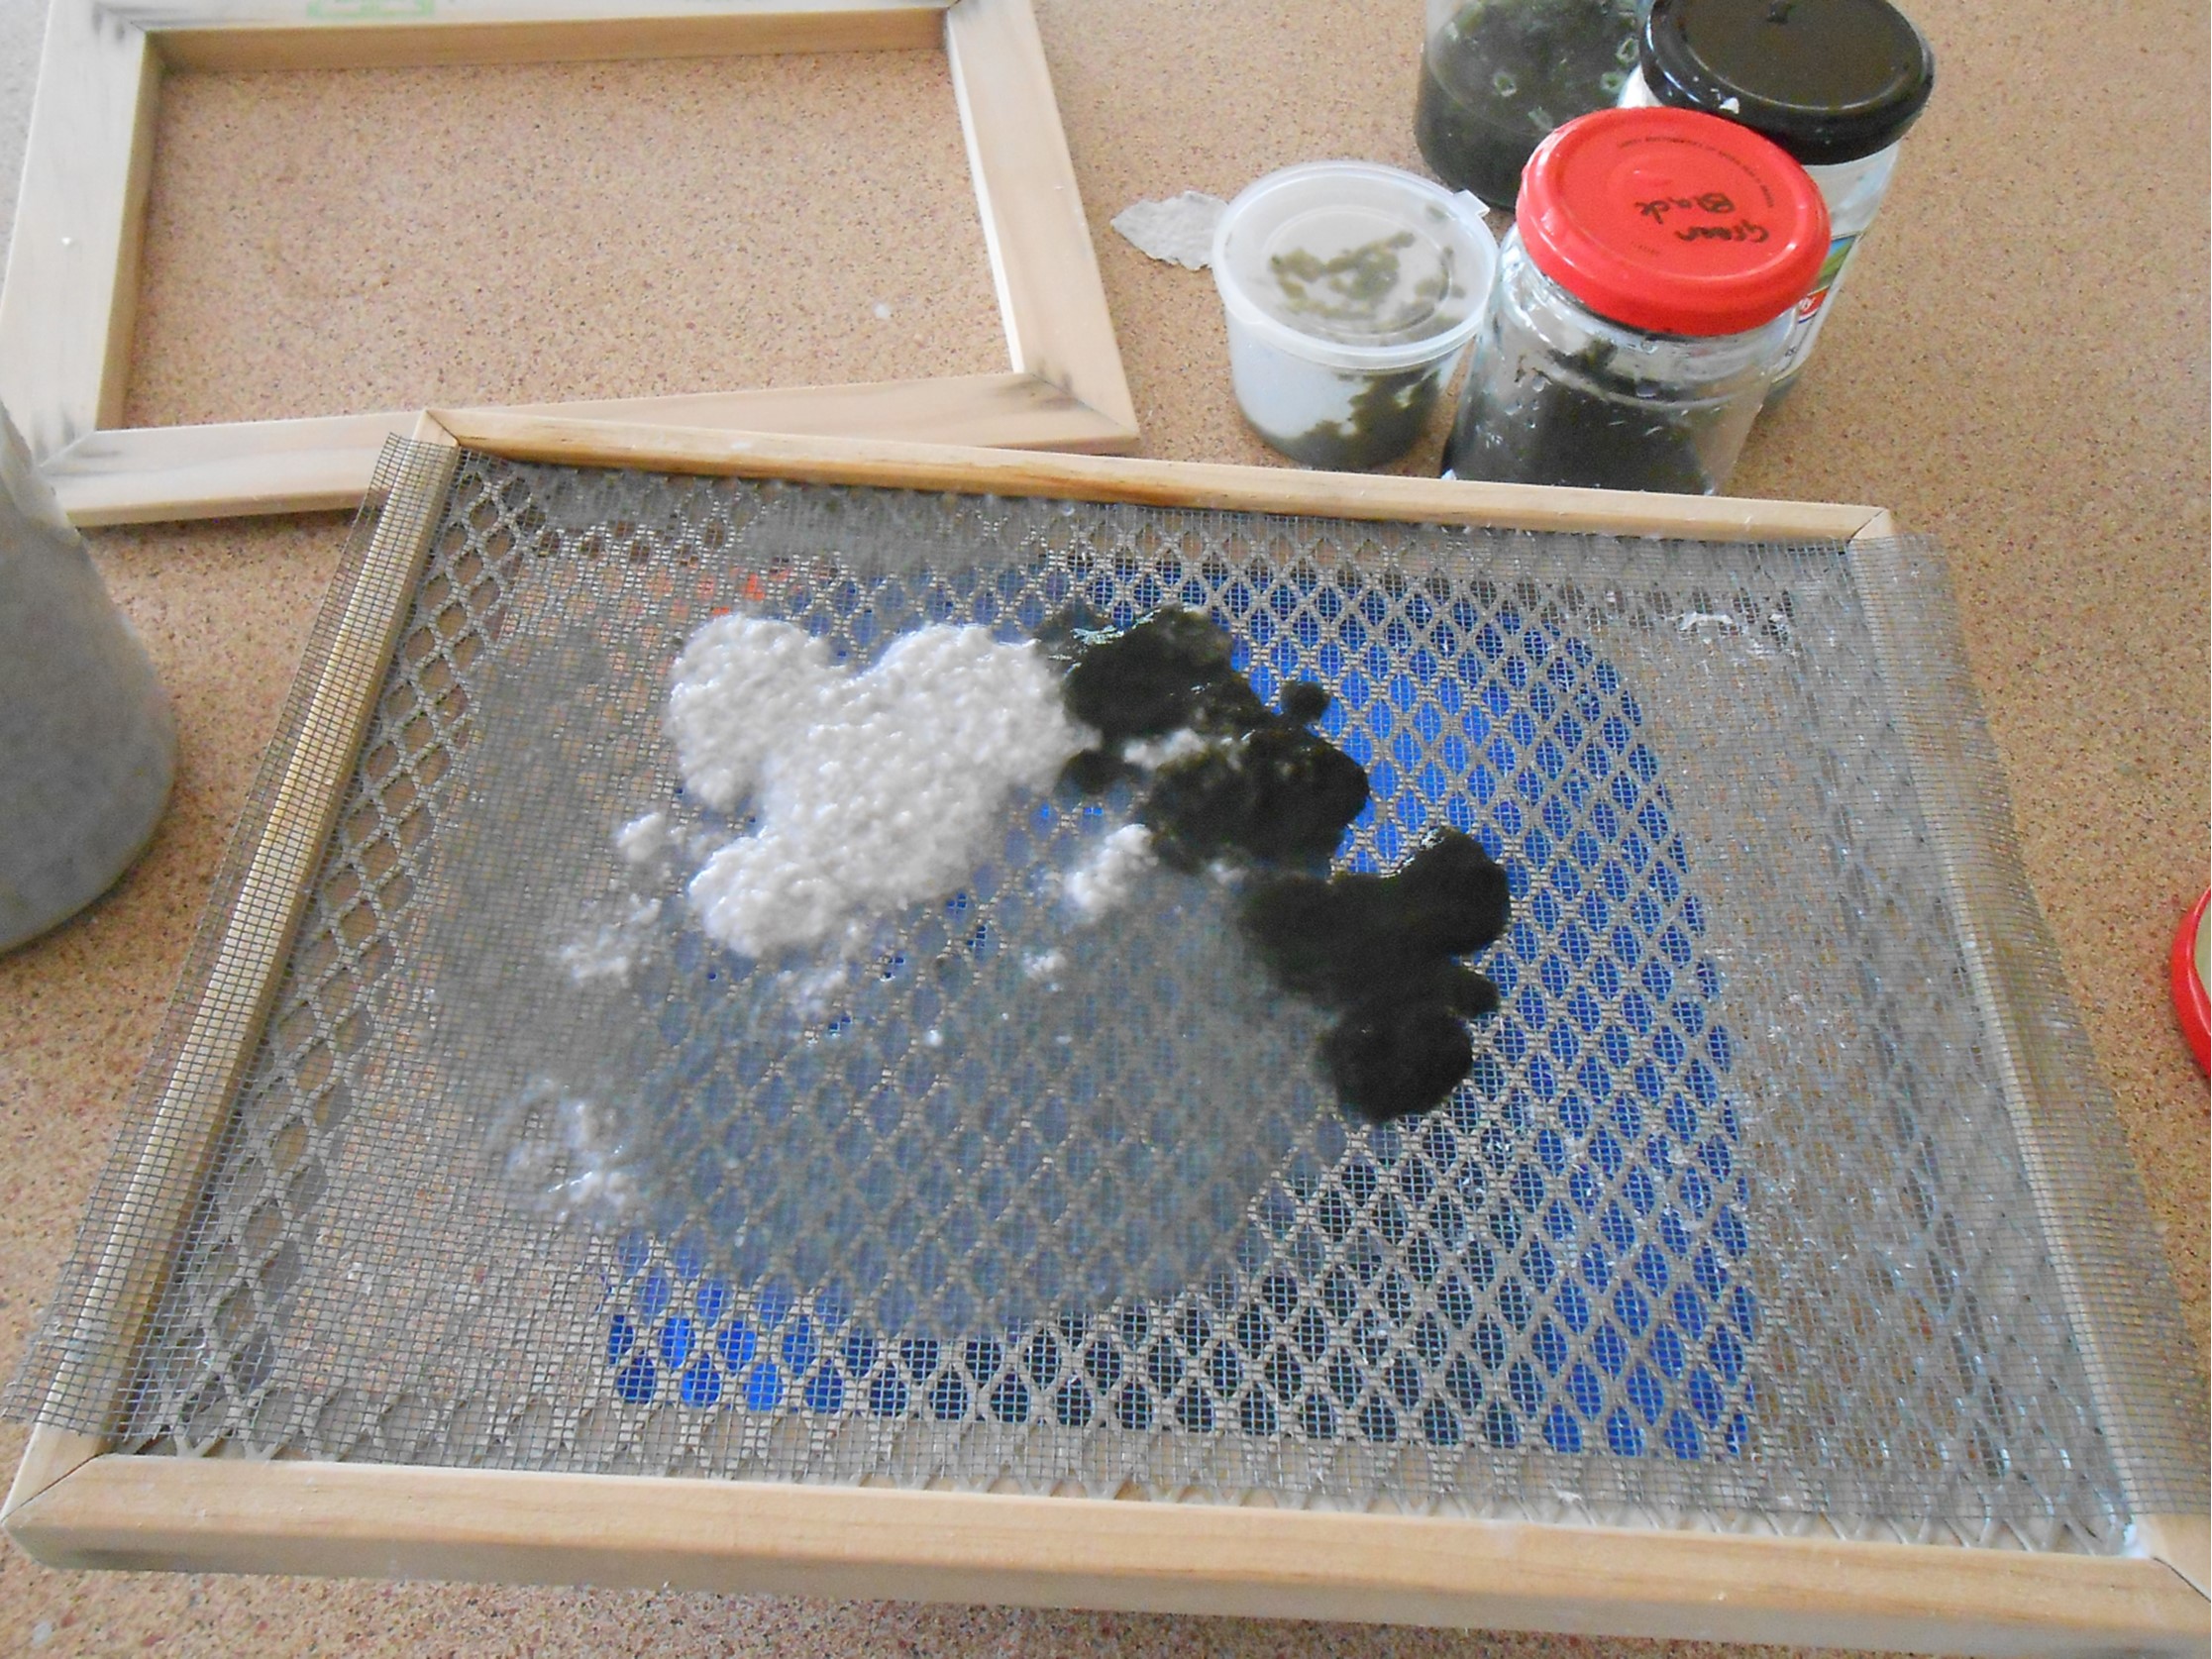
When the plaster is completely dry, the shells are gently lifted out. Recycled paper is is torn or shredded into small pieces, soaked in water for one or two days, and blended into paper pulp. Using a paper-making frame and deckle, sheets of paper are created and placed directly into the plaster mould, using a stiff brush to work the pulp into the crevices. The paper cast is set aside to thoroughly dry. Depending on the thickness and the weather, this can take several days. When dry, the paper can be gently prised out of the moulds.
The plaster moulds
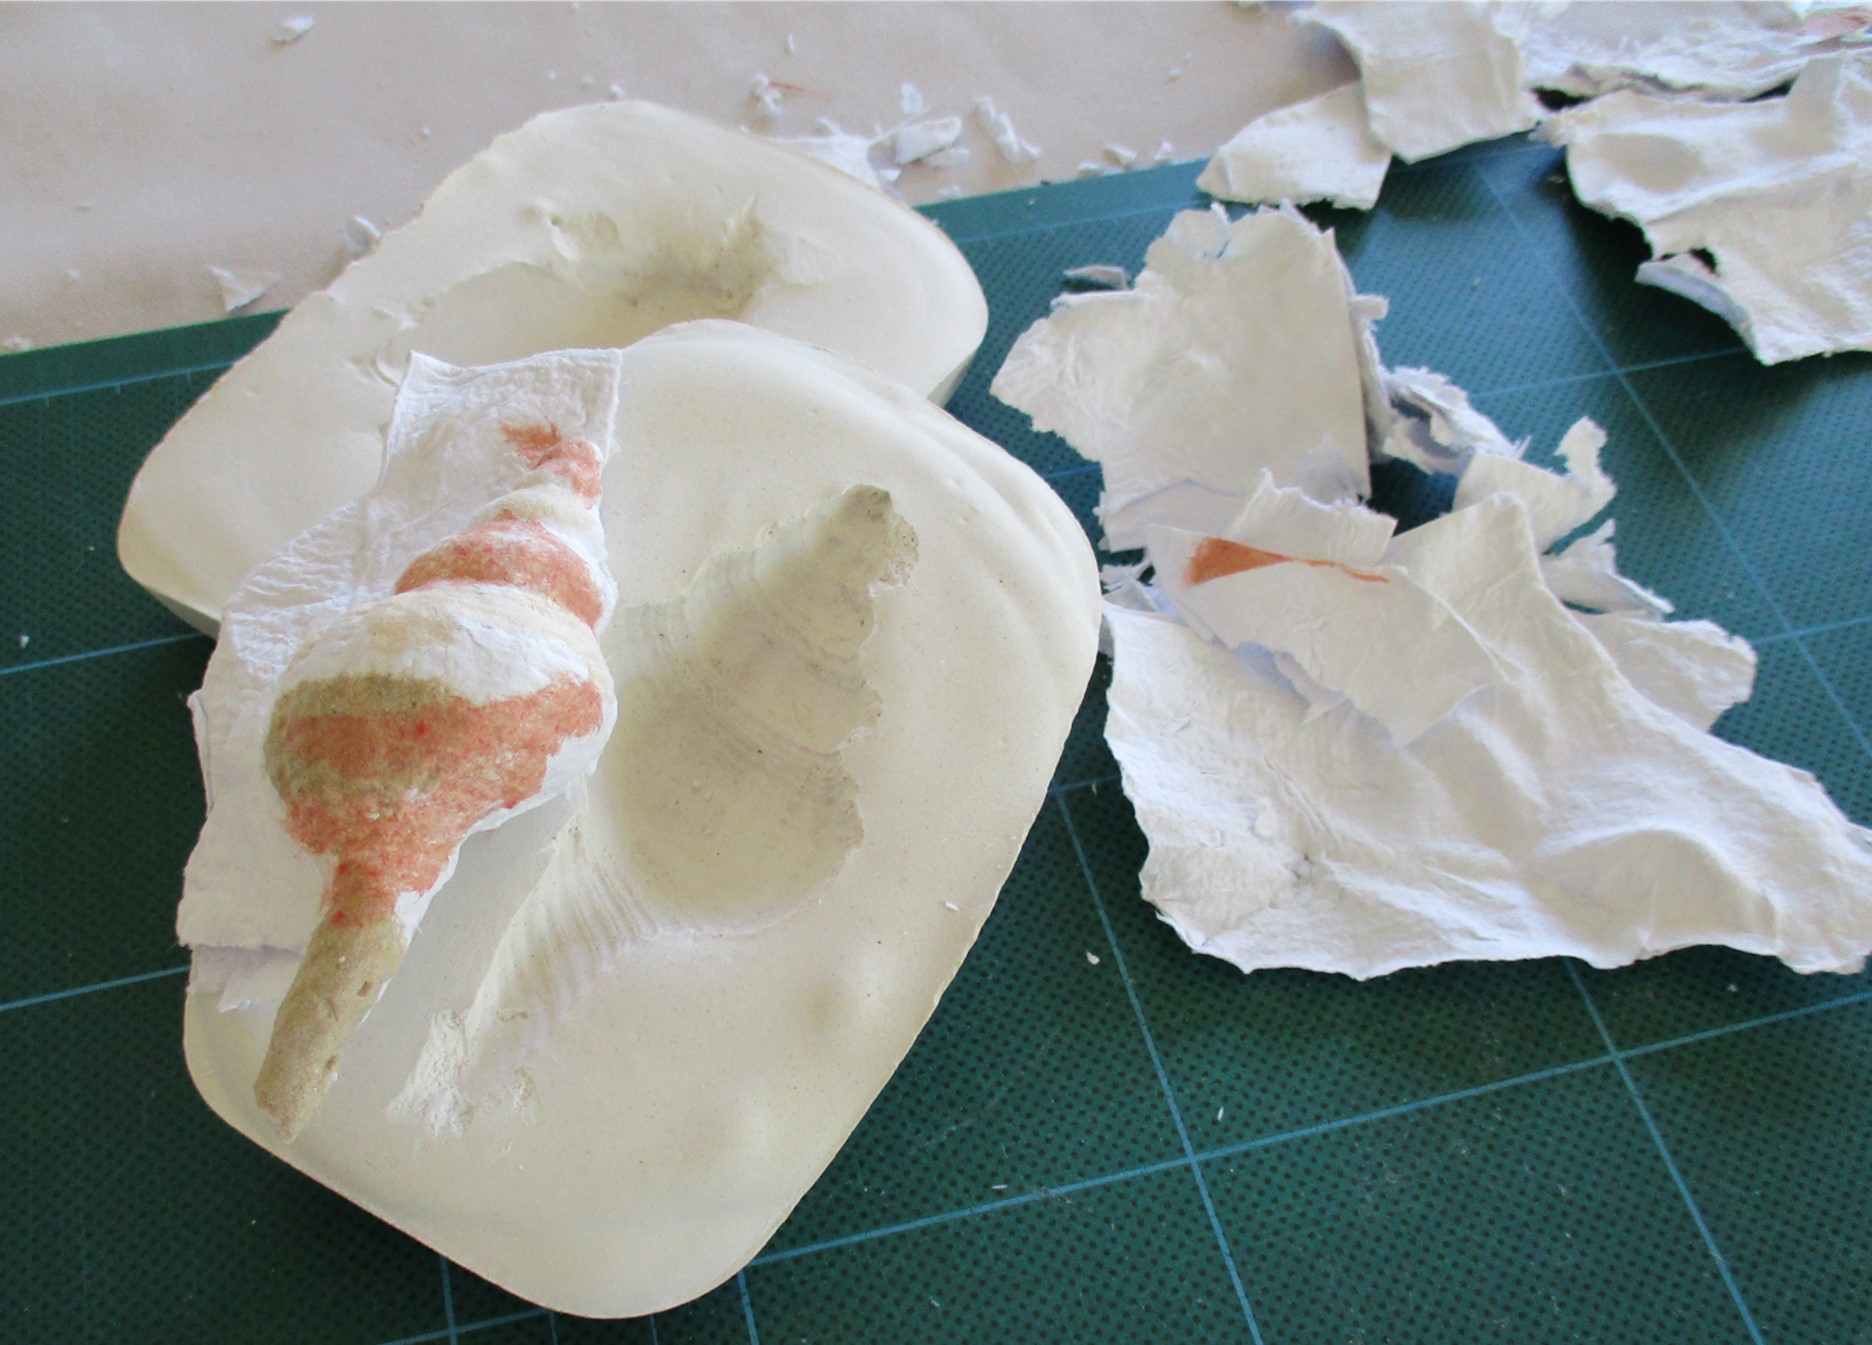
Removing the shell
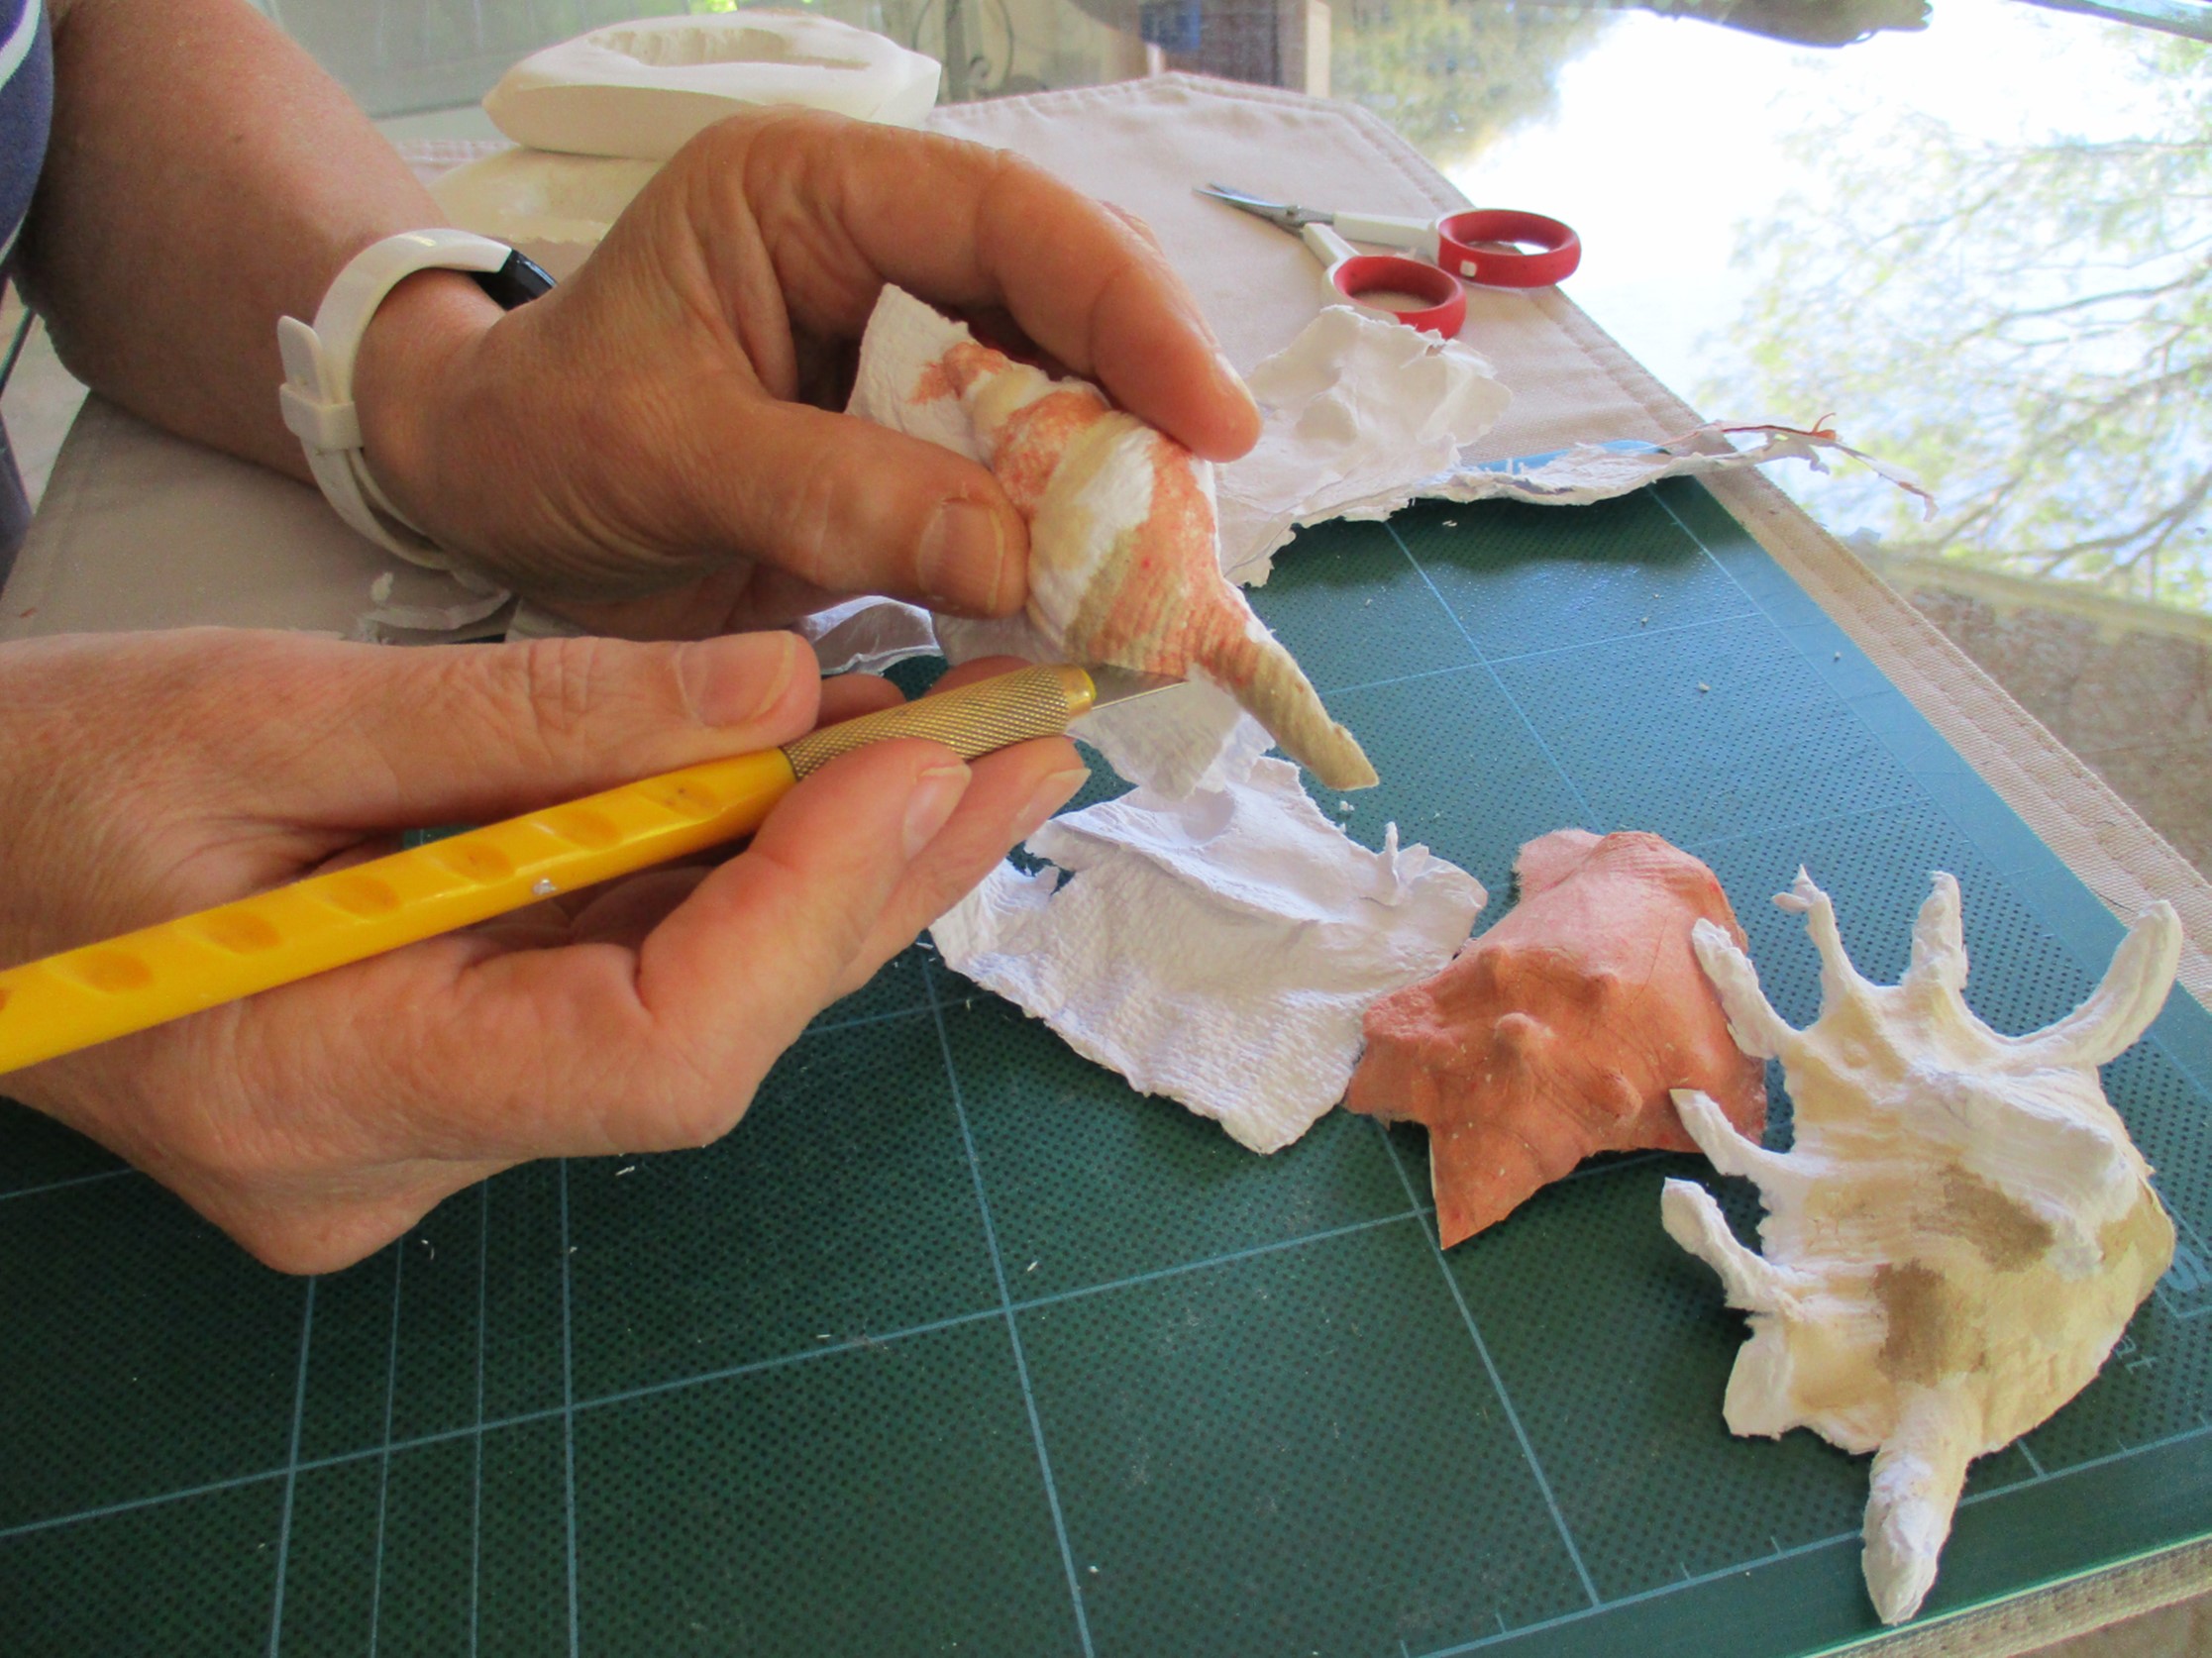
Trimming edges.
Paper overlap at the edges of the shells is carefully cut away with a small scissors or blade. If the paper layers separate in places at the edges, a very thin layer of glue can secure them. Coloured paper mulch can be used in the casting process (as in the image above) but most shells I’ve cast in white paper and painted. The best method for painting them is to coat them in a sealer (e.g. Mod Podge) and allow to dry. I’ve used diluted watercolour paint over the sealer to pick out natural colours.
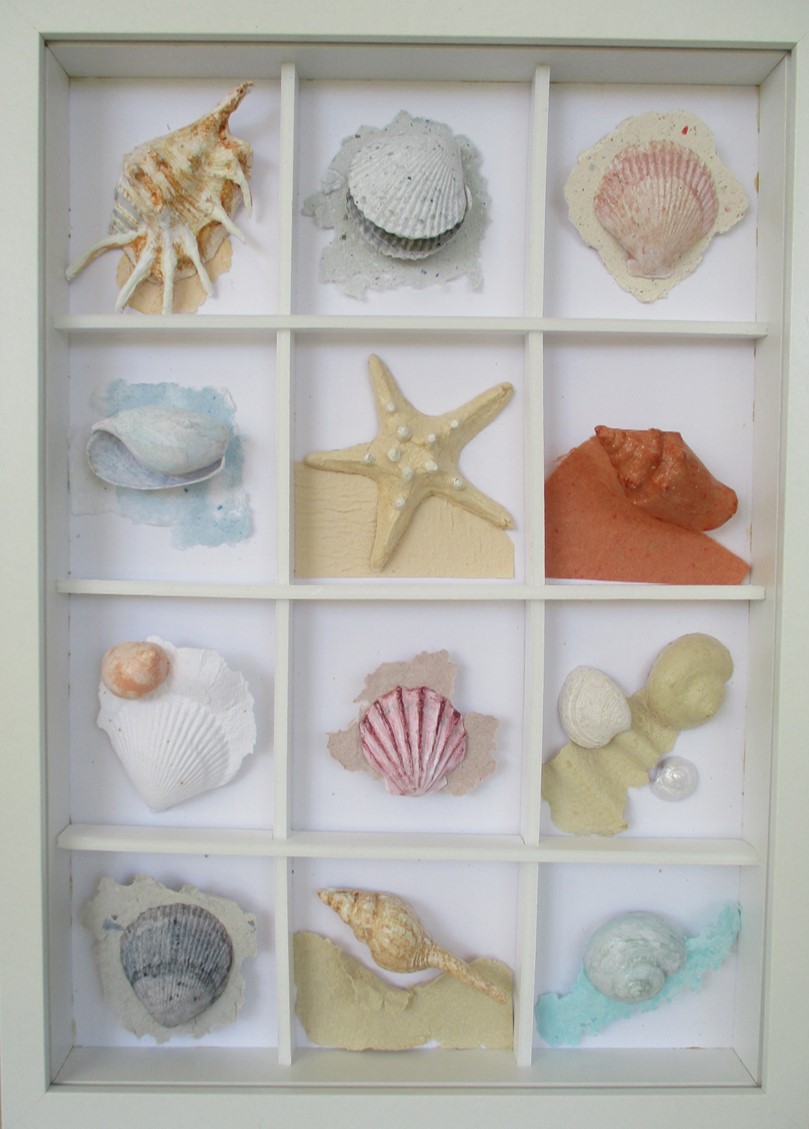
After making a few flat shells, I experimented with creating a full 3D shell, using a cast of both sides. I had some success, but need to practise and develop this further. Examples of my first tries are below.
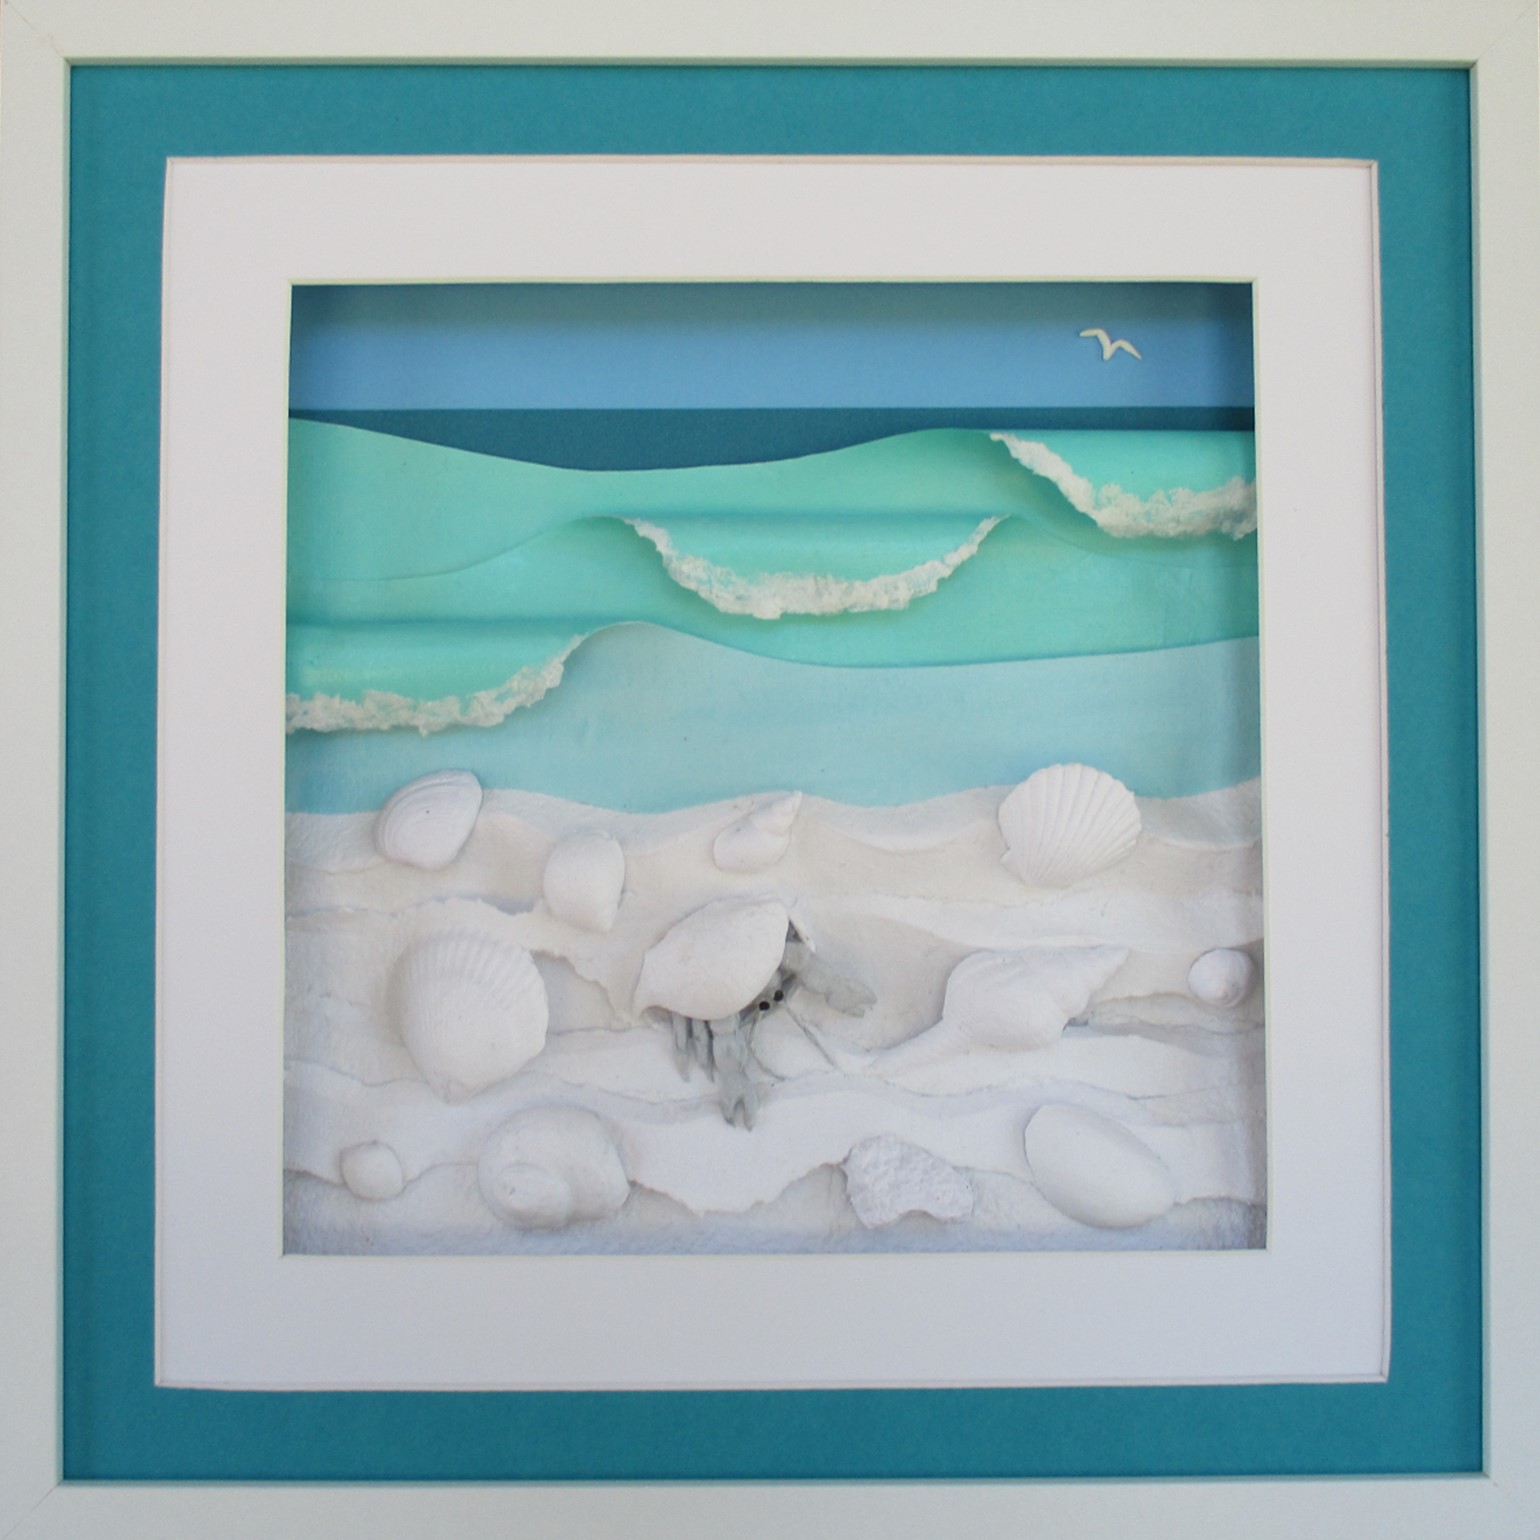
A: All the shells in the top image are paper. —————————————————————————————————— After nearly 2 years of experiments I finally put my shells into pictures. These pictures were on display at the Pepper Street Arts Centre SALA ‘Remake’ Exhibition during August 2023. Click the images below to enlarge.
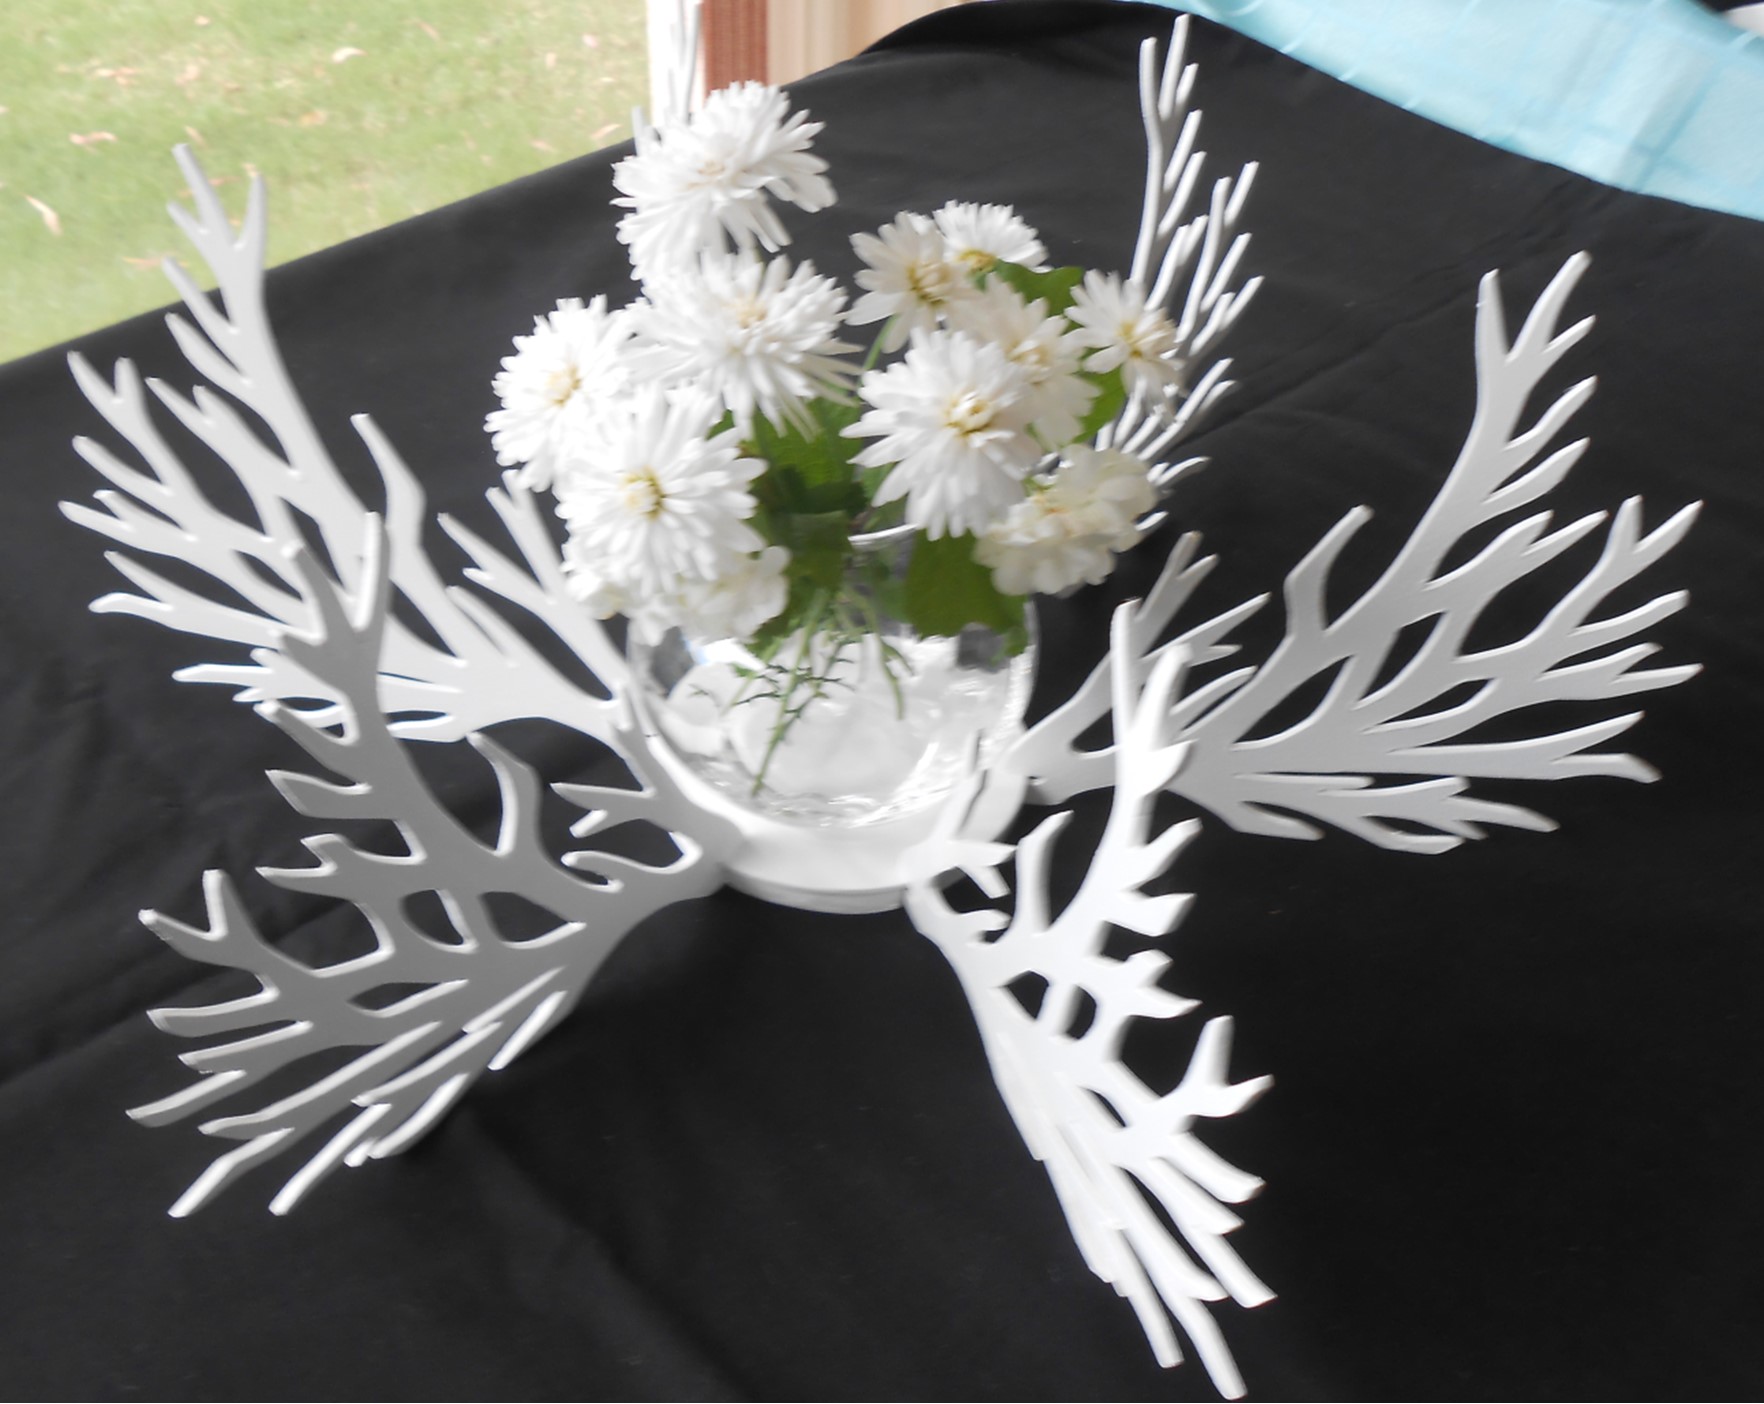
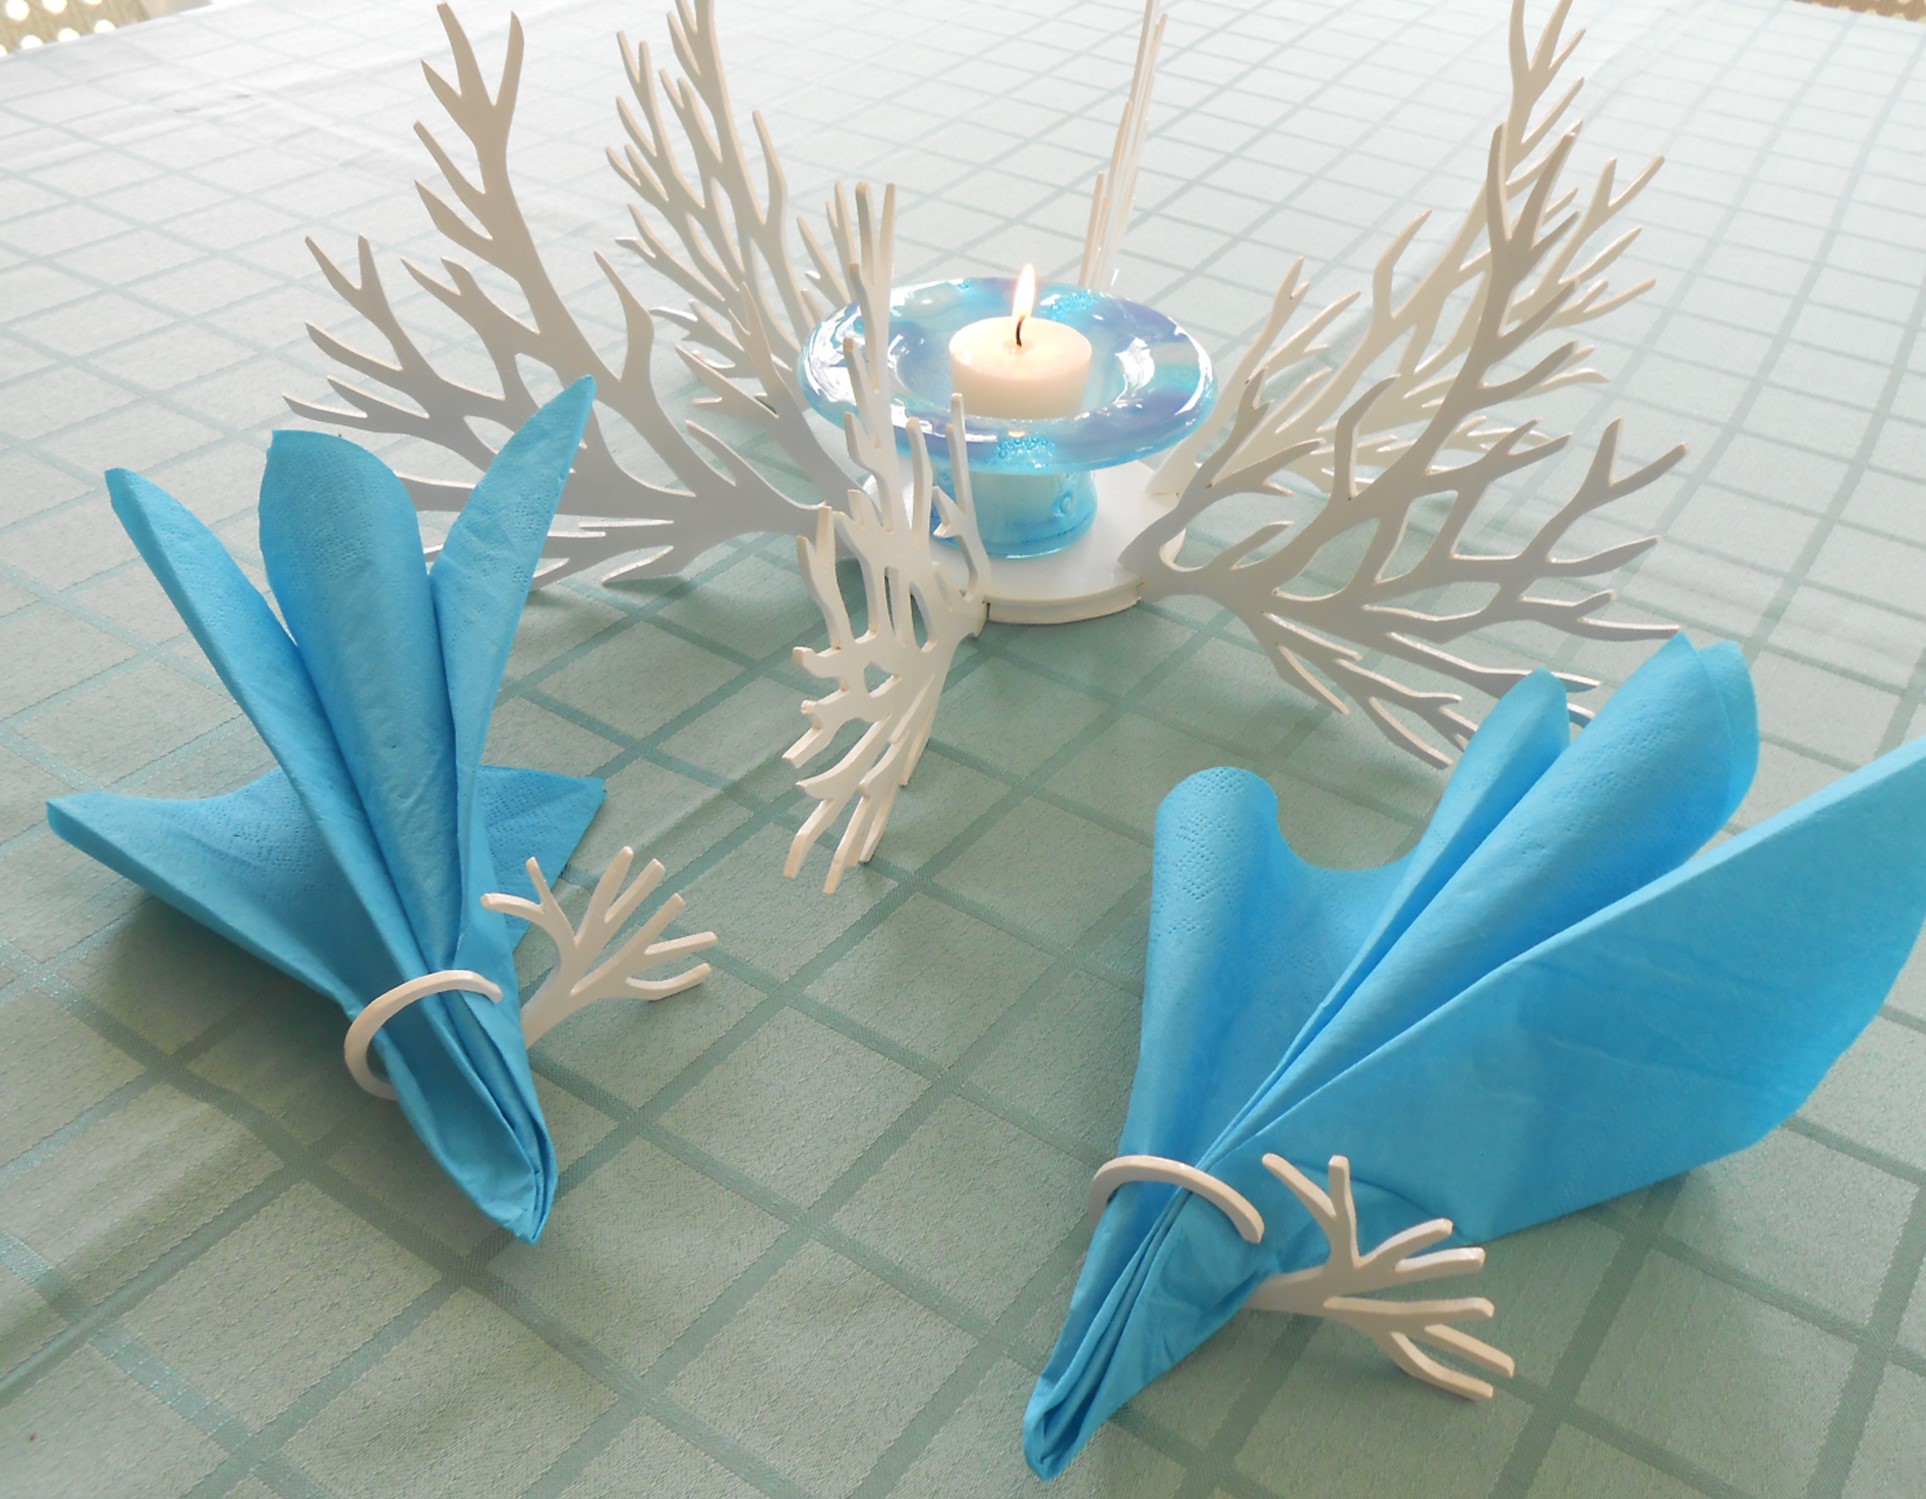
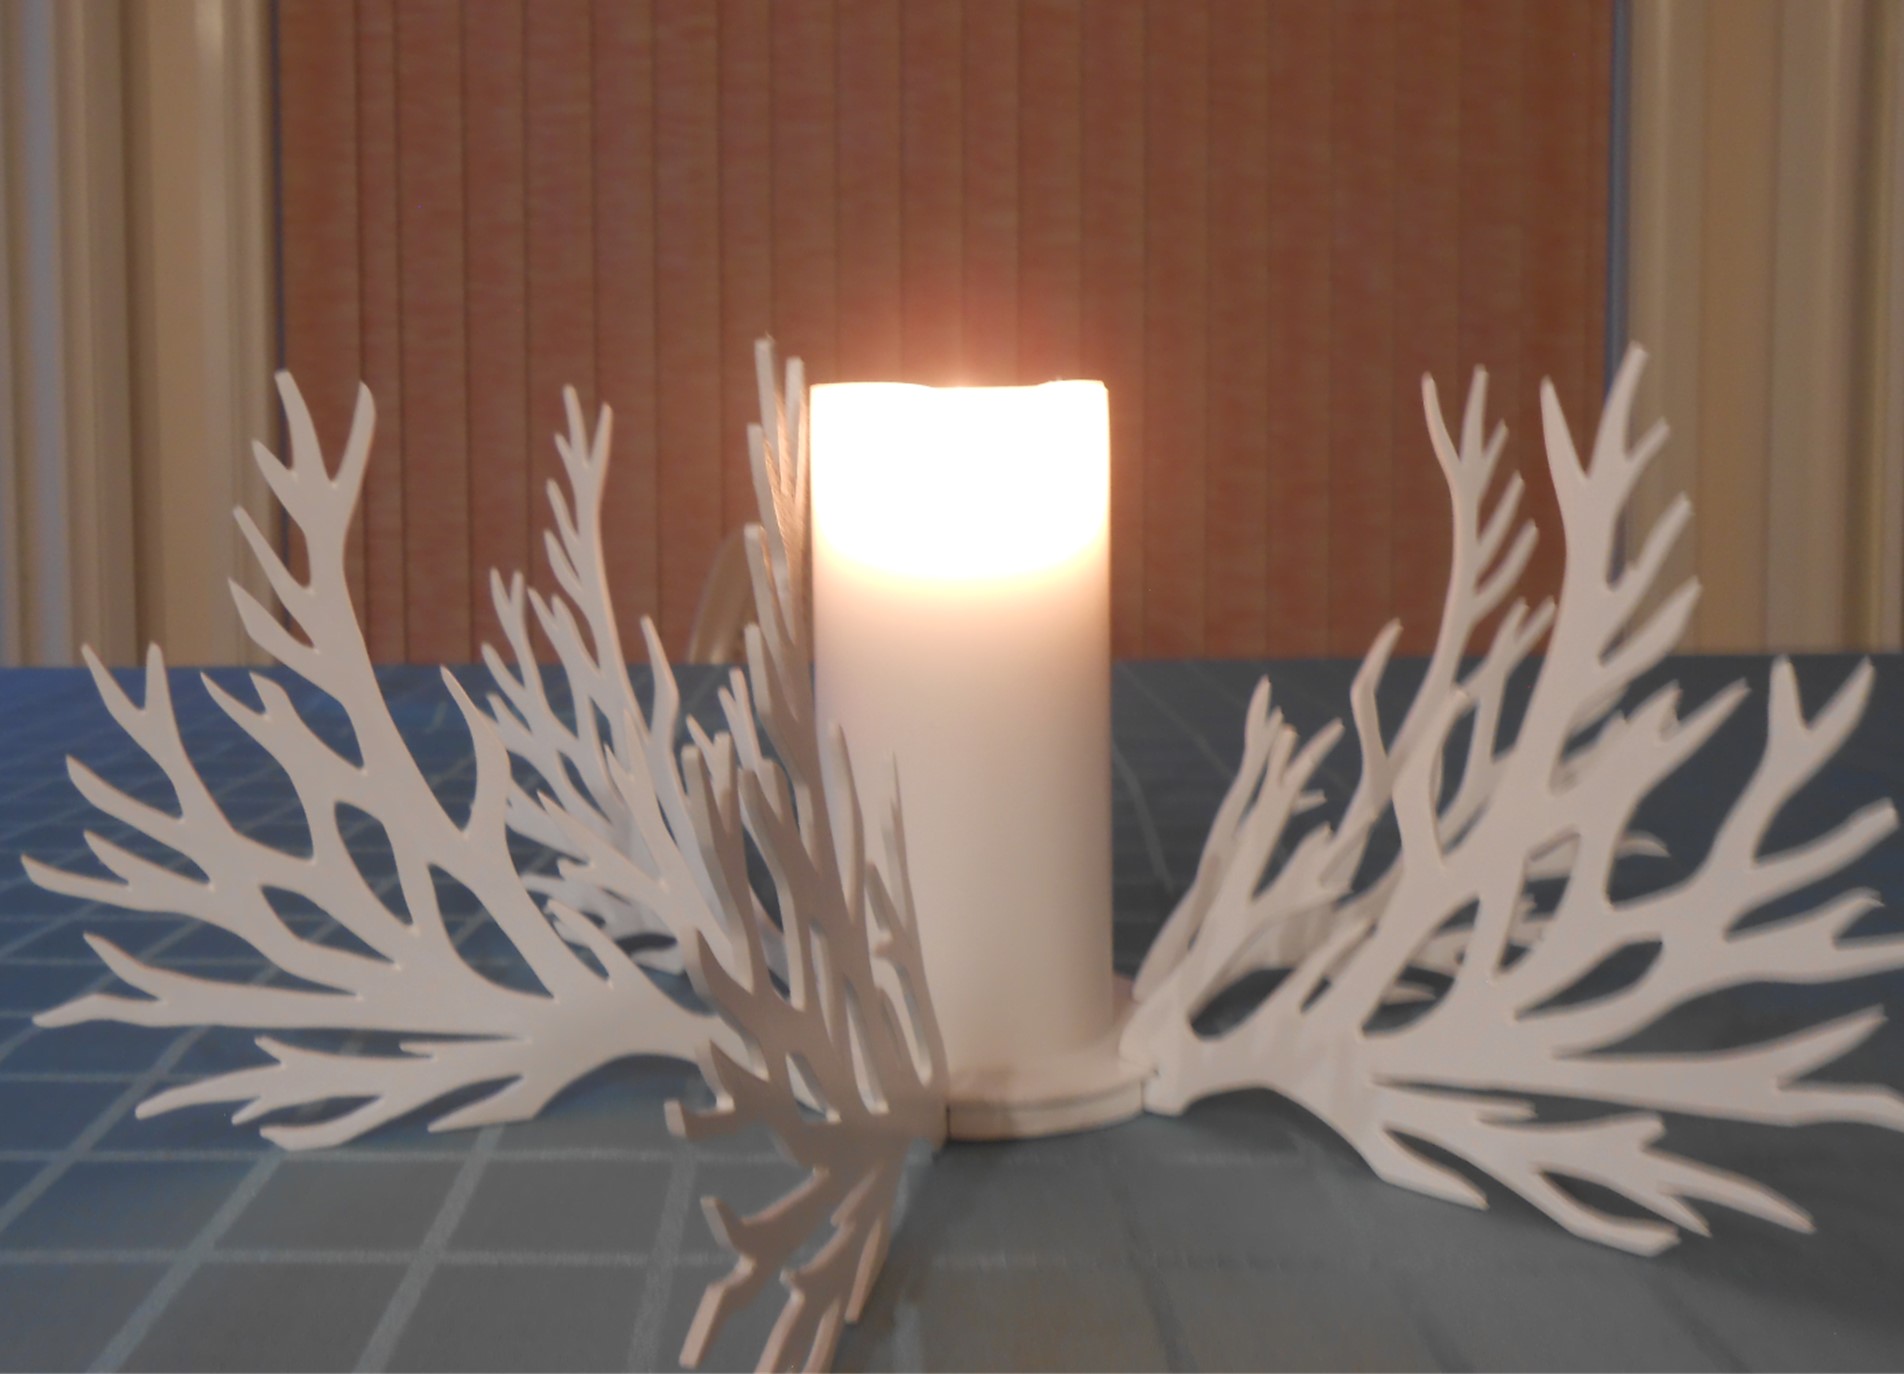
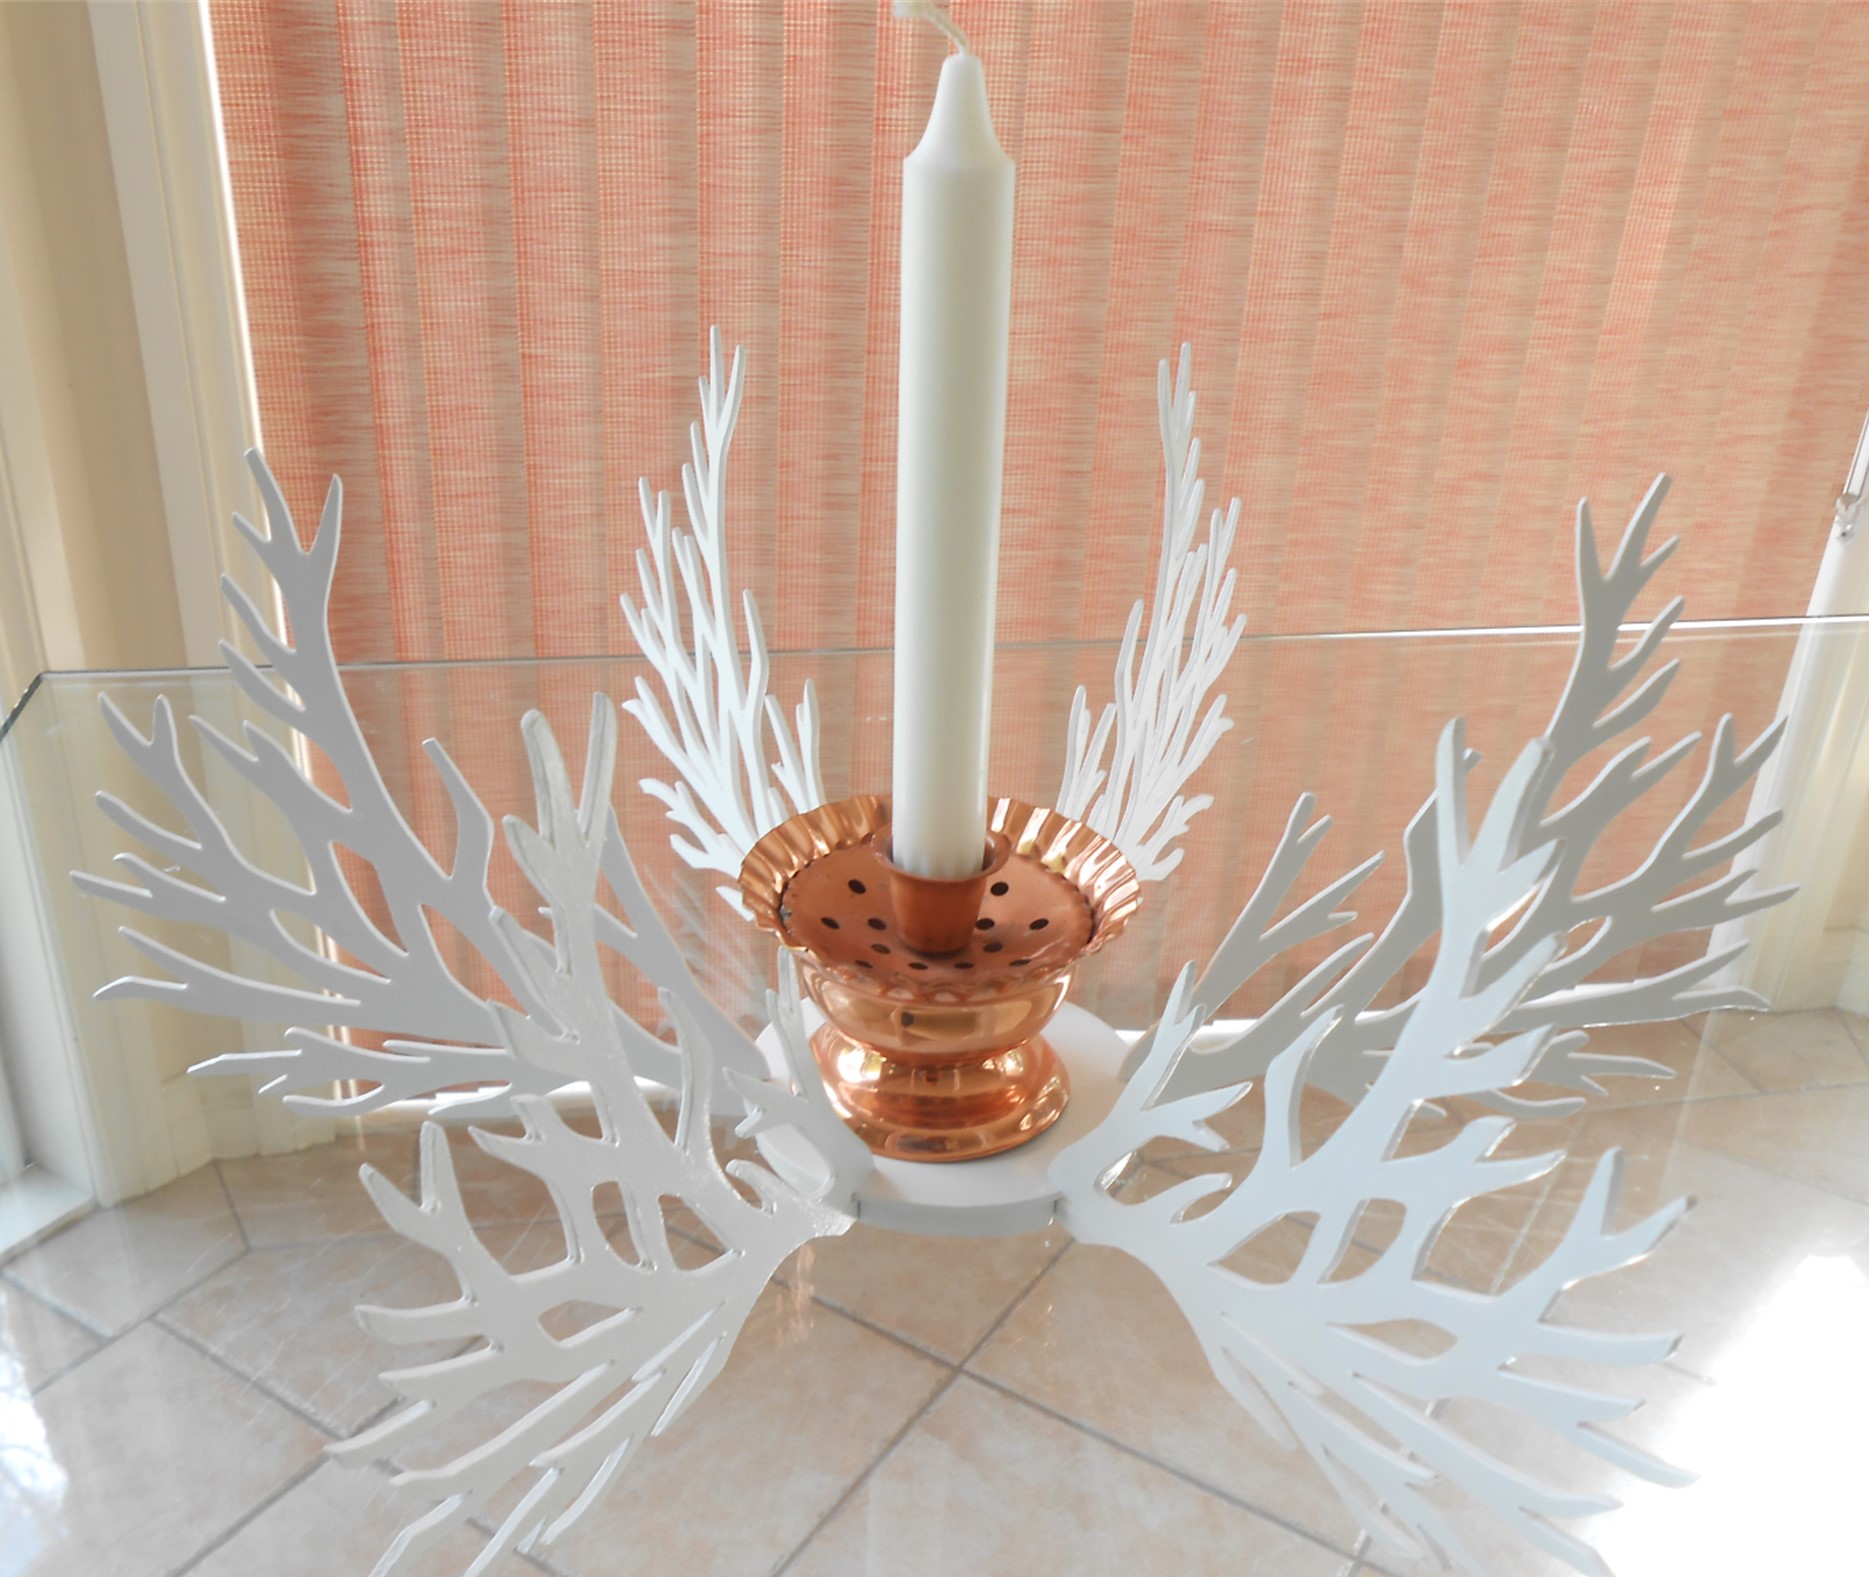
I wanted to create a table centrepiece that could be adapted for many occasions; formal, casual, day or evening. As I don’t have cupboard space for such decorative objects, it also needed to be designed to ‘break down’ and pack away flat.
This centrepiece consists of six ‘fins’ which slot into a base piece. The size of the circular base is 100mm, which will fit a variety of objects such as candles, vases of flowers or seasonal decorations. I’ve created this with 3mm mdf cut on my scroll-saw and painted in gloss white acrylic paint. I was pleased with the result so I designed some matching serviette rings.
When dismantled, the pieces all fit into a large envelope.
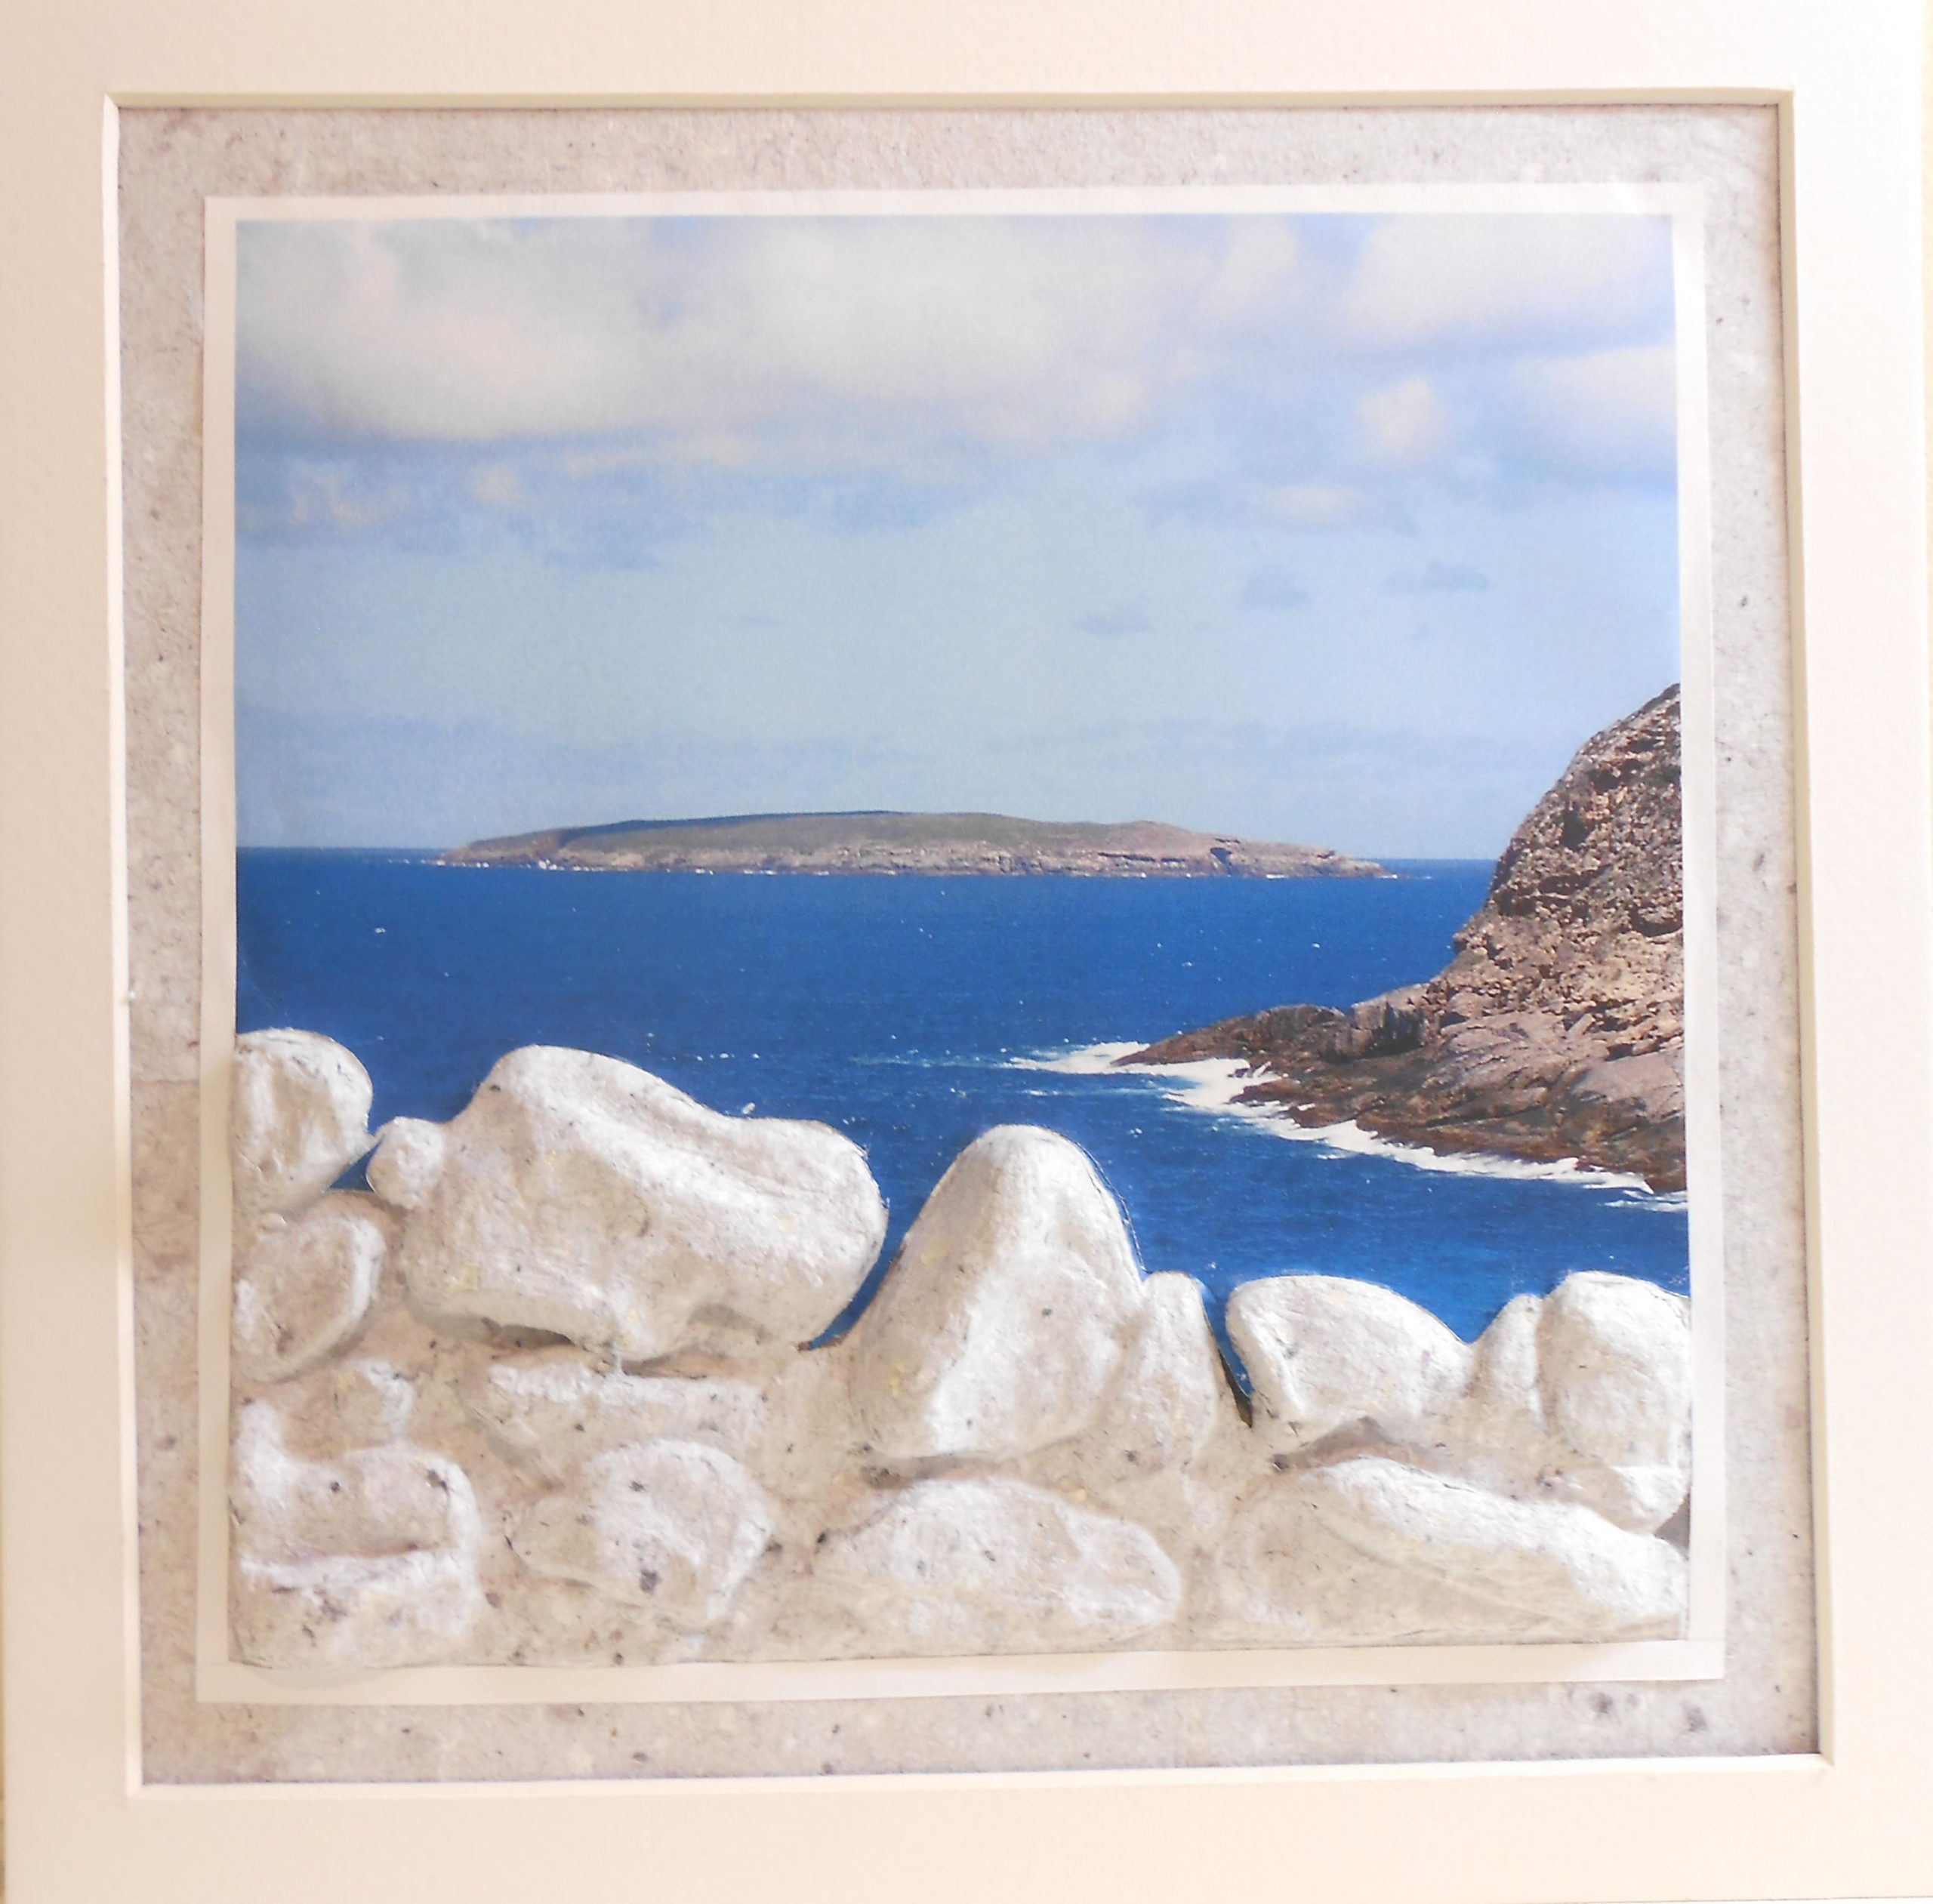
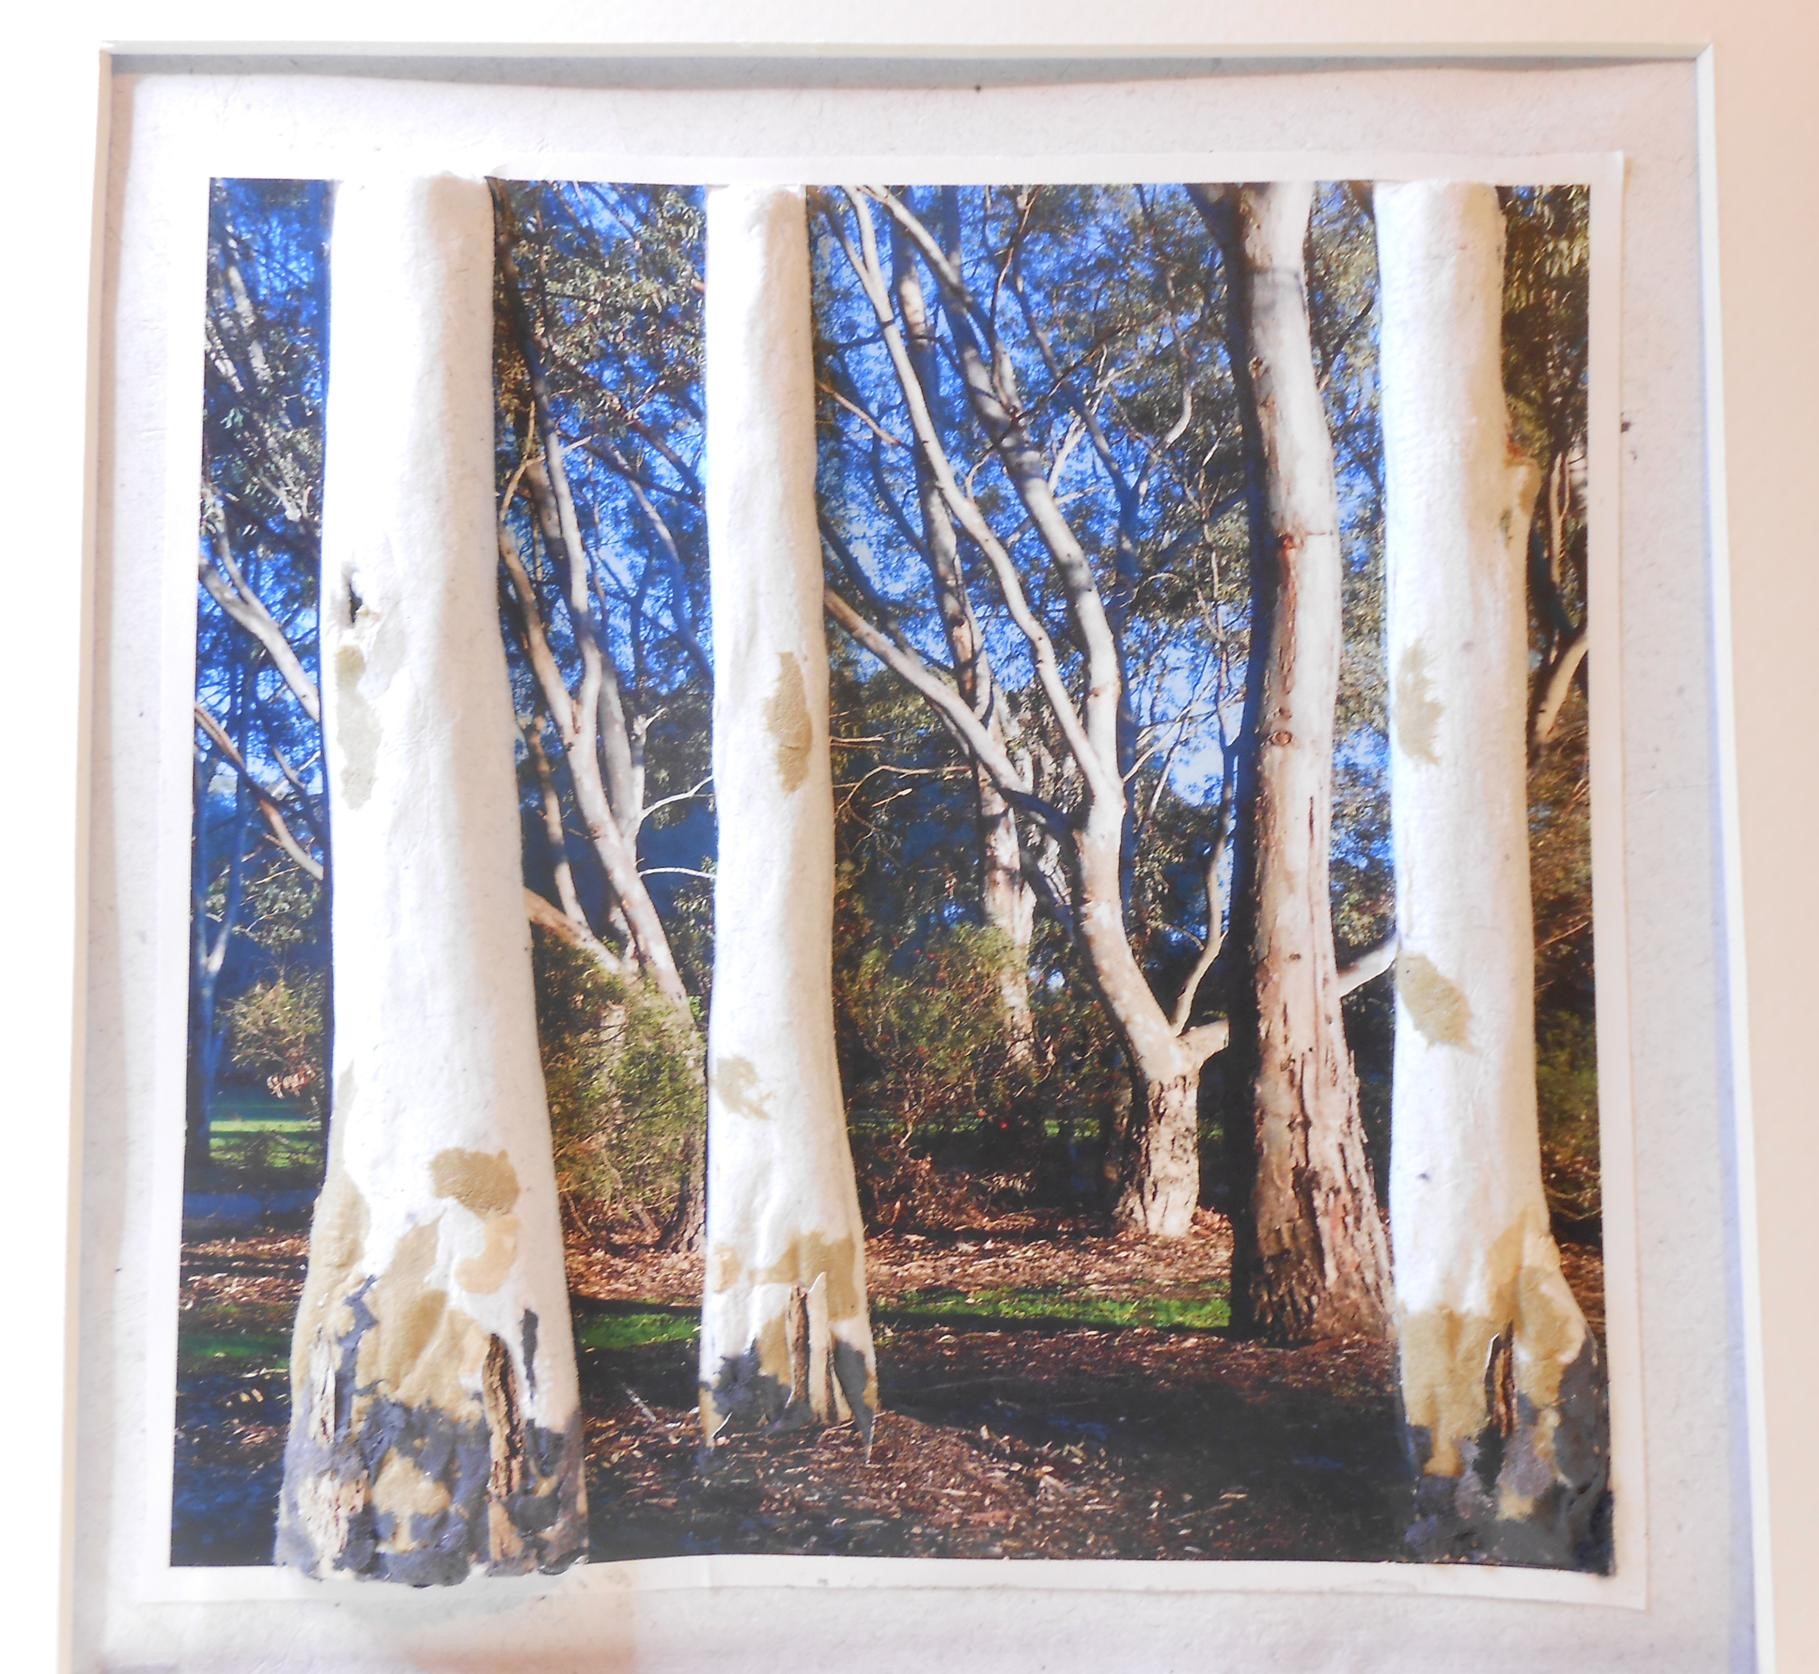
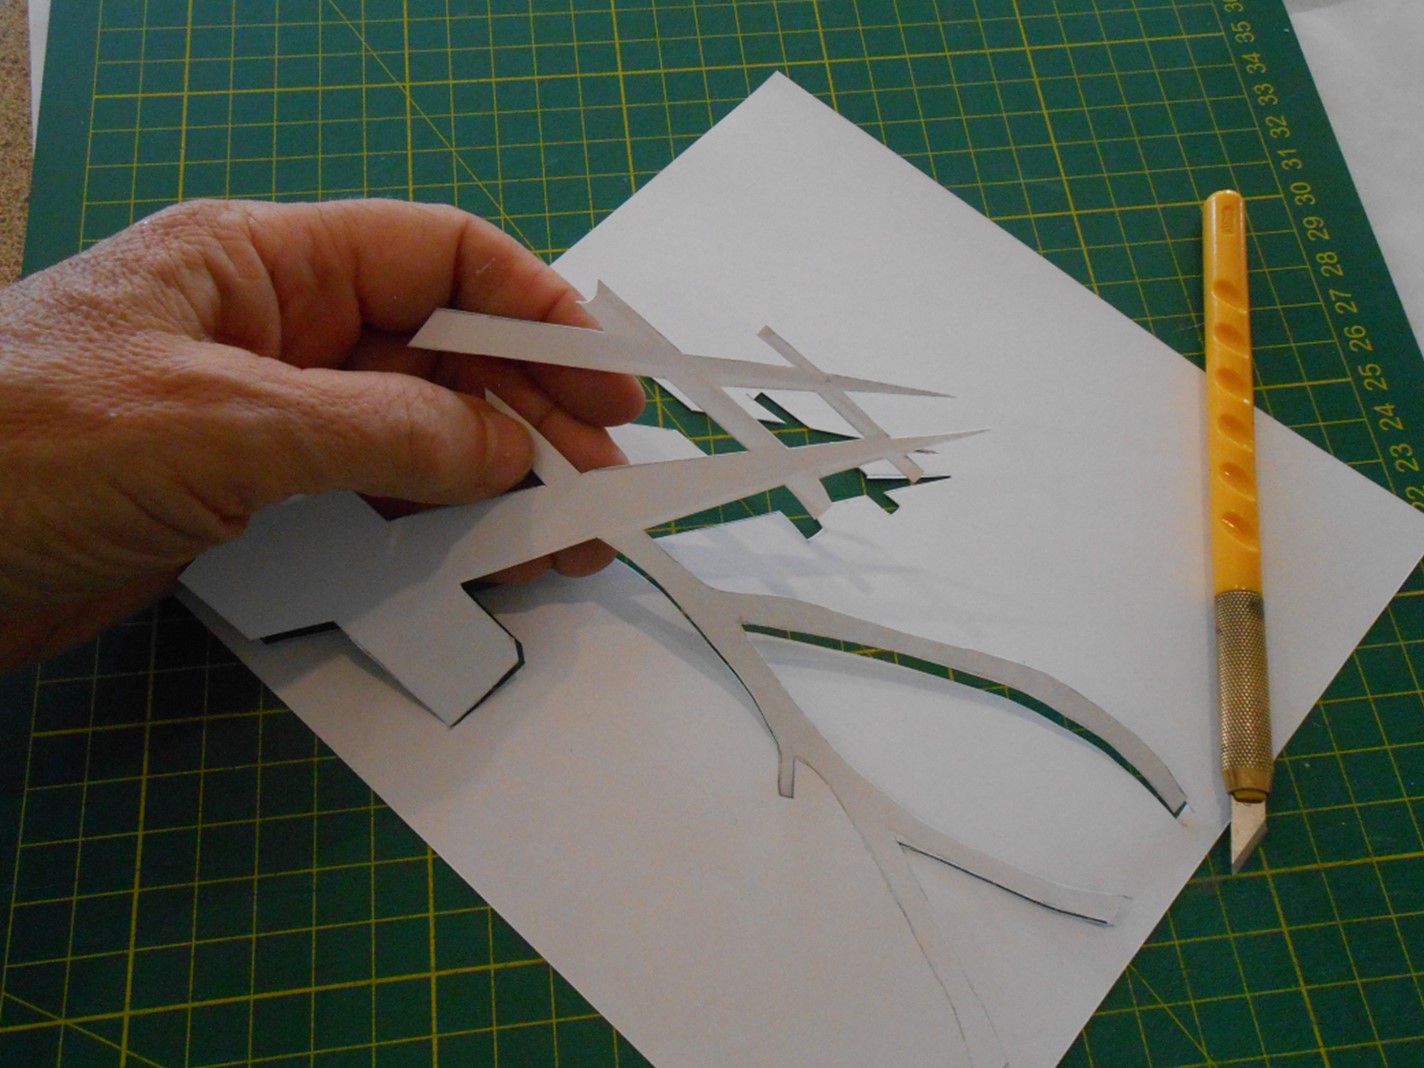
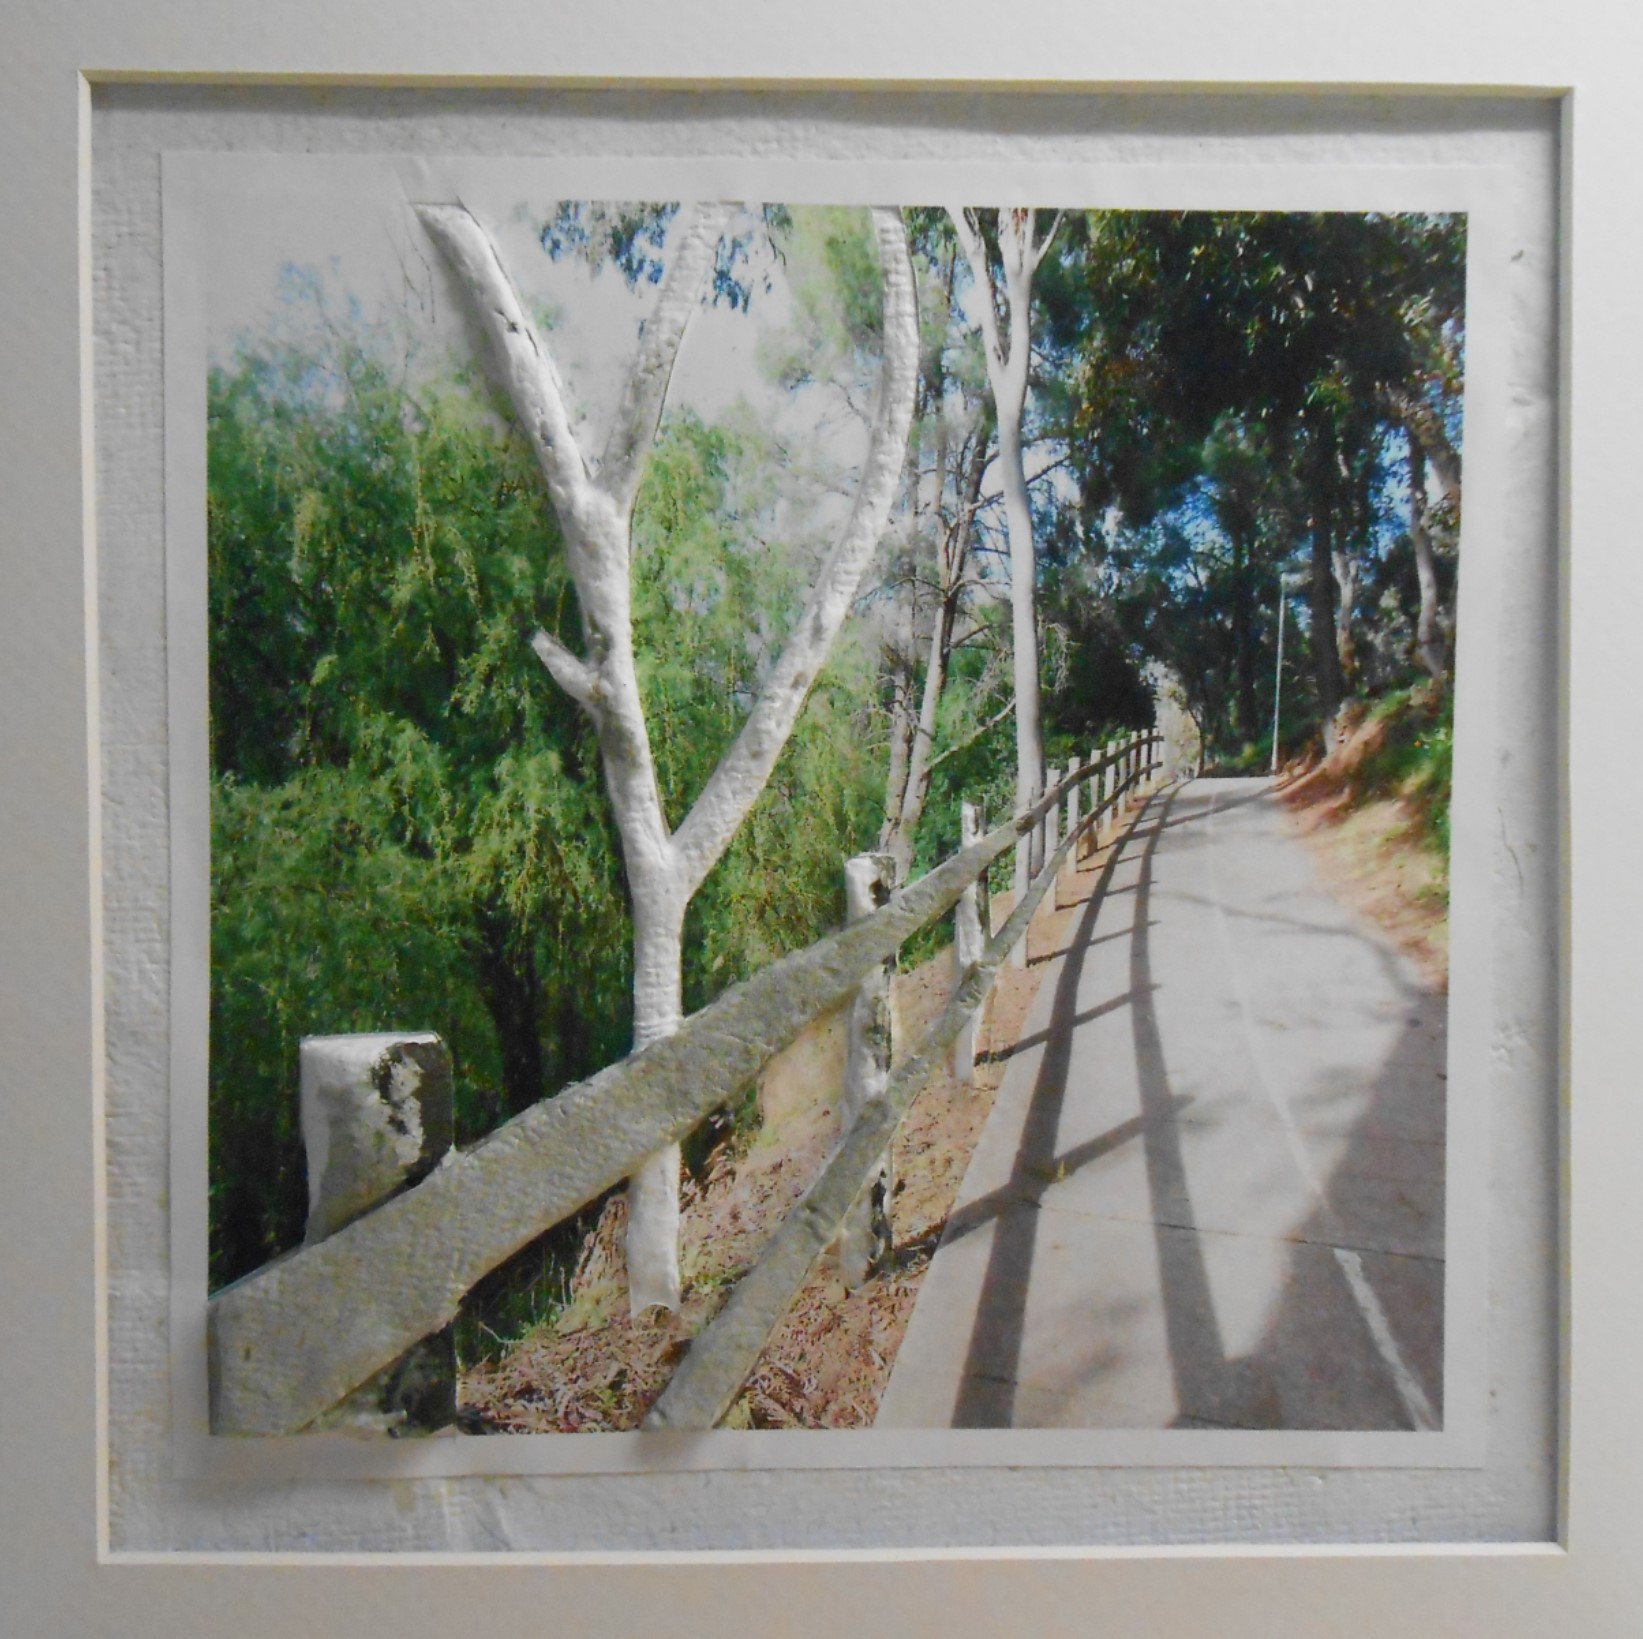
This experiment in three dimensional paper craft involves building up the foreground of a photograph in bas-relief with cast recycled paper. The result gives the photograph interest and depth and a ‘life like’ appearance.
Photos are taken that lend themselves to this technique. They need to have a prominent foreground focus and ideally, features where the bas-relief can ’blend back’ into the photo, for example, branches projecting from a tree trunk. Photos are edited to size and printed on matt paper.
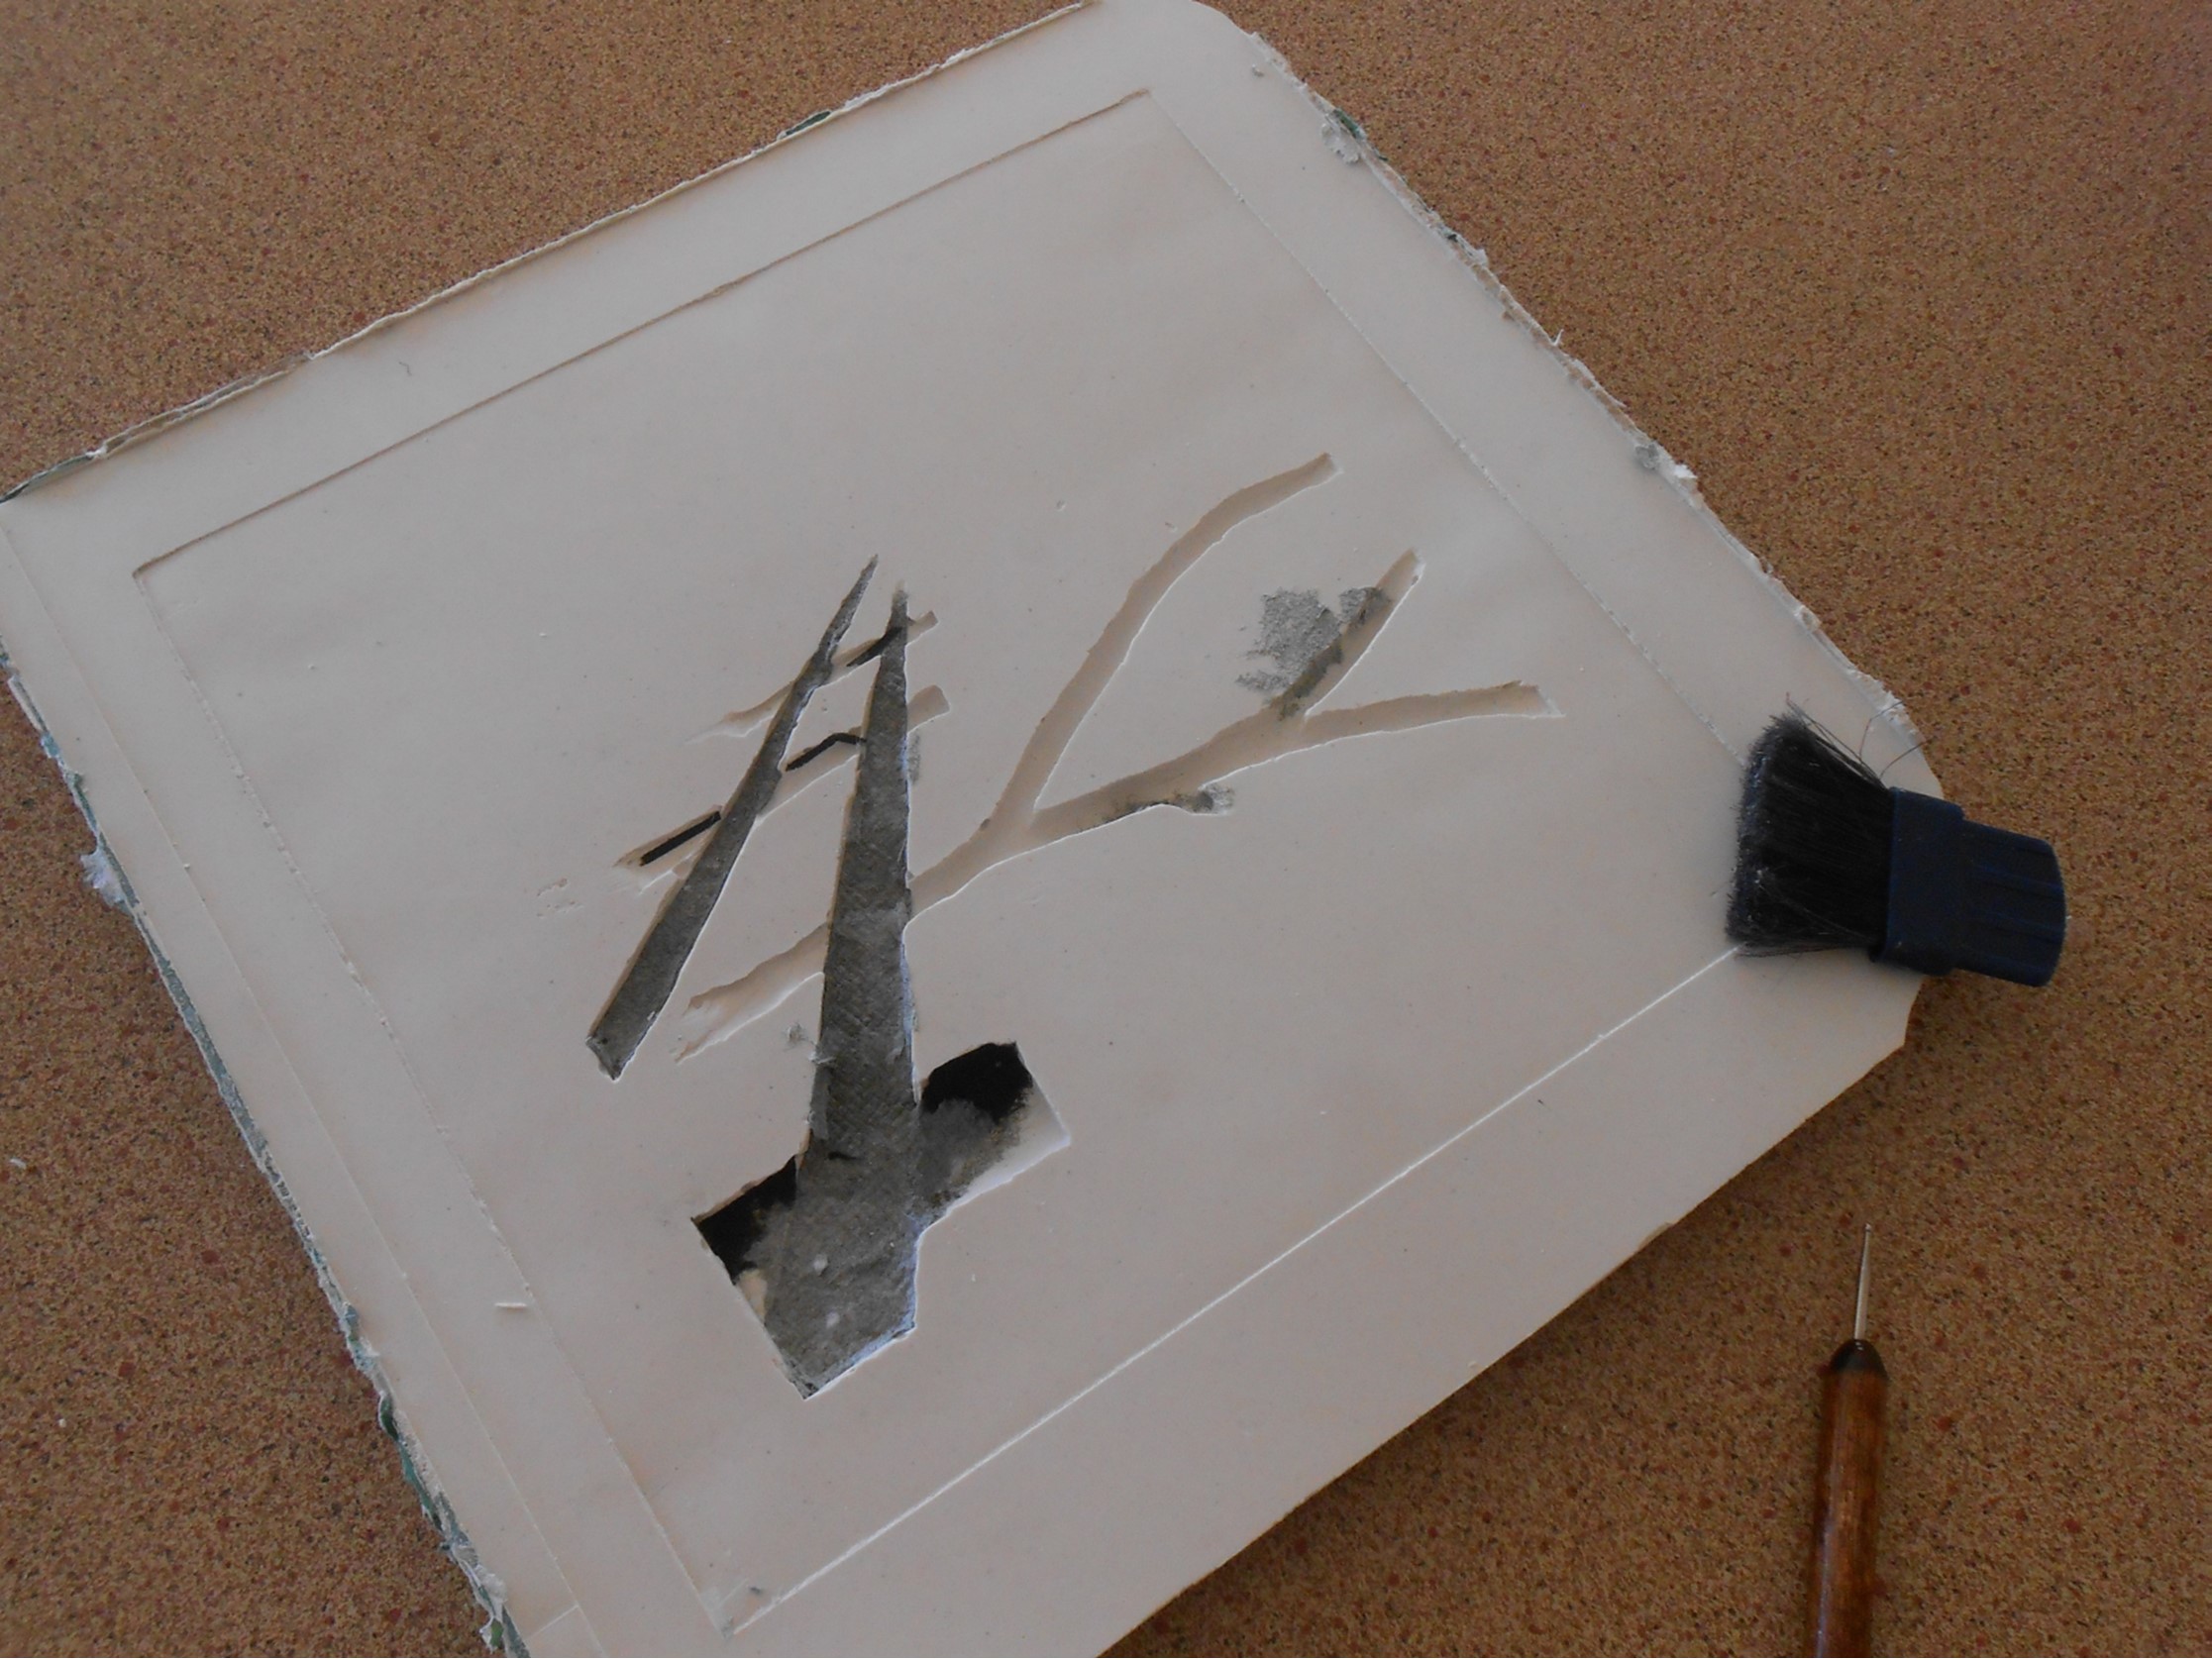
Moulding the image A bas-relief image of objects that are to stand out is created by moulding plasticine over the photograph.
This is done by placing a transparent sheet of acetate over the entire photograph. The acetate also creates a very smooth surface for the cast which aids in adhering the photo in the last stage.
The acetate sheet with the plasticine bas-relief is then placed into a deep container, large enough to have a margin around the edges of the acetate.
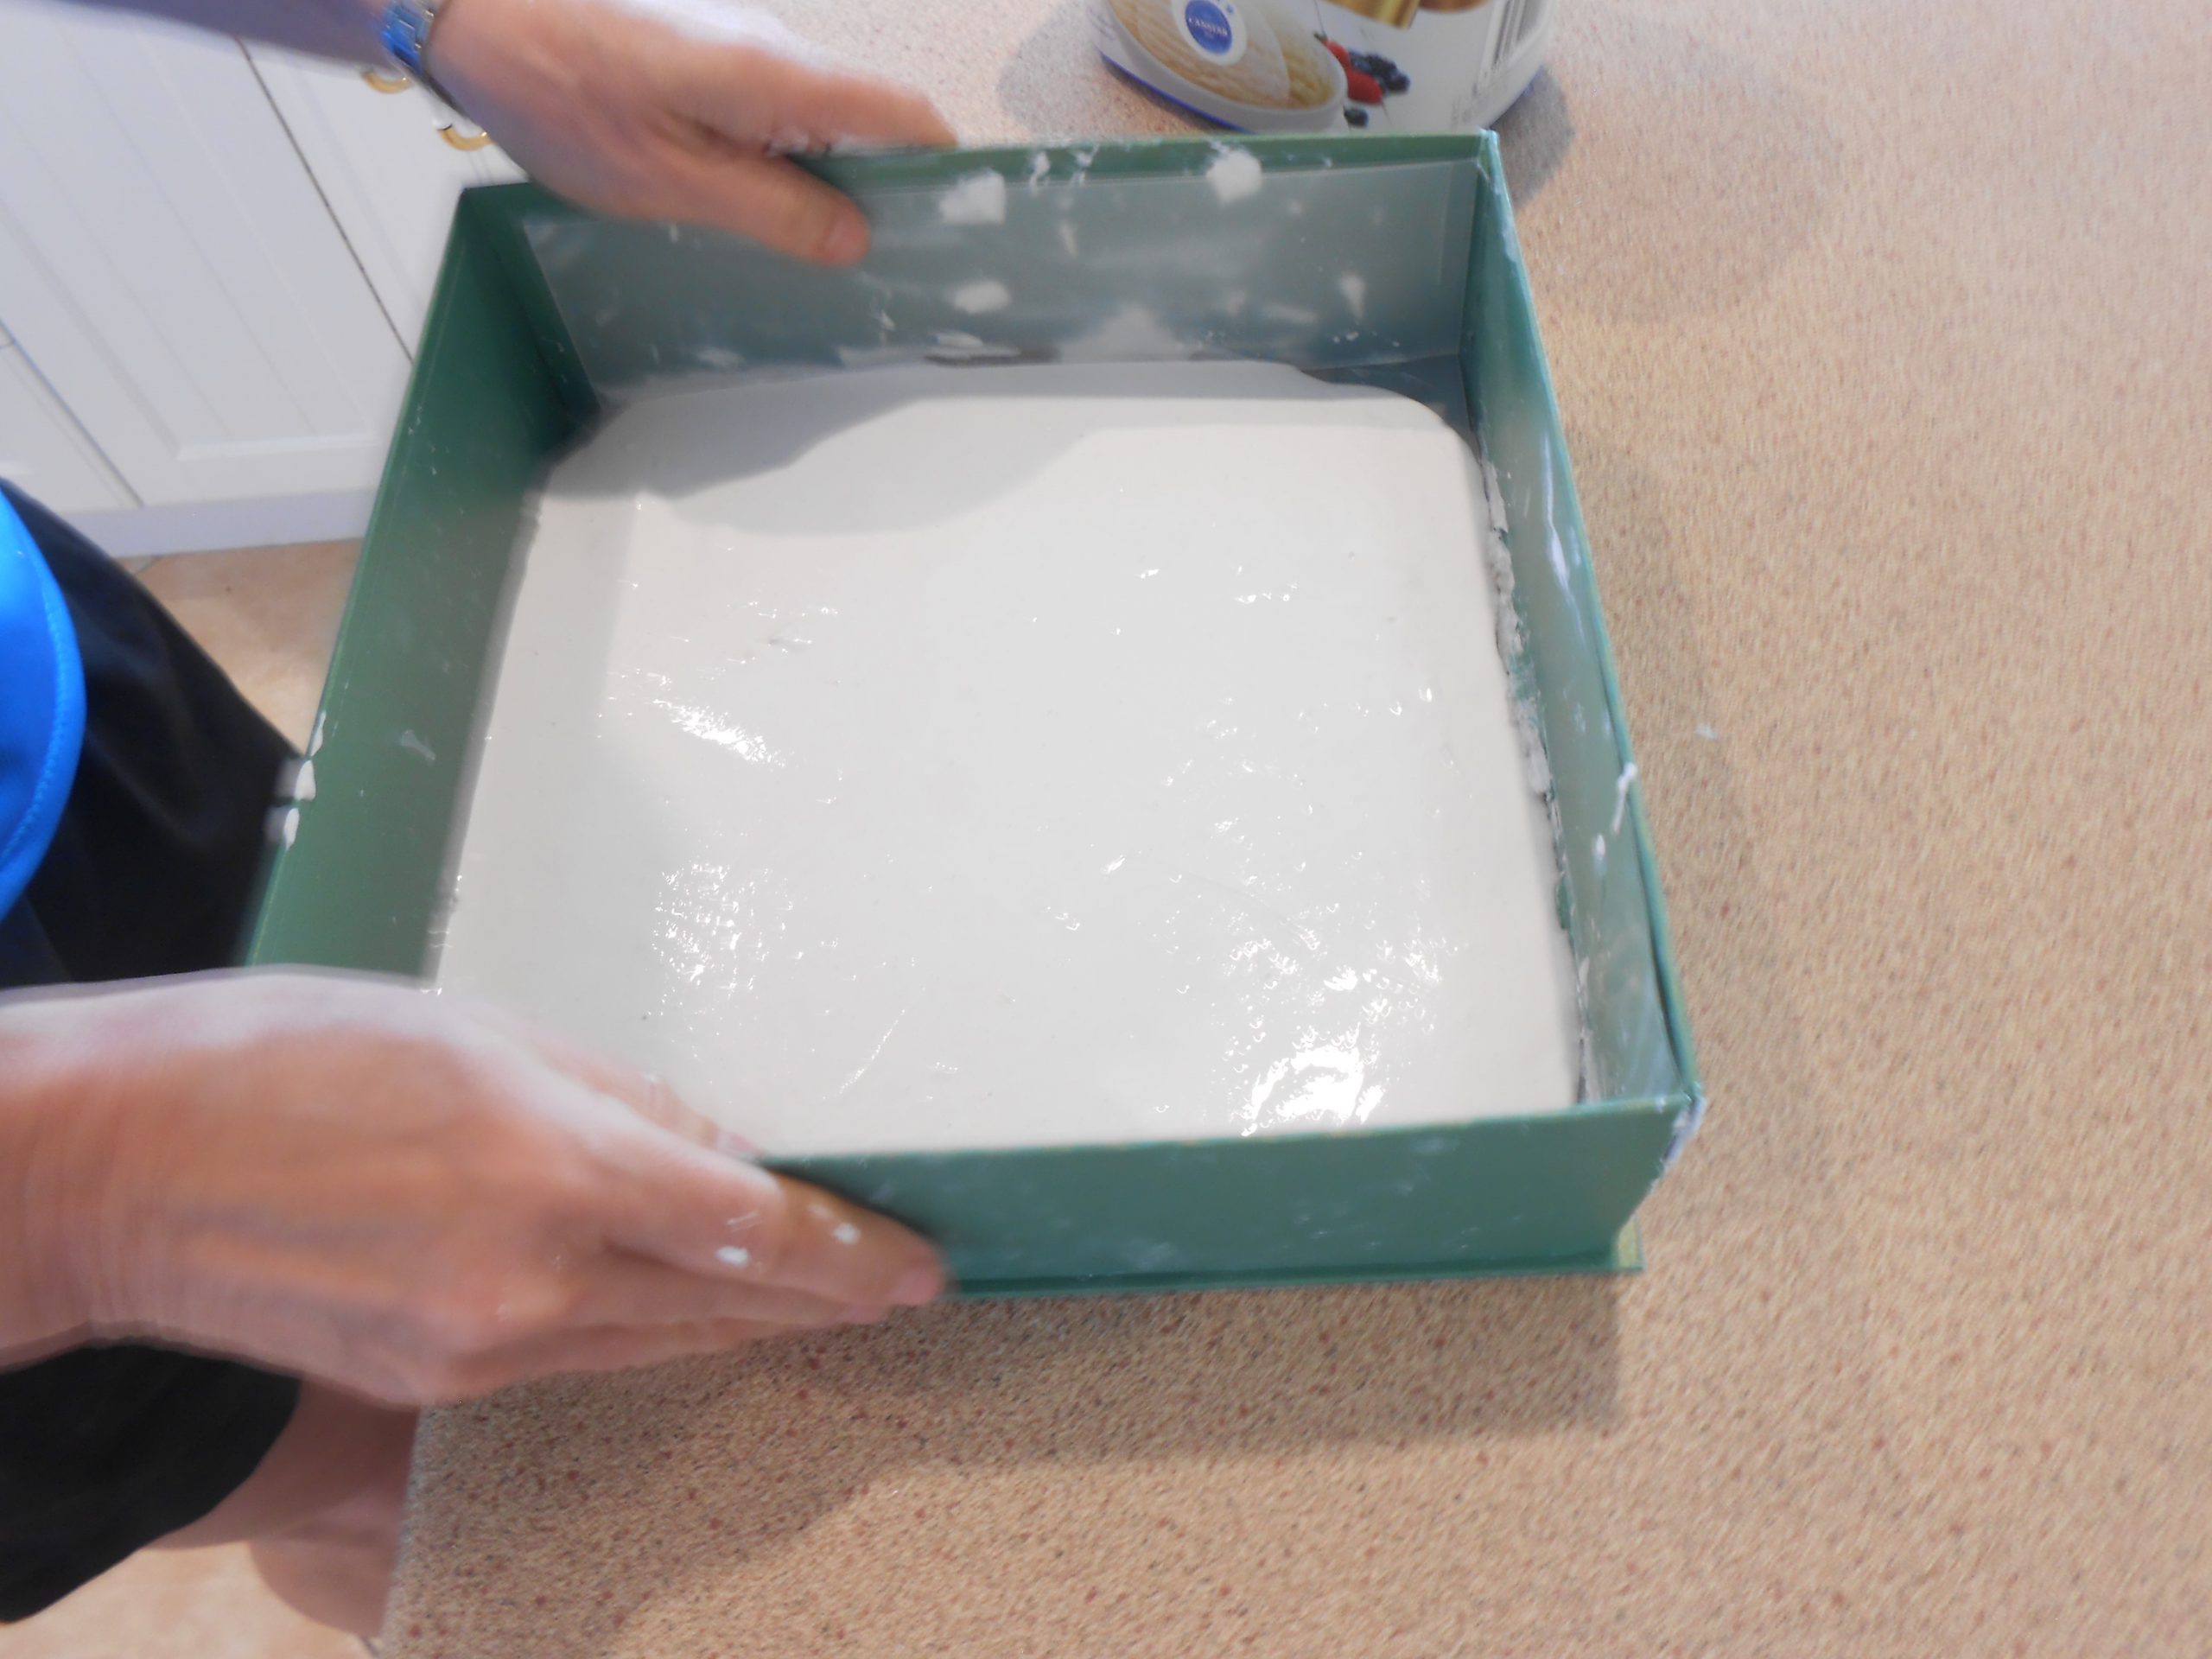
2. Creating the Cast. Plaster of Paris is mixed to a pouring consistency and poured into the container. This can be done in stages, ensuring the container is jolted gently from time to time, to enable air bubbles to escape and the plaster to run into grooves in the mouldings. The image is covered to a depth at least 1cm above the plasticine, ensuring the top is relatively flat to prevent cracking during paper casting.
The container is then left in a dry place until the plaster is completely set.
The plaster cast is removed from the container, and the acetate and plasticine is removed thoroughly from the plaster. It may be necessary to use a fine blade to neaten edges if plaster has under-run the plasticine in spots.
3. Making paper mulch Recycled paper is chosen to best match the colours in the photograph. Paper is torn or shredded into small pieces, soaked in water for one or two days, and blended into paper pulp.
Batches of paper in various colours can be made and blended together at this stage to best colour match the photo. To accurately replicate blended colours, a sample is blended and dried, as the dry result will appear lighter.
4. Casting the paper
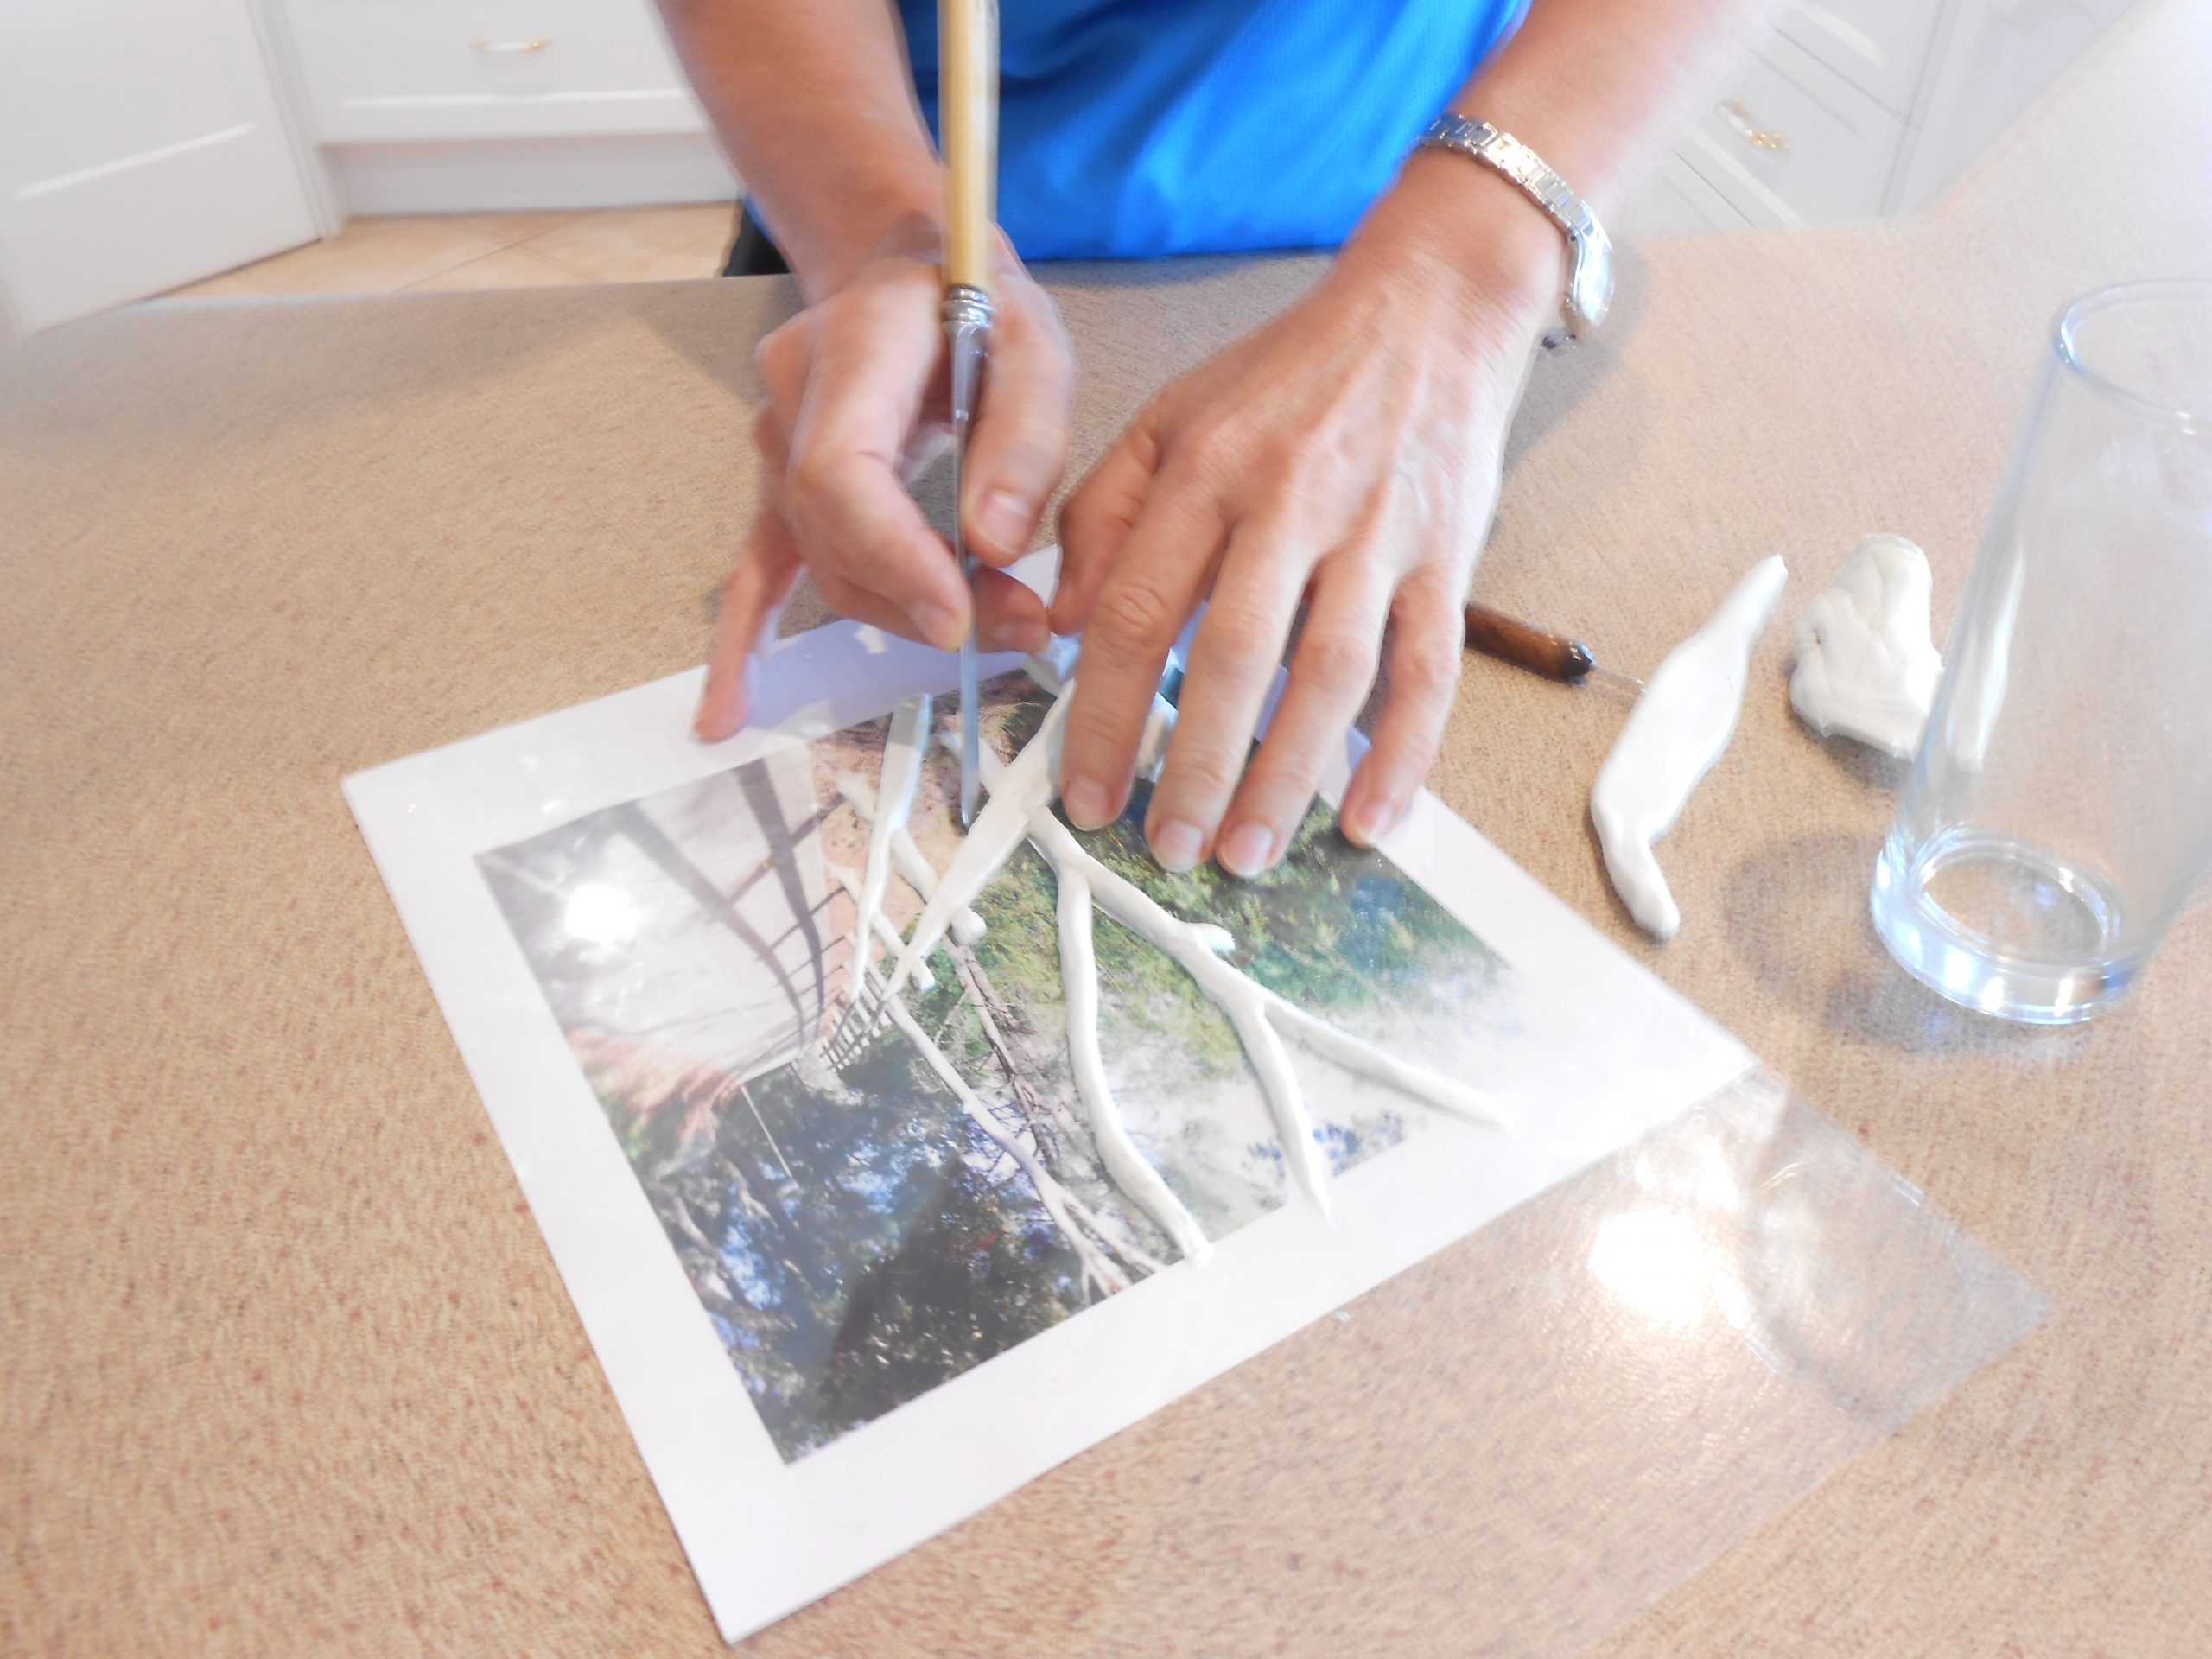
The first step is to lay any surface contrast colour into the mould (e.g. tree bark) using small pieces of mulch and spraying with water to keep damp.
The main colour paper mulch is mixed with water in a deep basin or container. Dipping a paper-making frame and deckle, sheets of paper are created and placed directly into the plaster mould, overlapping as necessary to fill the mould to extend beyond the acetate edges.
A small brush is used to work the paper carefully into the crevices and to blend together any overlaps of the wet paper sheets.
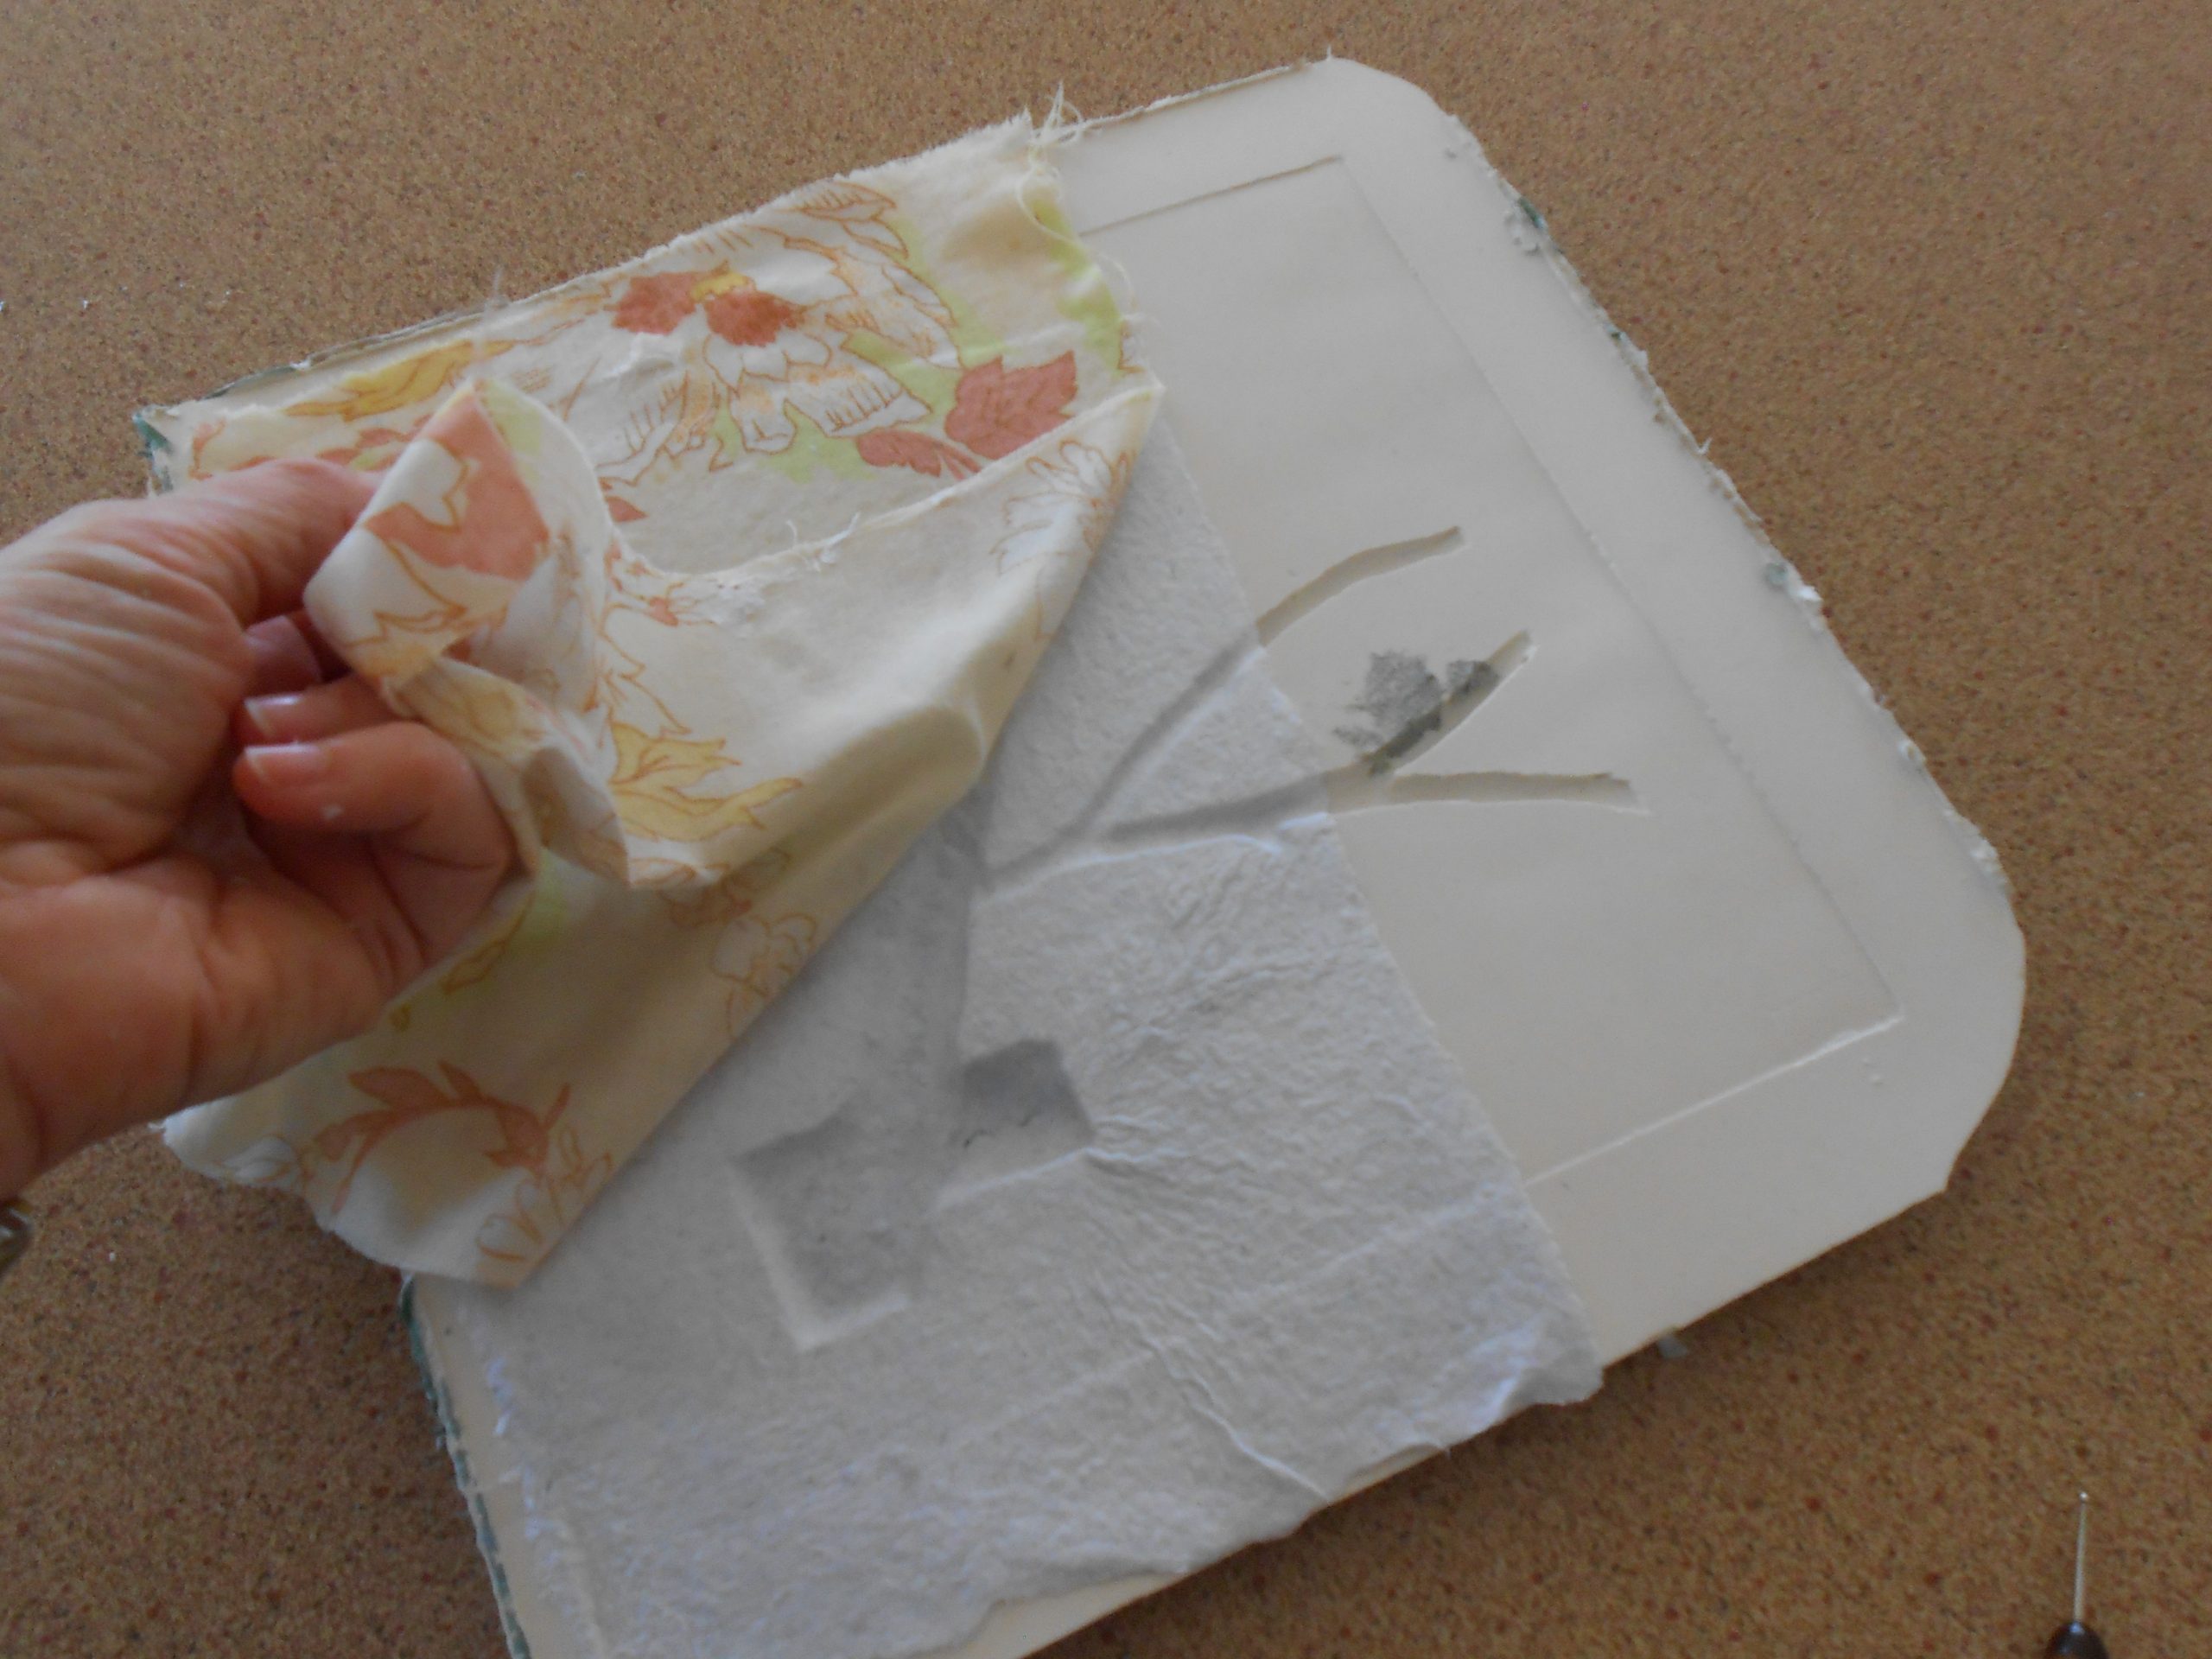
A substantial thickness needs to be built up to support the image, particularly in deep areas and on fragile edges, using a cloth or sponge to absorb as much moisture as possible between layers. The paper cast is set aside to thoroughly dry. Depending on the thickness and the weather, this can take several days.
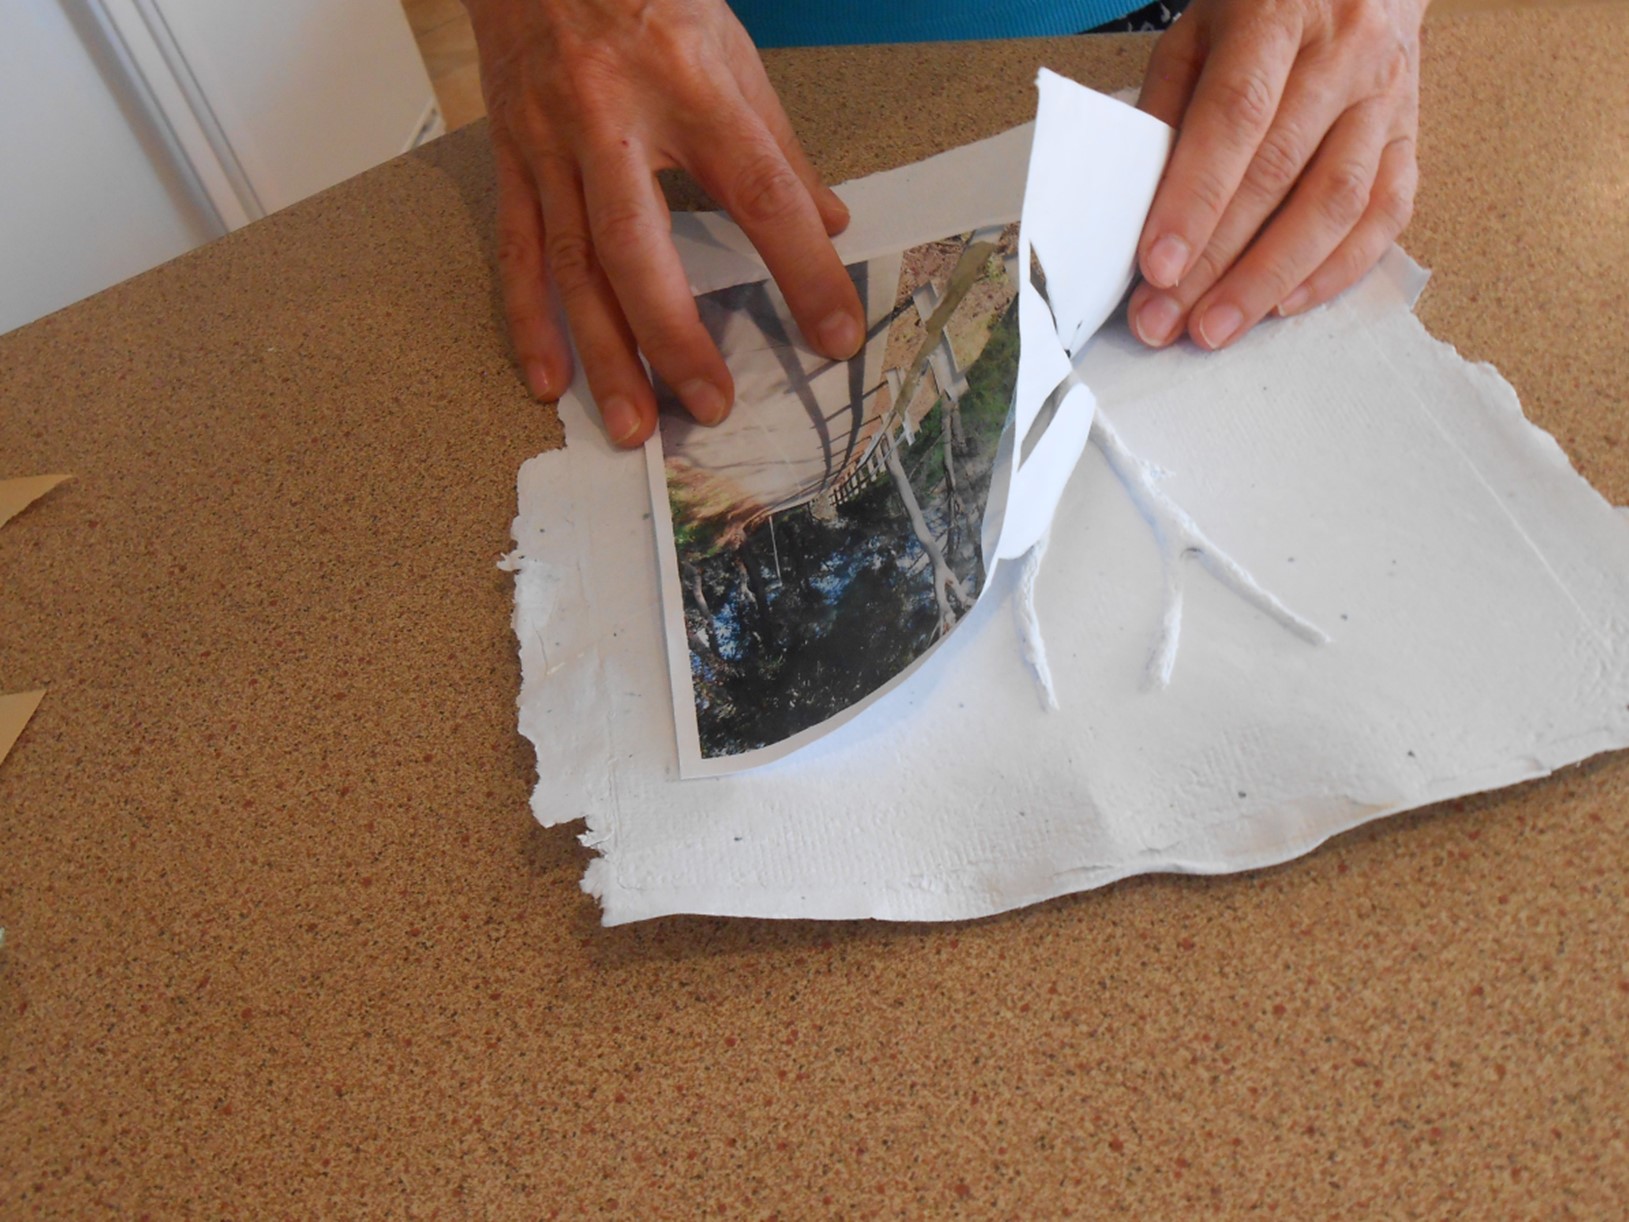
5. Applying the photograph to the cast
The paper cast is gently removed from the plaster mould. Any loose or fragile pieces that did not adhere completely can be secured with a clear paper glue at this stage.
Using the plaster mould, a tracing is made of the bas-relief areas which is then transferred to the back of the photograph.
These sections are cut out. Pieces of the photo are placed around the bas-relief cast and glued to the paper mould. The edges are trimmed and the picture framed.
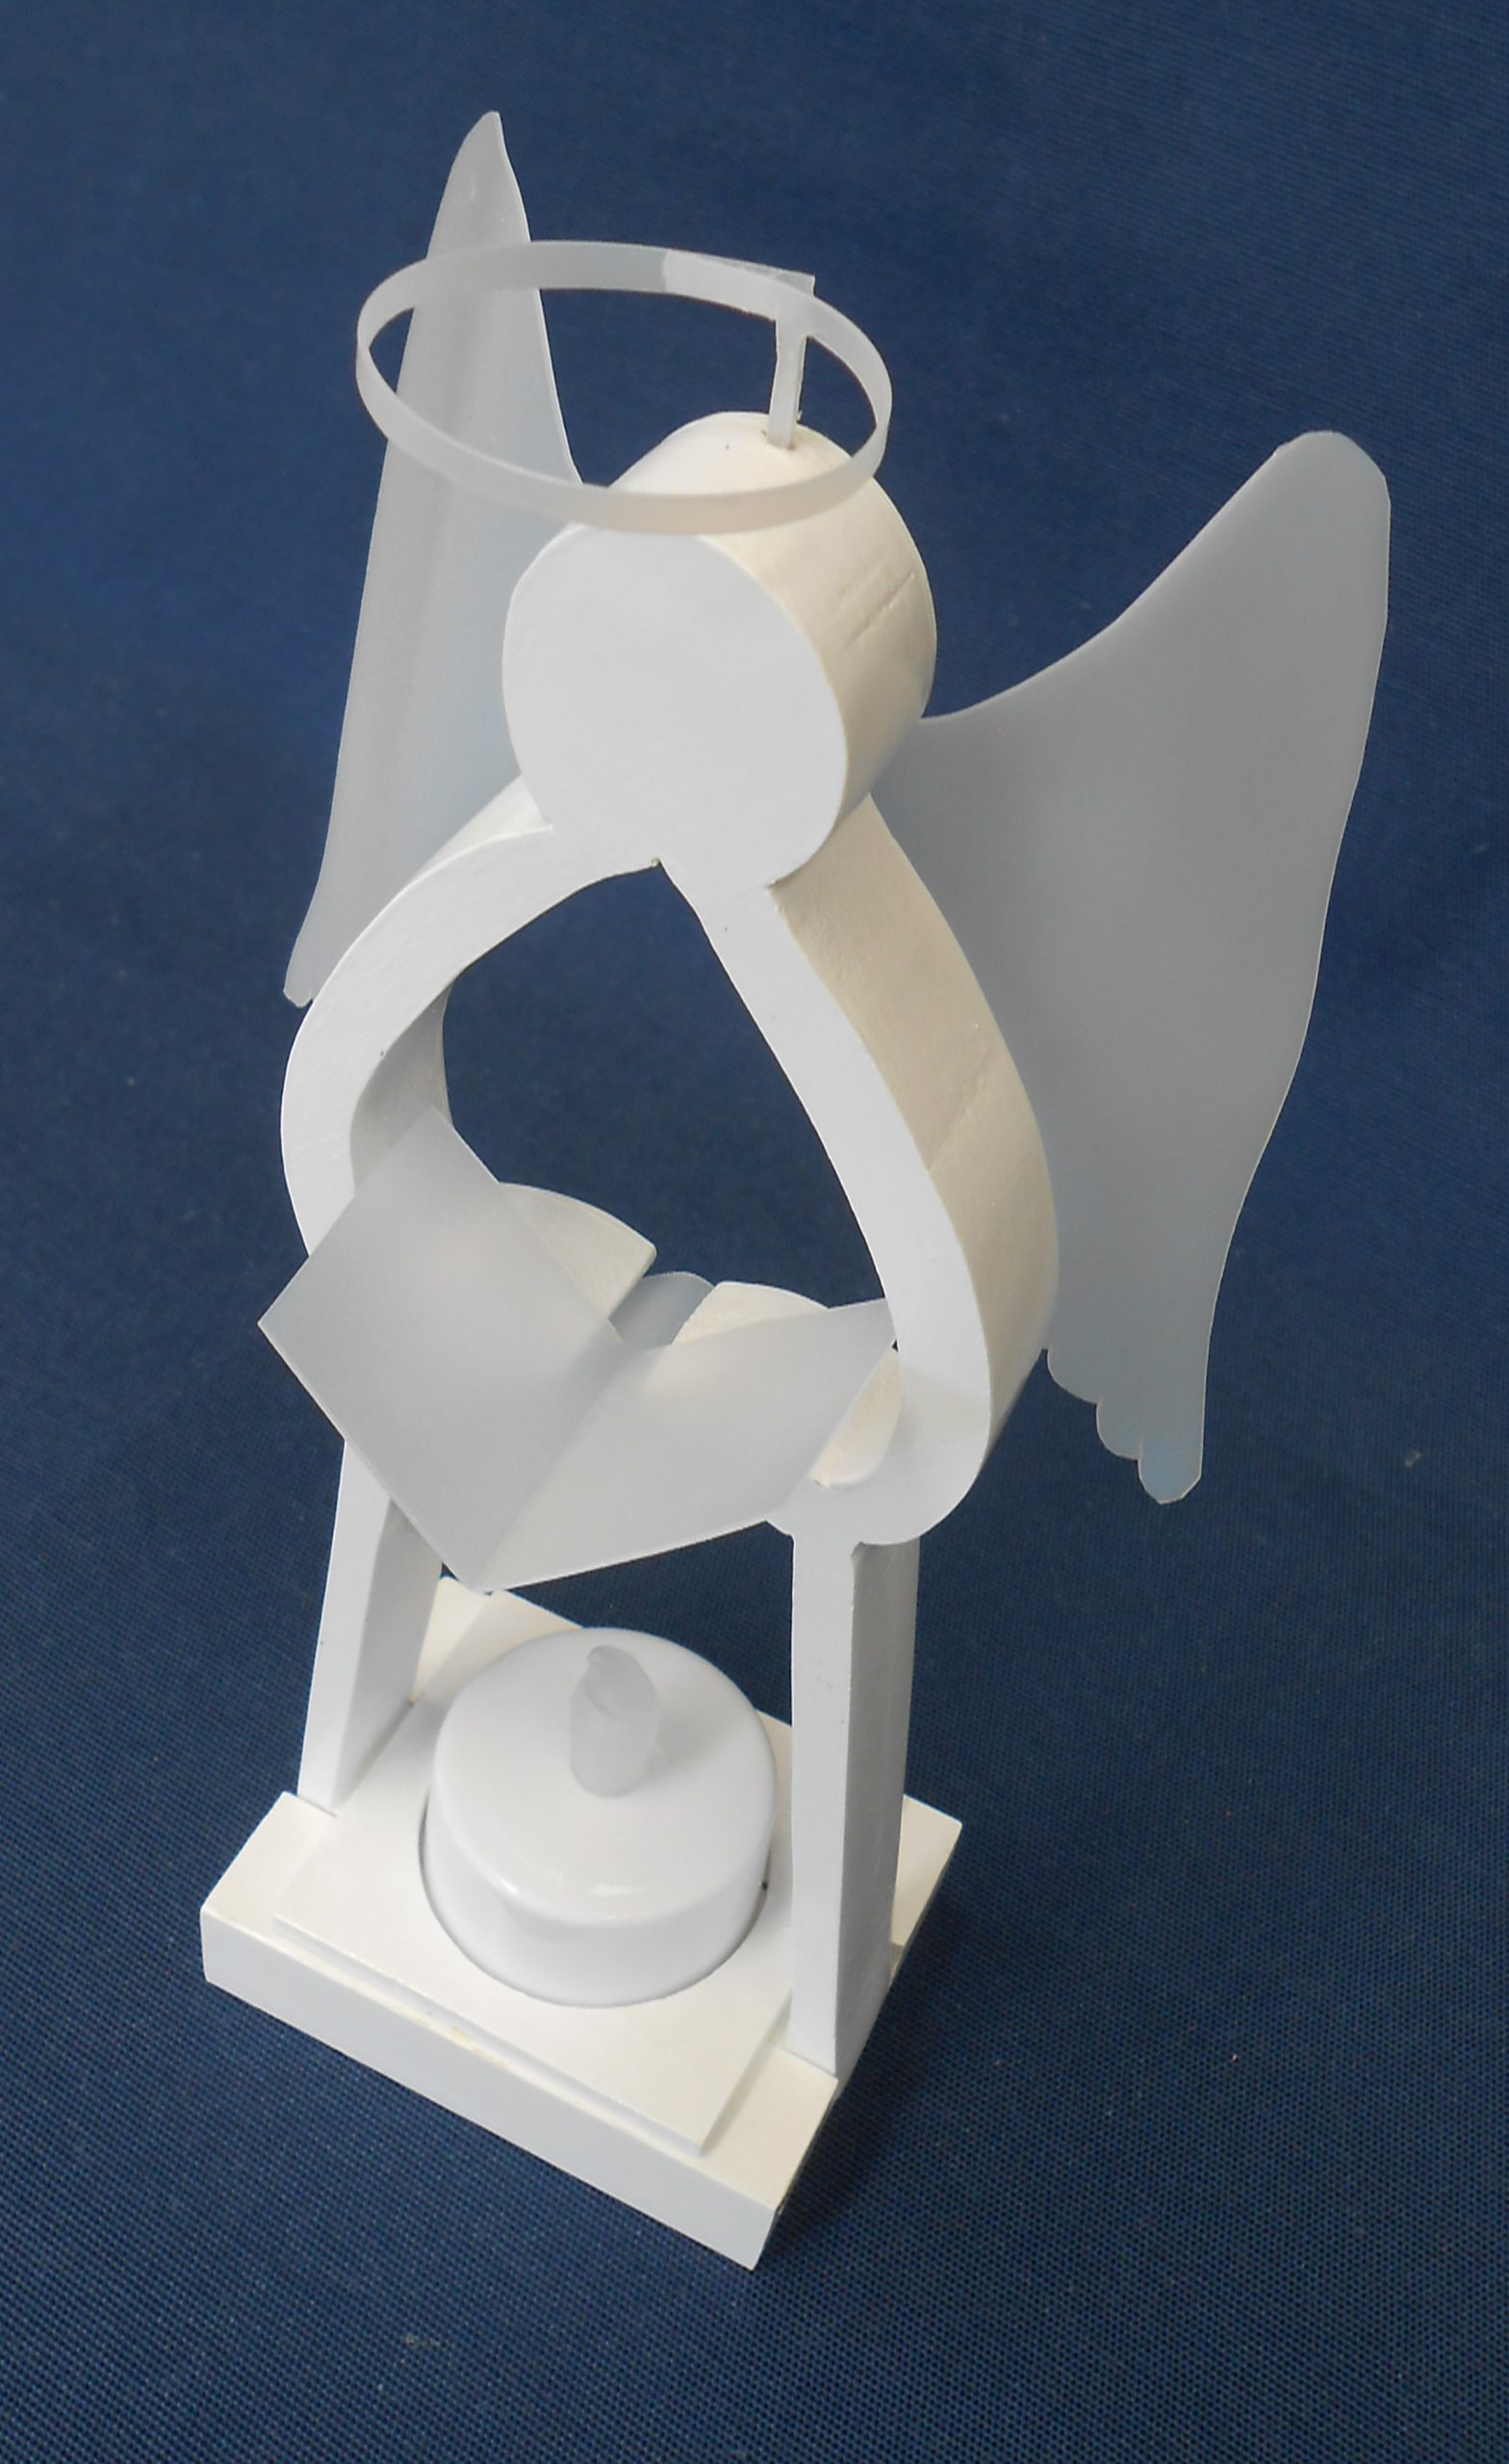
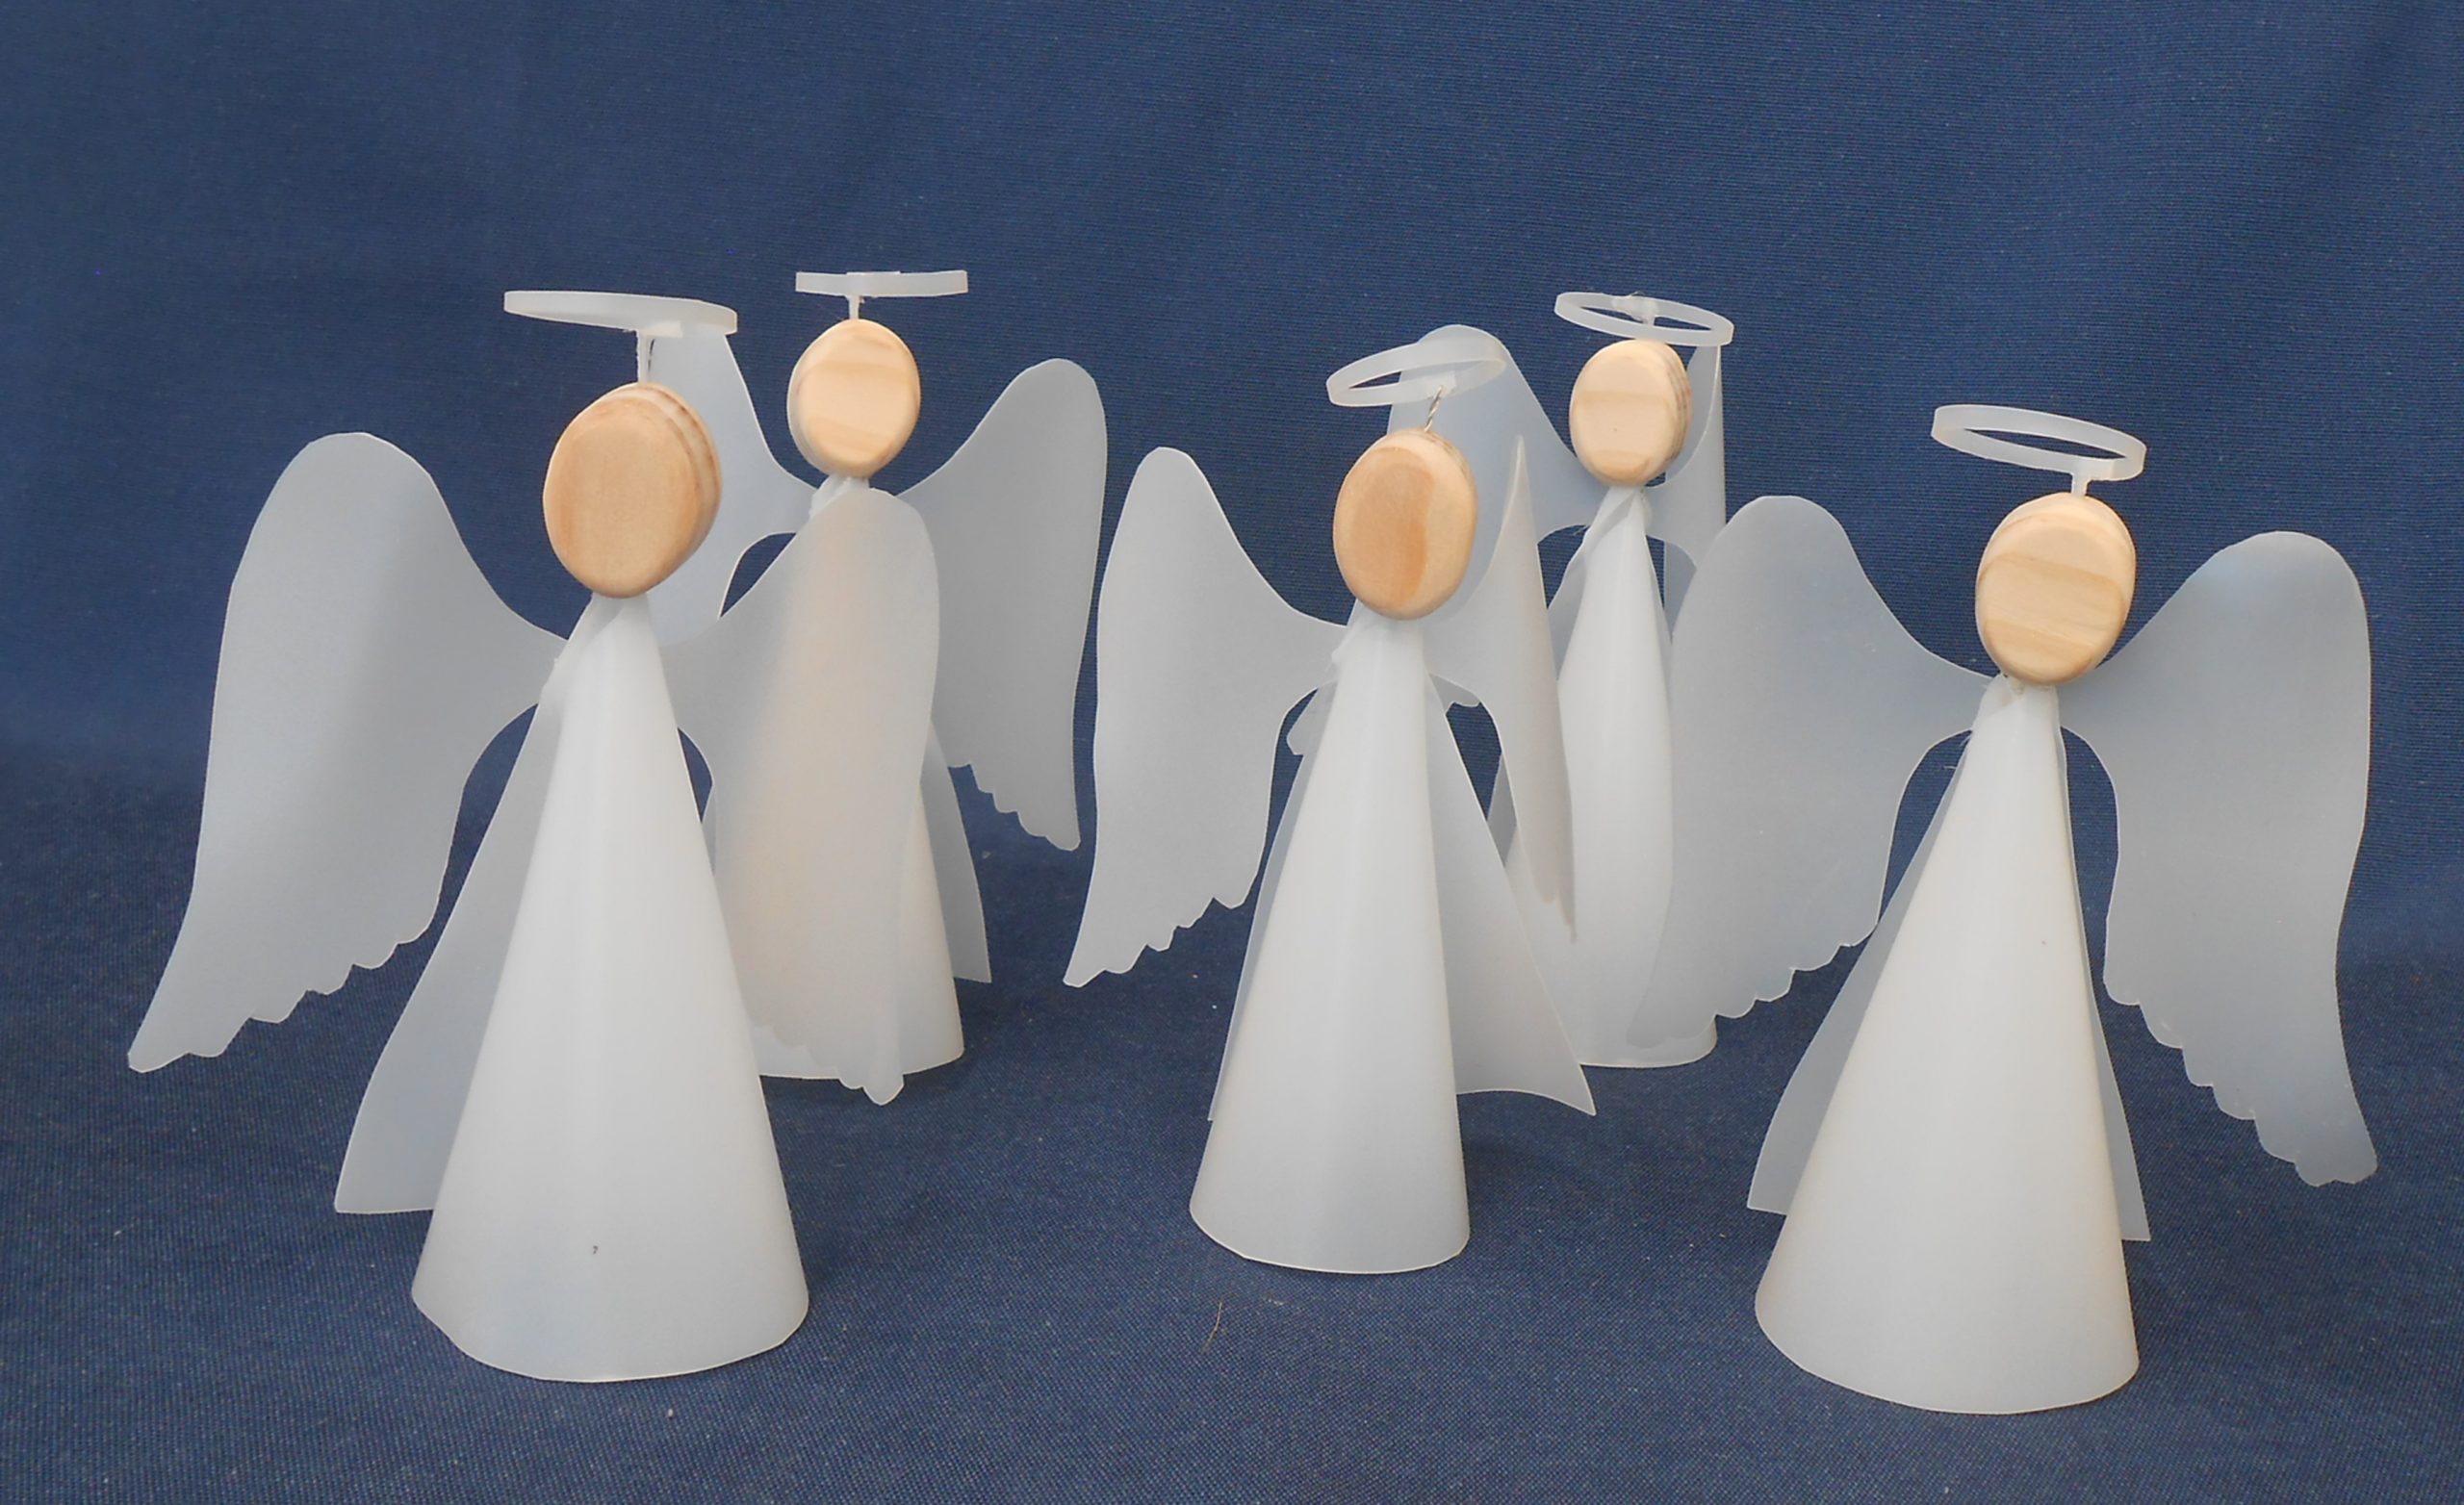
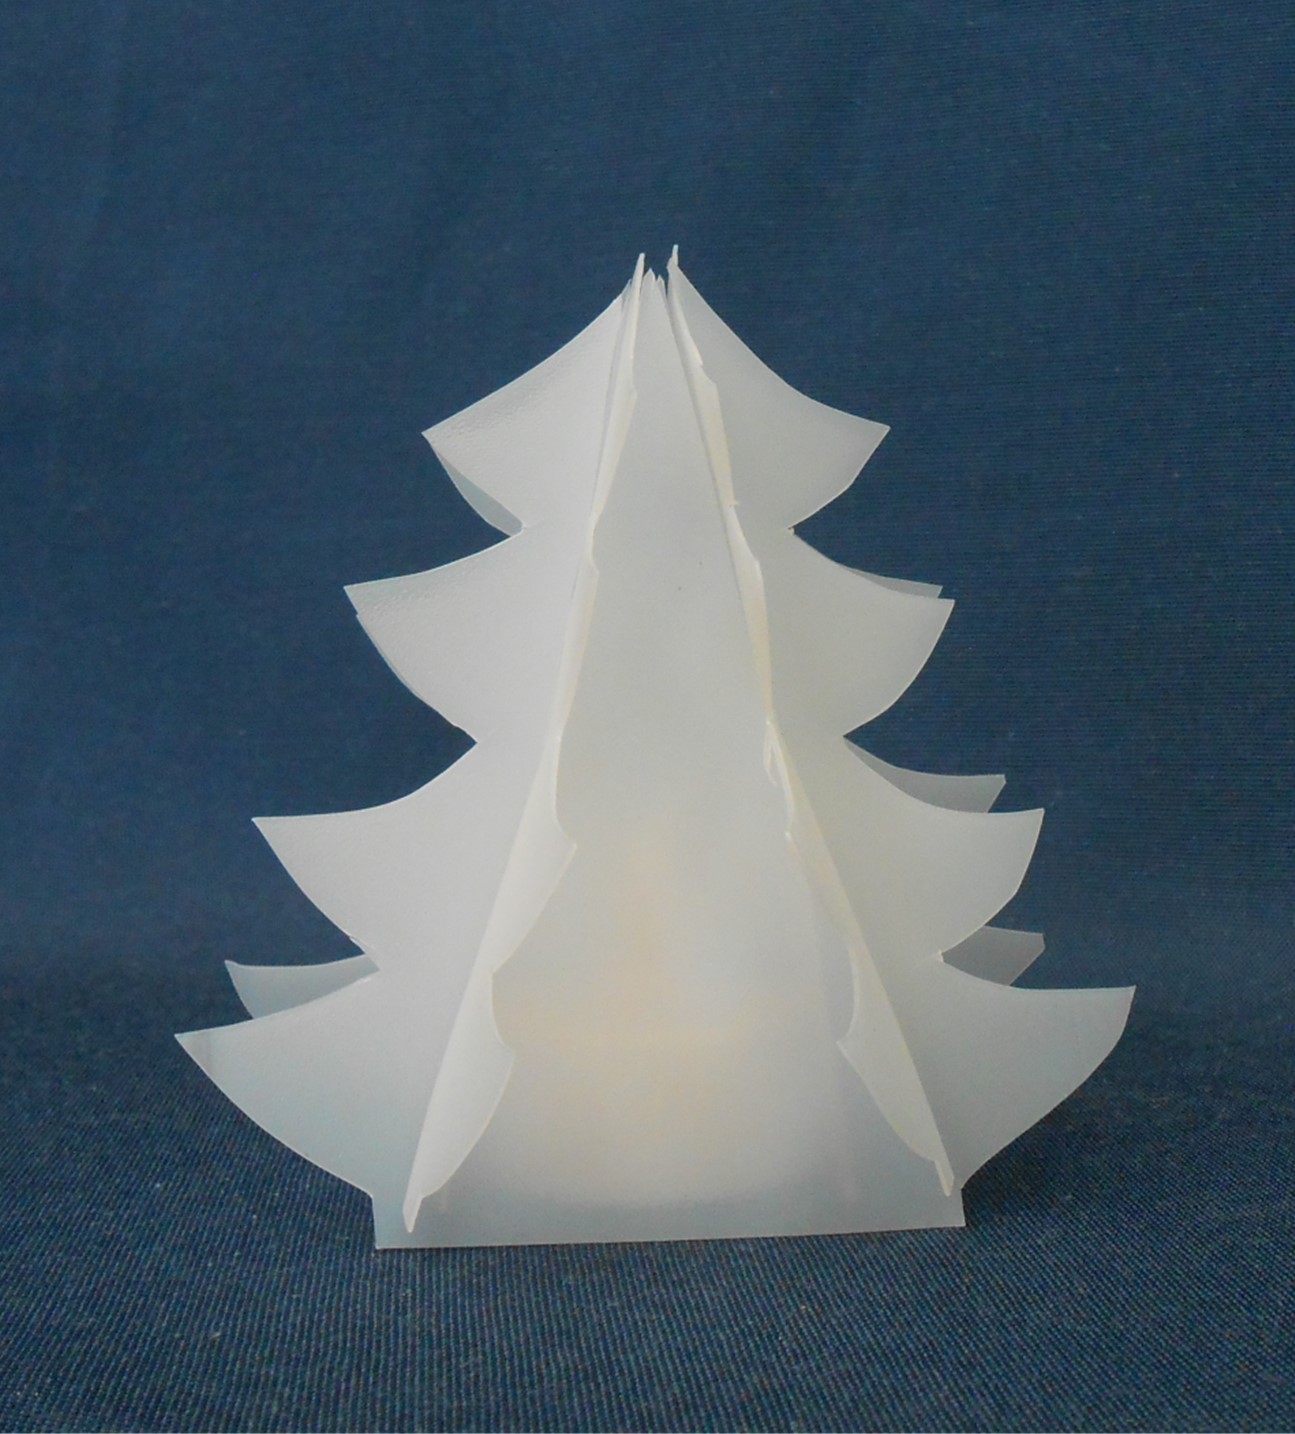
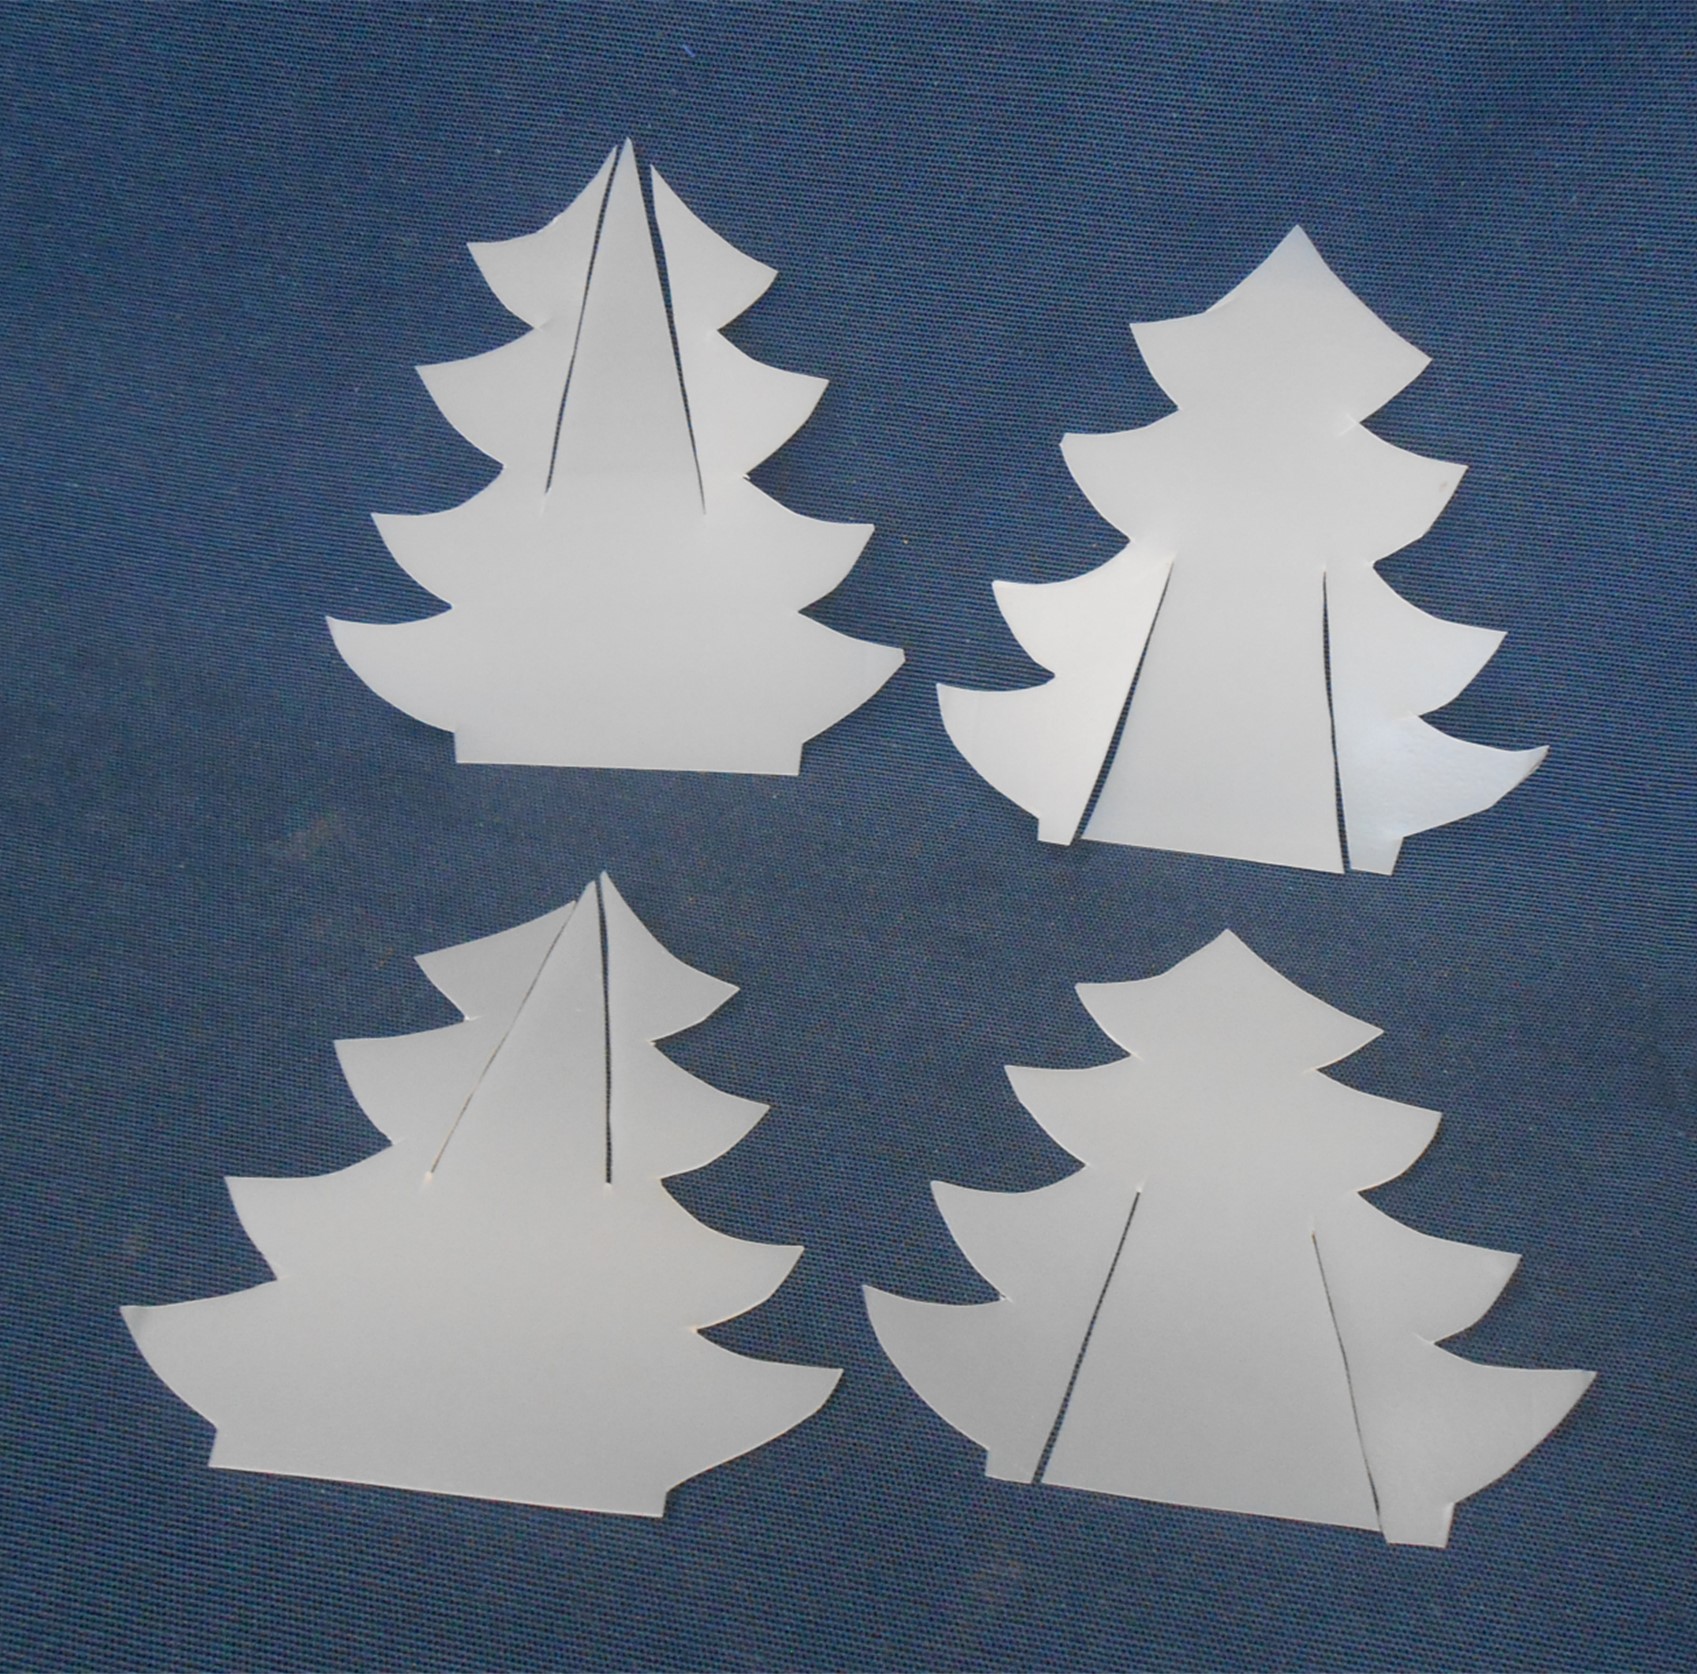
Recycled Plastic milk cartons are the basis of these white Christmas designs.
After completing my Angels scrollsaw projects, I made a variation to the designs by adding wings, halos and hymn sheet cut from the plastic. It gives a delicate and slightly transparent effect.
A heat gun is used to shape the cut out pieces, either by hand (with thick gloves!) or by bending the warmed plastic around a piece of dowel.
One of the biggest challenges of working with plastic milk cartons is that food grade 2 plastic is virtually impervious to gluing. After many experiments with different glues, a hot glue gun was the most successful, however, the slight transparency of the plastic means that any glue used can be seen.
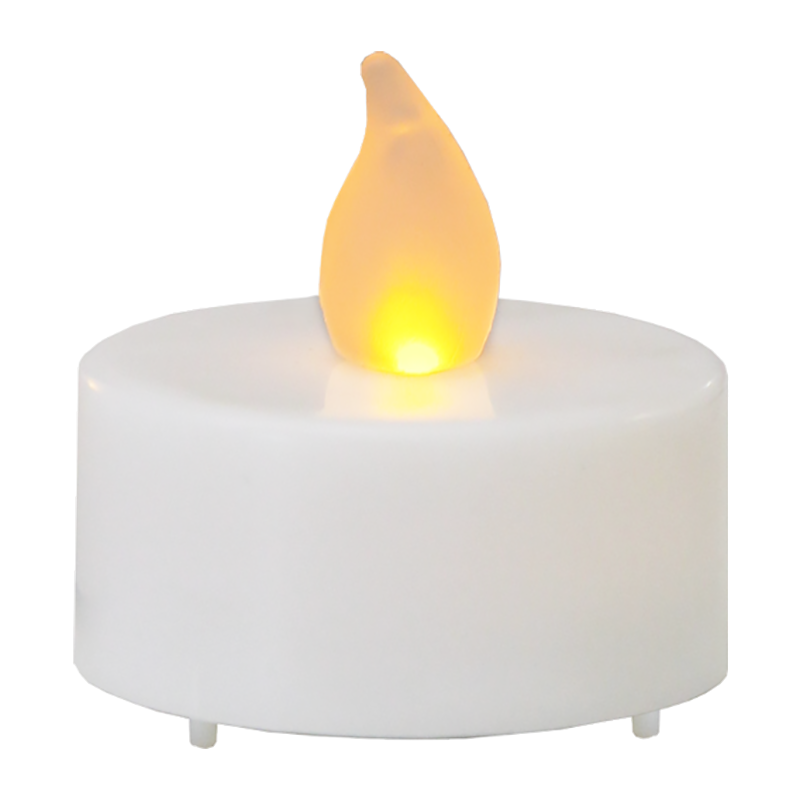
With this in mind I created two designs that slot together, rather than glue. 1. An entire “heavenly host” of small angels for table decoration. The heads are cut from pine. These require just one dob of glue to join the head / body / wings. 2. A slice-form Christmas tree, no glue at all! Both of these decorations ‘glow’ as they stand above flameless tea lights.
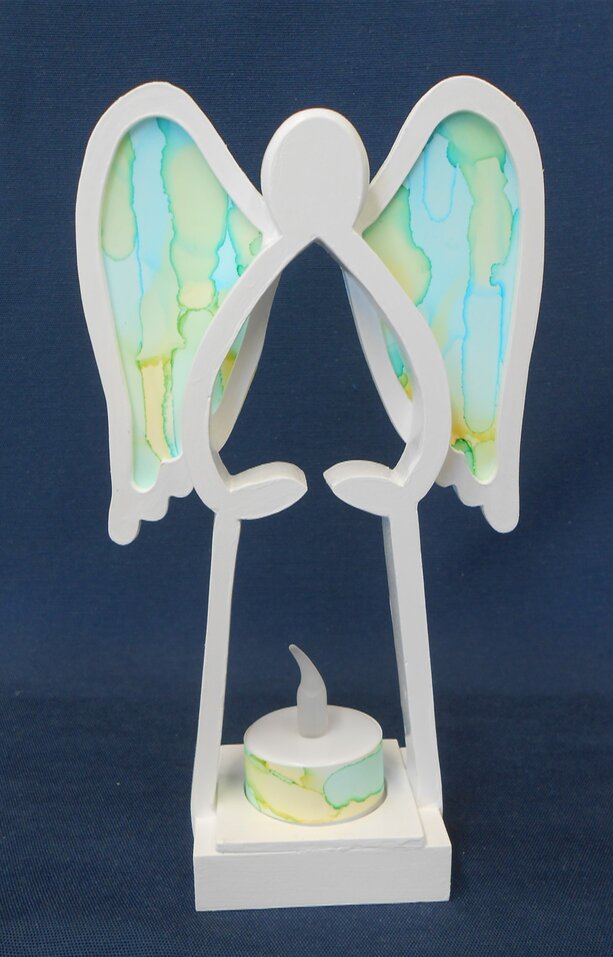
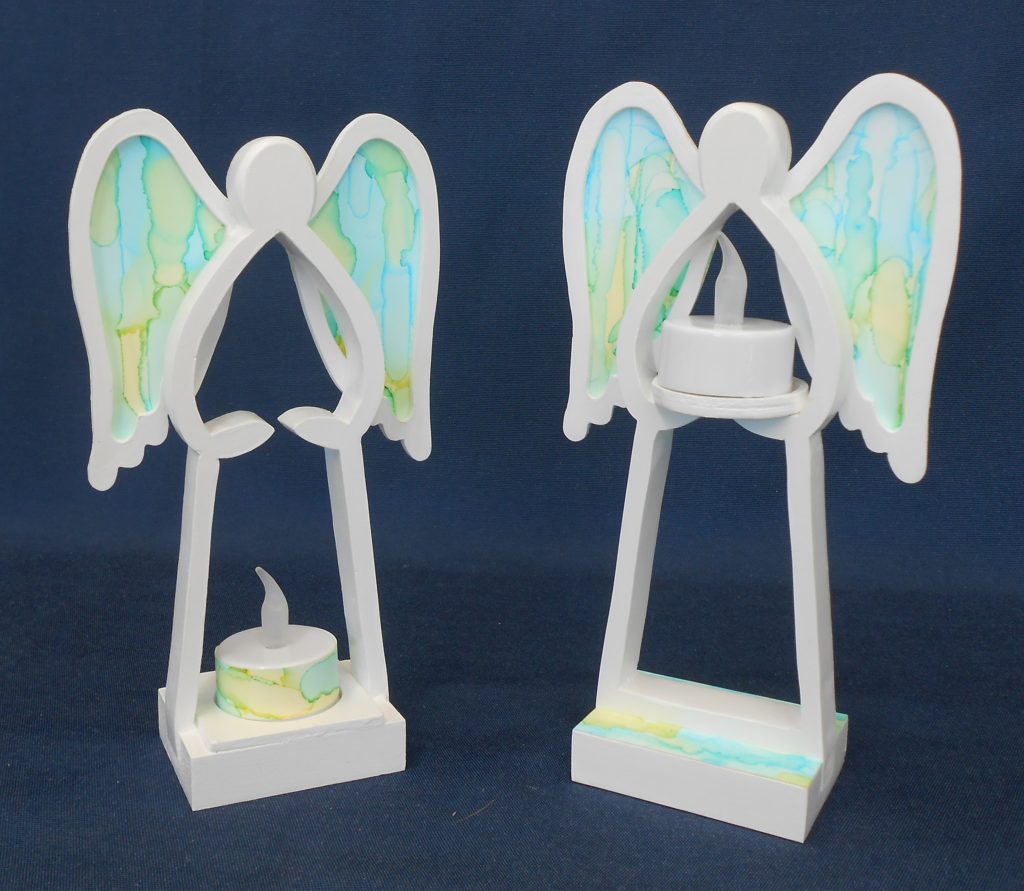
Using my scroll saw and offcuts of 16mm melamine, these angels hold flameless tealight candles. There are two designs.
Once the shape was cut and sanded, I used white gloss acrylic paint on both the cut mdf edges and the surface. The wing outlines are cut from 3mm mdf and painted. I experimented with alcohol inks on synthetic paper and used the results to ‘fill’ the wings by gluing the paper to the back.
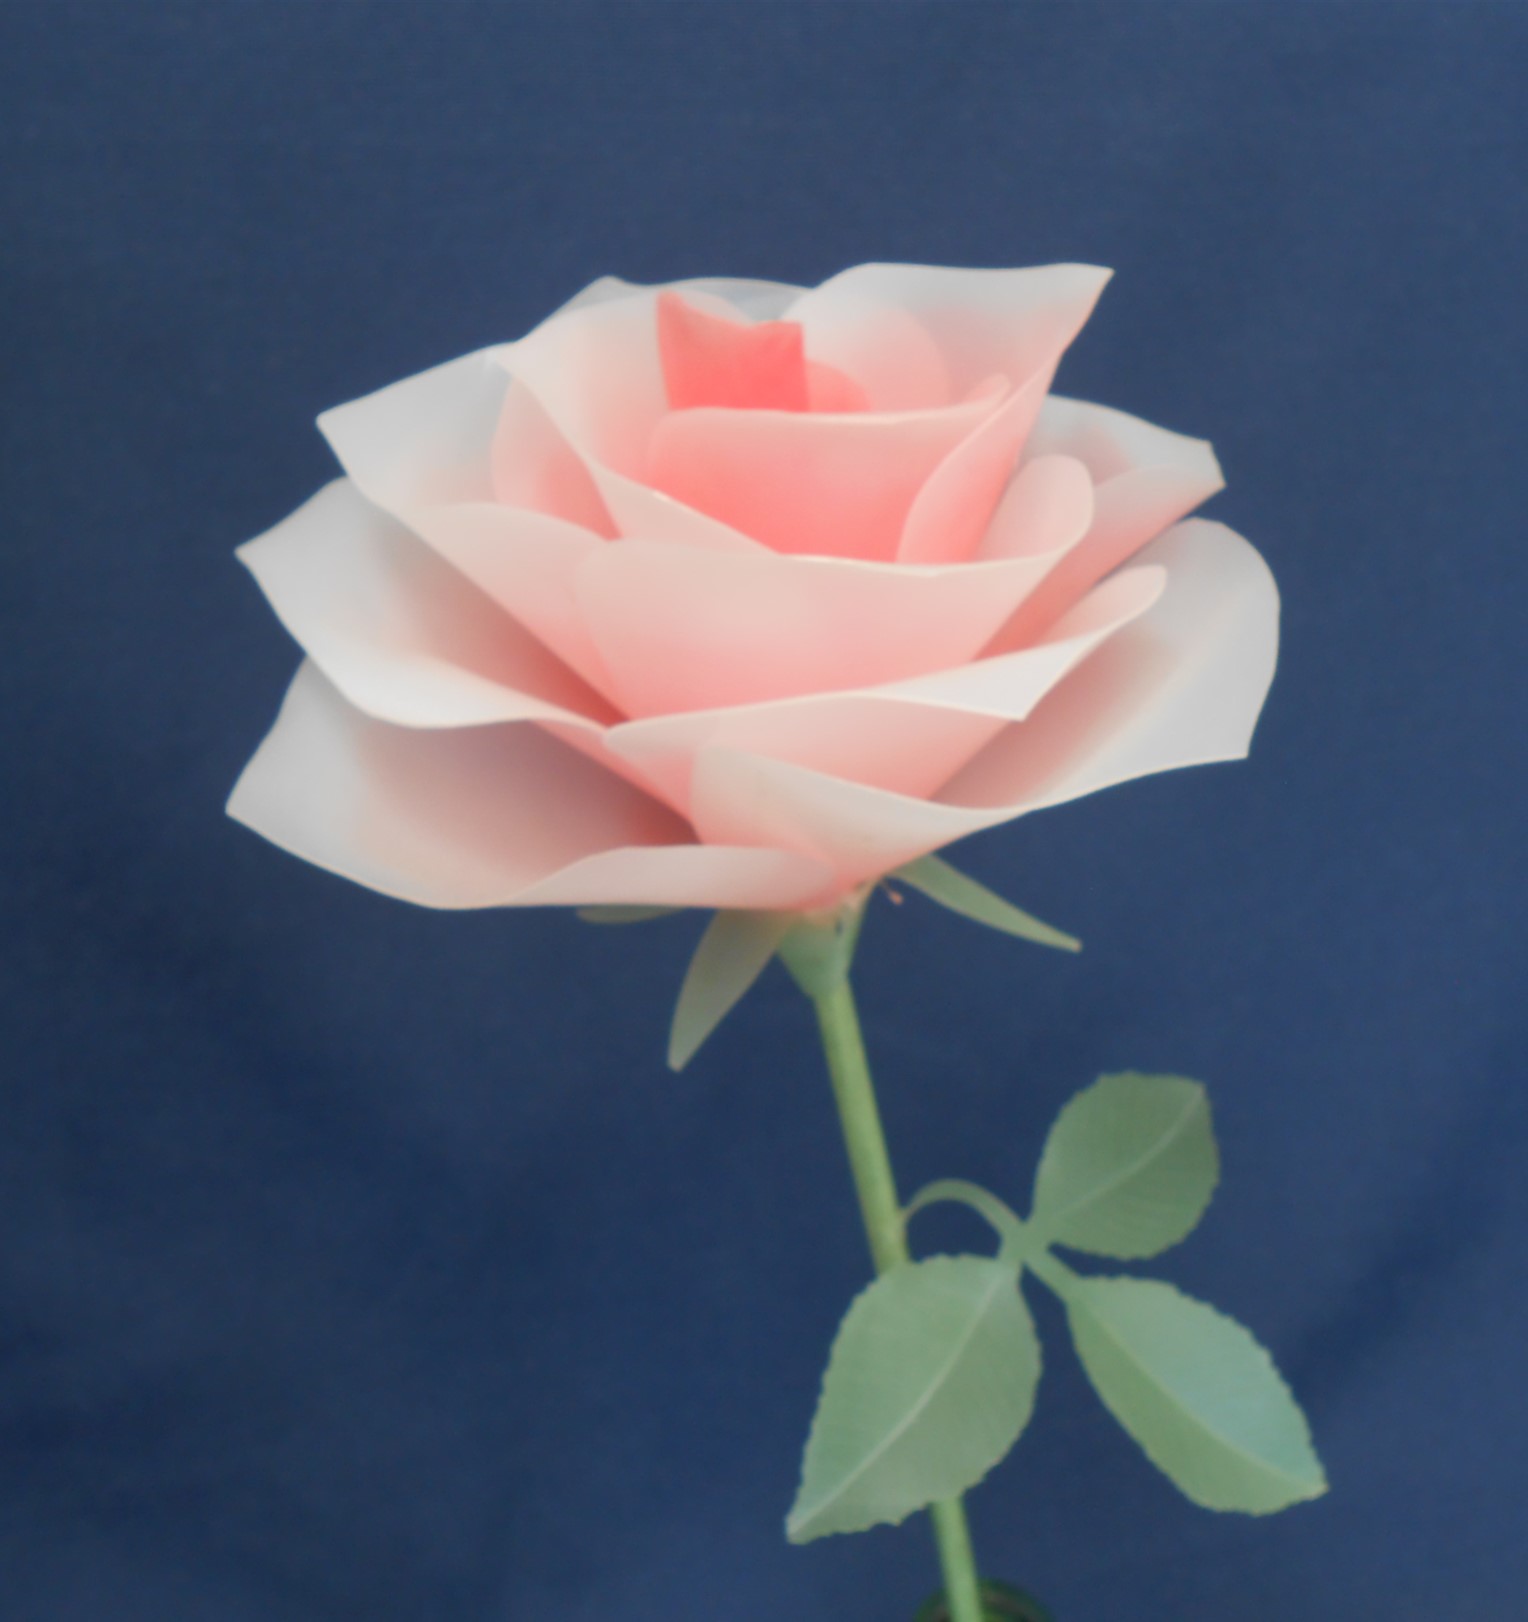
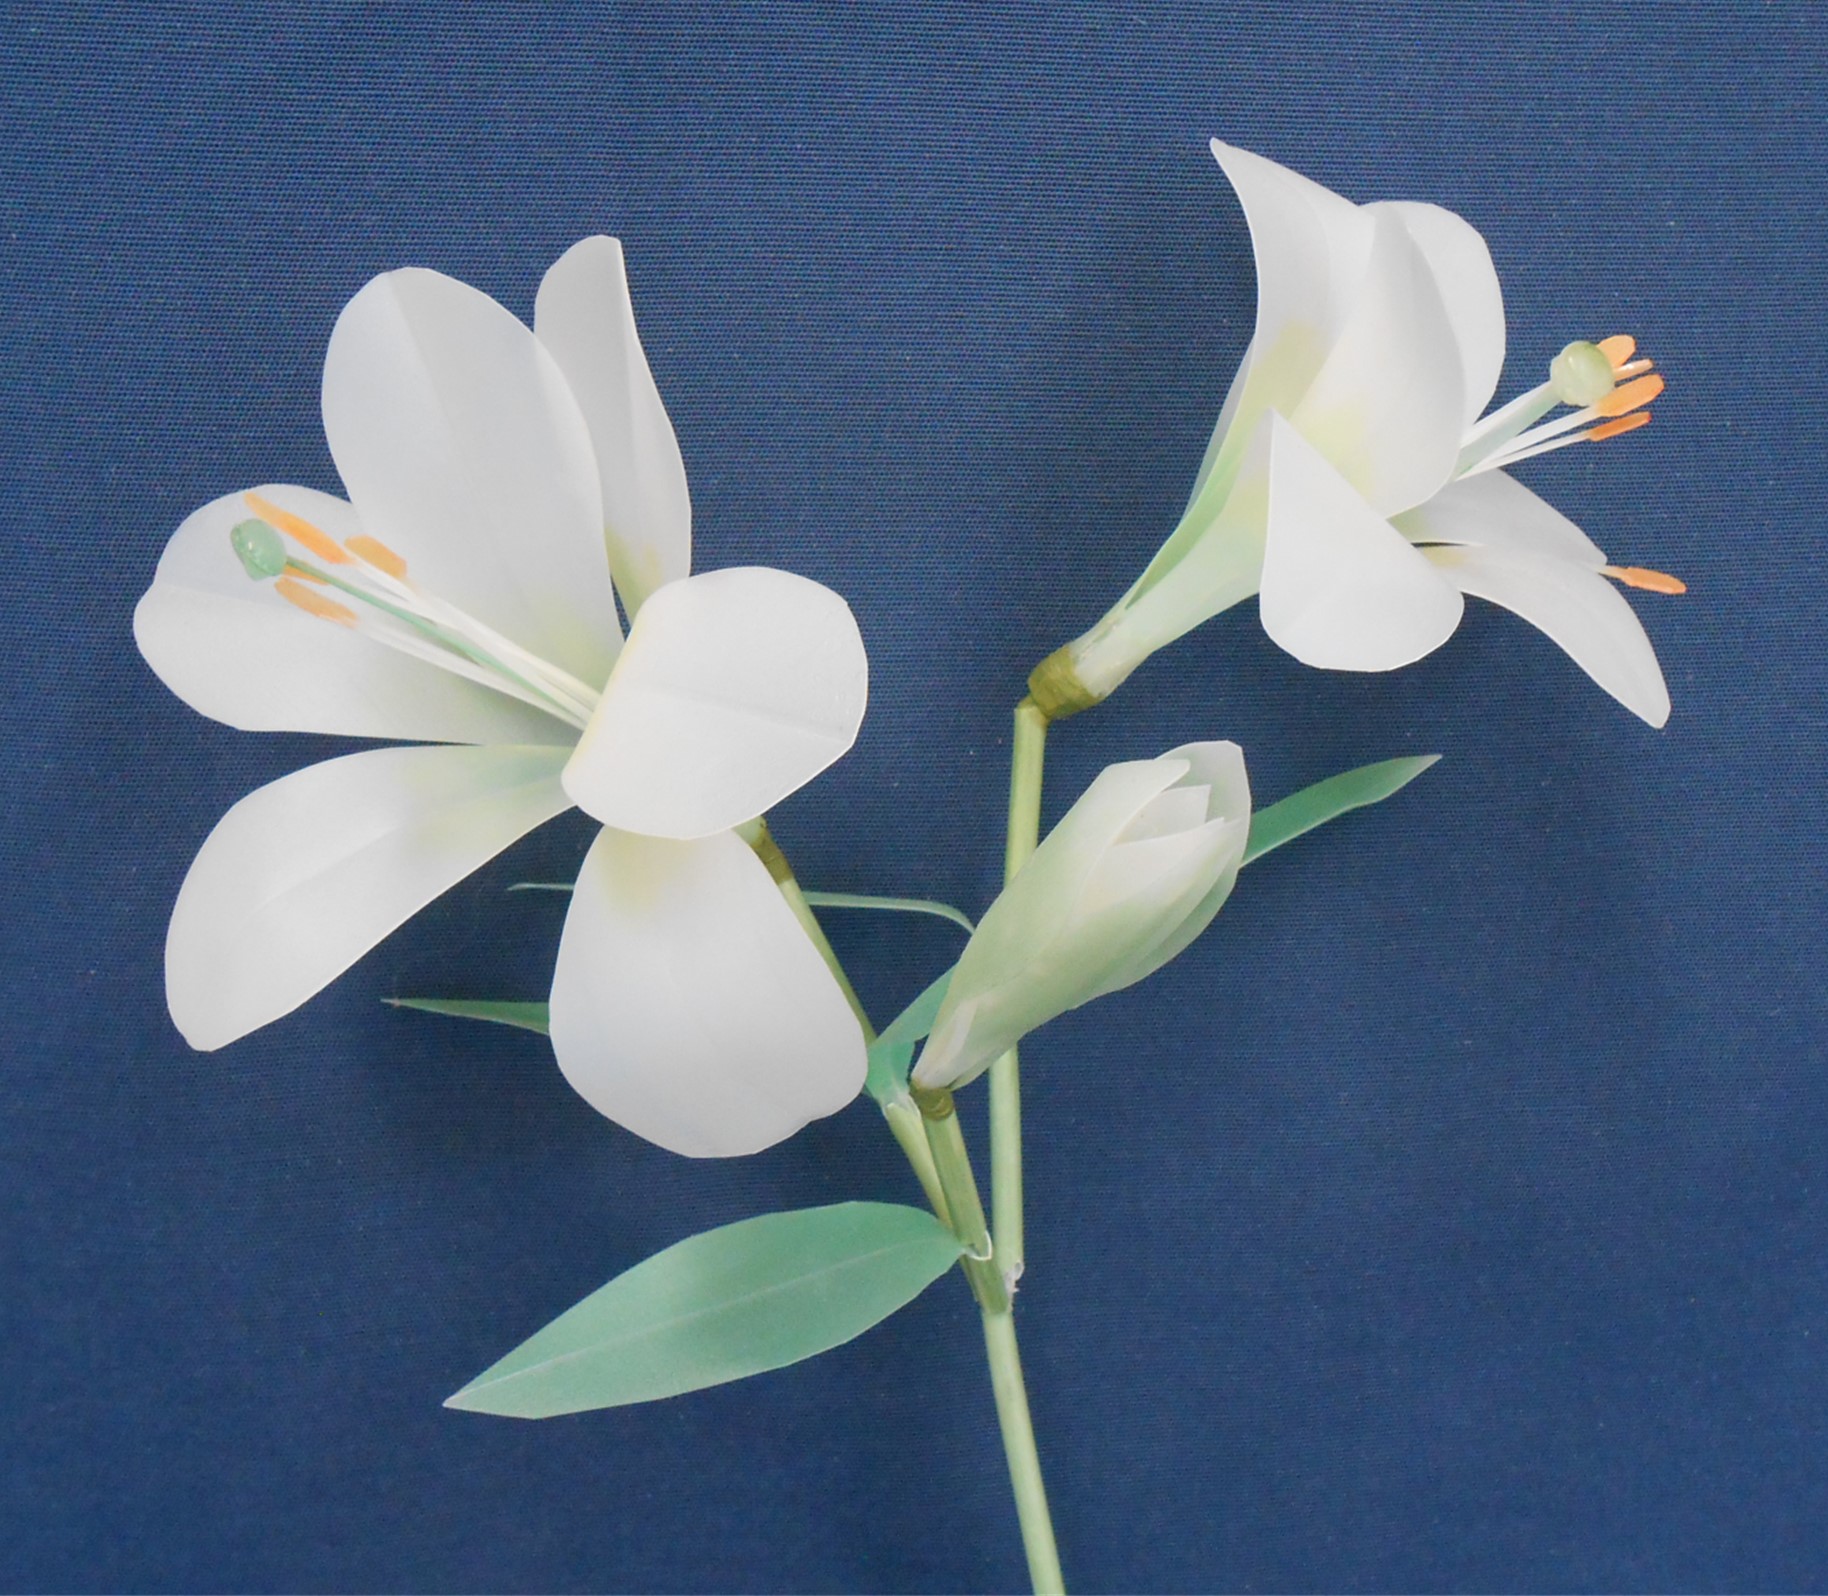
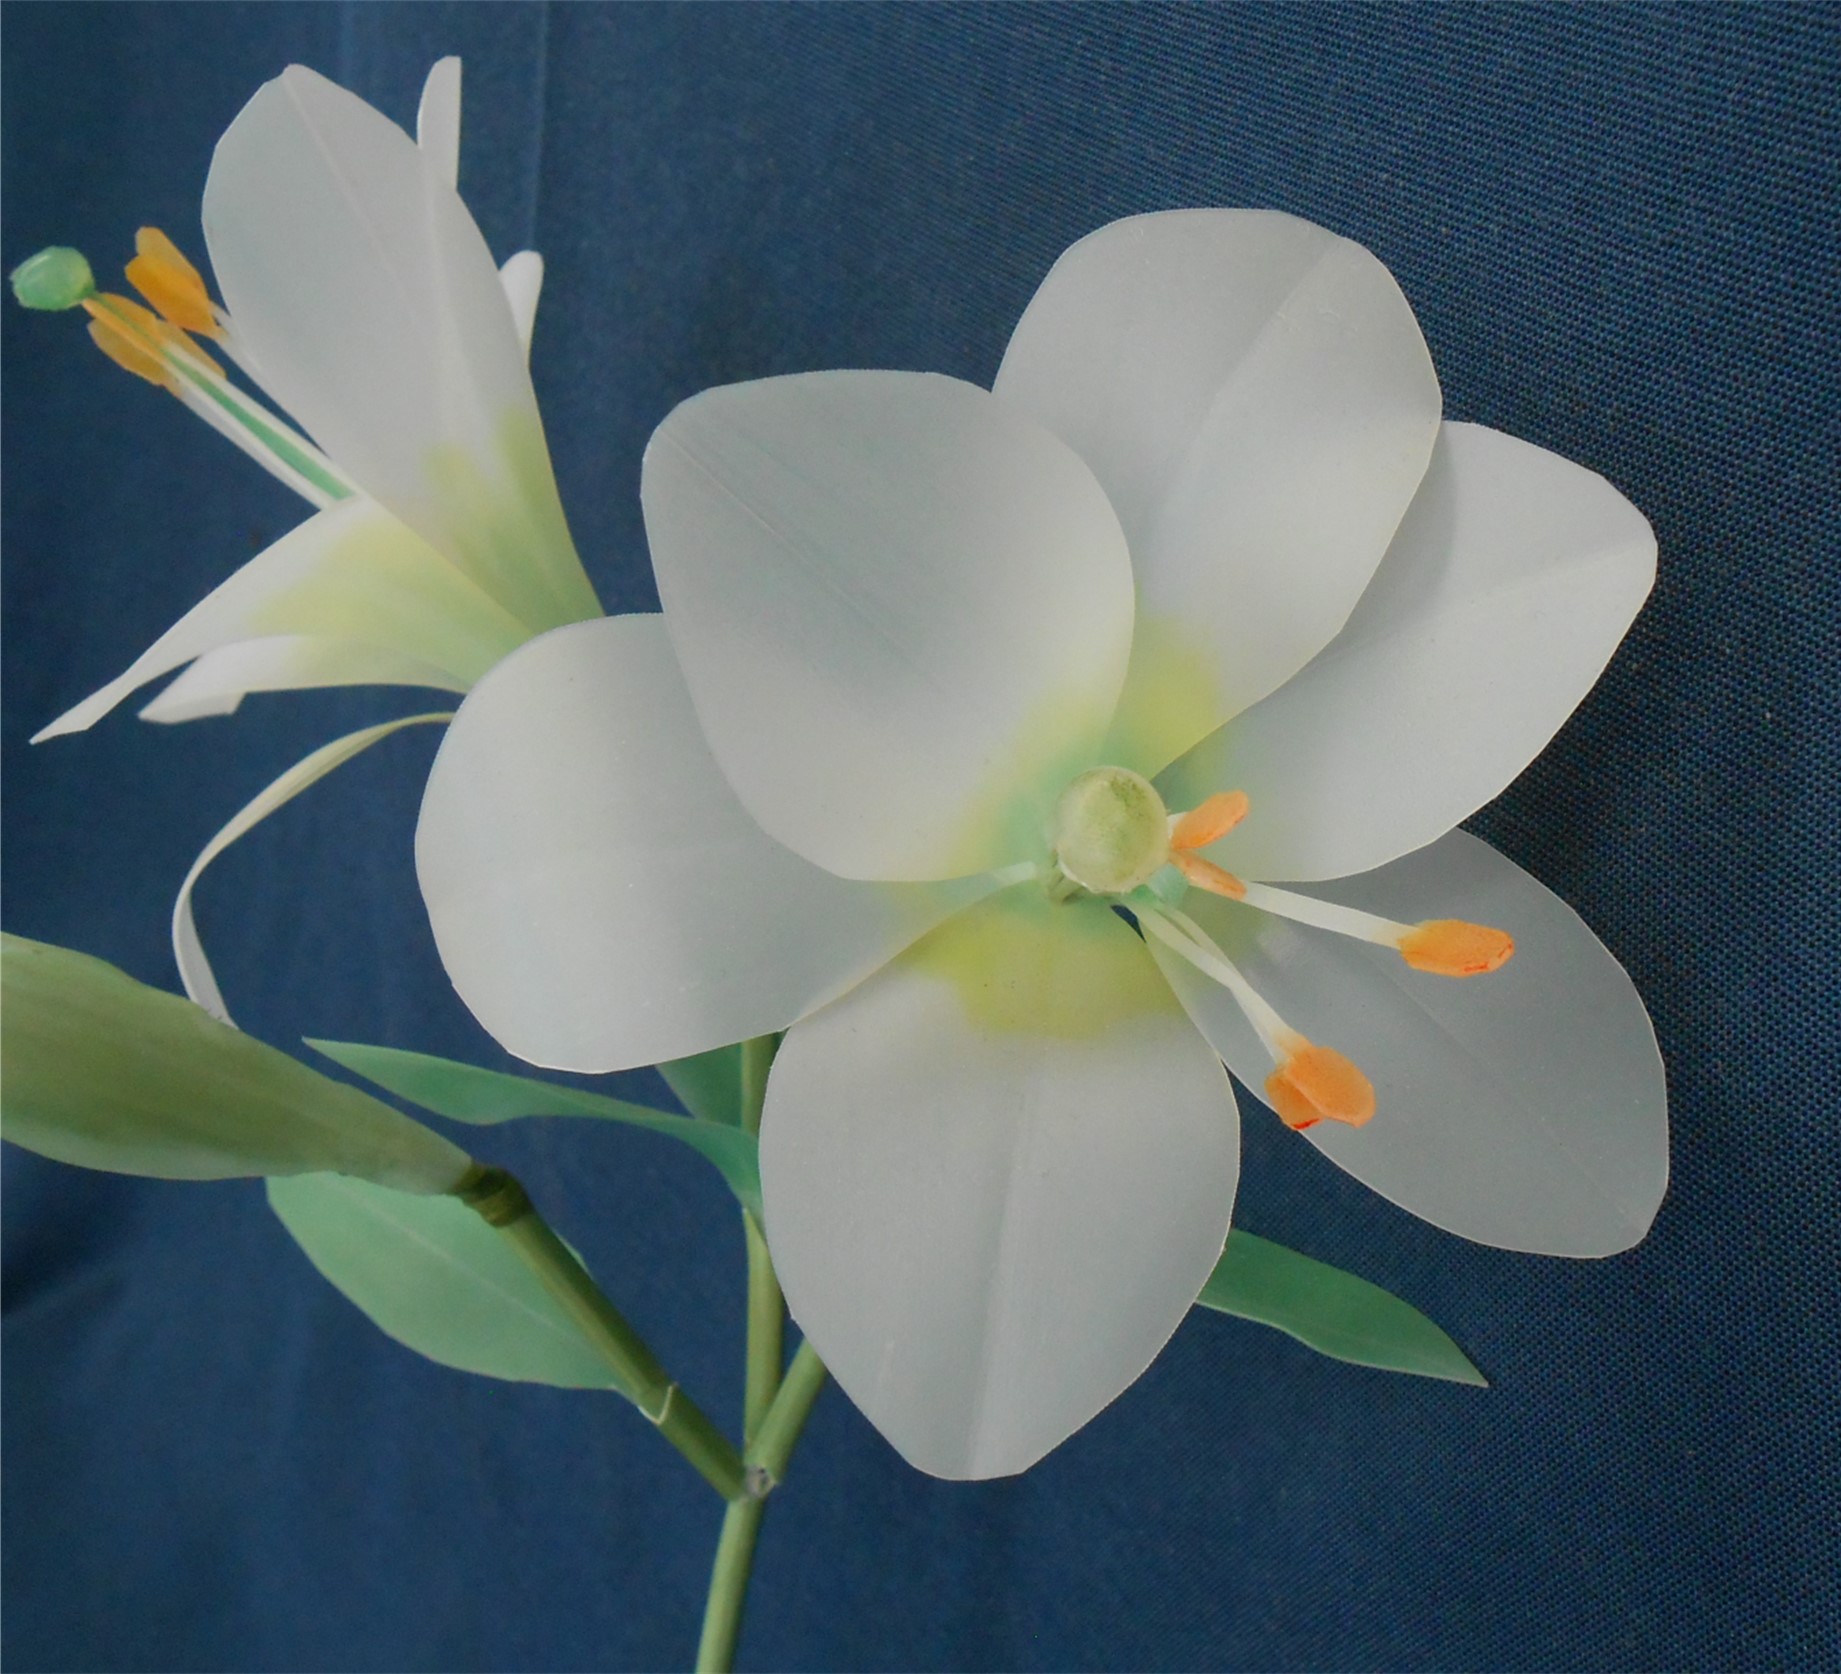
While rinsing out milk cartons for recycling one day, I wondered how they might be ReCreated into something decorative.
I started by experimenting with the plastic to find it’s characteristics. As it’s food grade 2 plastic, it is virtually impervious to absorbing anything – that includes glue and paint! A hot-glue gun is the only glue I had any success with, but it is brittle and care has to be taken that petals don’t snap off when working with it.
I began by cutting petal and leaf shapes and, using a heat gun, molded them around a piece of wooden dowel to curve them.
I managed to add pastel shading with a “staining” method, using a rag and alcohol inks to rub colour onto the petals. The next step was gluing the petals to the stem with a hot-glue gun . The flower stems are plastic balloon sticks, which is the same grade plastic as the milk cartons. I also stained these with colour. I found that I had to reinforce the stems by inserting wire inside, as the first ones I made snapped! The wire also enables the stem to curve slightly, making it look more natural than a straight stick.
The sepals and leaves are then secured with florist tape to the stem. I chose white tape which I also stained so the colours matched as closely as possible.
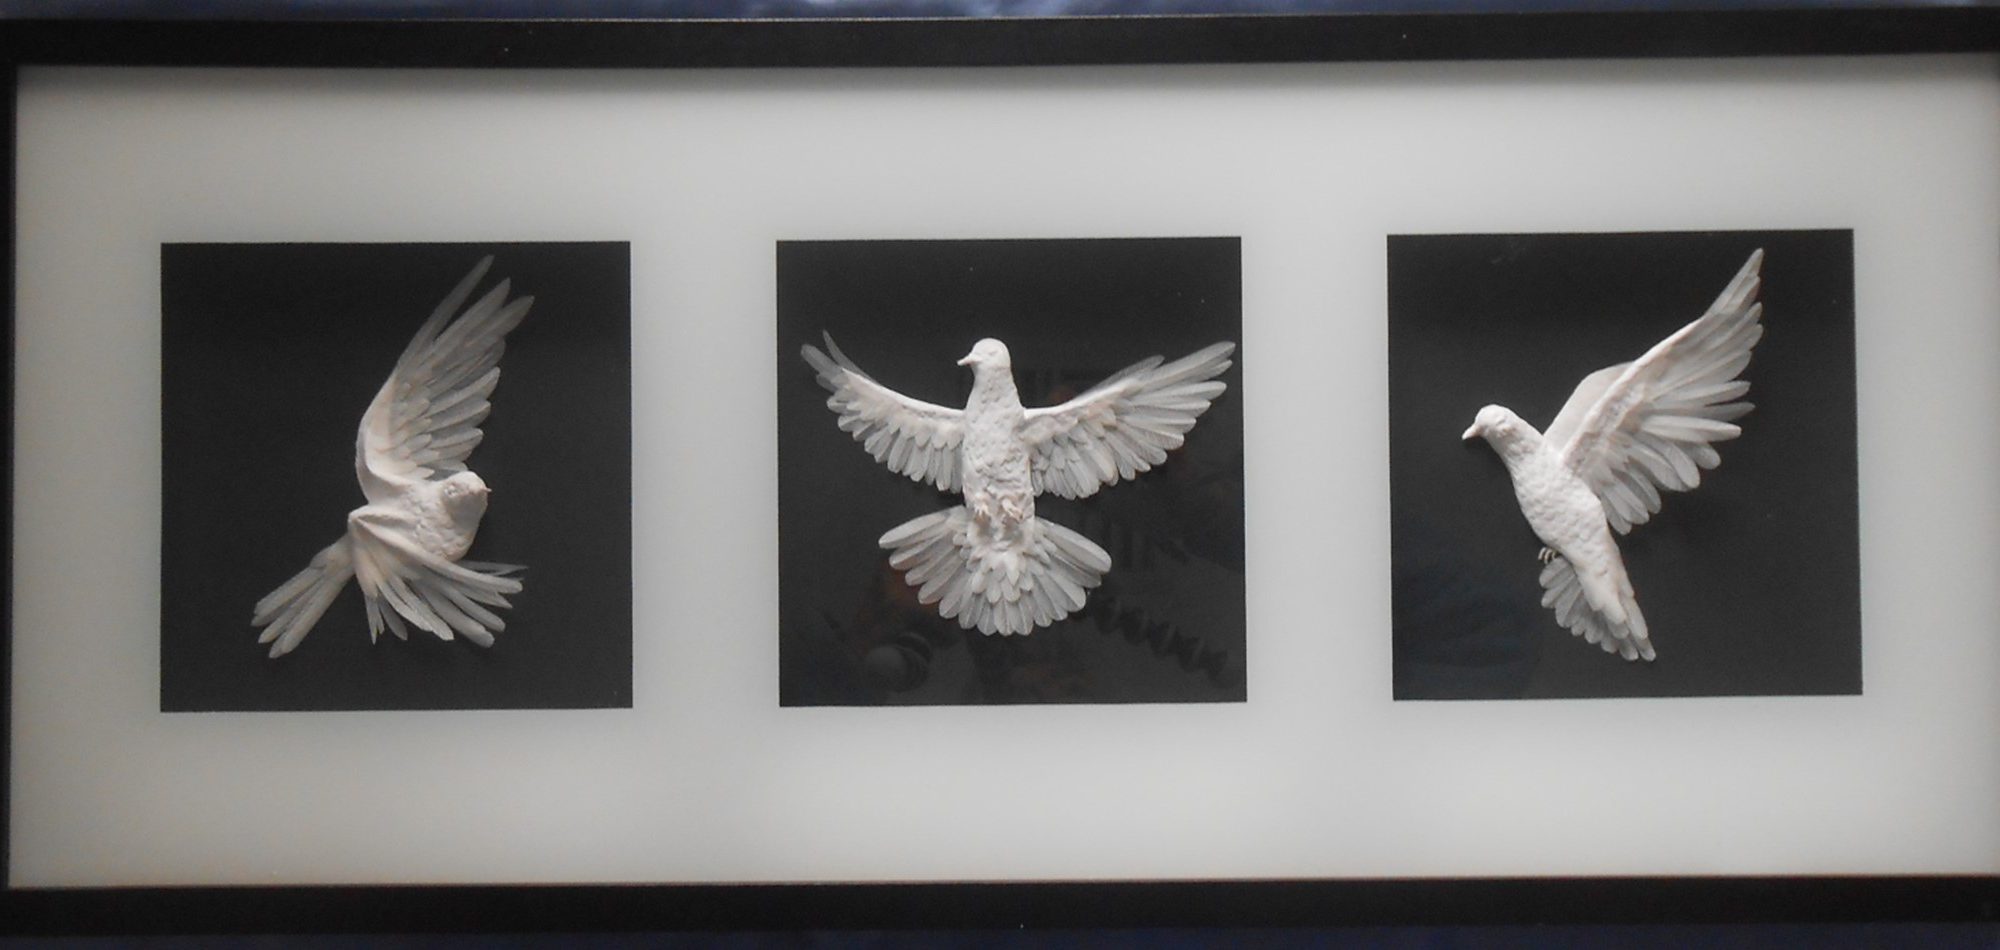
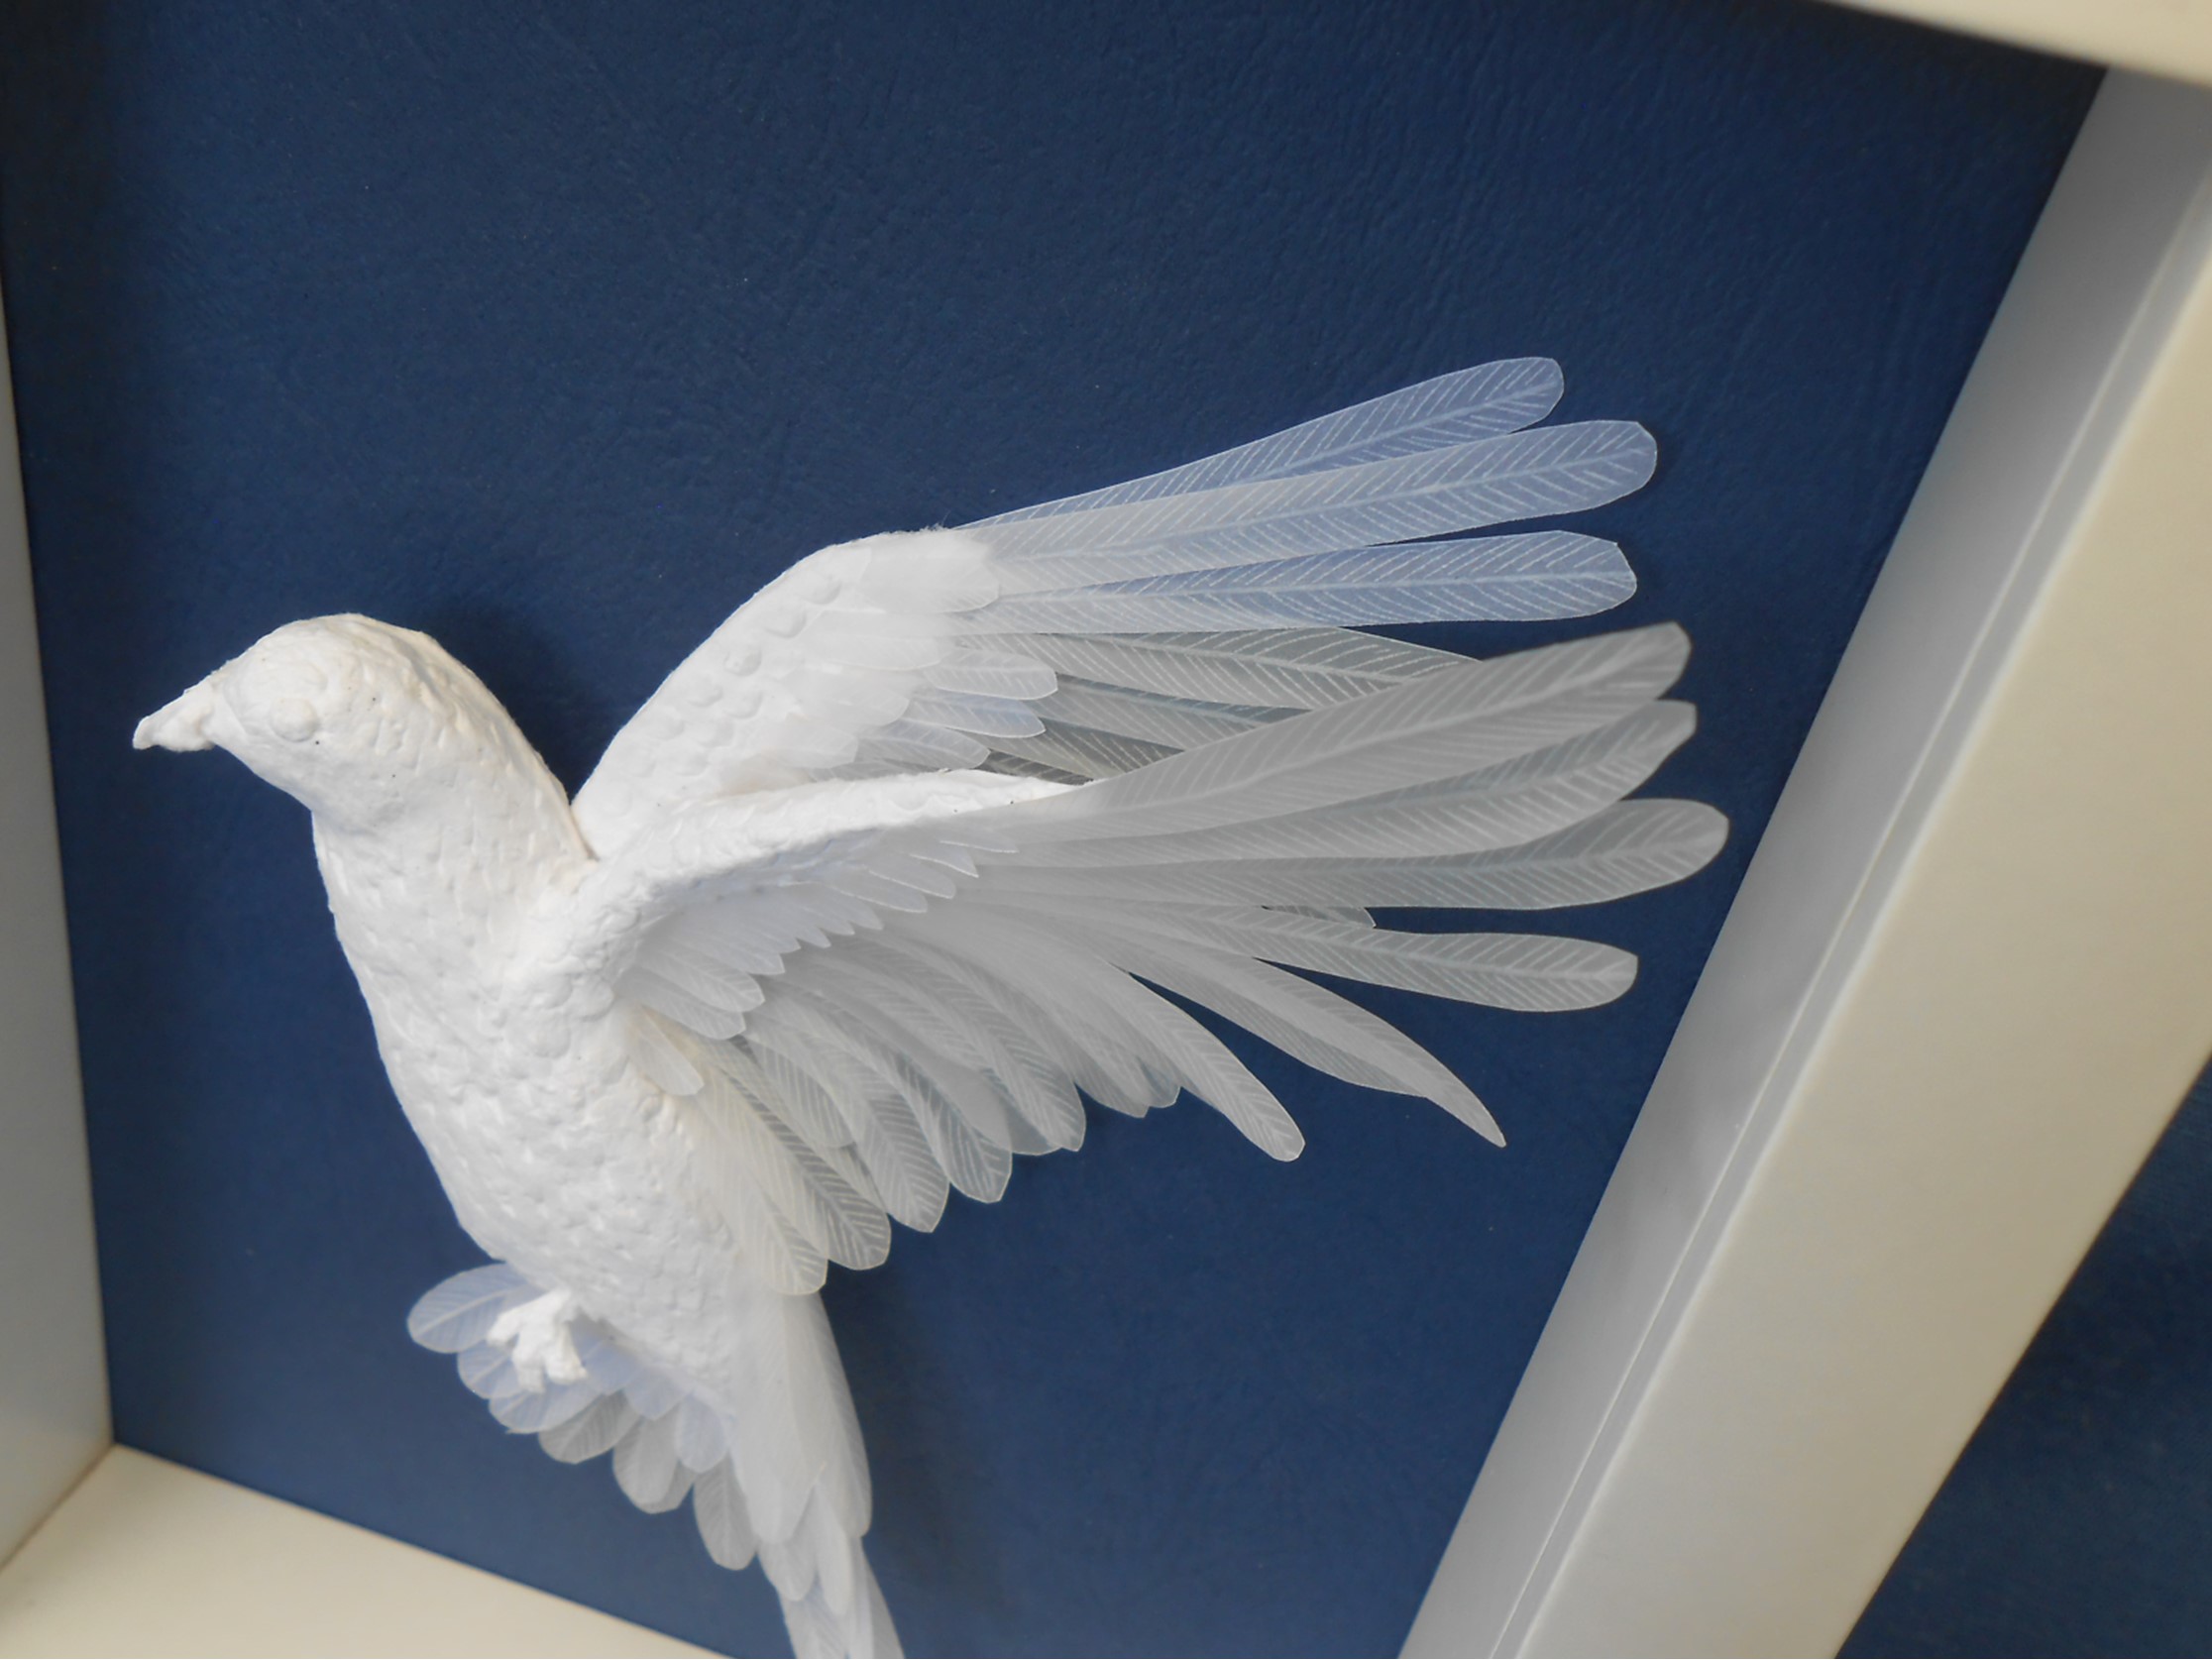
I saw a photograph of a bird in flight with sunlight behind, making its wings almost transparent. I experimented to see if a similar effect could be achieved with paper and finally settled on paper vellum which is strong enough for fine cutting and marking and yet has a slightly transparent quality which shows up when layered.
The bodies of the birds are cast recycled paper. Using plasticine to form the shape, I then make a mold from plaster of Paris. Paper mulch is pressed into the mold and dried. The next step is to individually cut and mark each feather before layering them and gluing them to the body. More details of the cast and feathers are in the illustrations below.
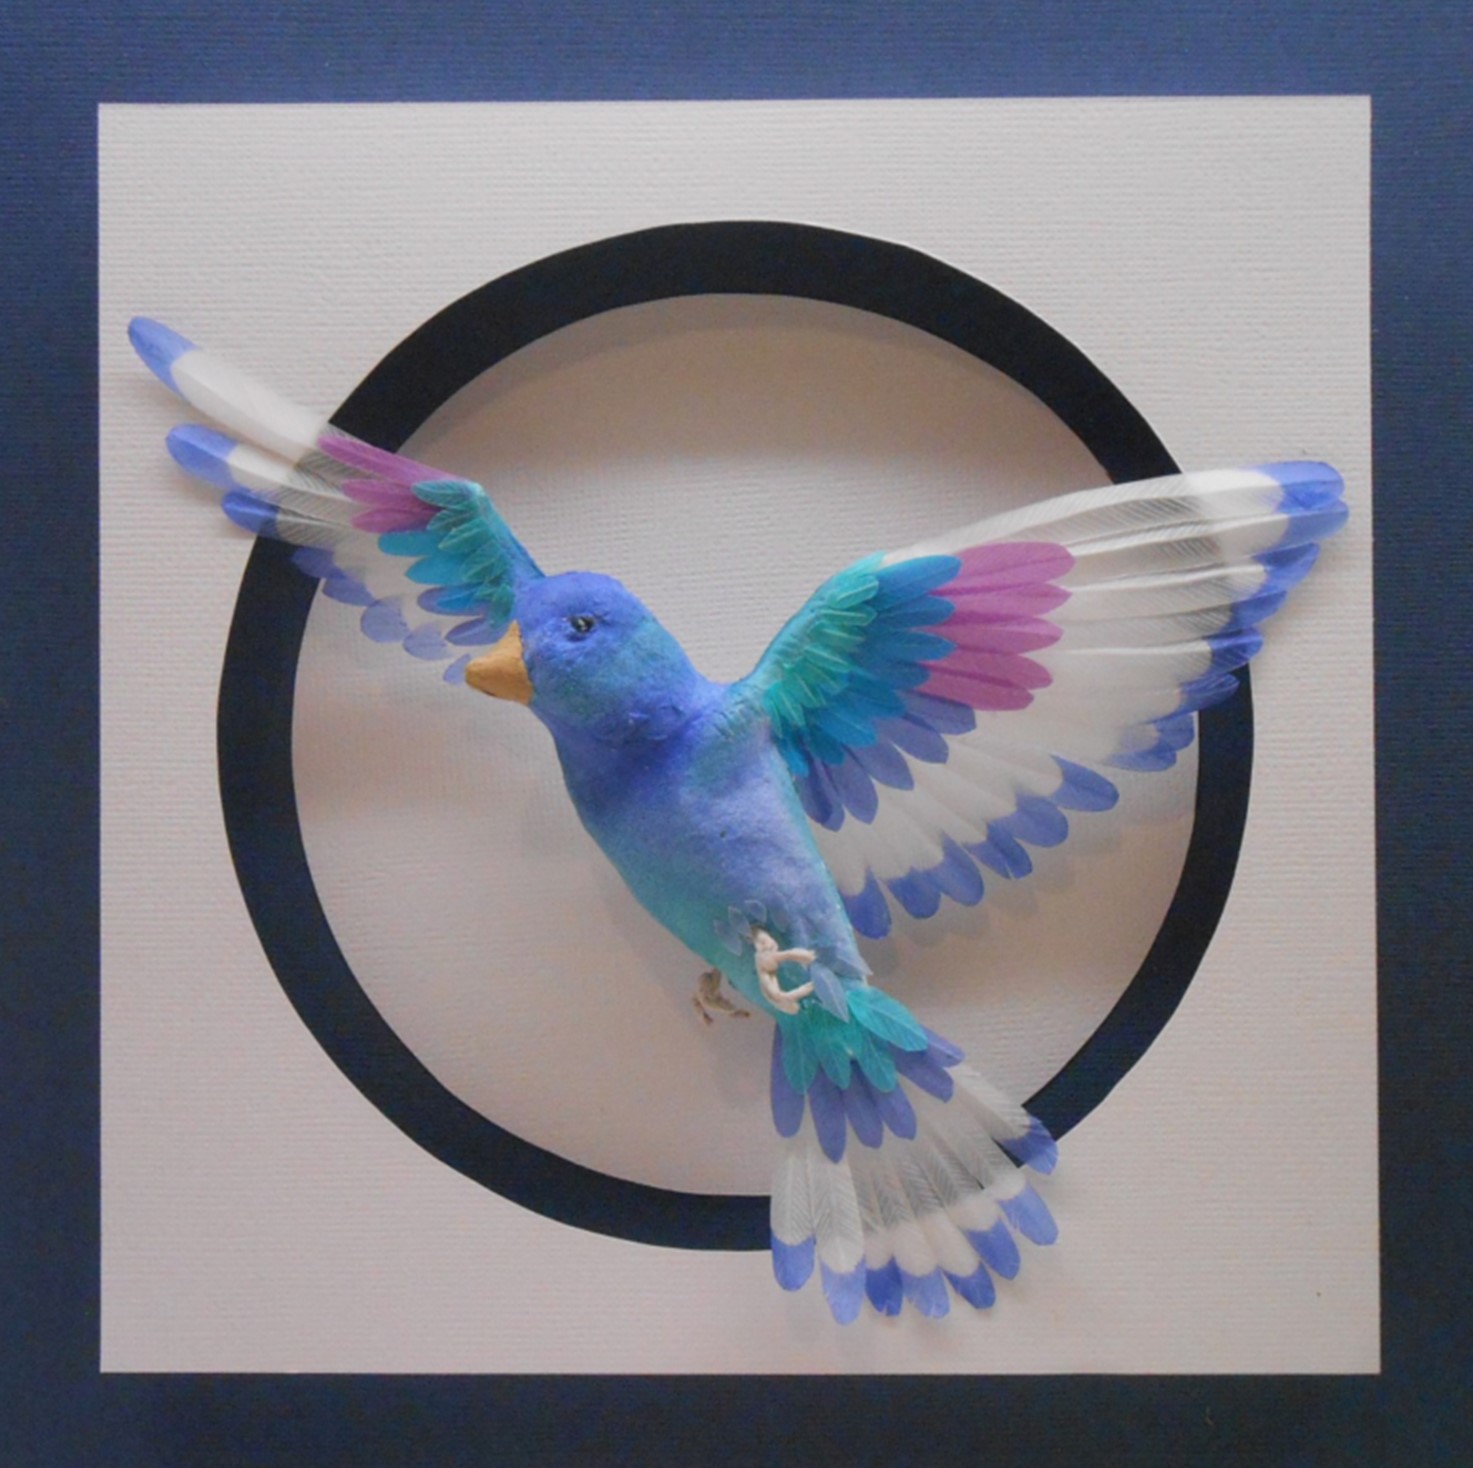
Once this project was completed, I began experimenting with colour. More about this in my Layered Papercut Parrots post.
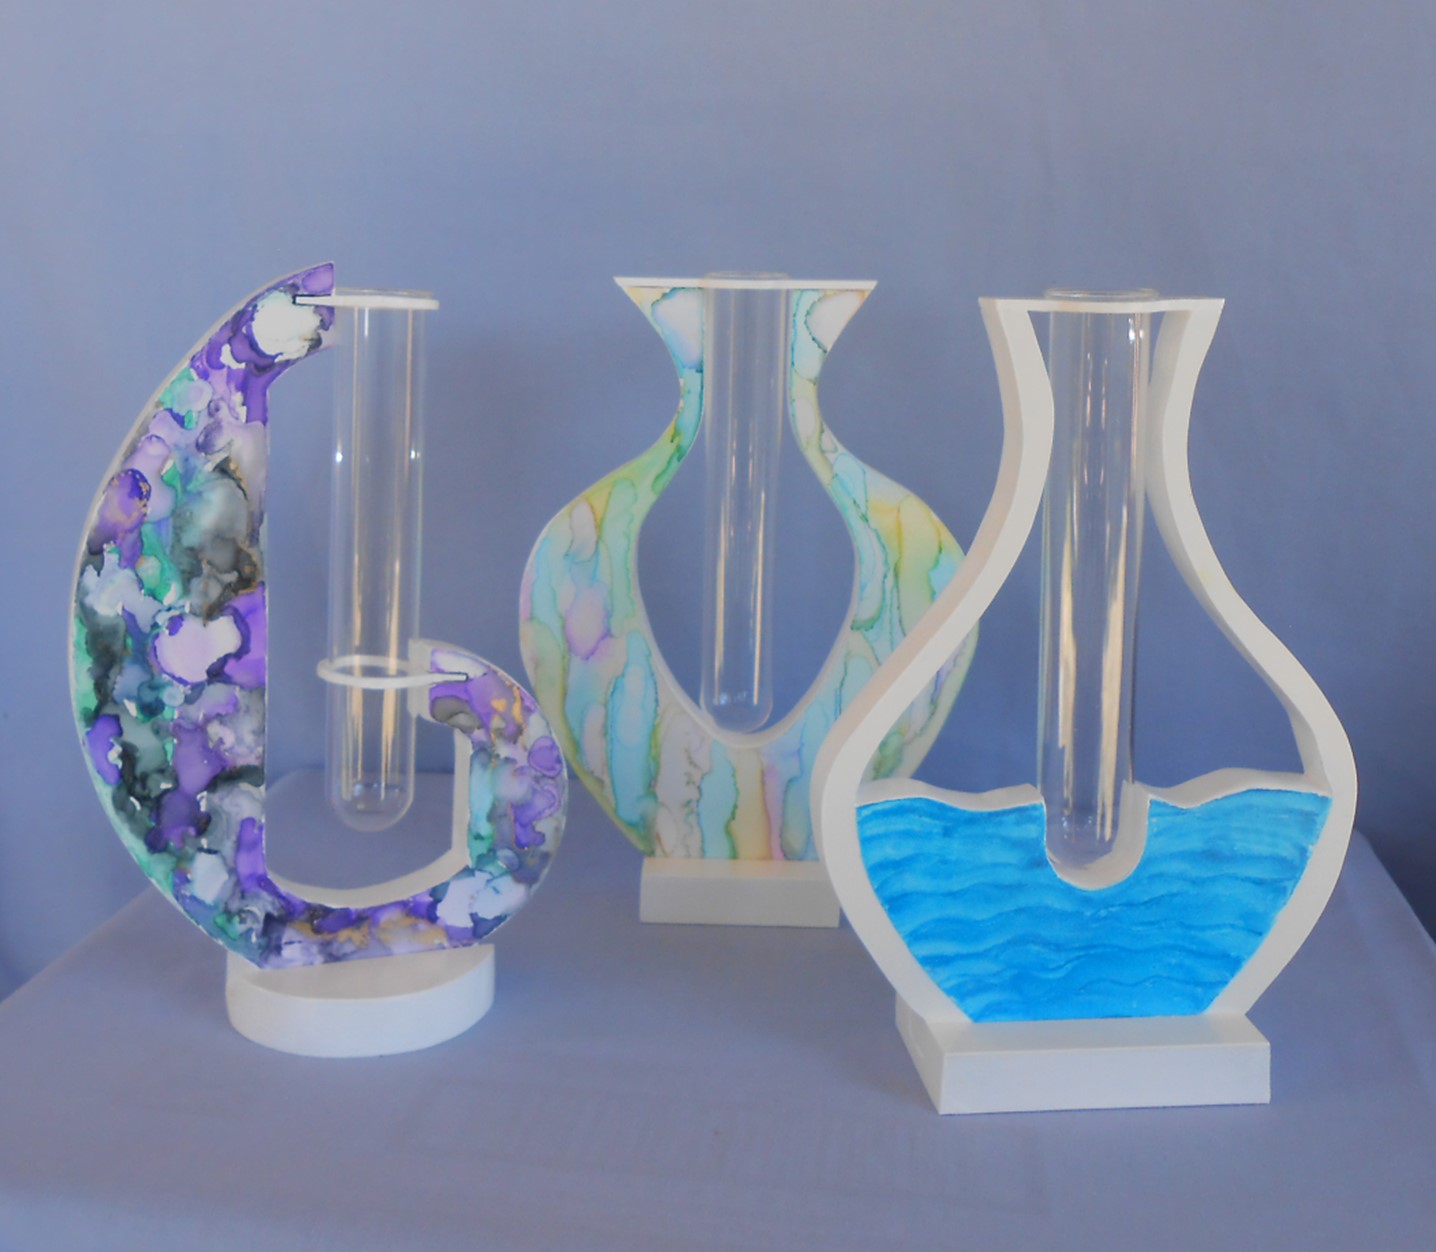
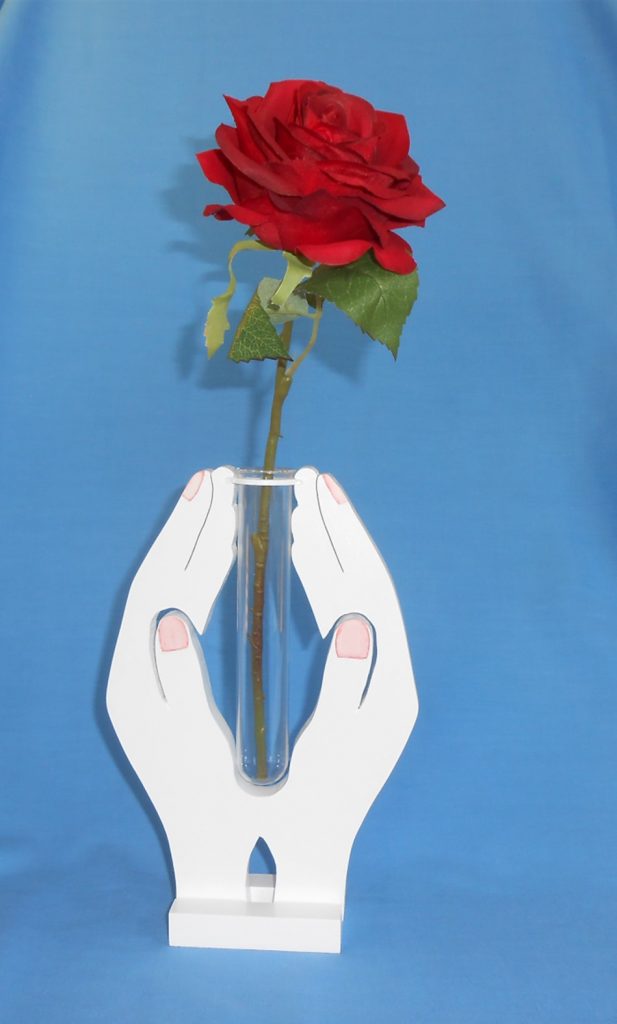
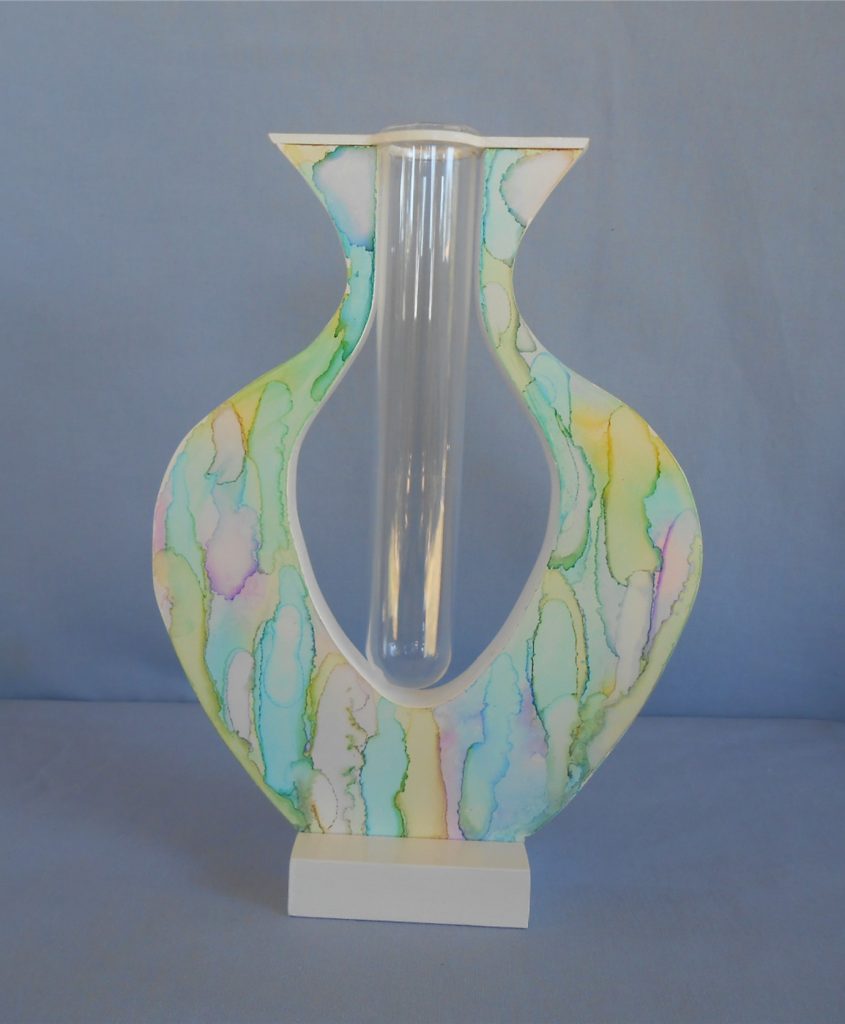
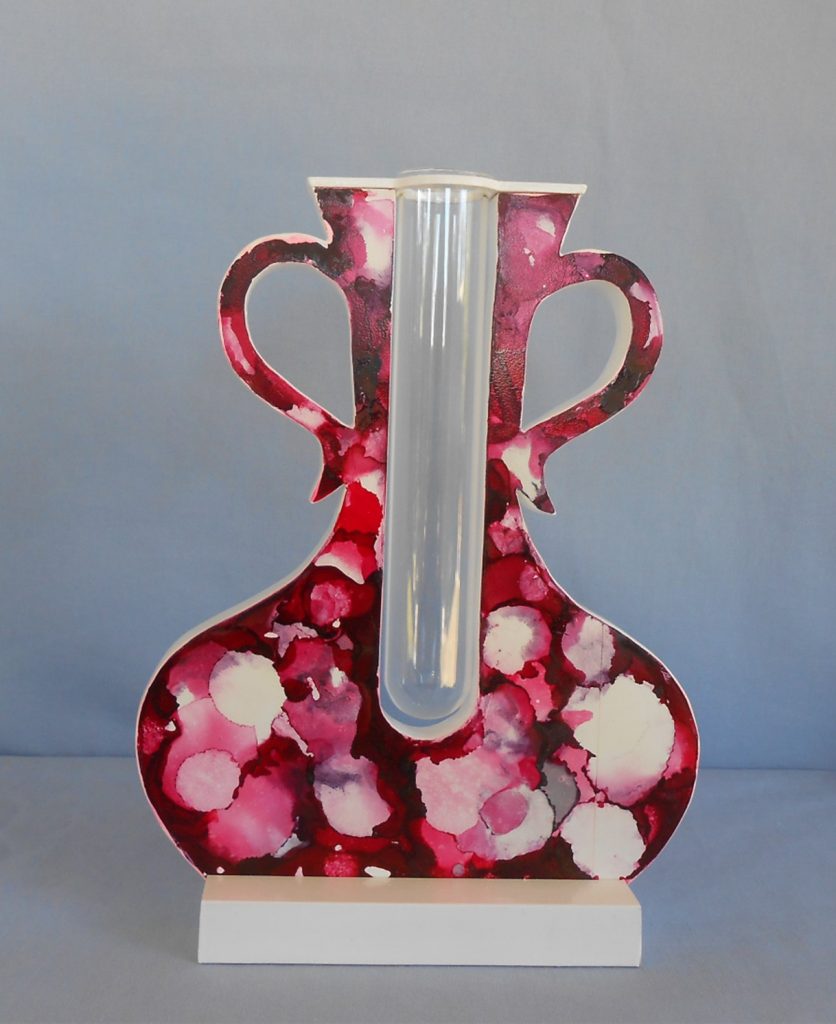
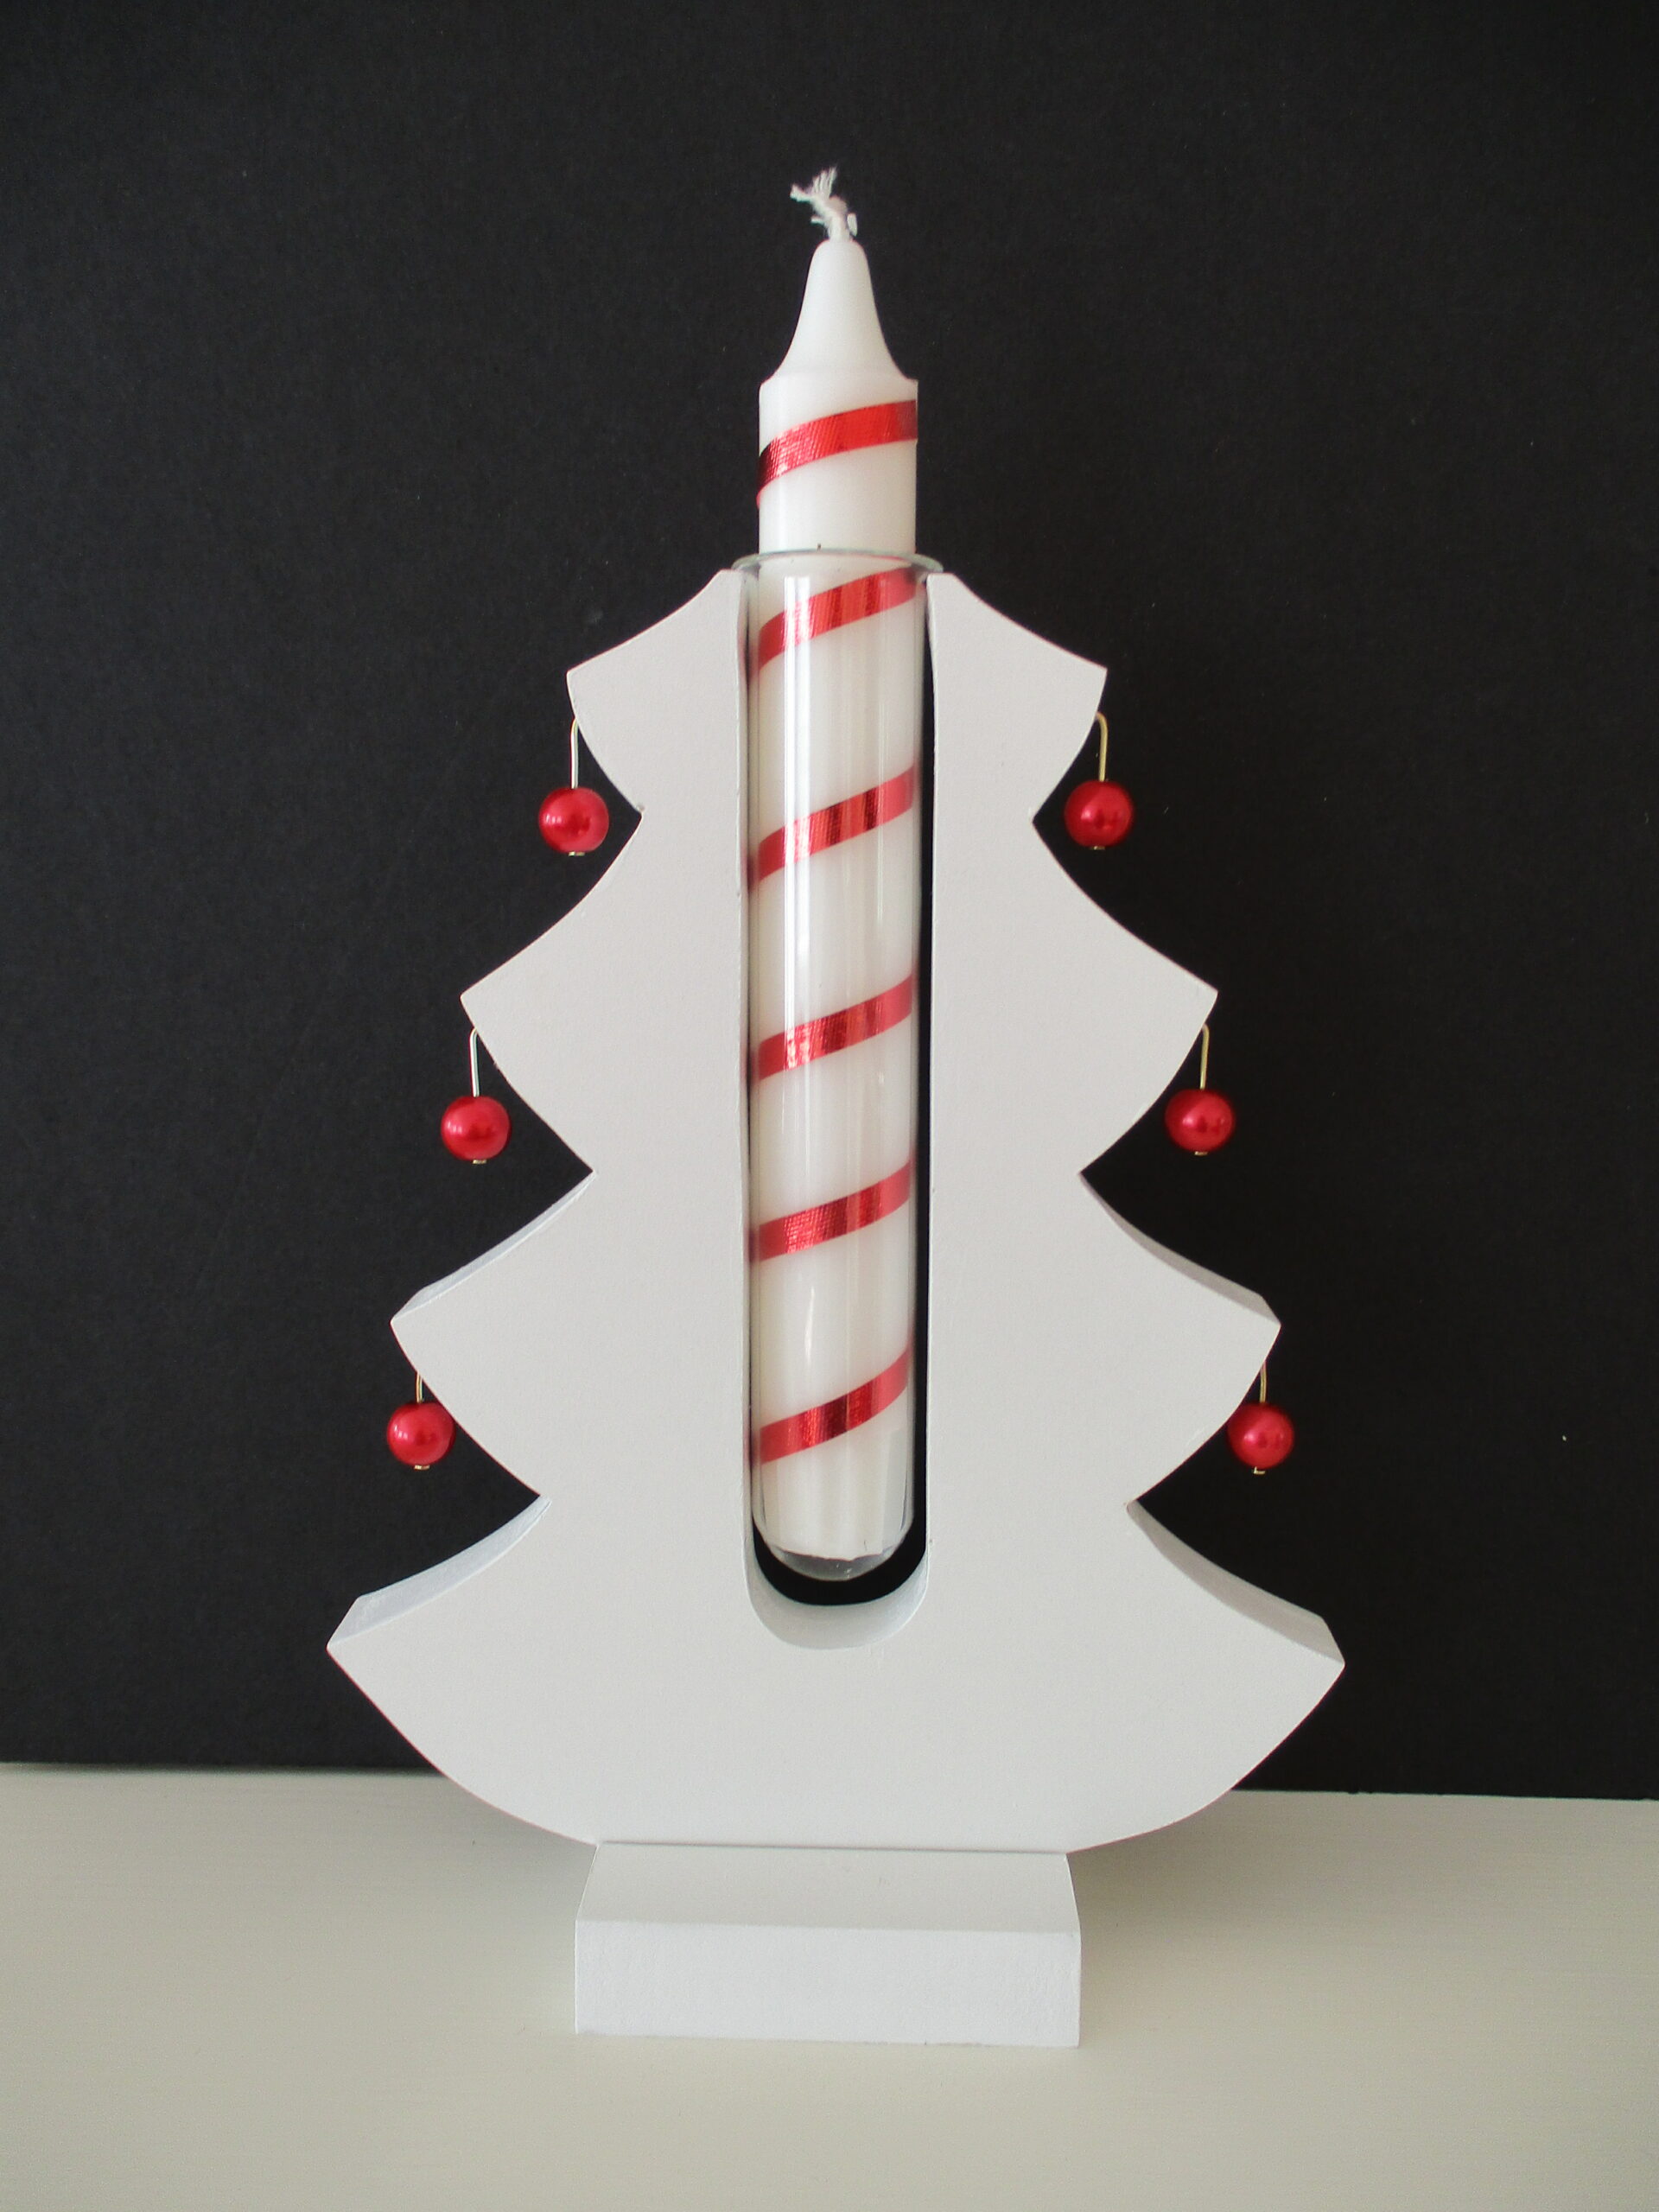
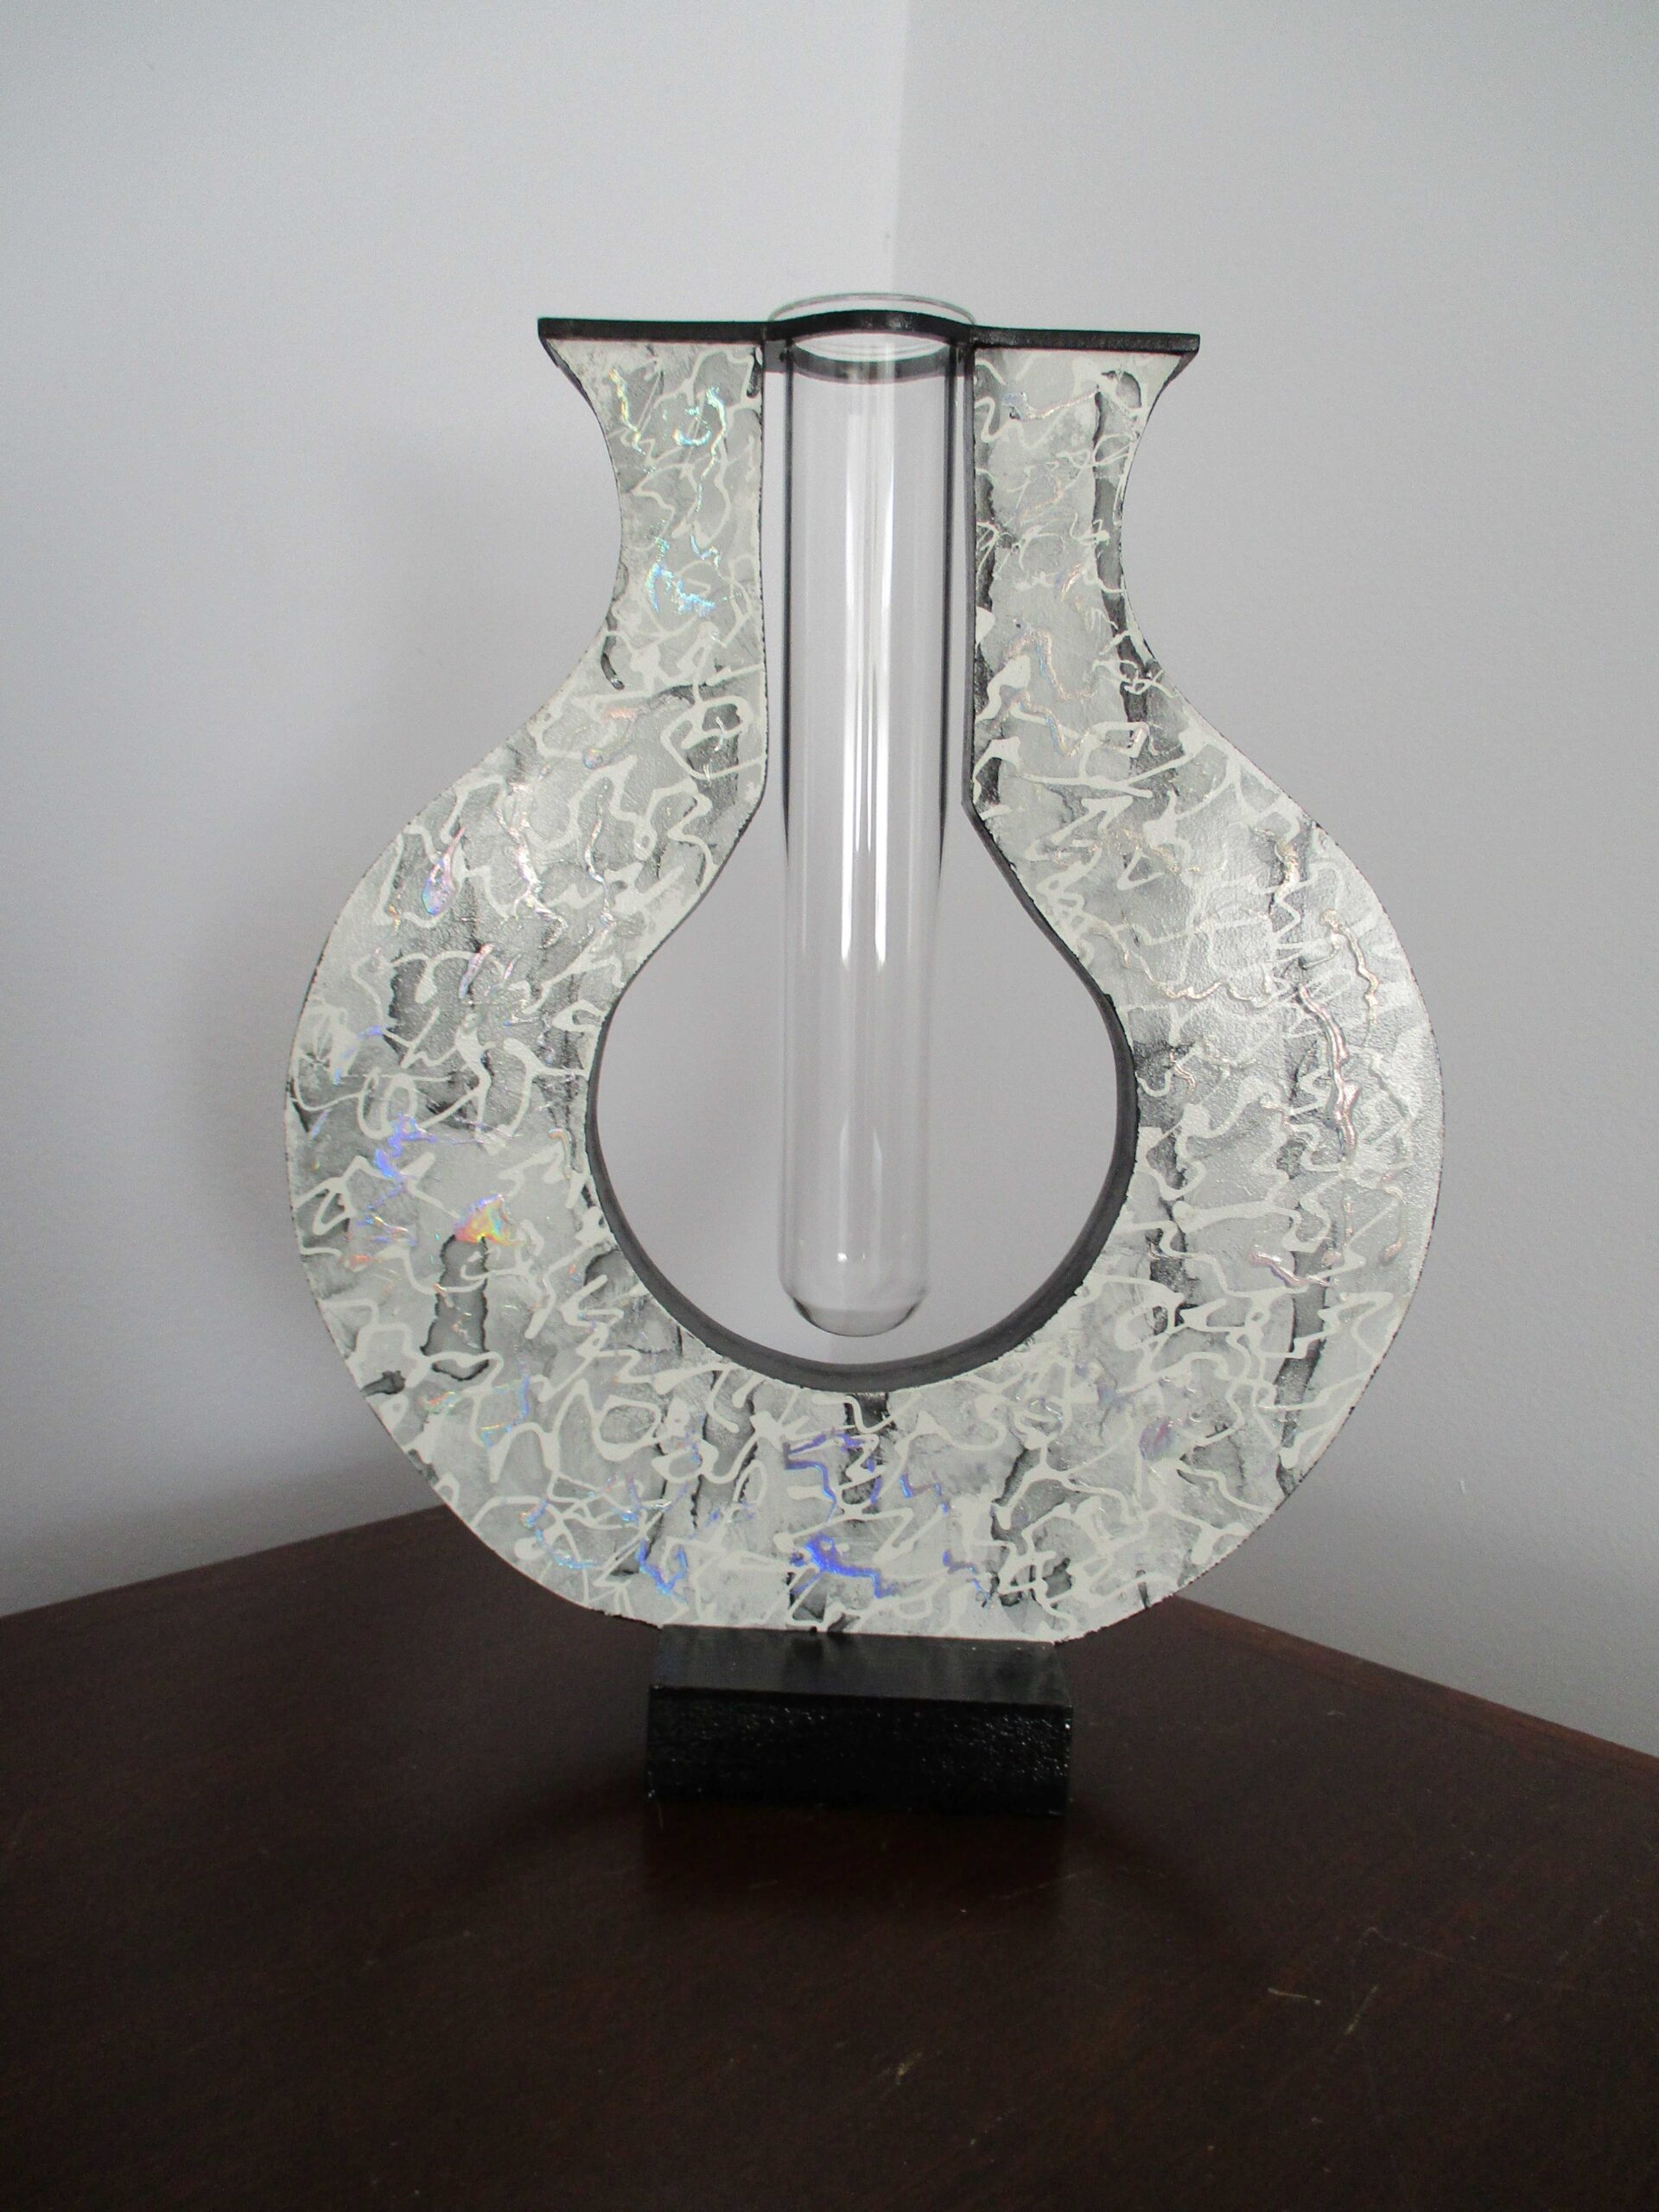
A kitchen renovation left a pile of old melamine shelving which inspired this collection of bud vases. The shelving is 16mm laminated mdf (medium density fibreboard). It was a design challenge to create traditionally 3D objects from flat shelves! Test tubes are used to hold the flowers and these are removable for cleaning. The designs are cut with a scroll saw and the cut edges painted. I was curious to see if alcohol inks would take on the laminated surfaces. I experimented with various techniques to obtain the different finishing effects.