I’ve been digging through my salvaged materials to ReCreate a new art ‘sculpture’.
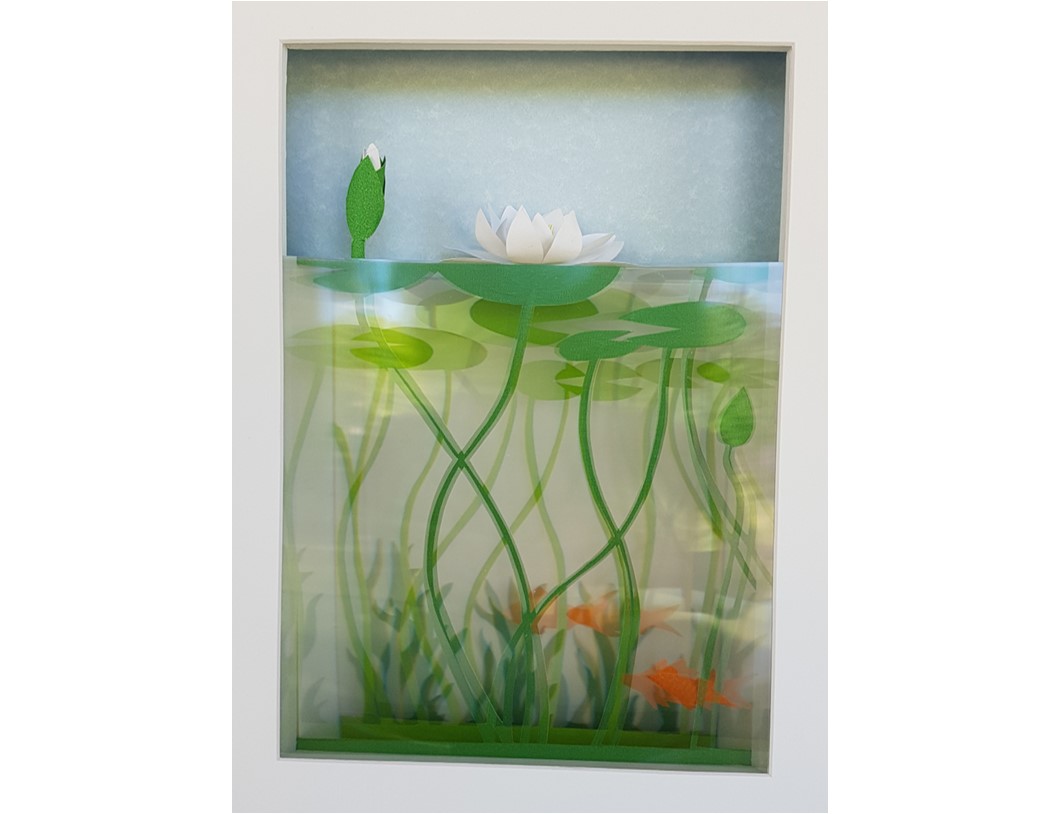
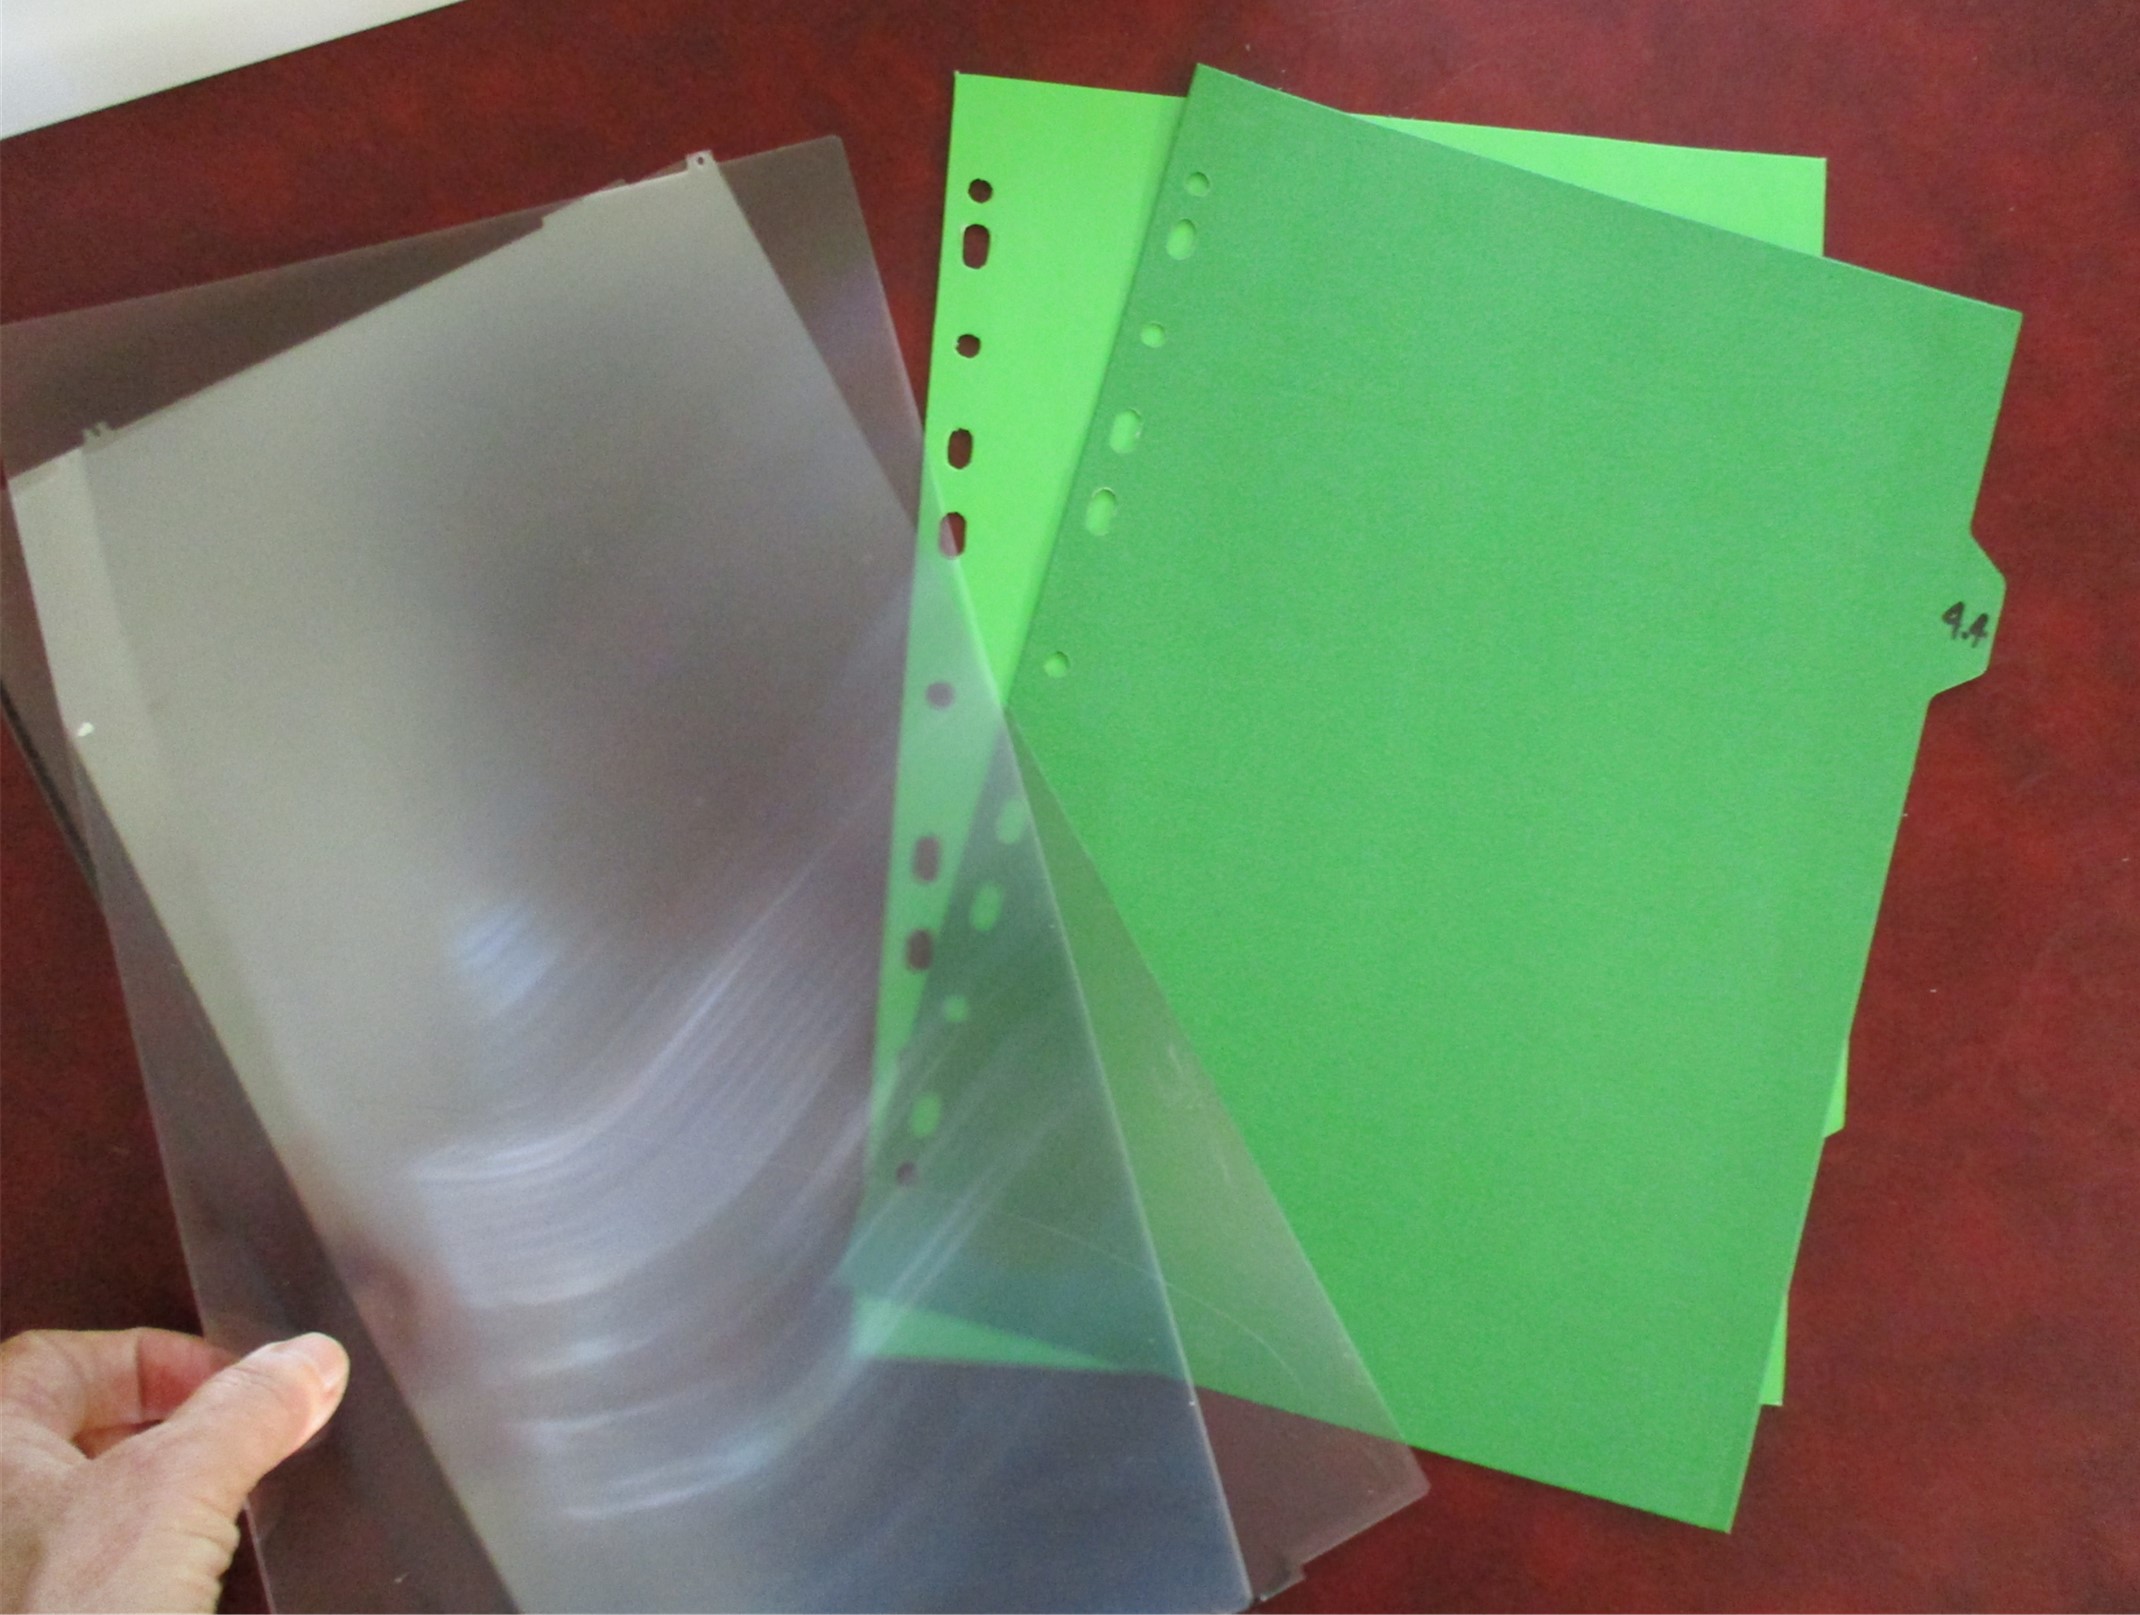
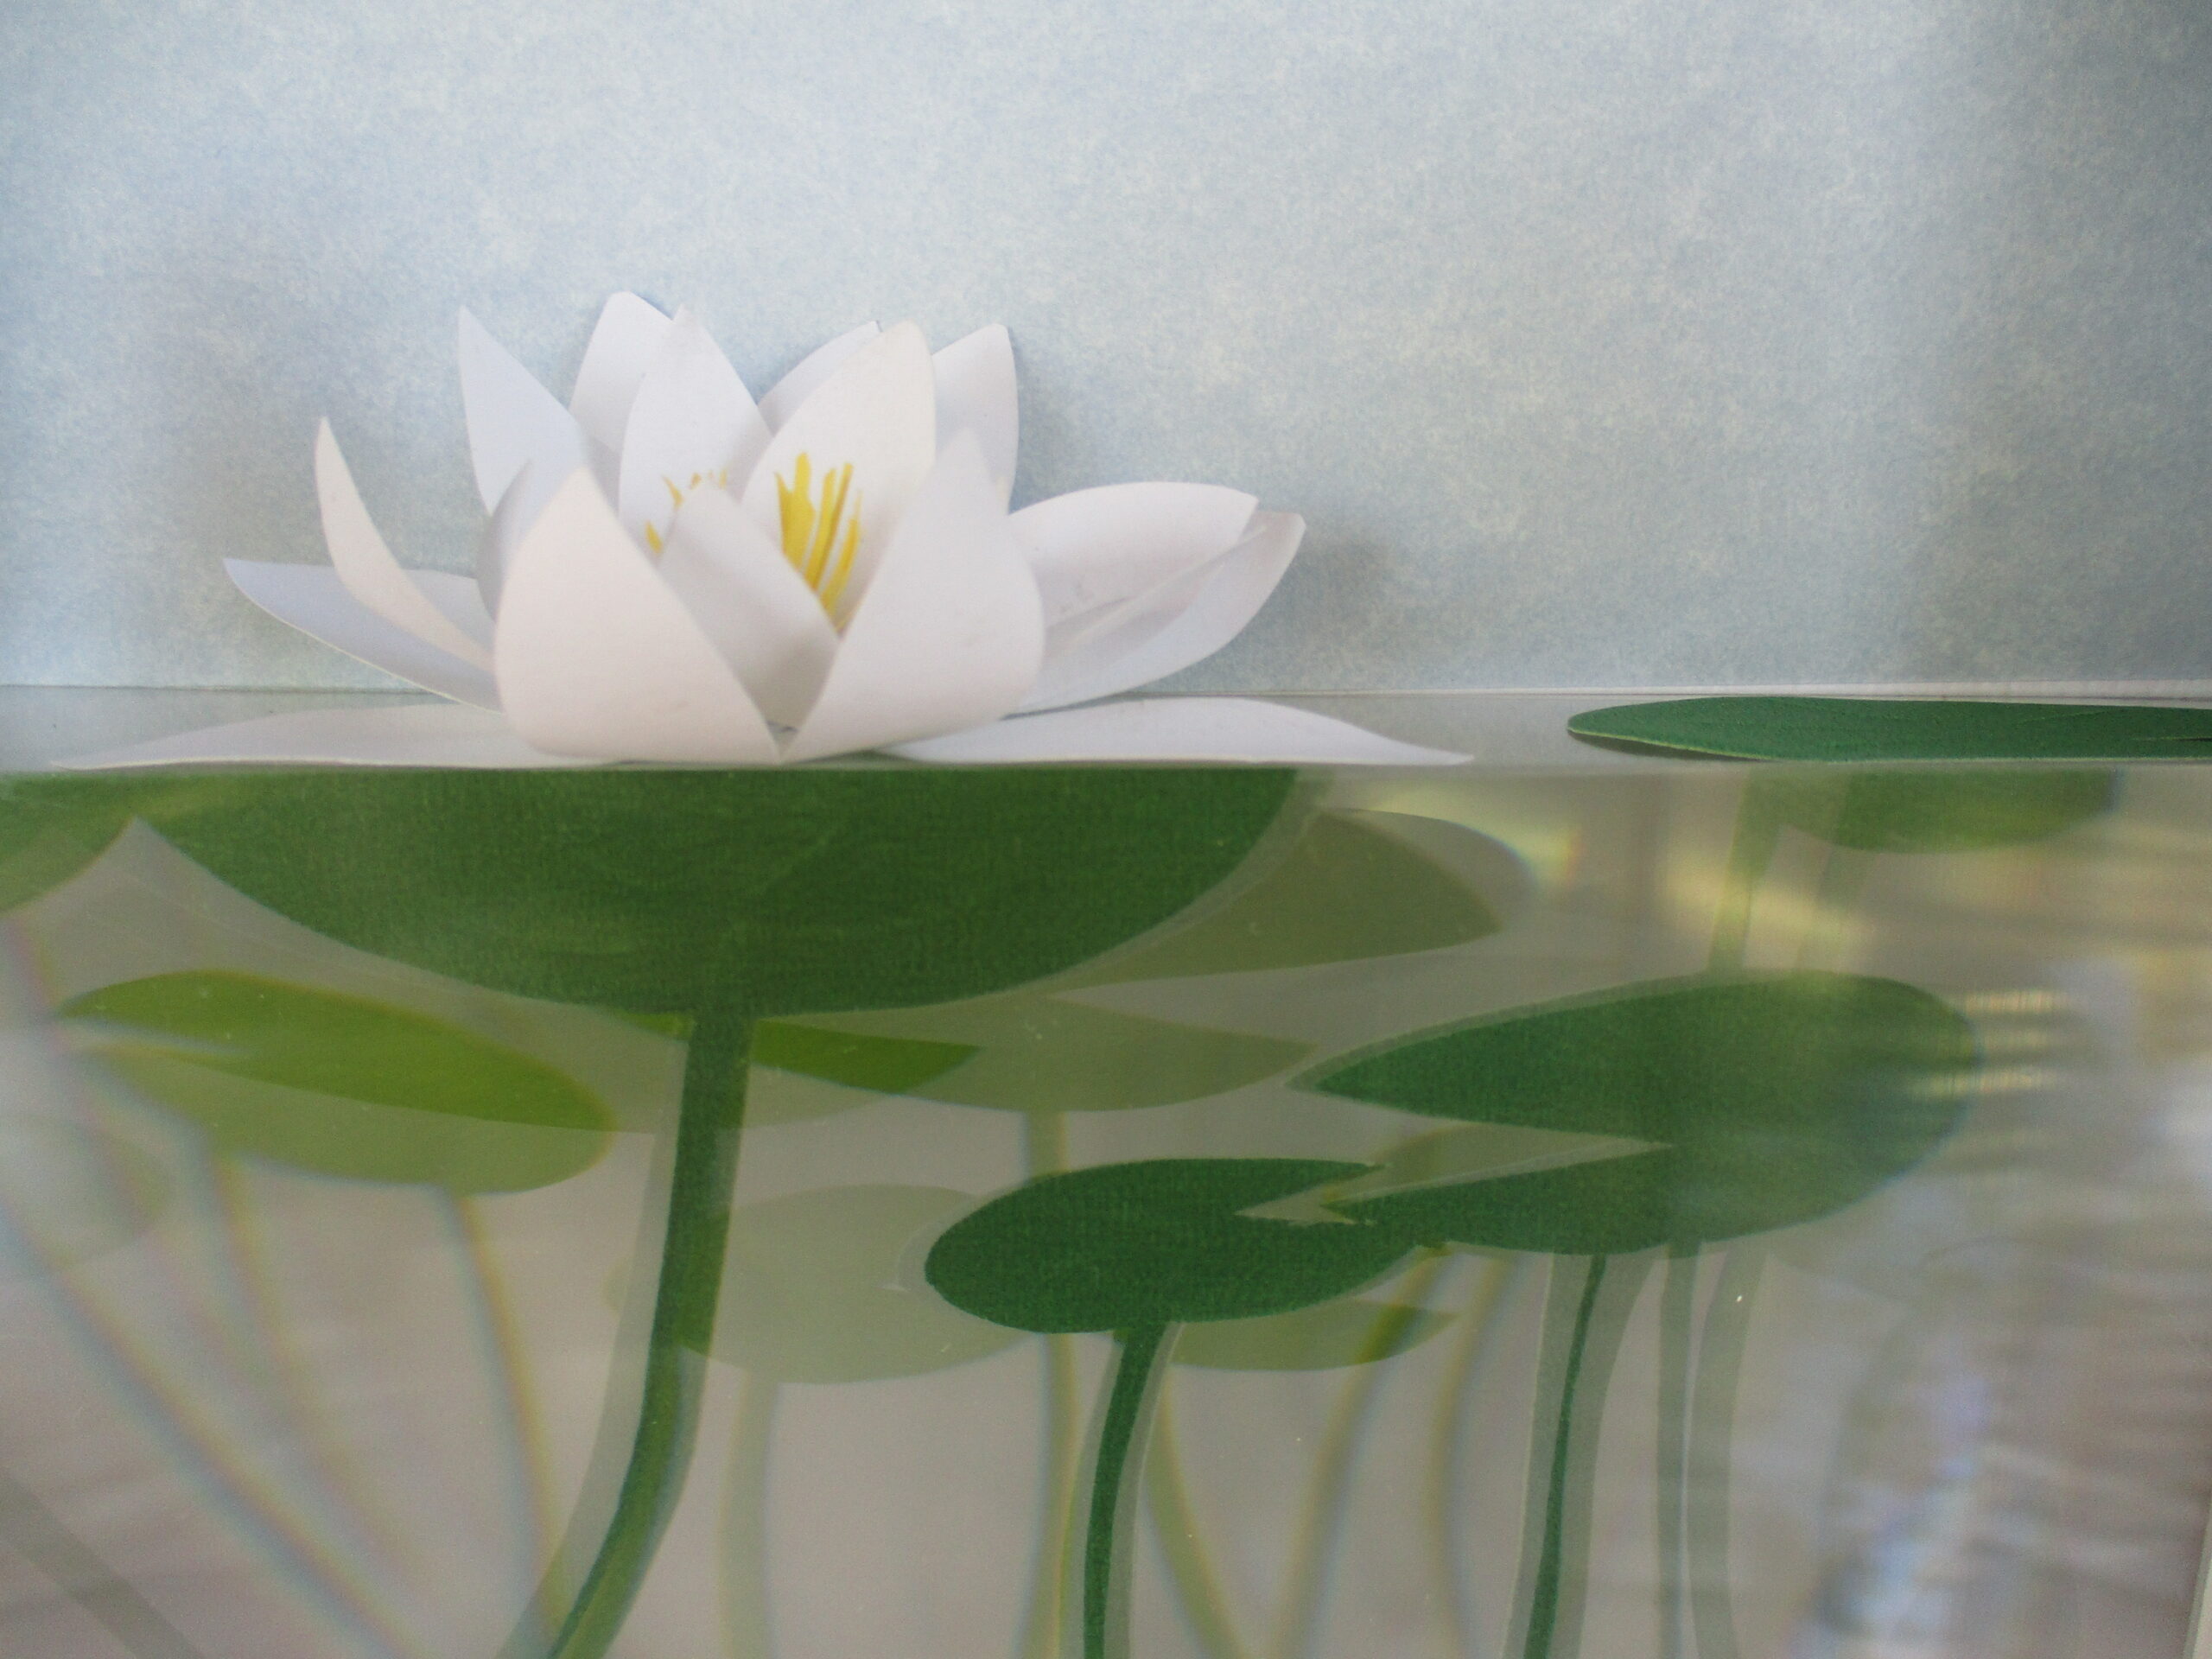
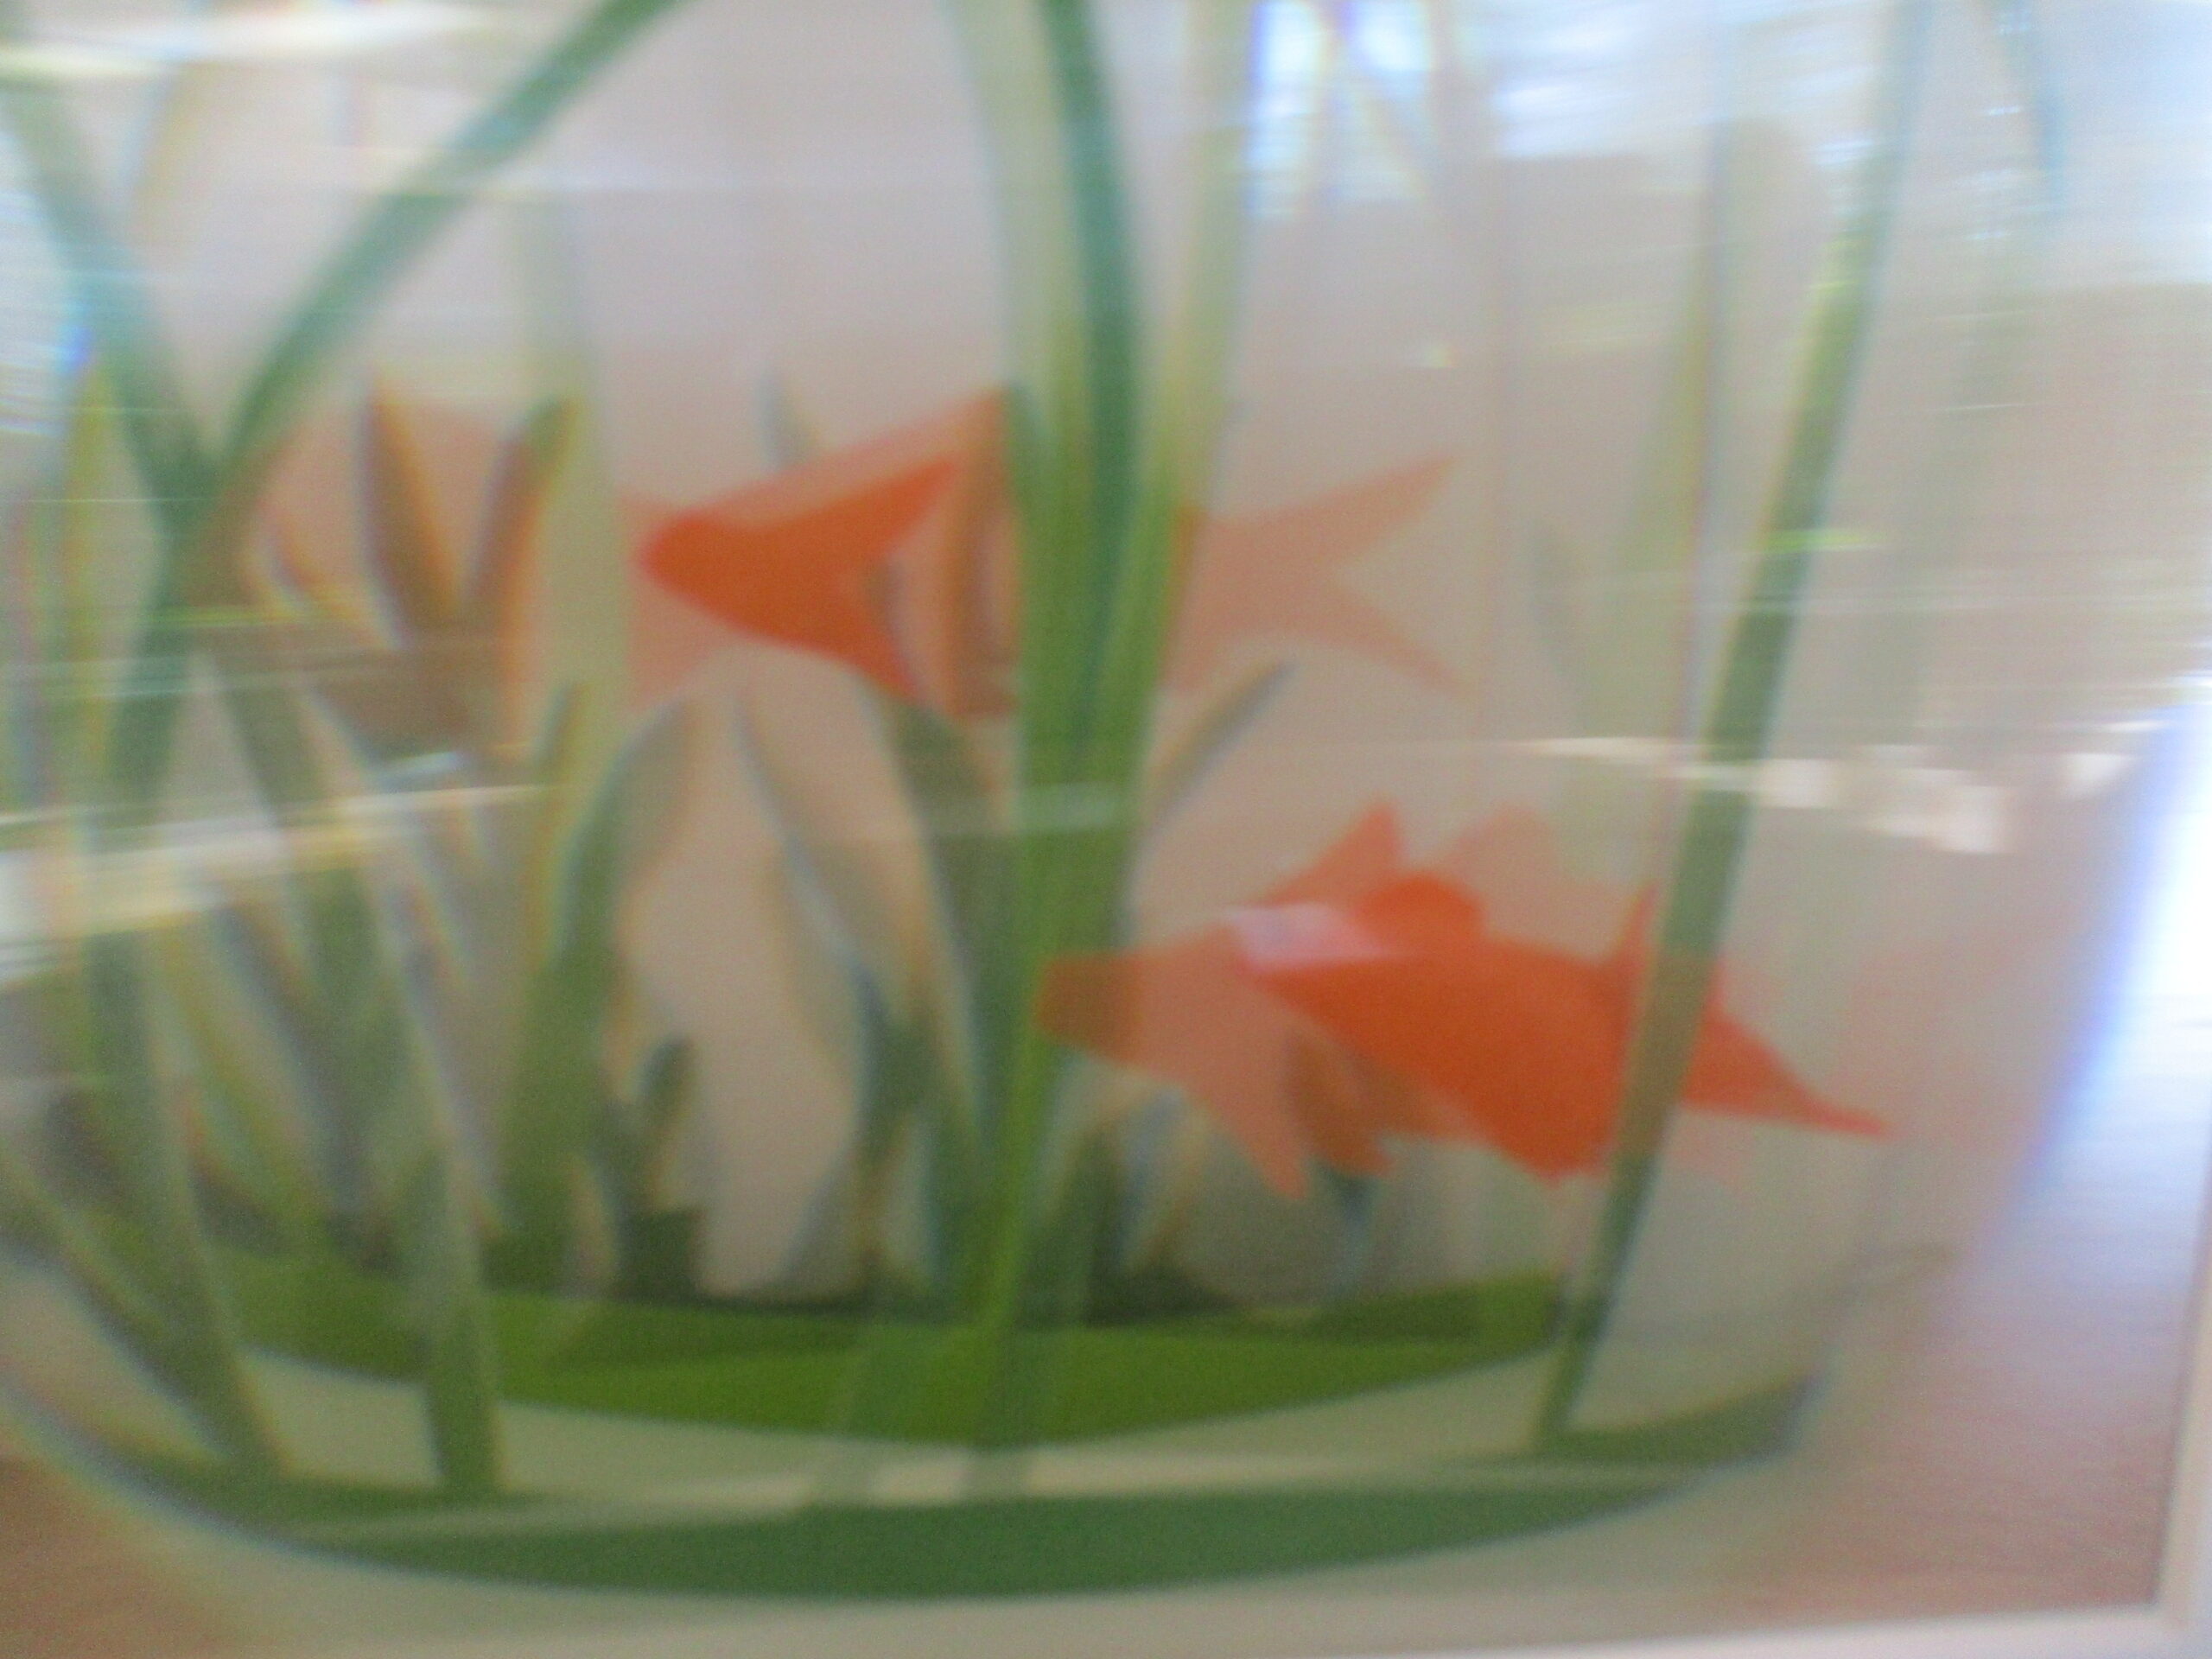
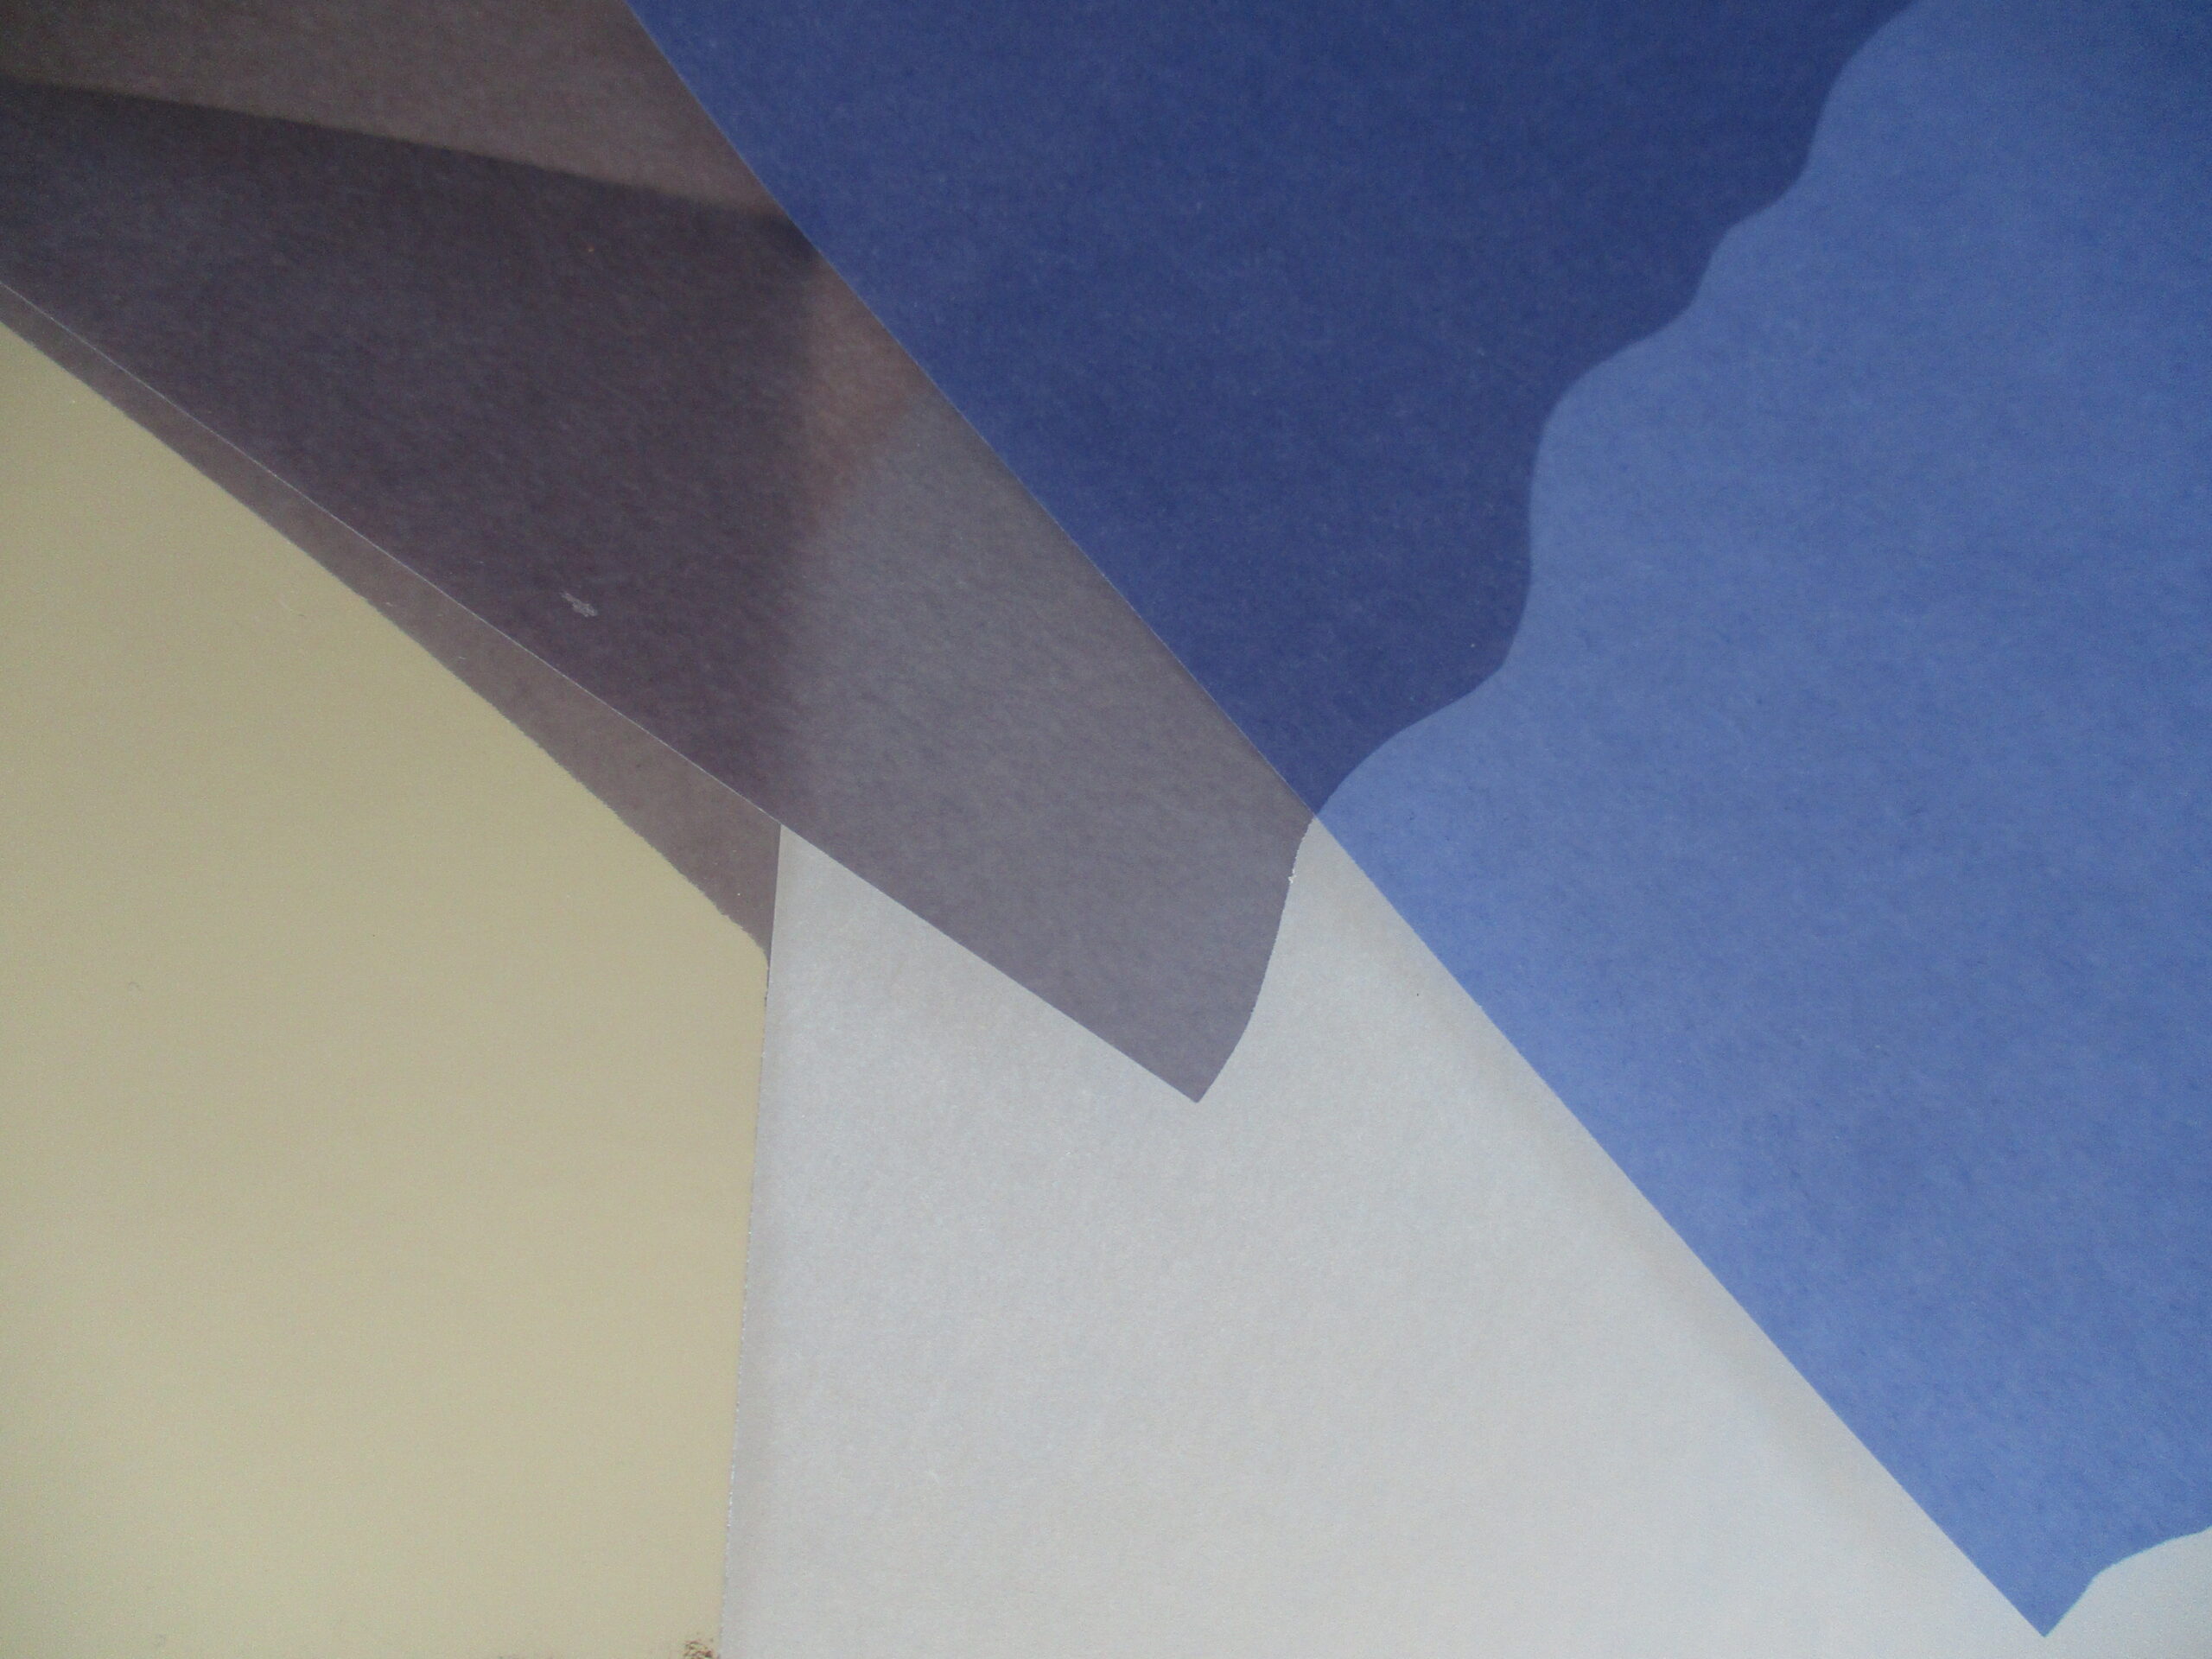
‘Lily Pond’ is made predominantly from ring-folder dividers (see picture below). It incorporates paper cutting and shaping, constructed in three layers, with the centre layer supported on a piece of clear overhead projector film.
The ‘secret ingredient’ that creates the underwater effect? An LCD backlight diffuser sheet that comes from behind an old dismantled laptop screen! This film is mirror-like on one side, but the other side warps, magnifies and blurs objects directly behind it, making the layered art look underwater. (Click on the close-ups above to enlarge)
It’s weird, because viewing it from the side you can see nothing behind the film – you have to view it front-on, but that makes it very unusual and a bit mysterious. I’m planning to explore the possibilities further with more ‘underwater’ experiments. Stay tuned!
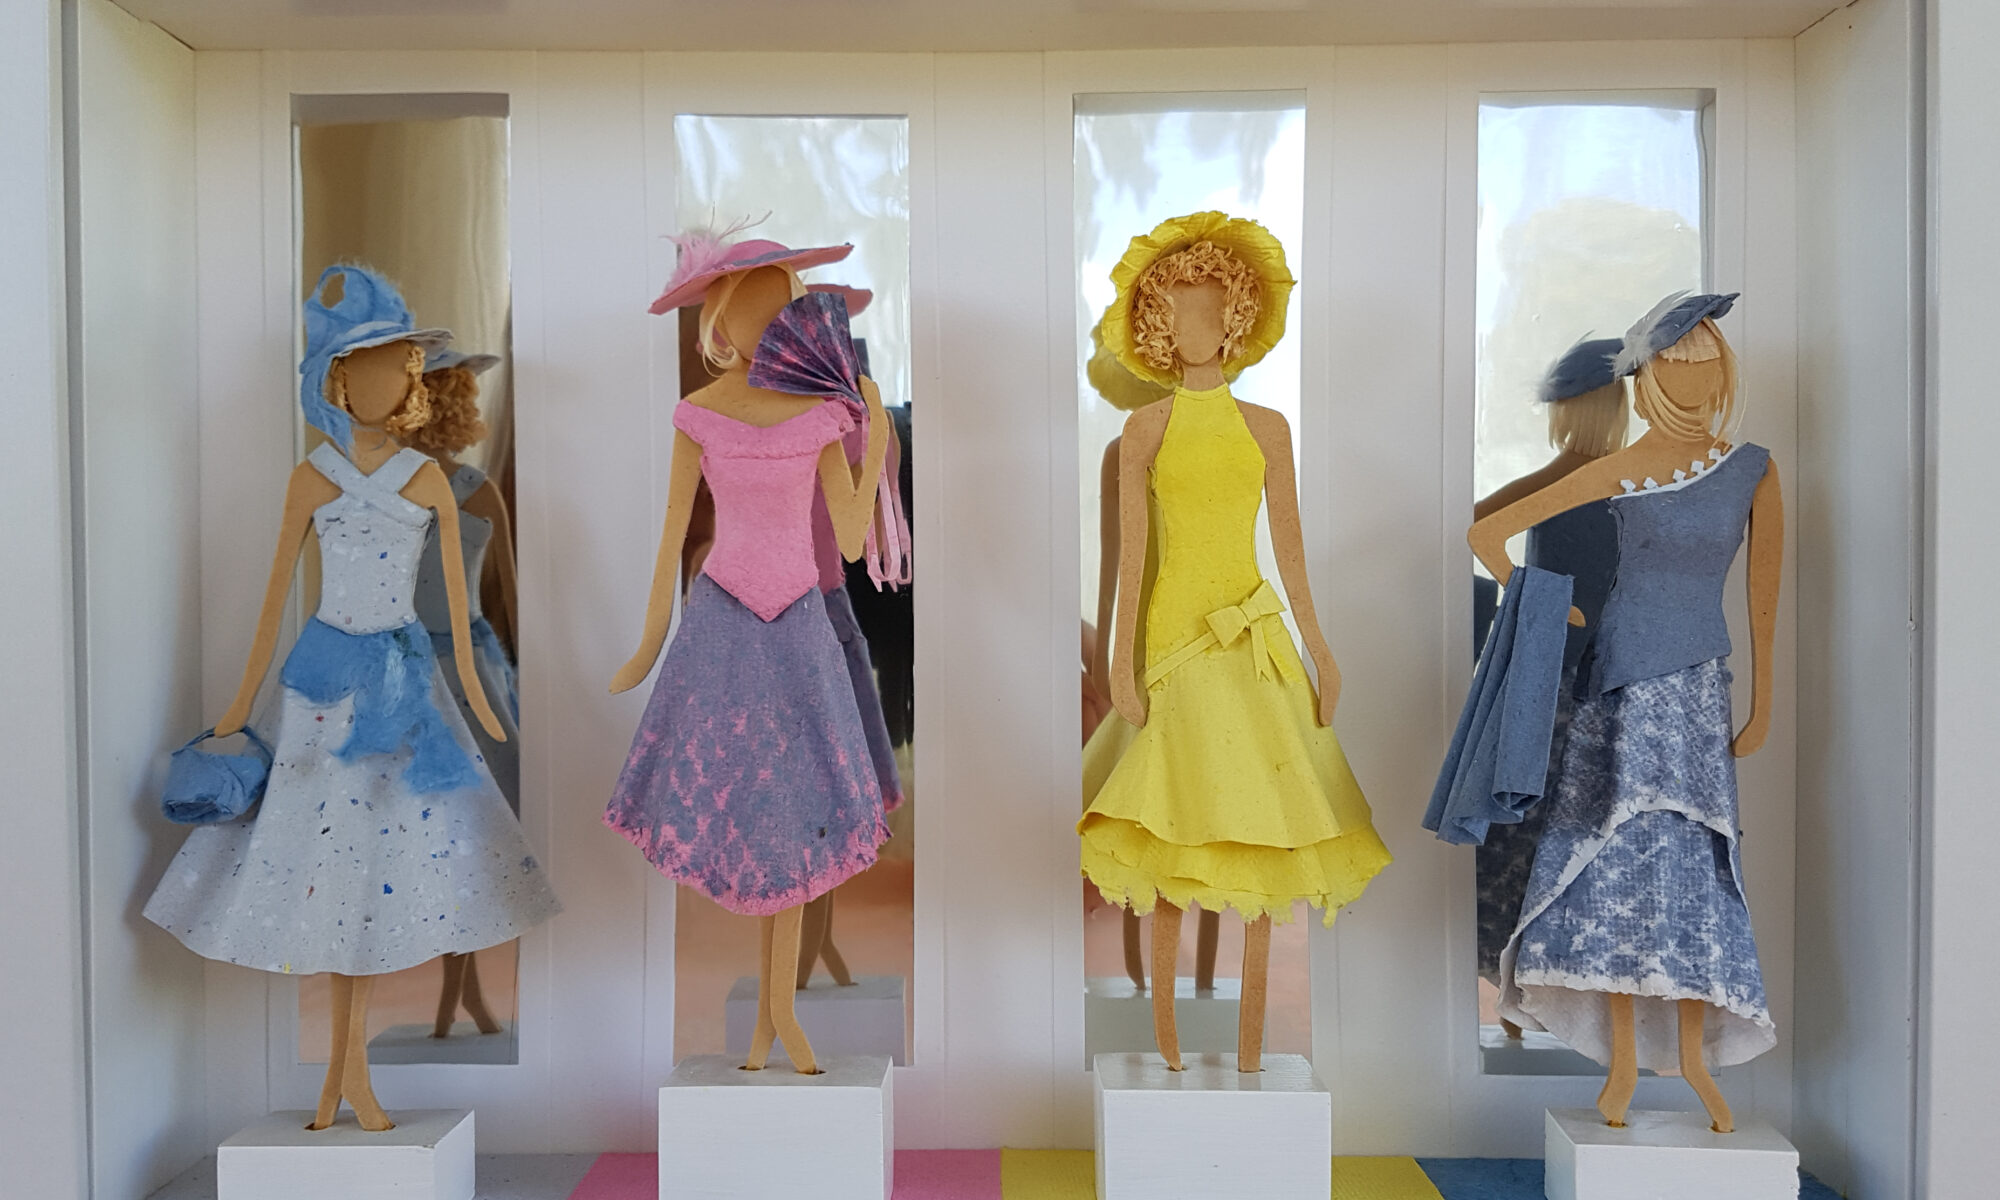
This ‘boutique’ shop window was inspired by memories of dressing paper dolls as a child, together with my love of op-shops and sewing, although creating paper clothing is much more challenging than fabric!
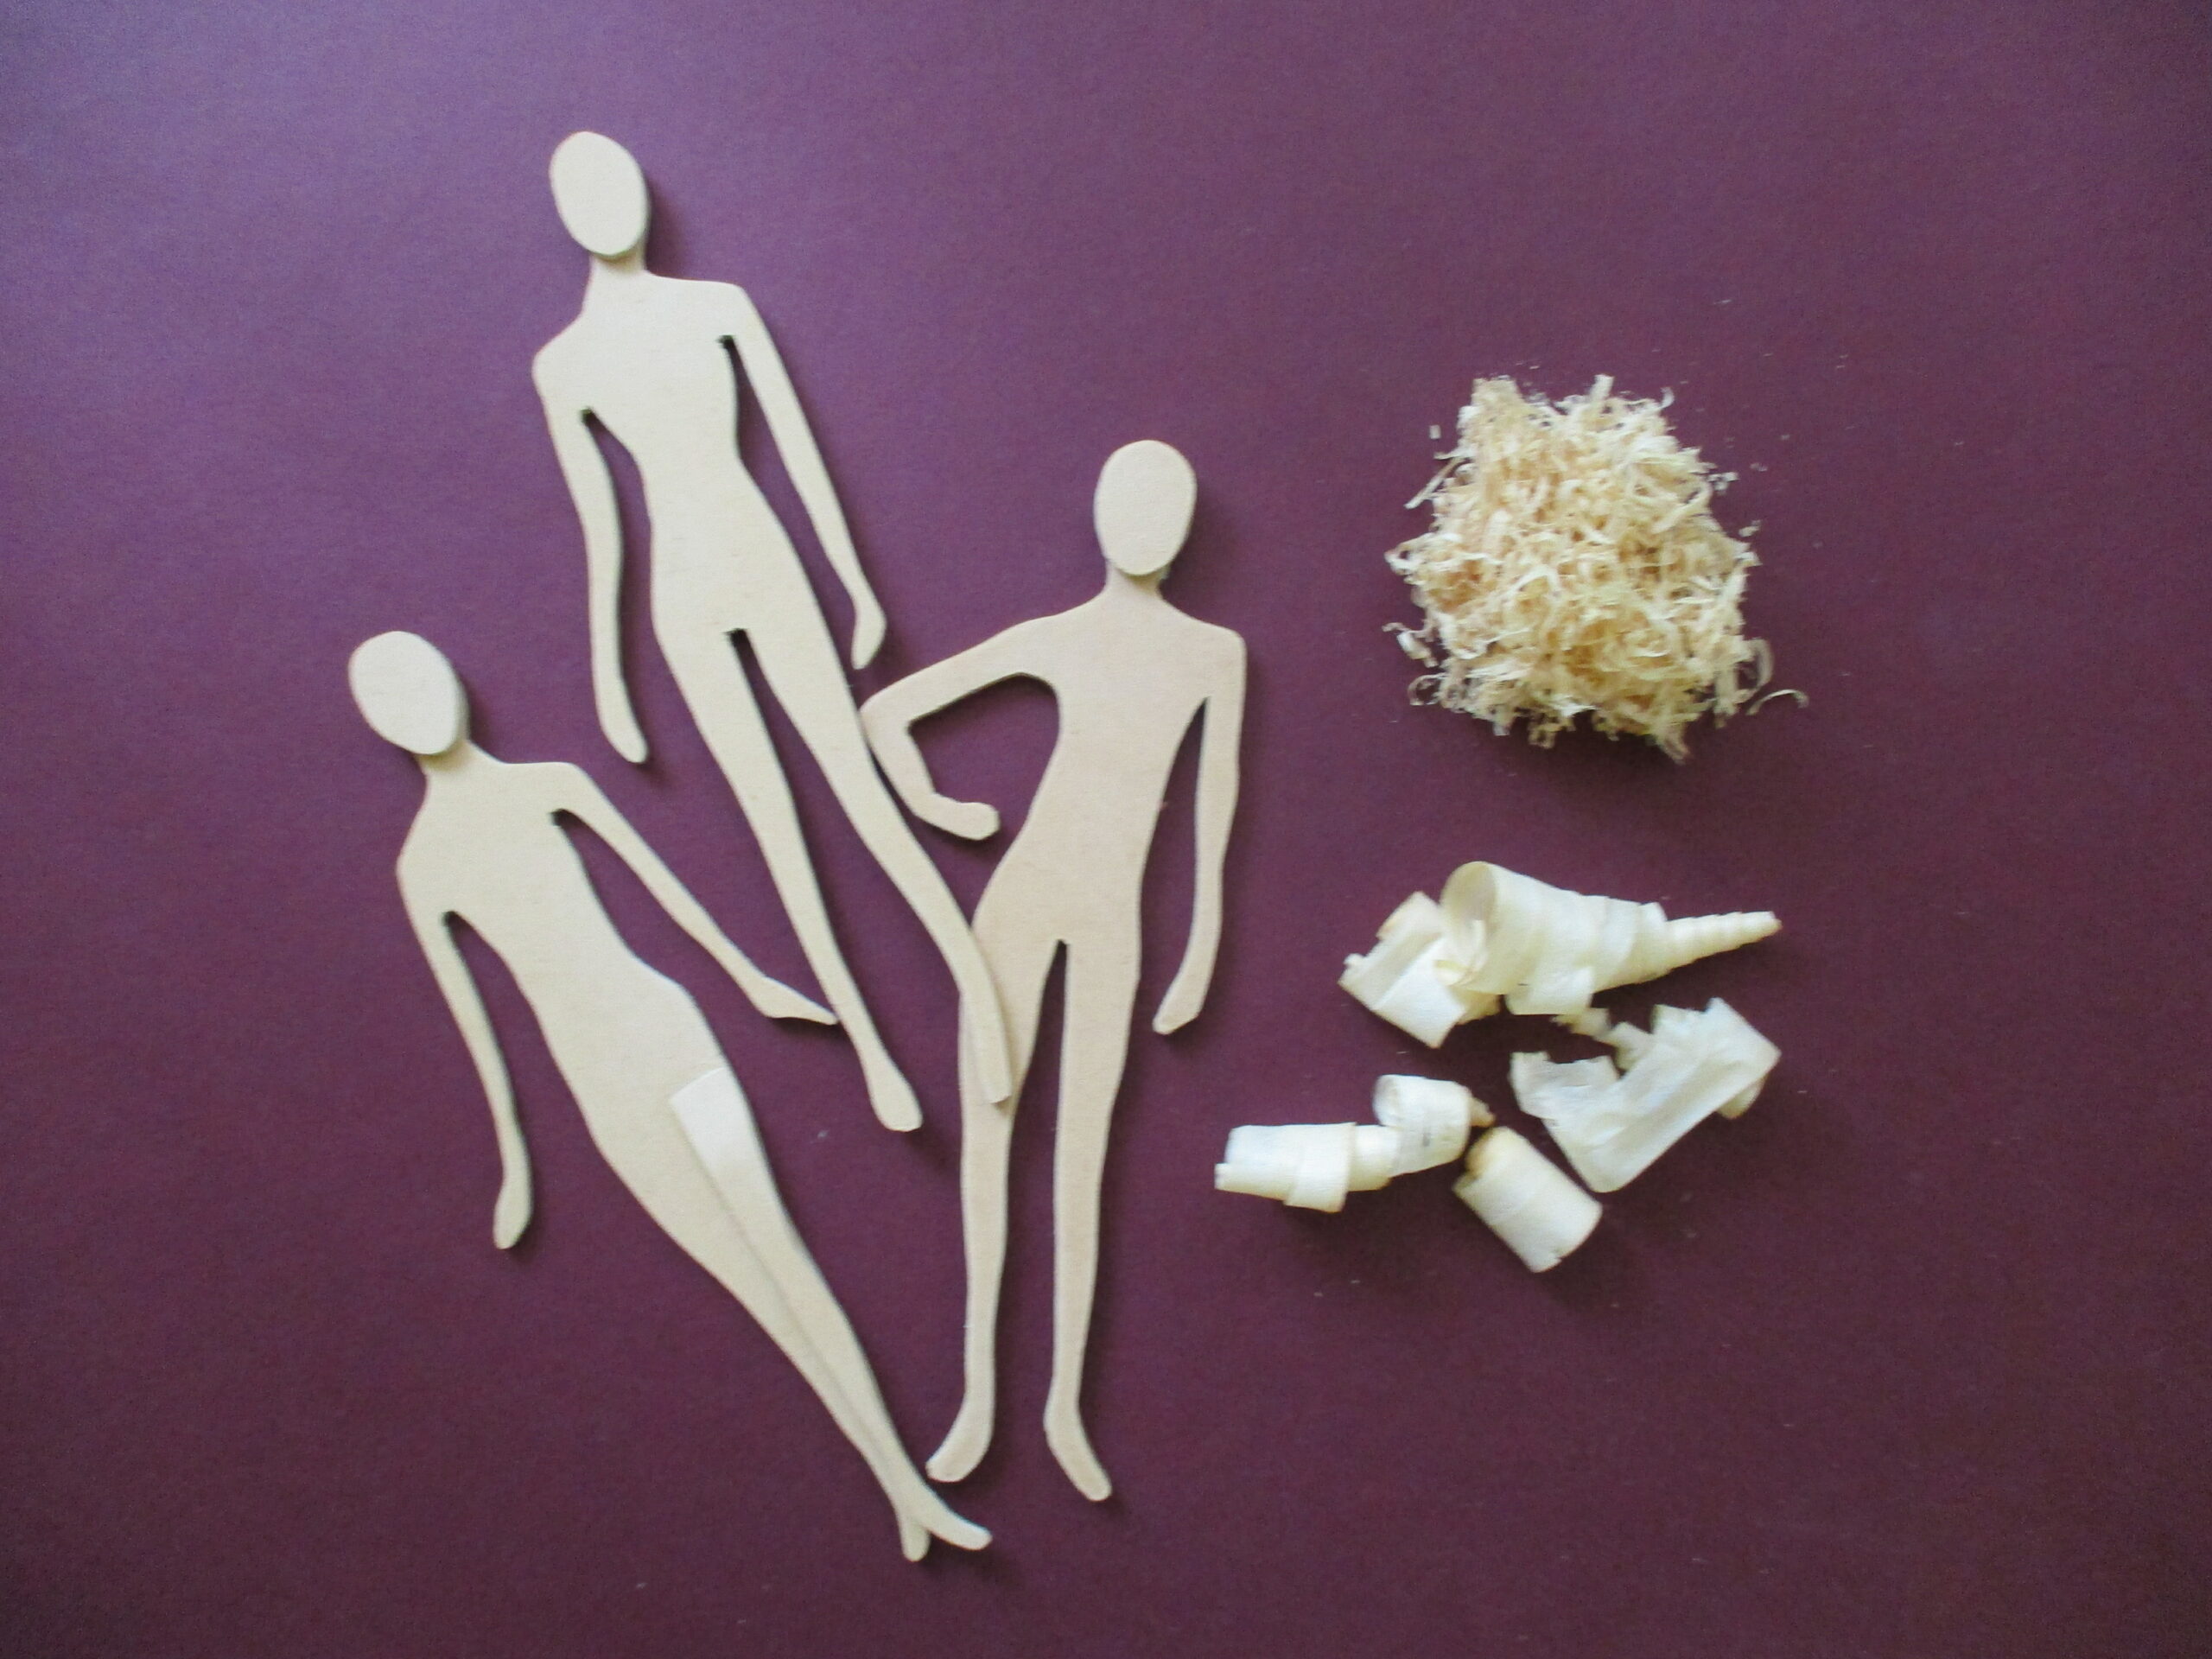
The mannequins are shaped with a scroll saw from offcuts of mdf (medium density fibreboard). While mannequins don’t usually have hair, I’ve used wood shavings as hair made their hats look and fit so much better.
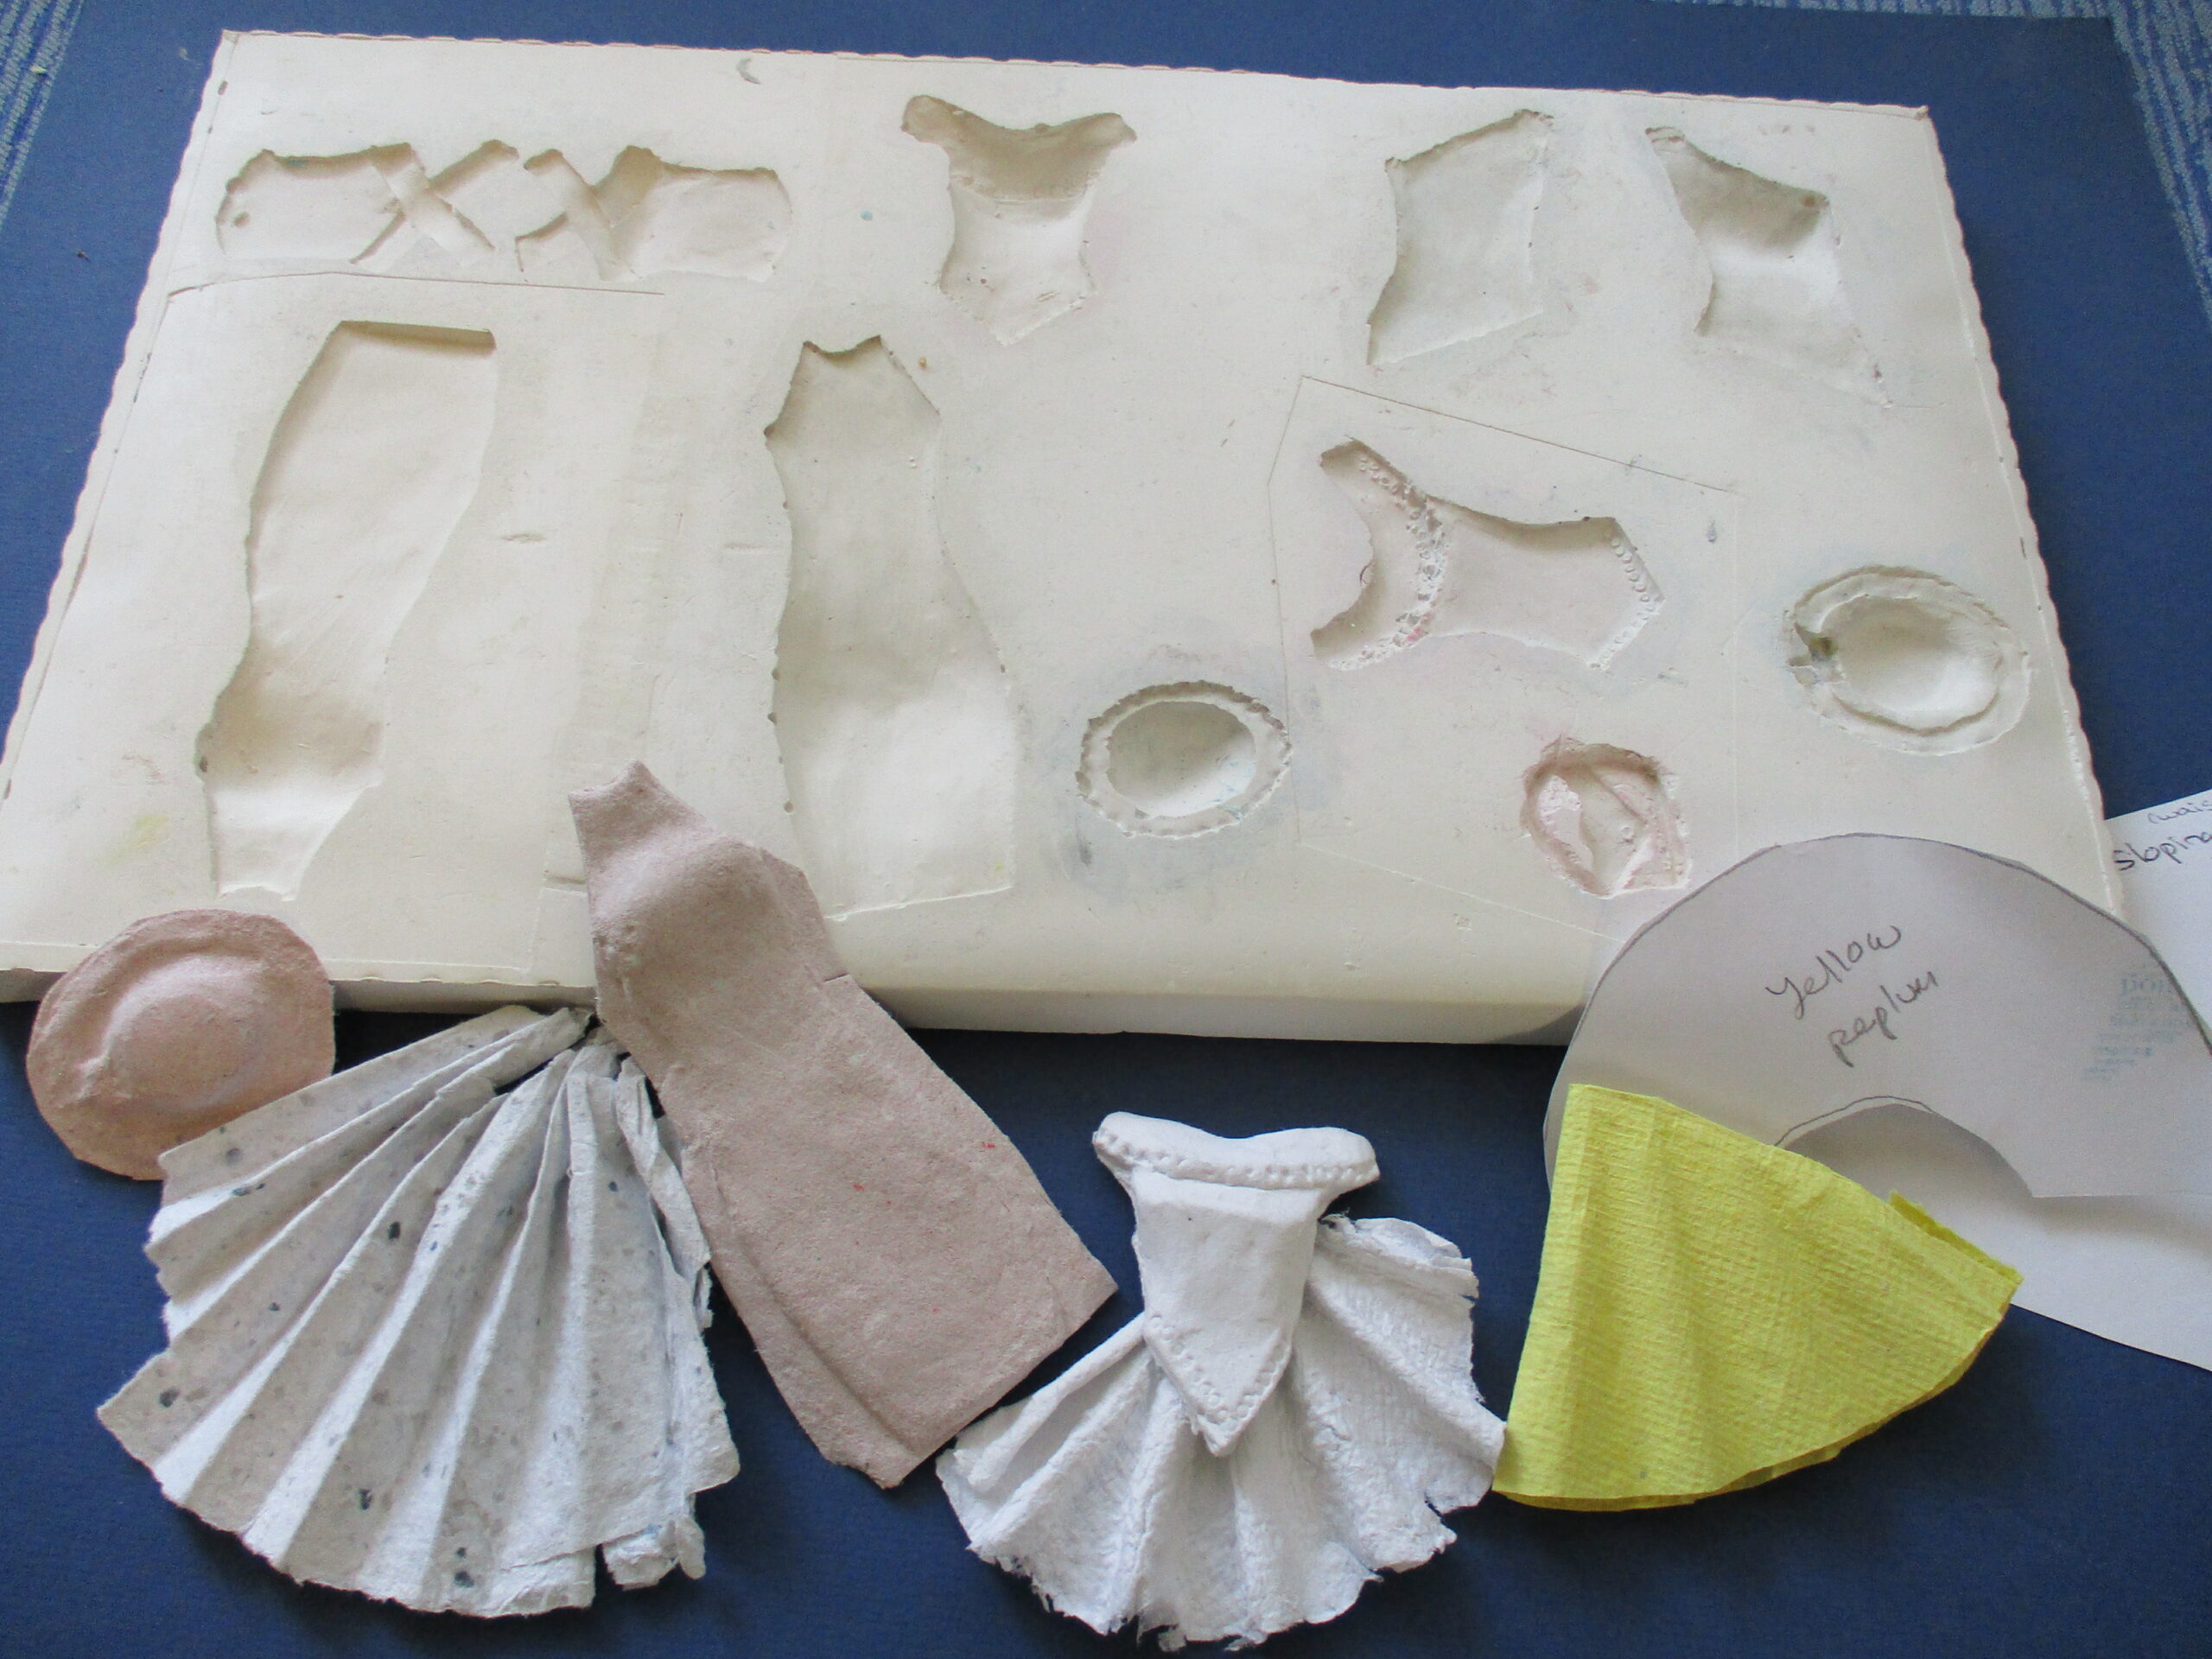
Paper scraps from office stationery, wrapping paper, craft offcuts etc, are shredded and mulched into paper pulp. The clothing is then constructed by experimenting with a variety of paper sculpture techniques; cast paper formed in plaster moulds (to give shape to the bodices and accessories), fluting and shaping the skirts by gently pulling wet pulp sheets onto fabric pieces and leaving them to dry, and by layering sheets of different coloured pulps together.
Mannequins
Moulded & shaped paper
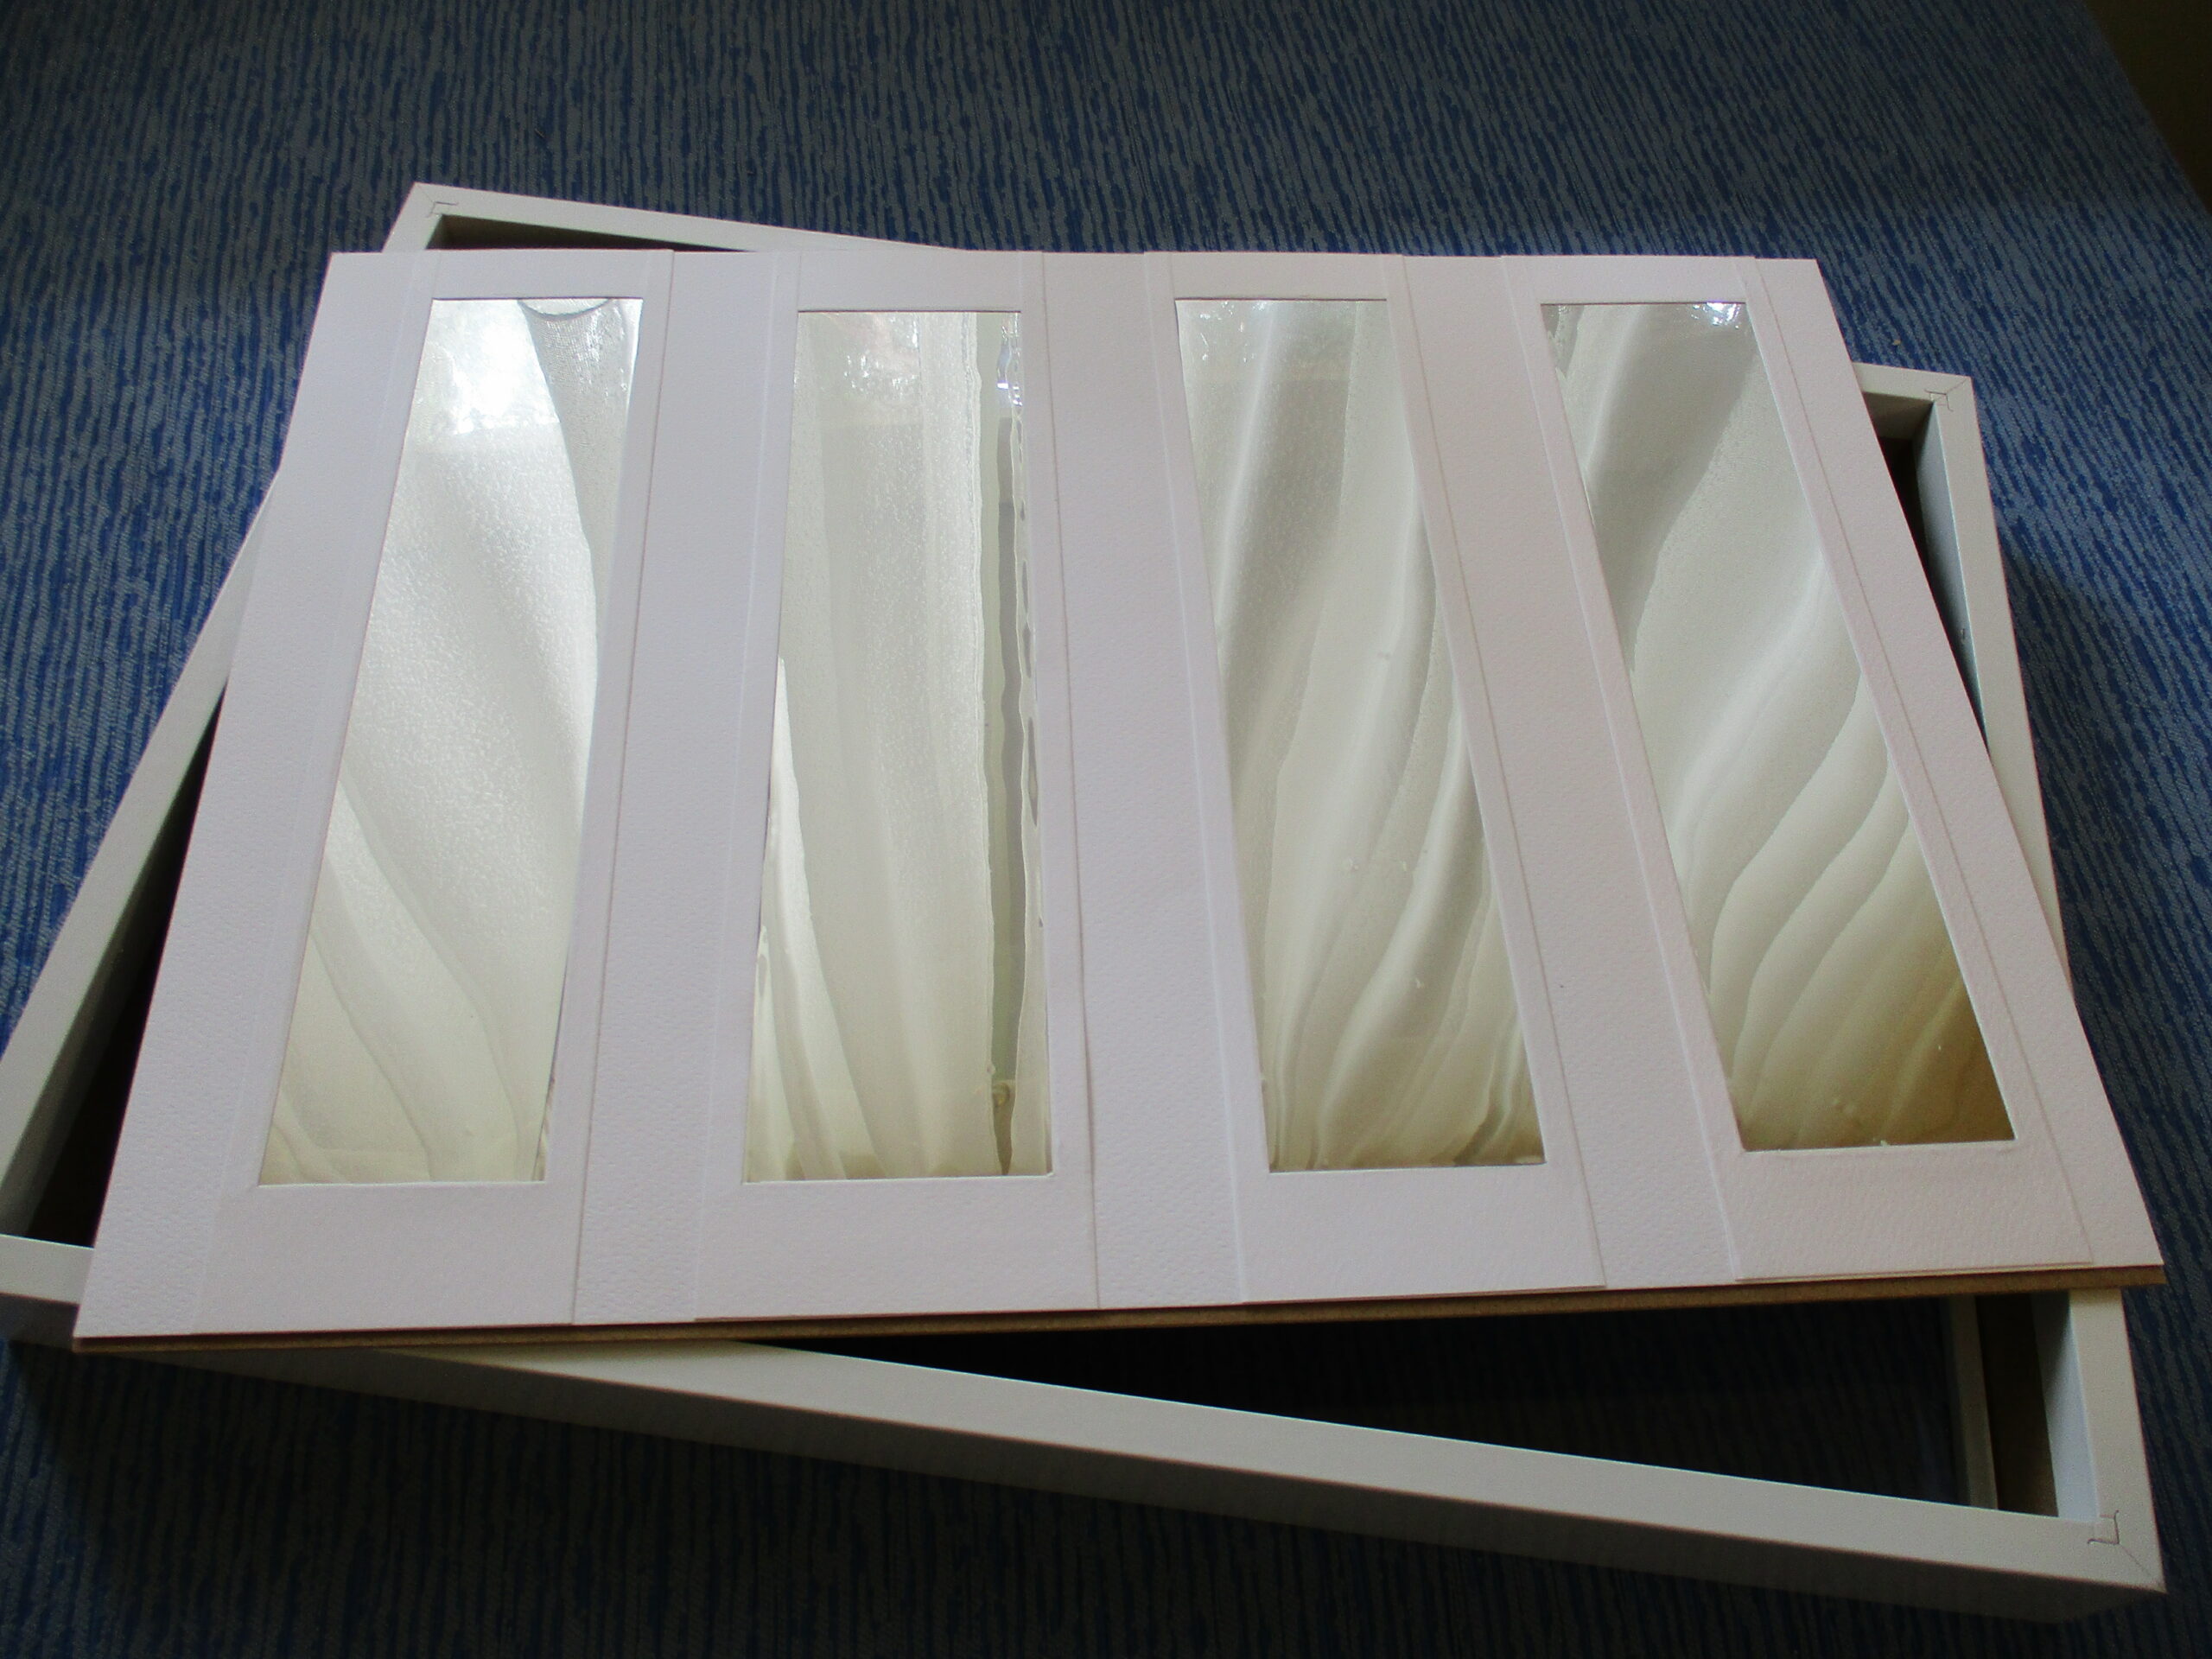
Mirrored ‘shop window’
I’ve used mirror paper in the background to give the impression of a shop window, and also to show off the back of the models.
This piece was created for a Fringe exhibition in 2022 at Gallery 1855 called “Fashion – Make a Statement”.
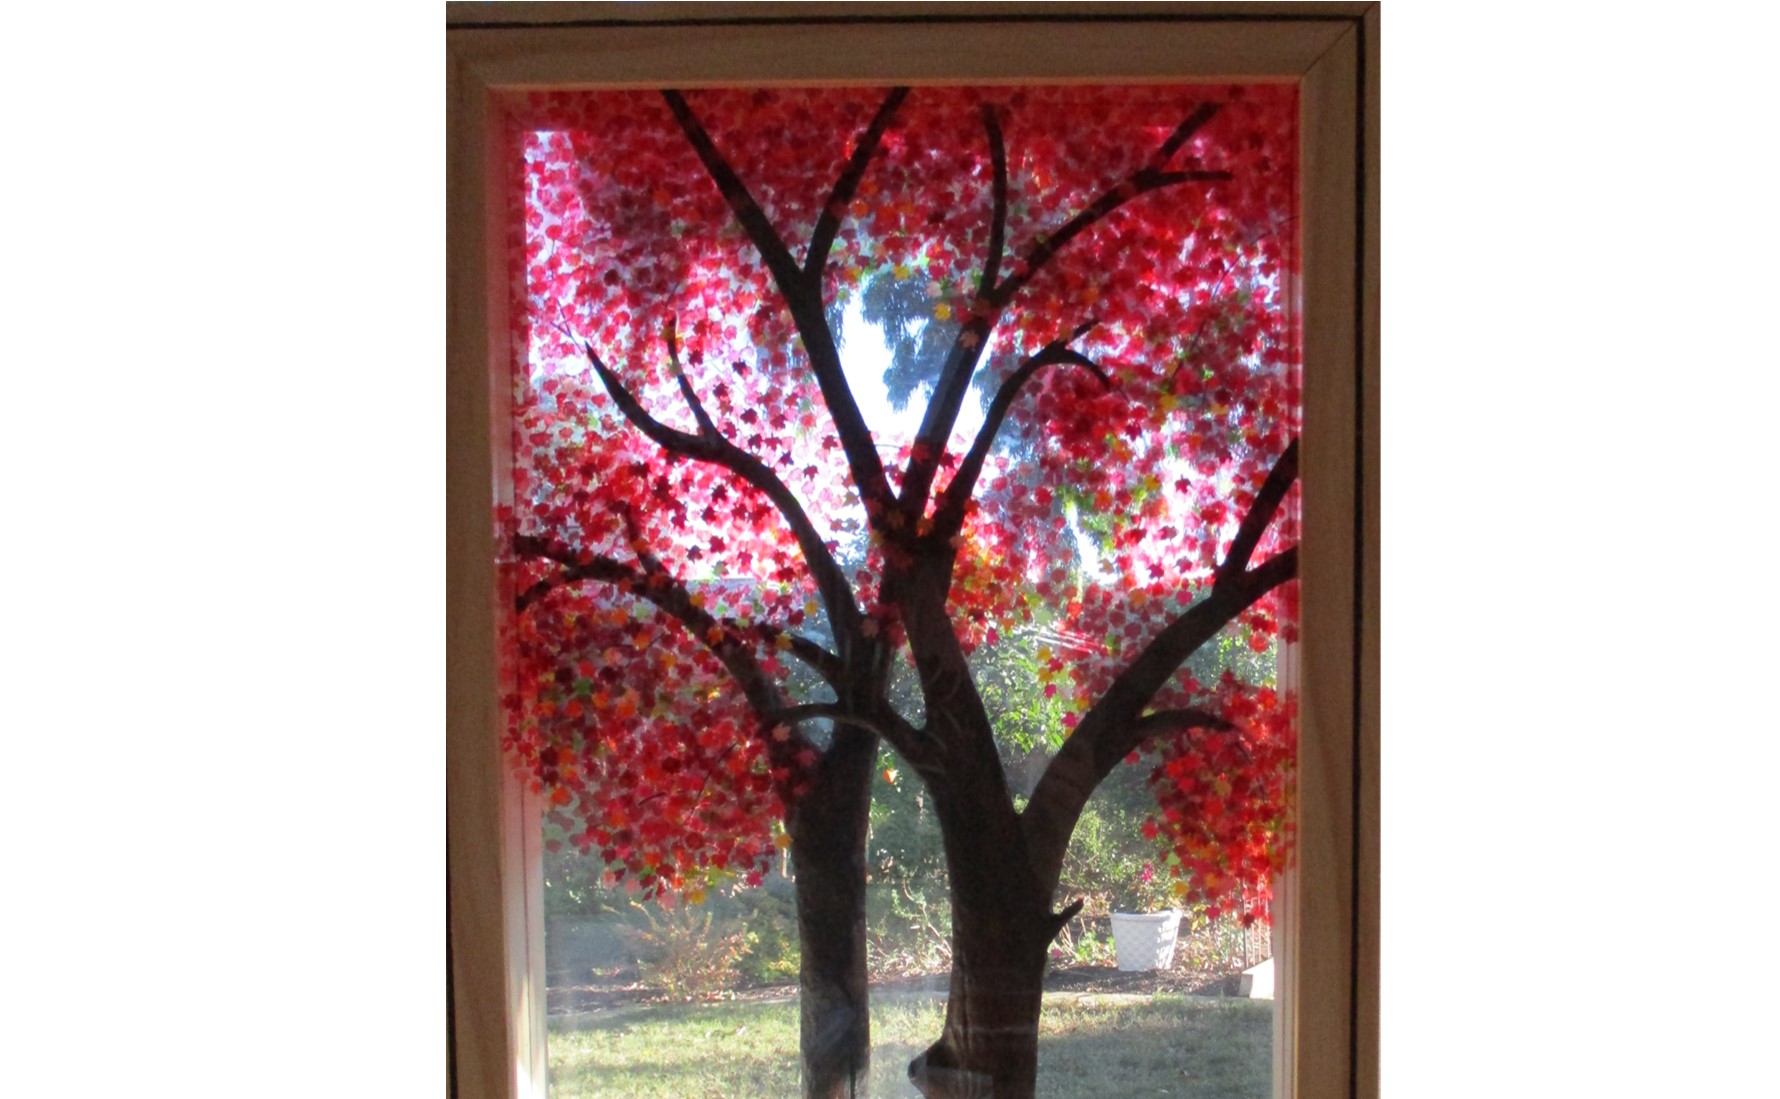
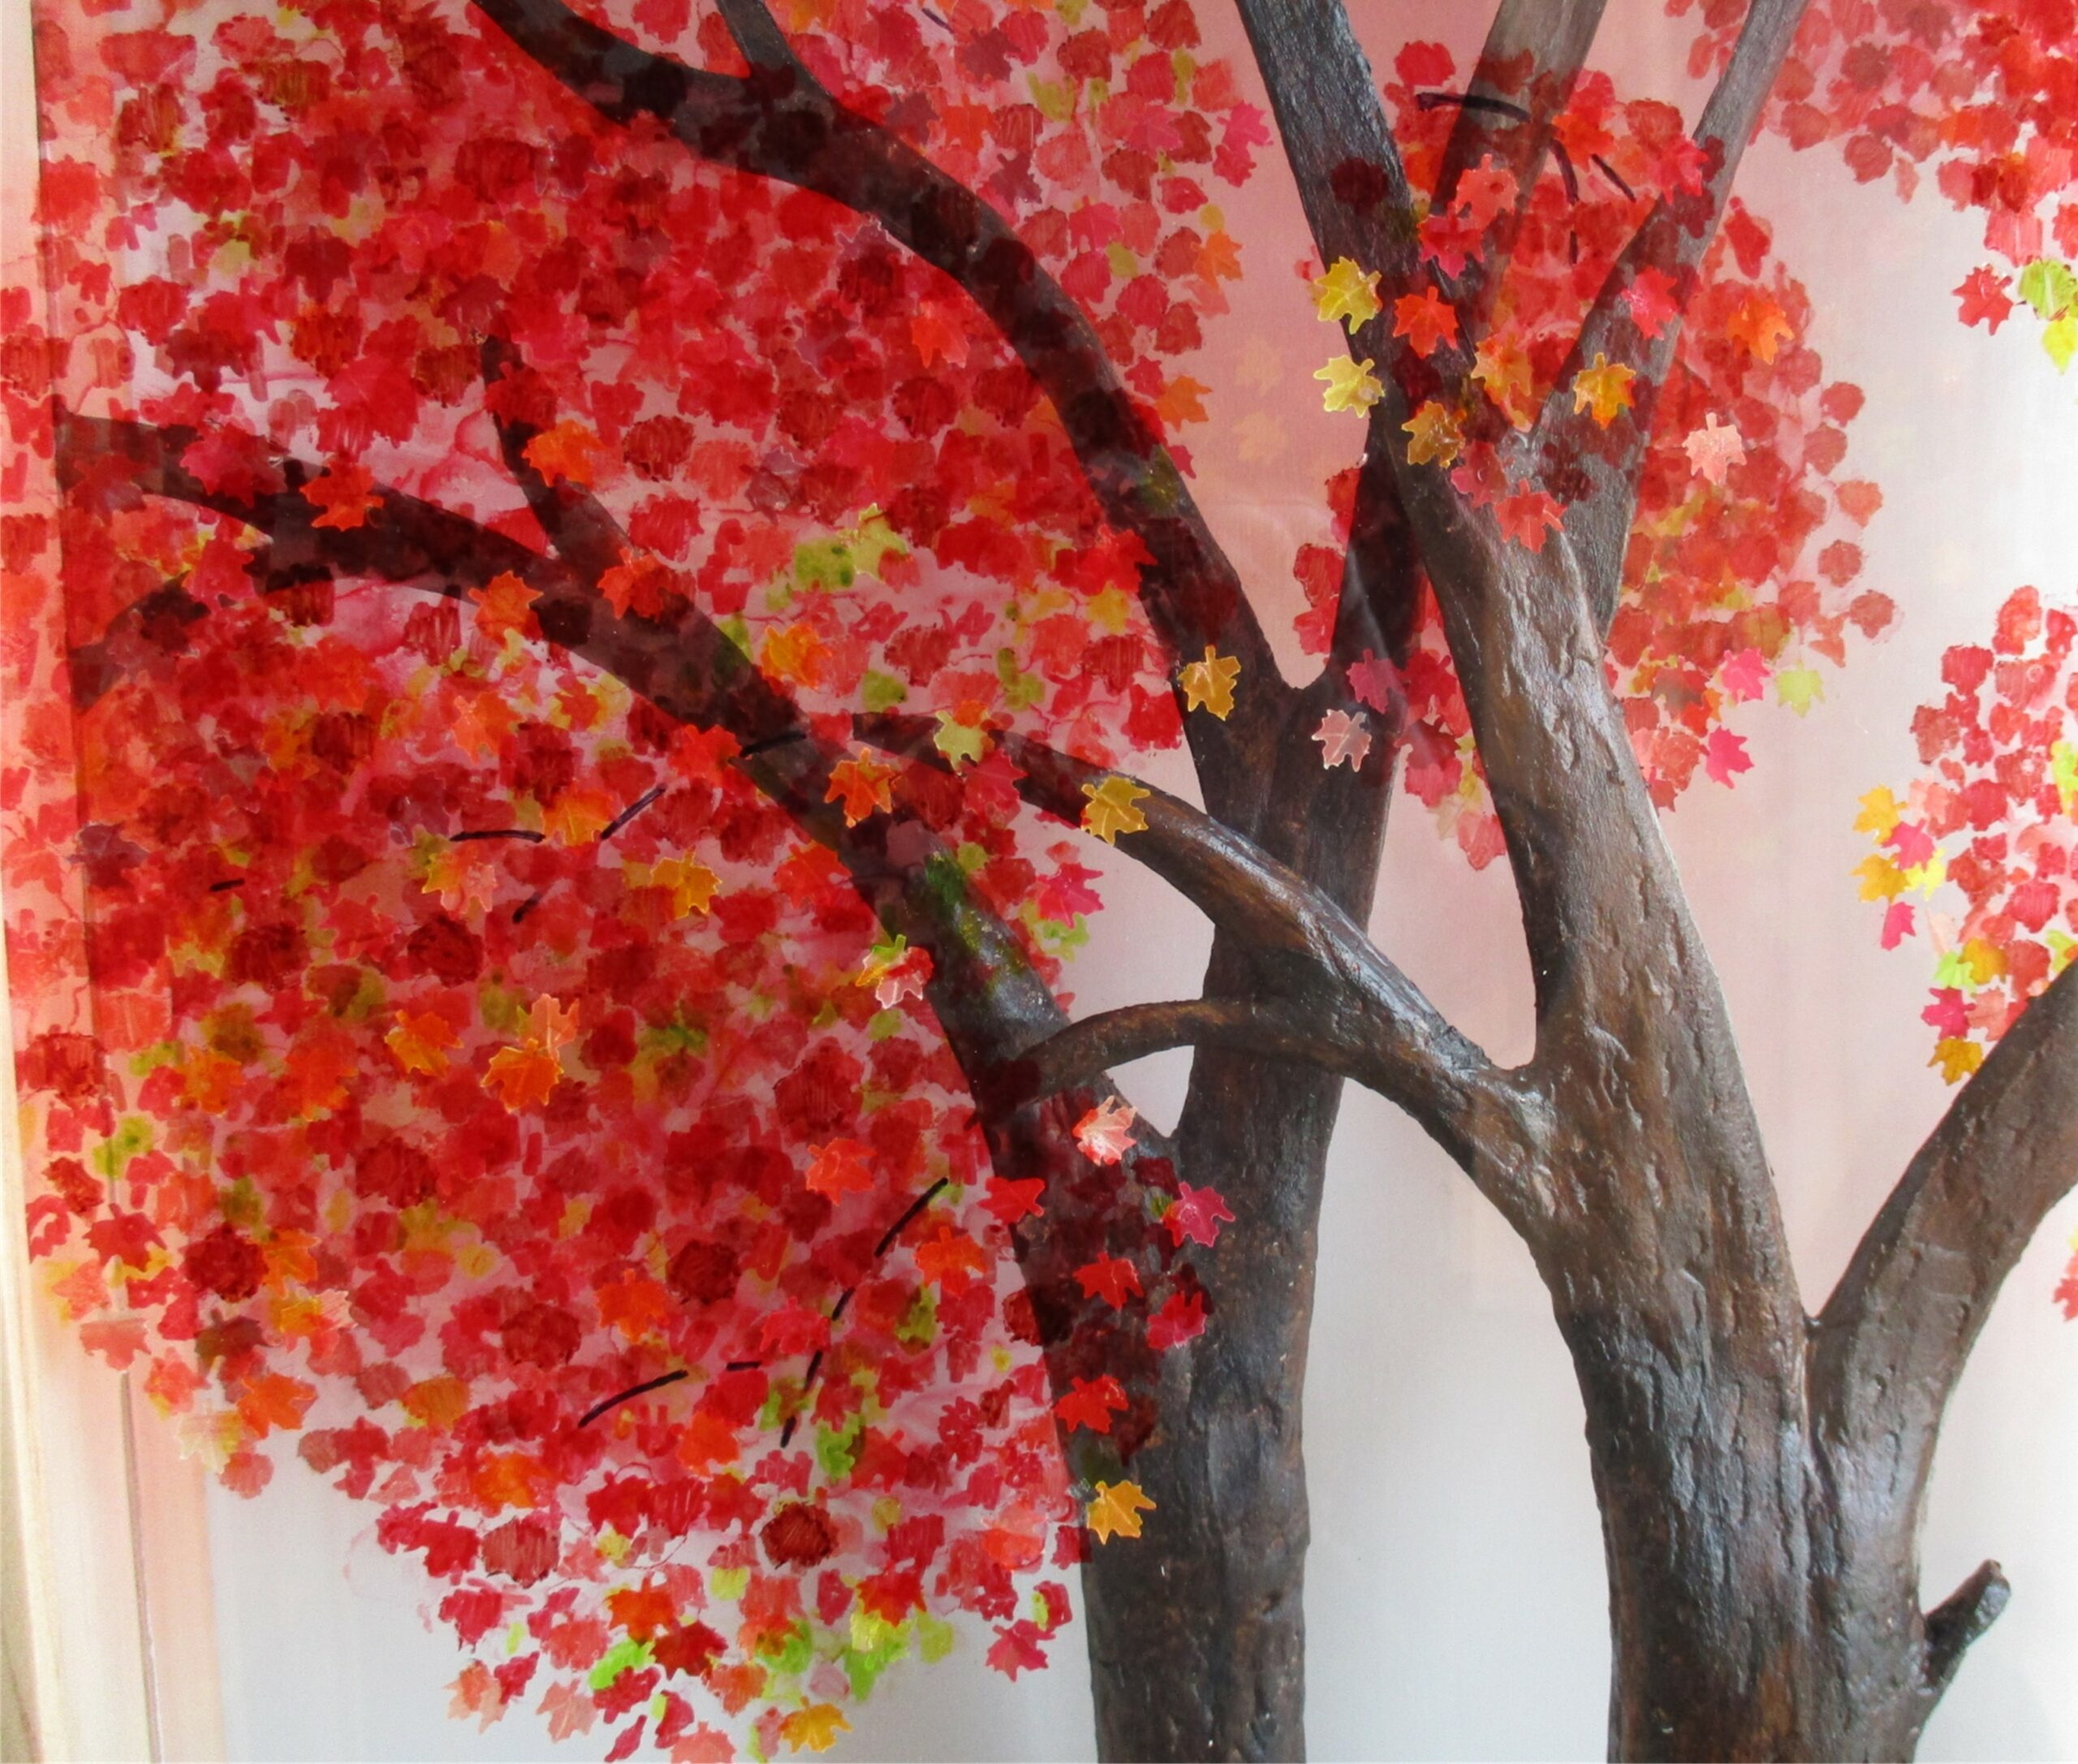
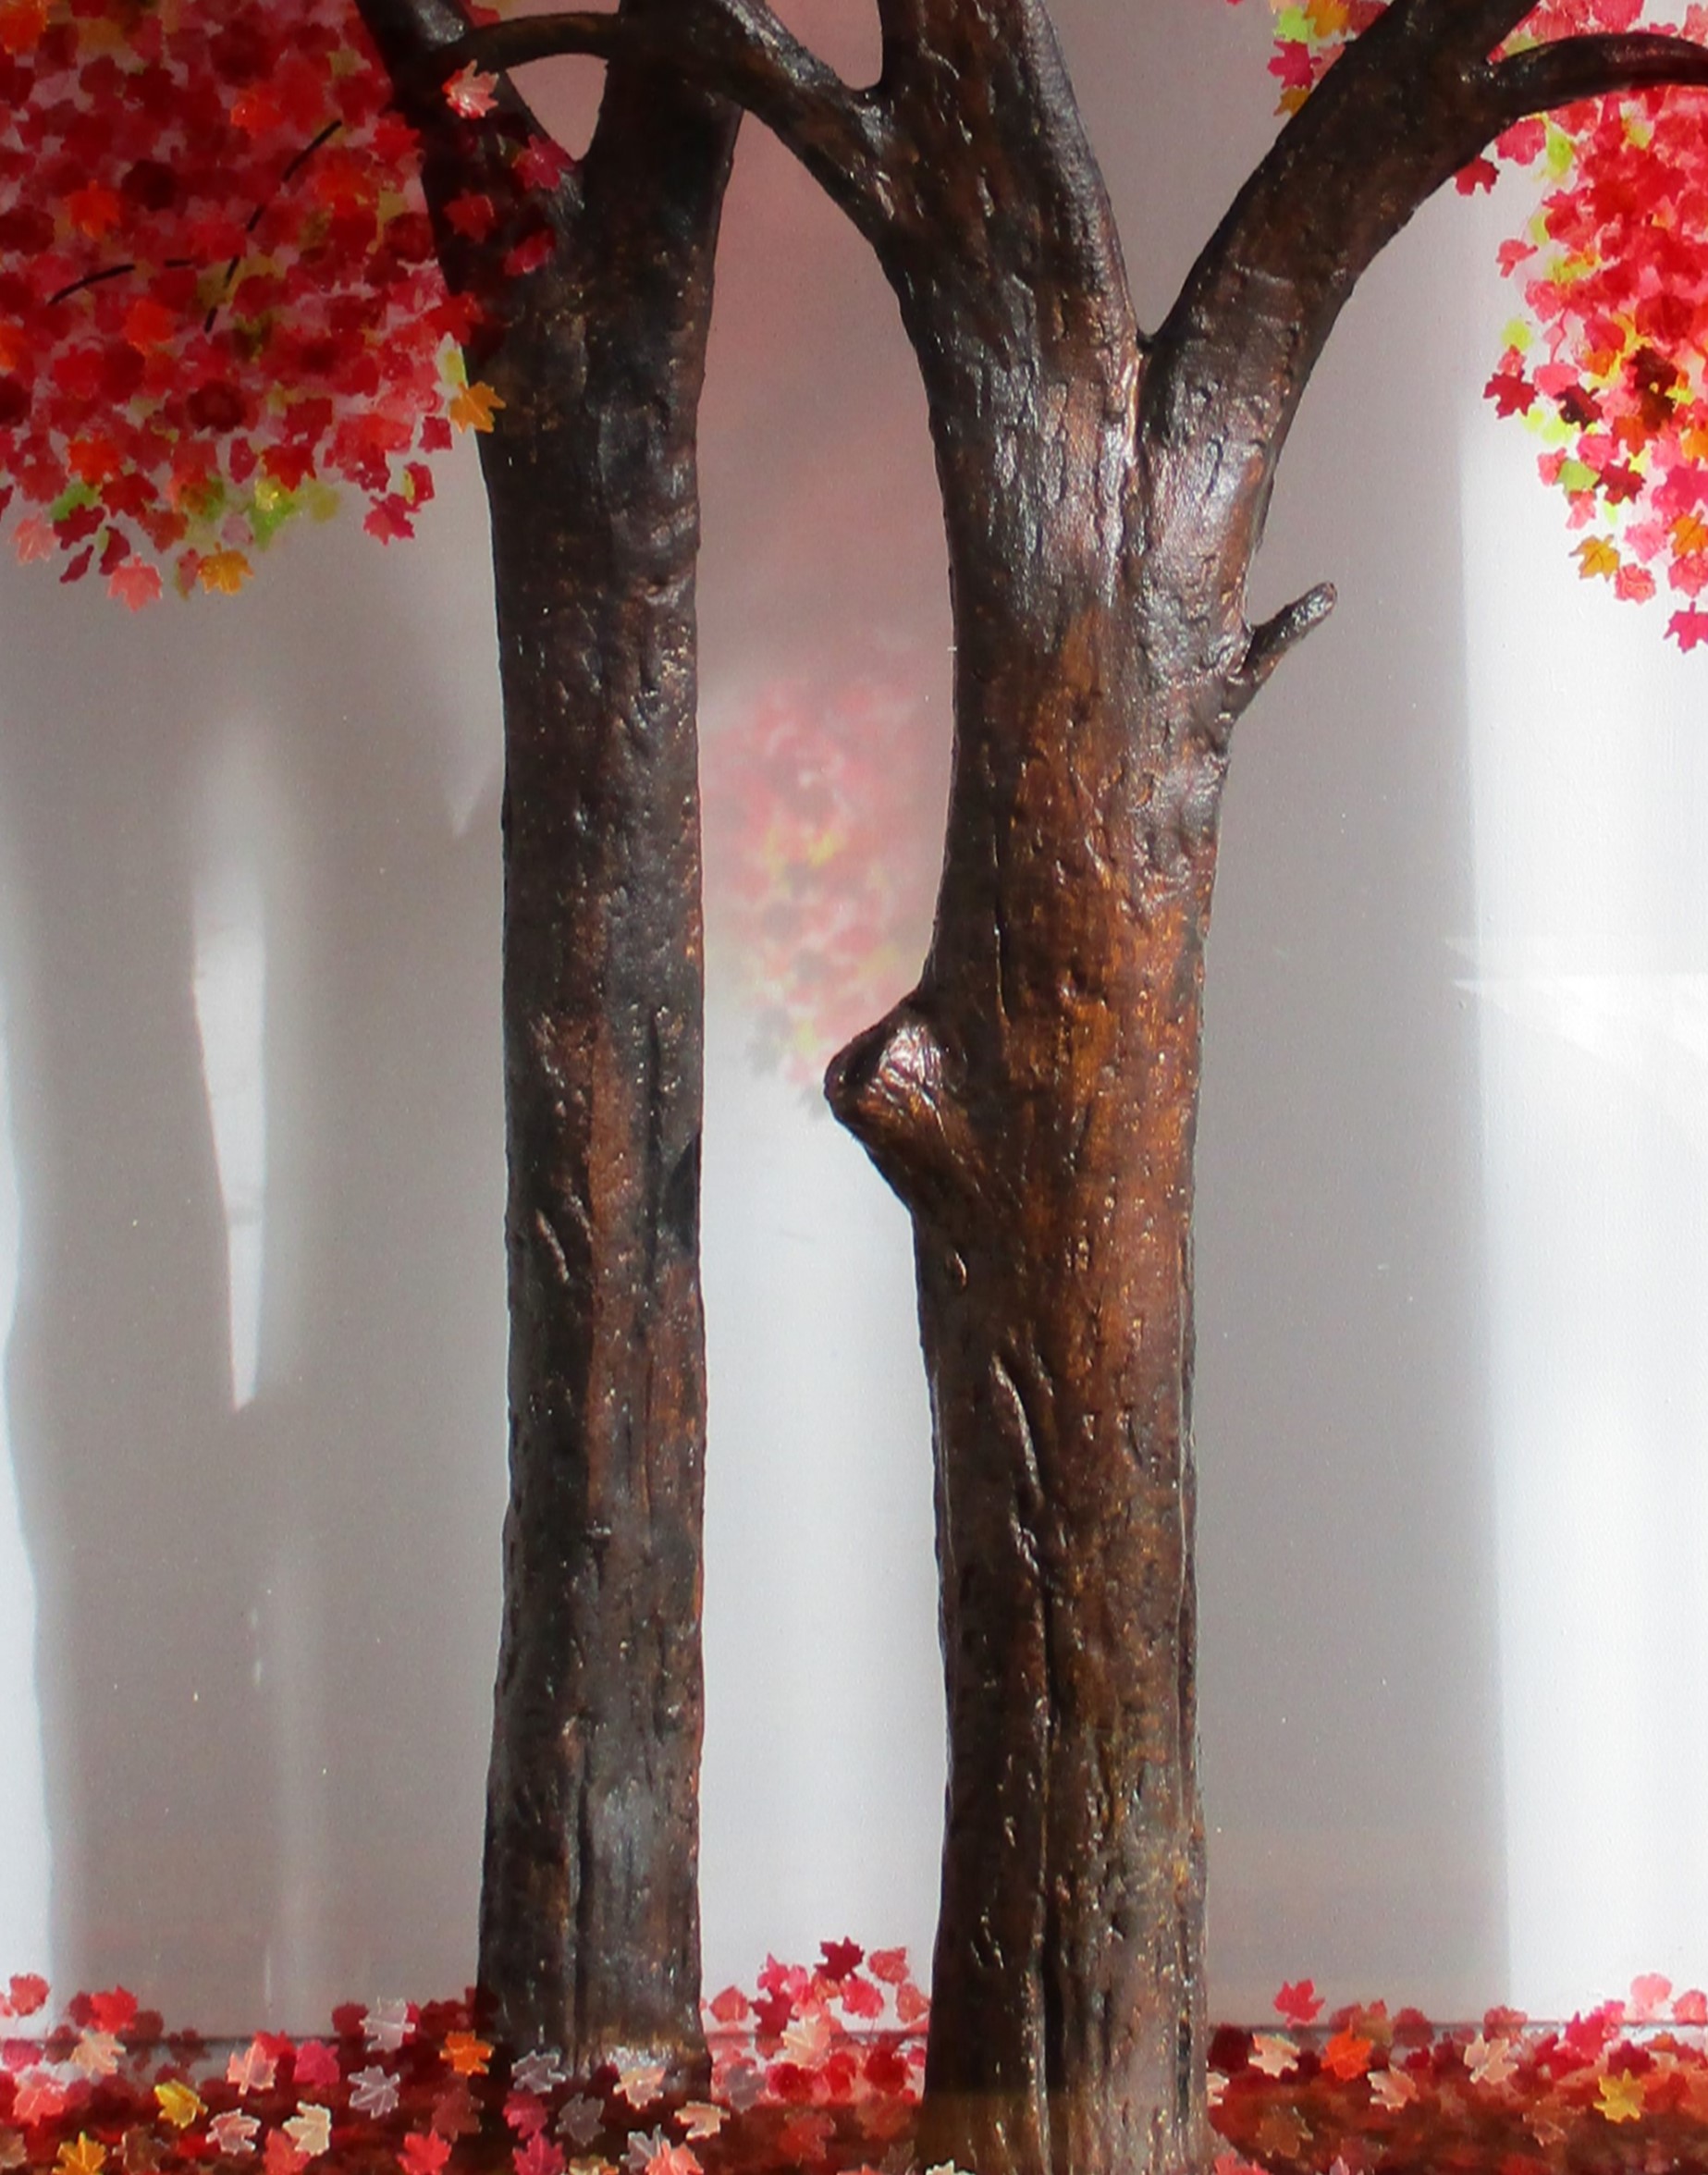
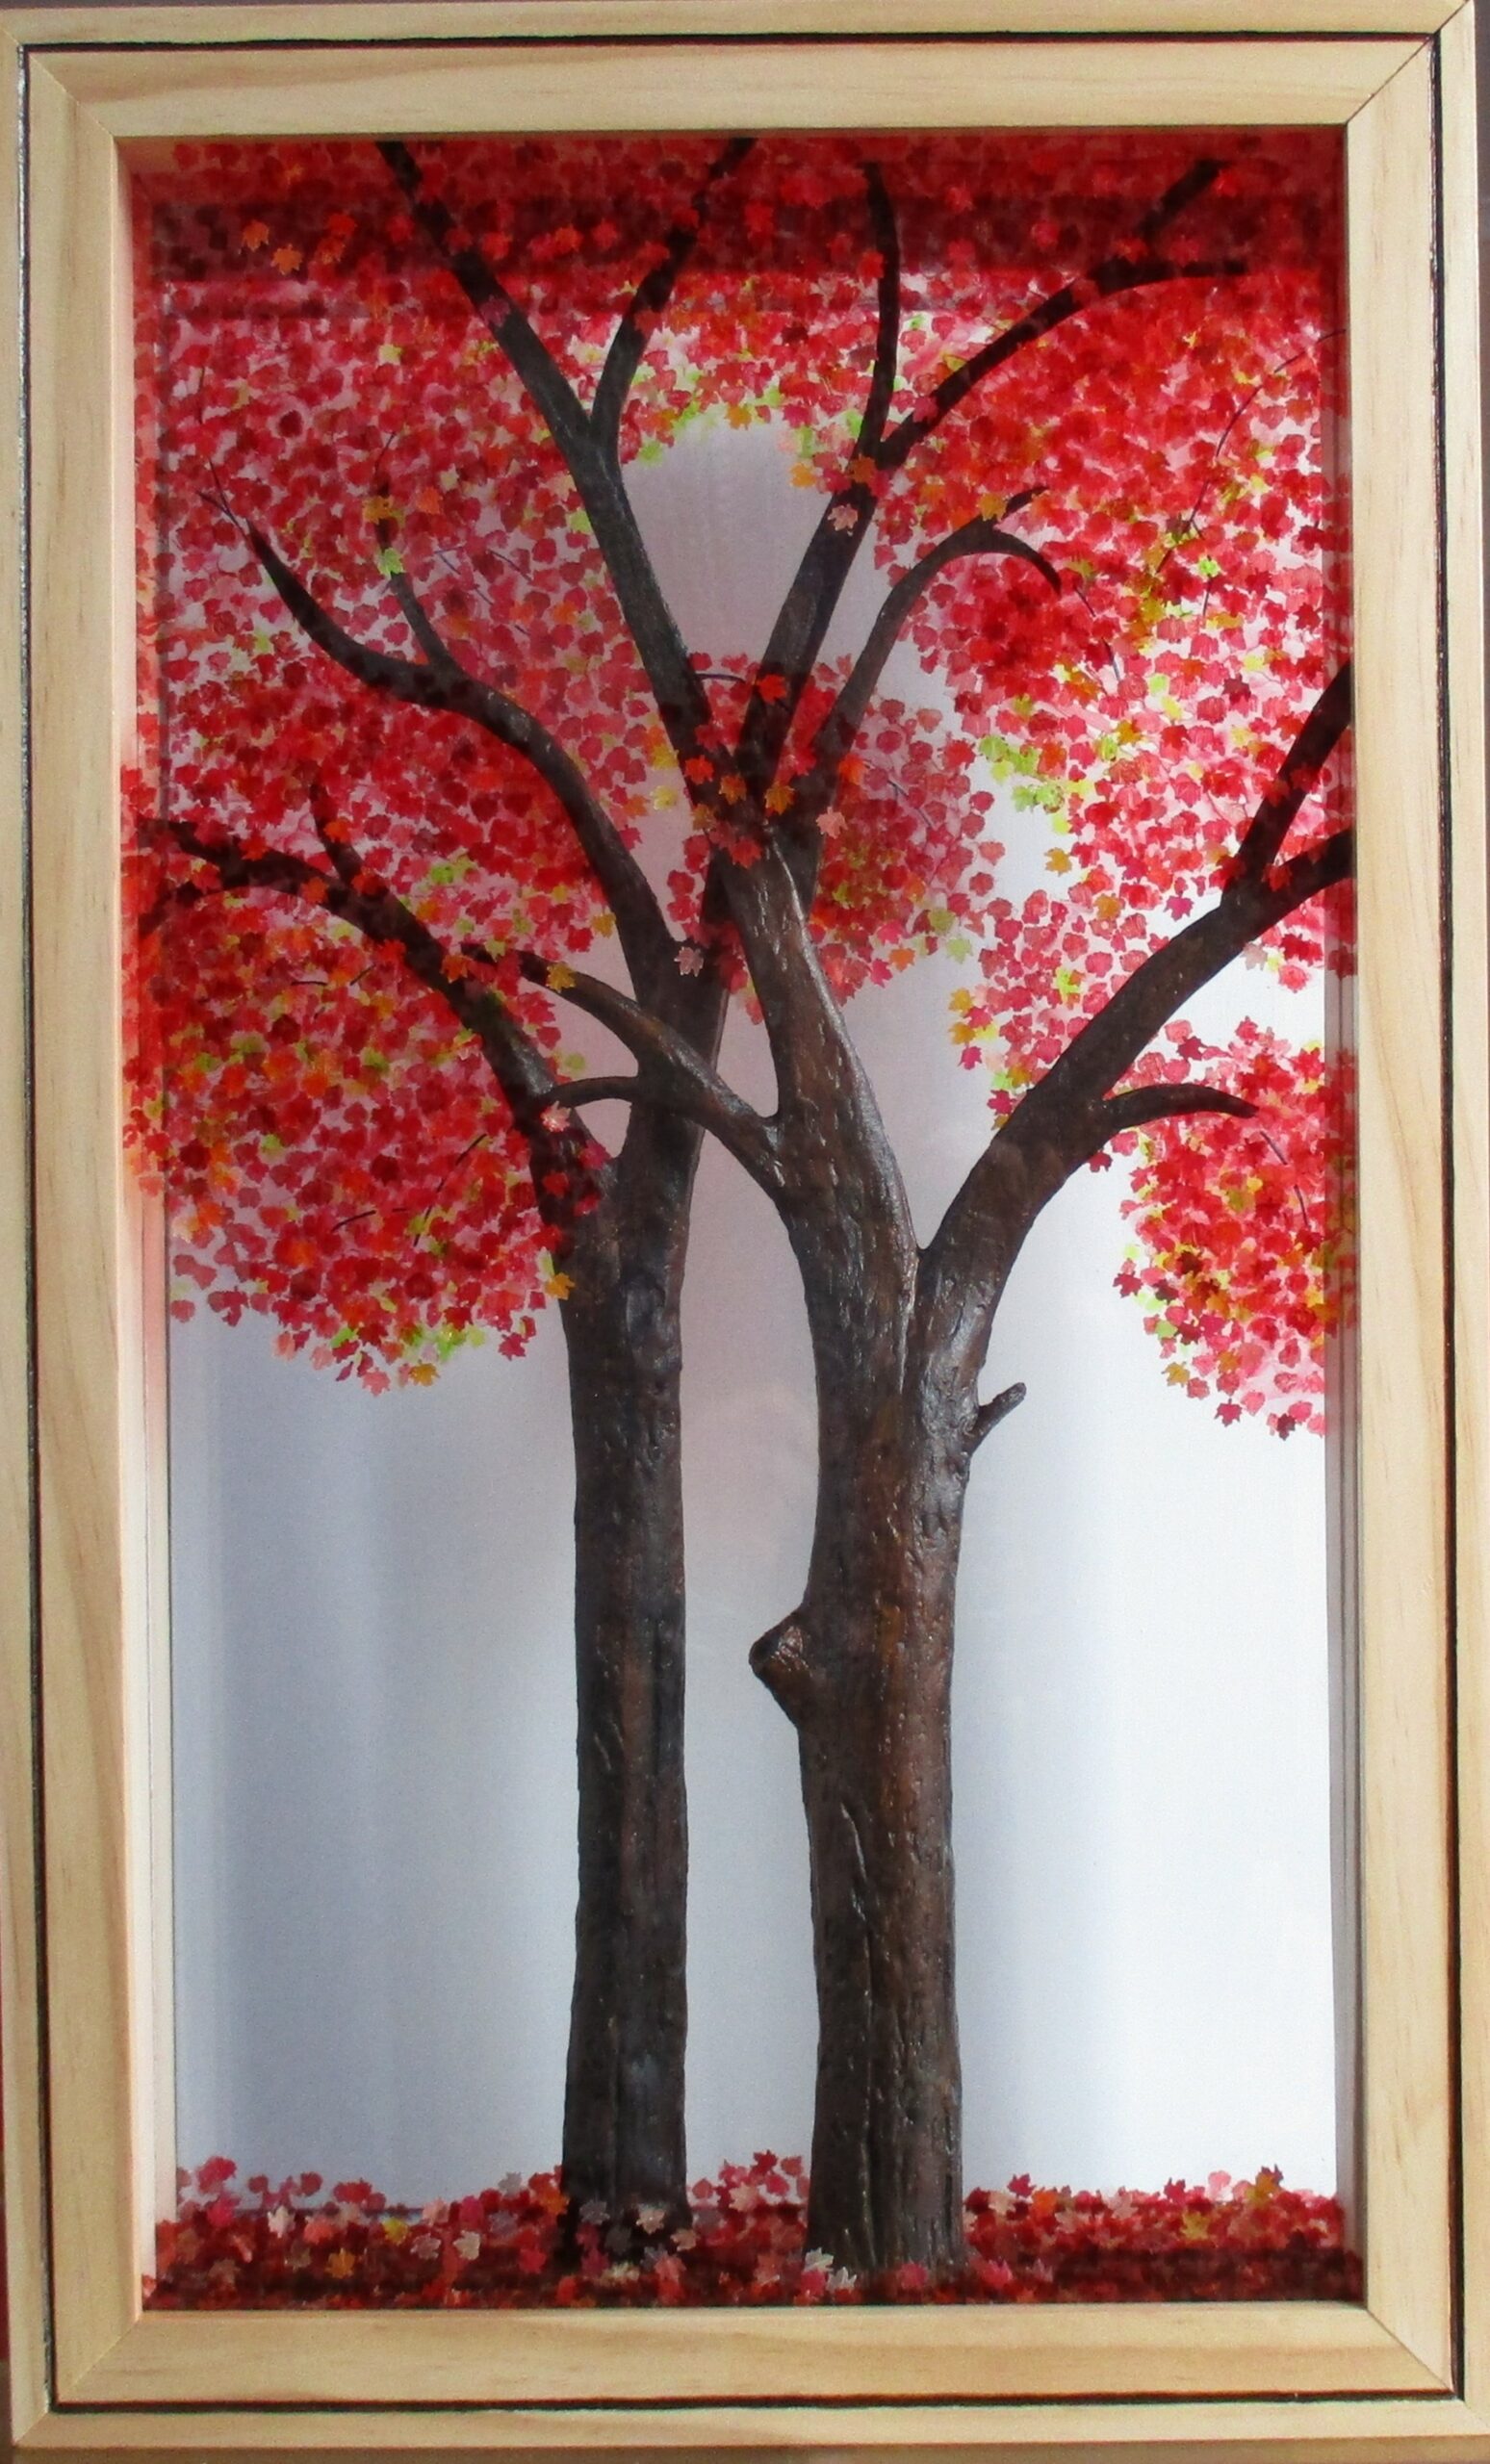
Winter is a perfect season for hours of experiments with art. The days grow cold and dim, but not before the glorious splash of autumn that is such an inspiration! Watching the sun illuminate the leaves of maple trees, I wanted to capture their colour, glow and delicacy, and to contrast it with the dark, solid trunks.
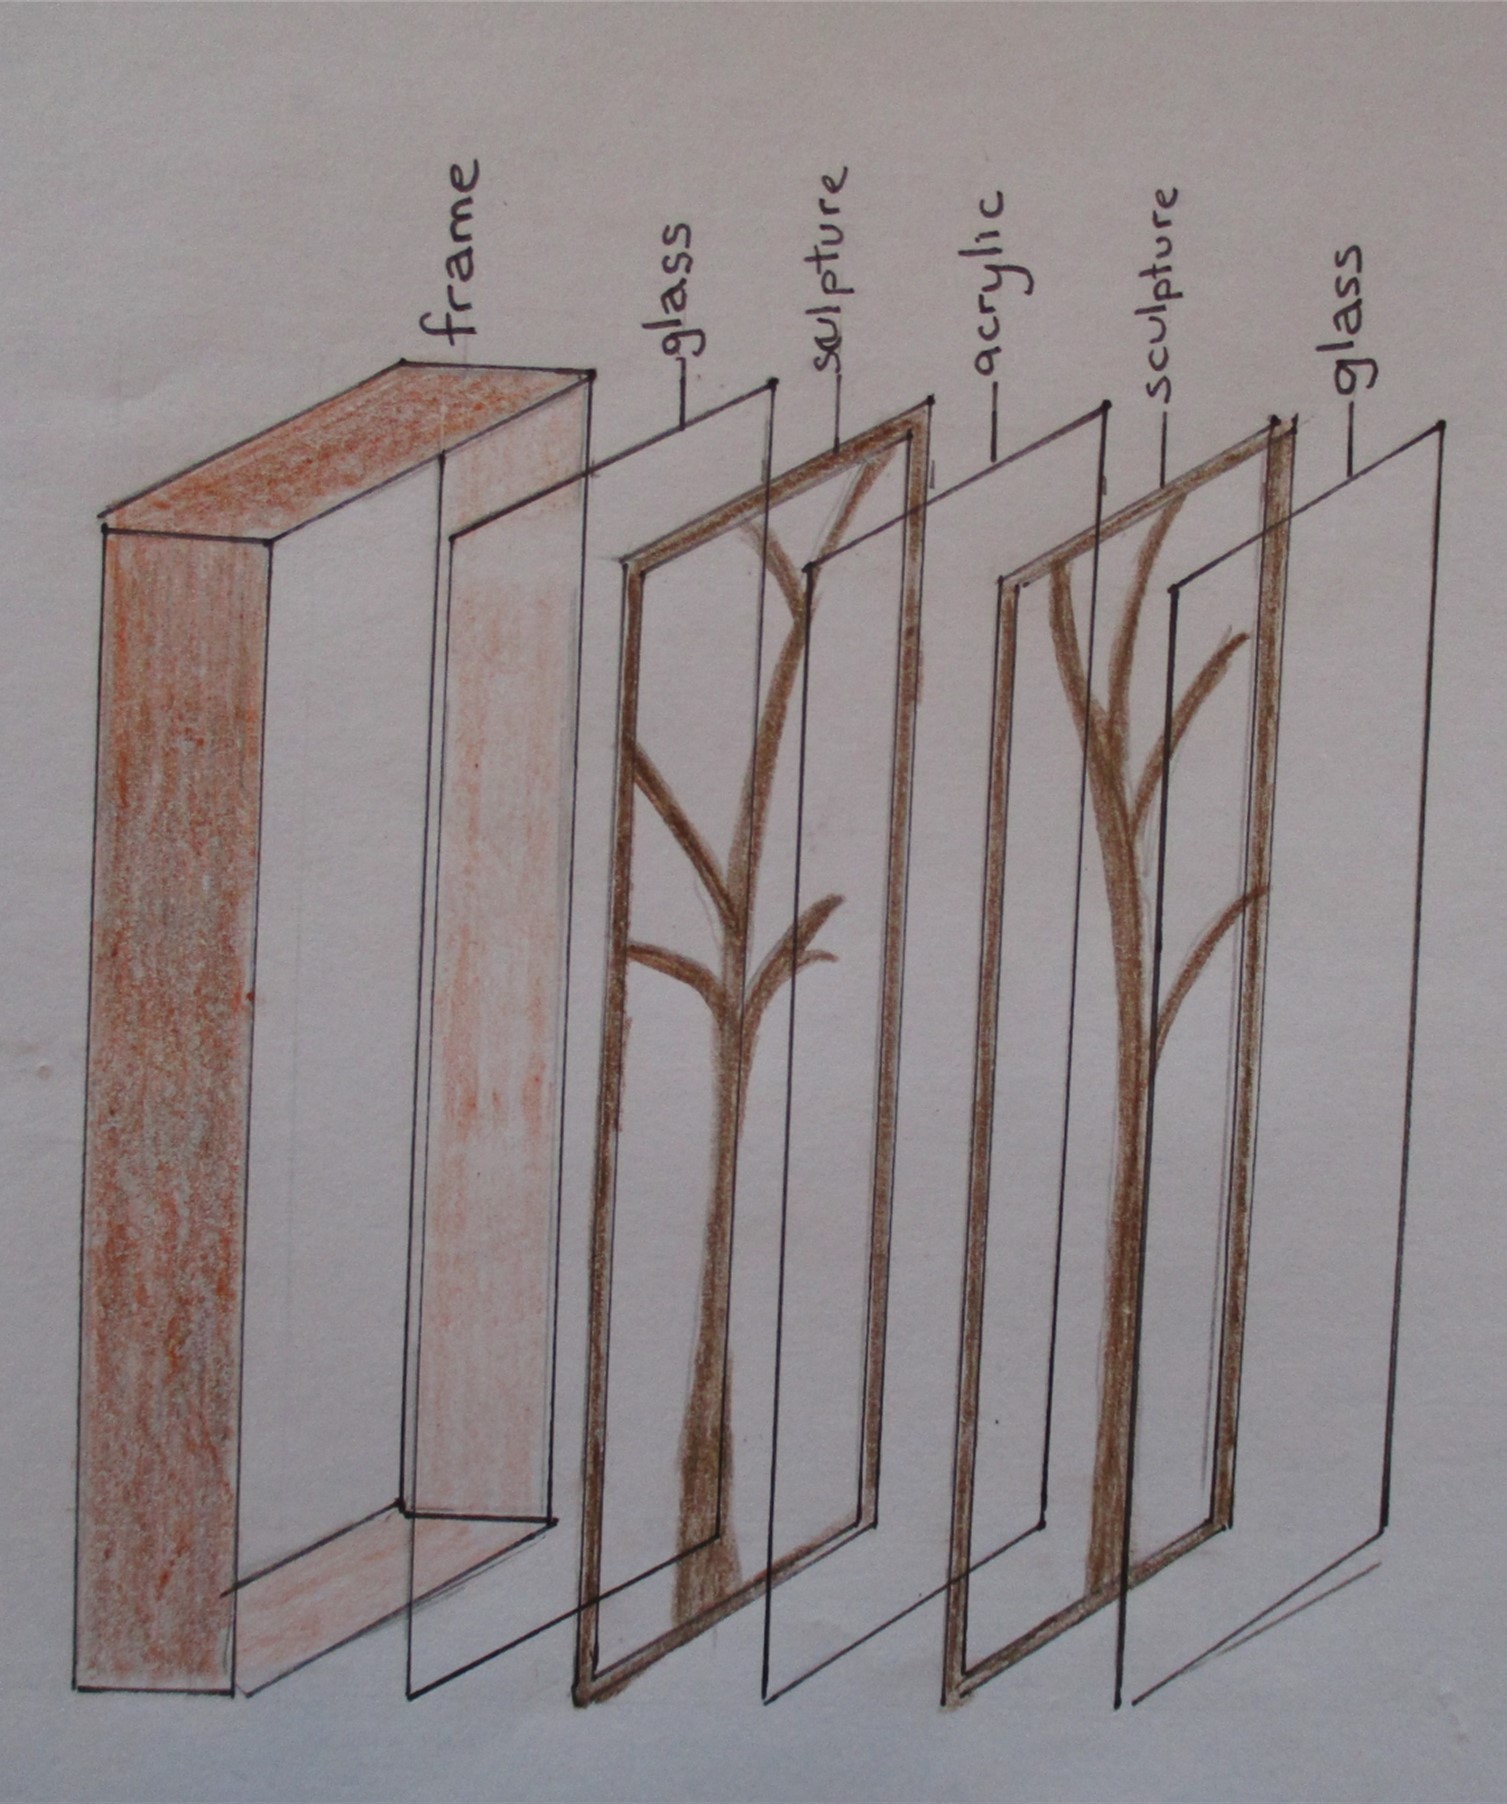
It’s been fun to further develop my love of layering and 3D art, as well as using mainly recycled elements. I’ve cut to size glass and clear acrylic from old picture frames found in op-shops and used recycled paper for the sculptured trunks and branches.
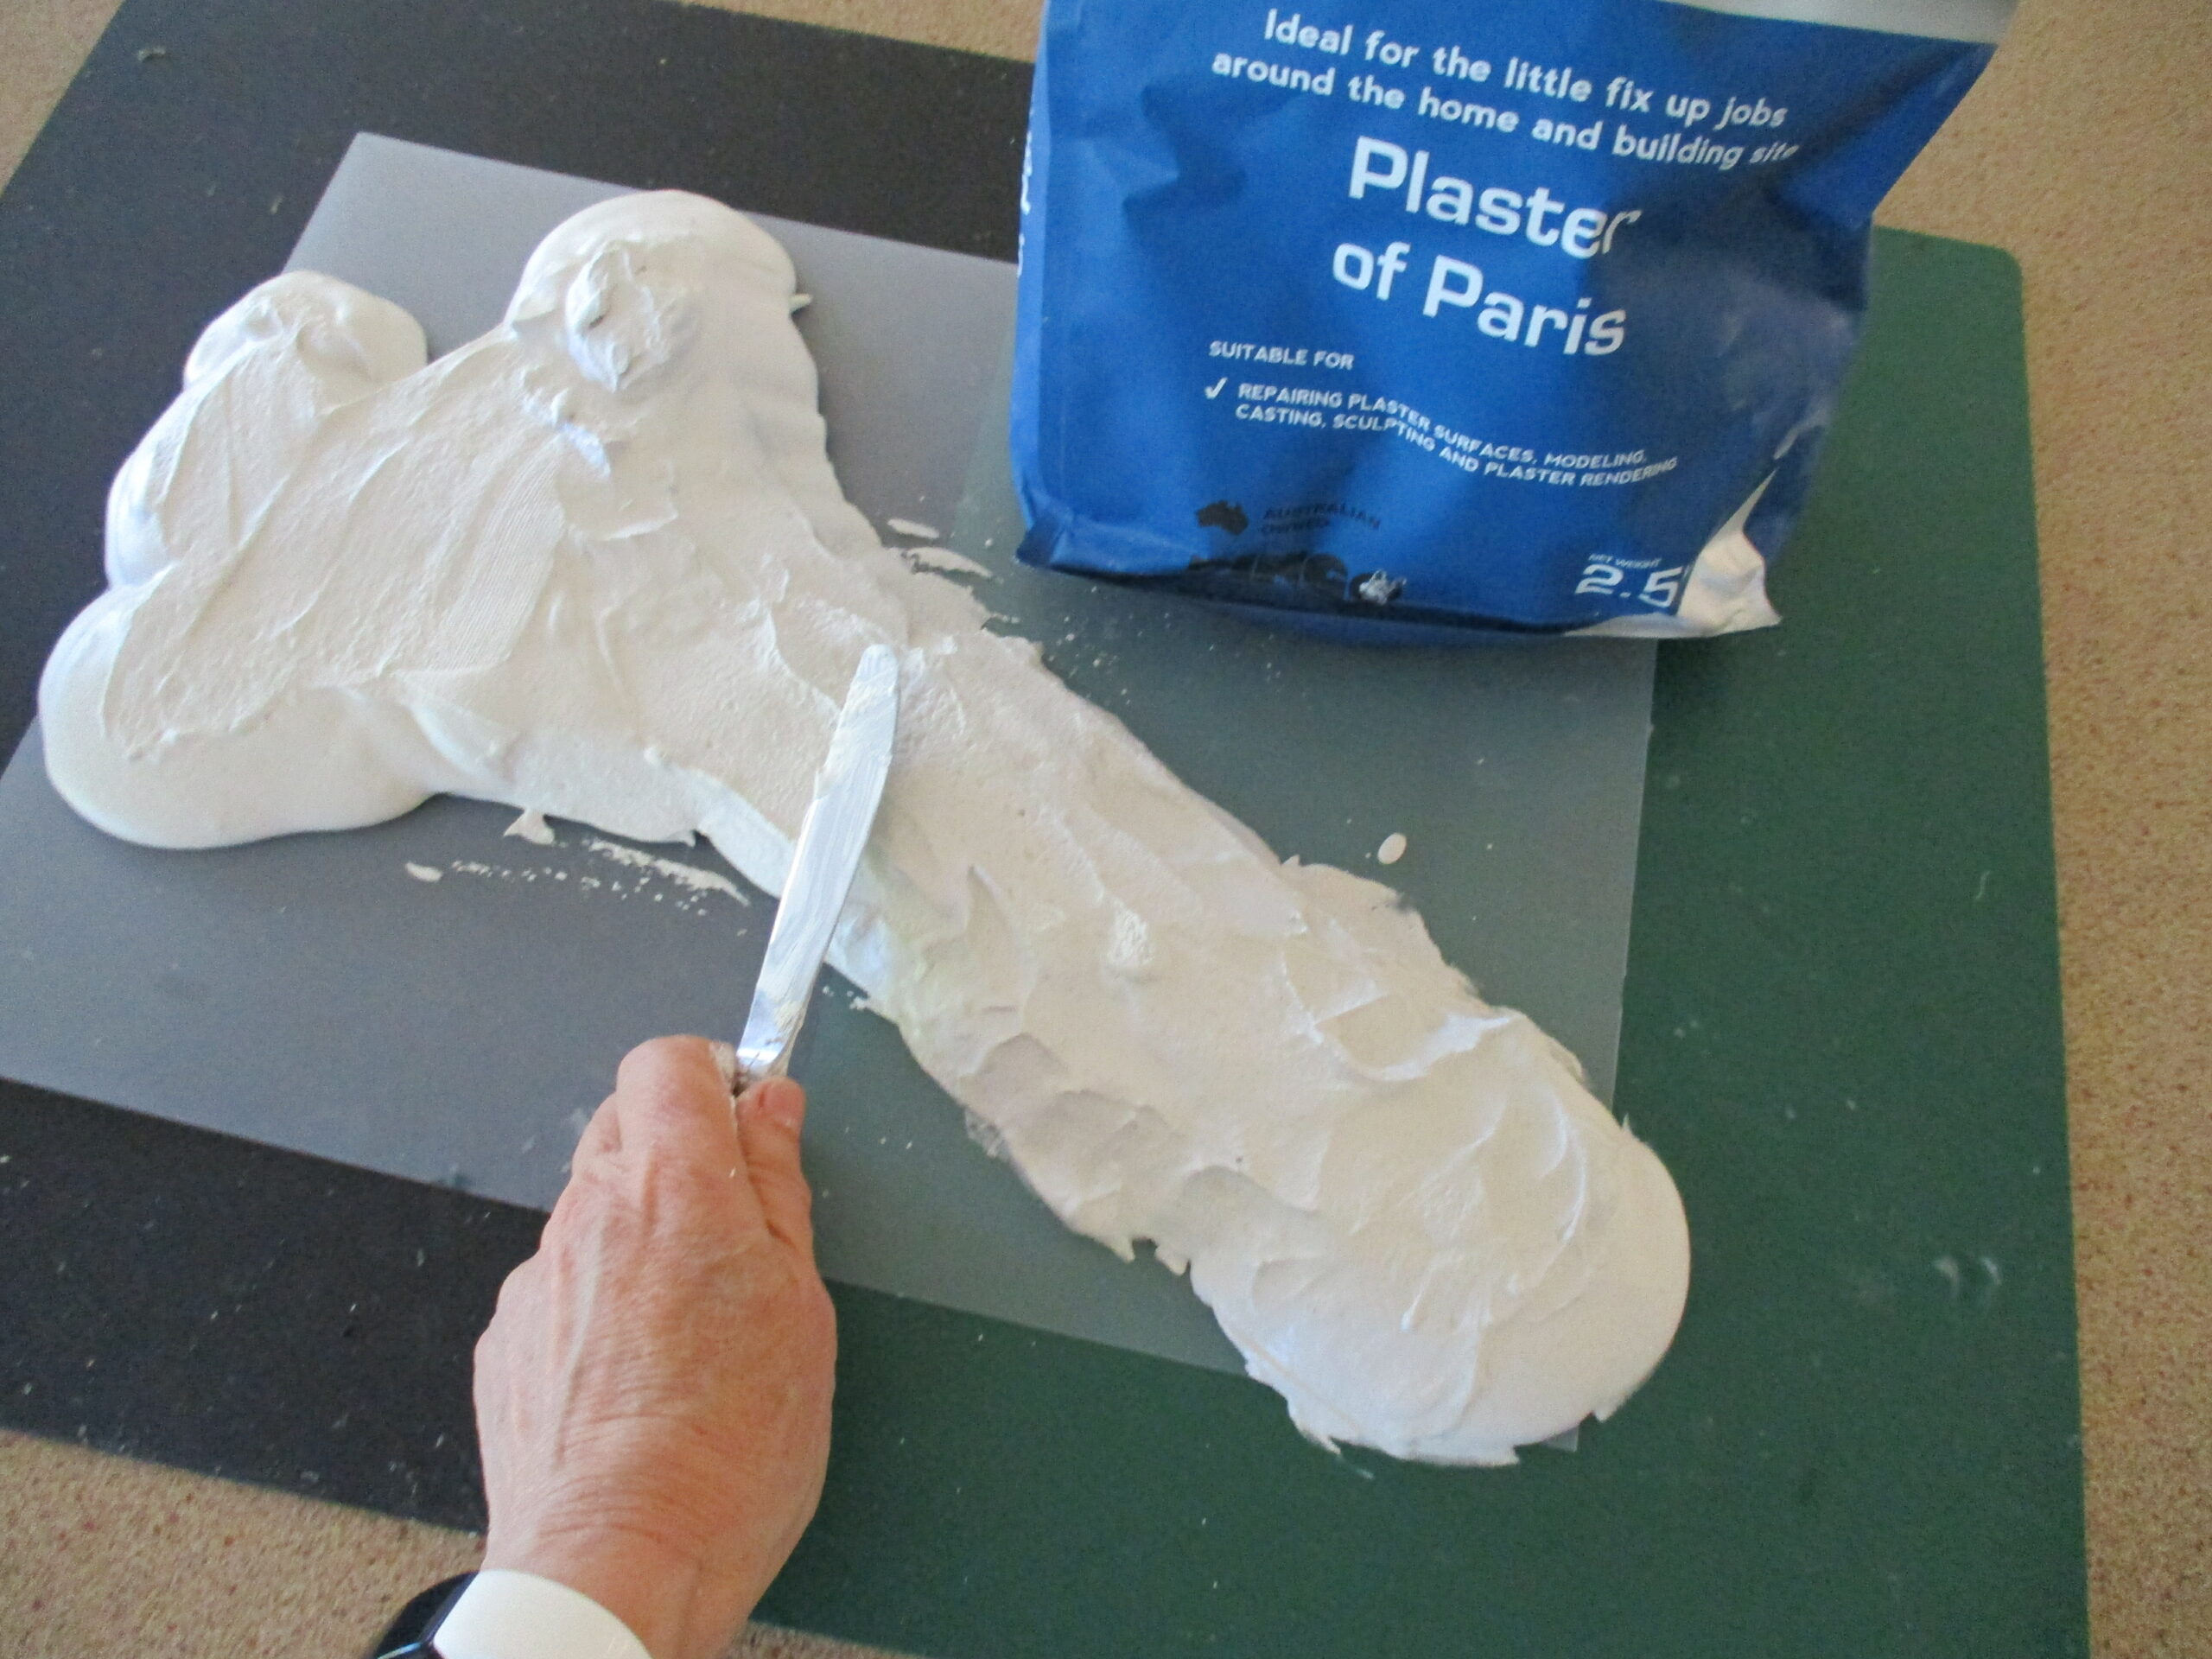
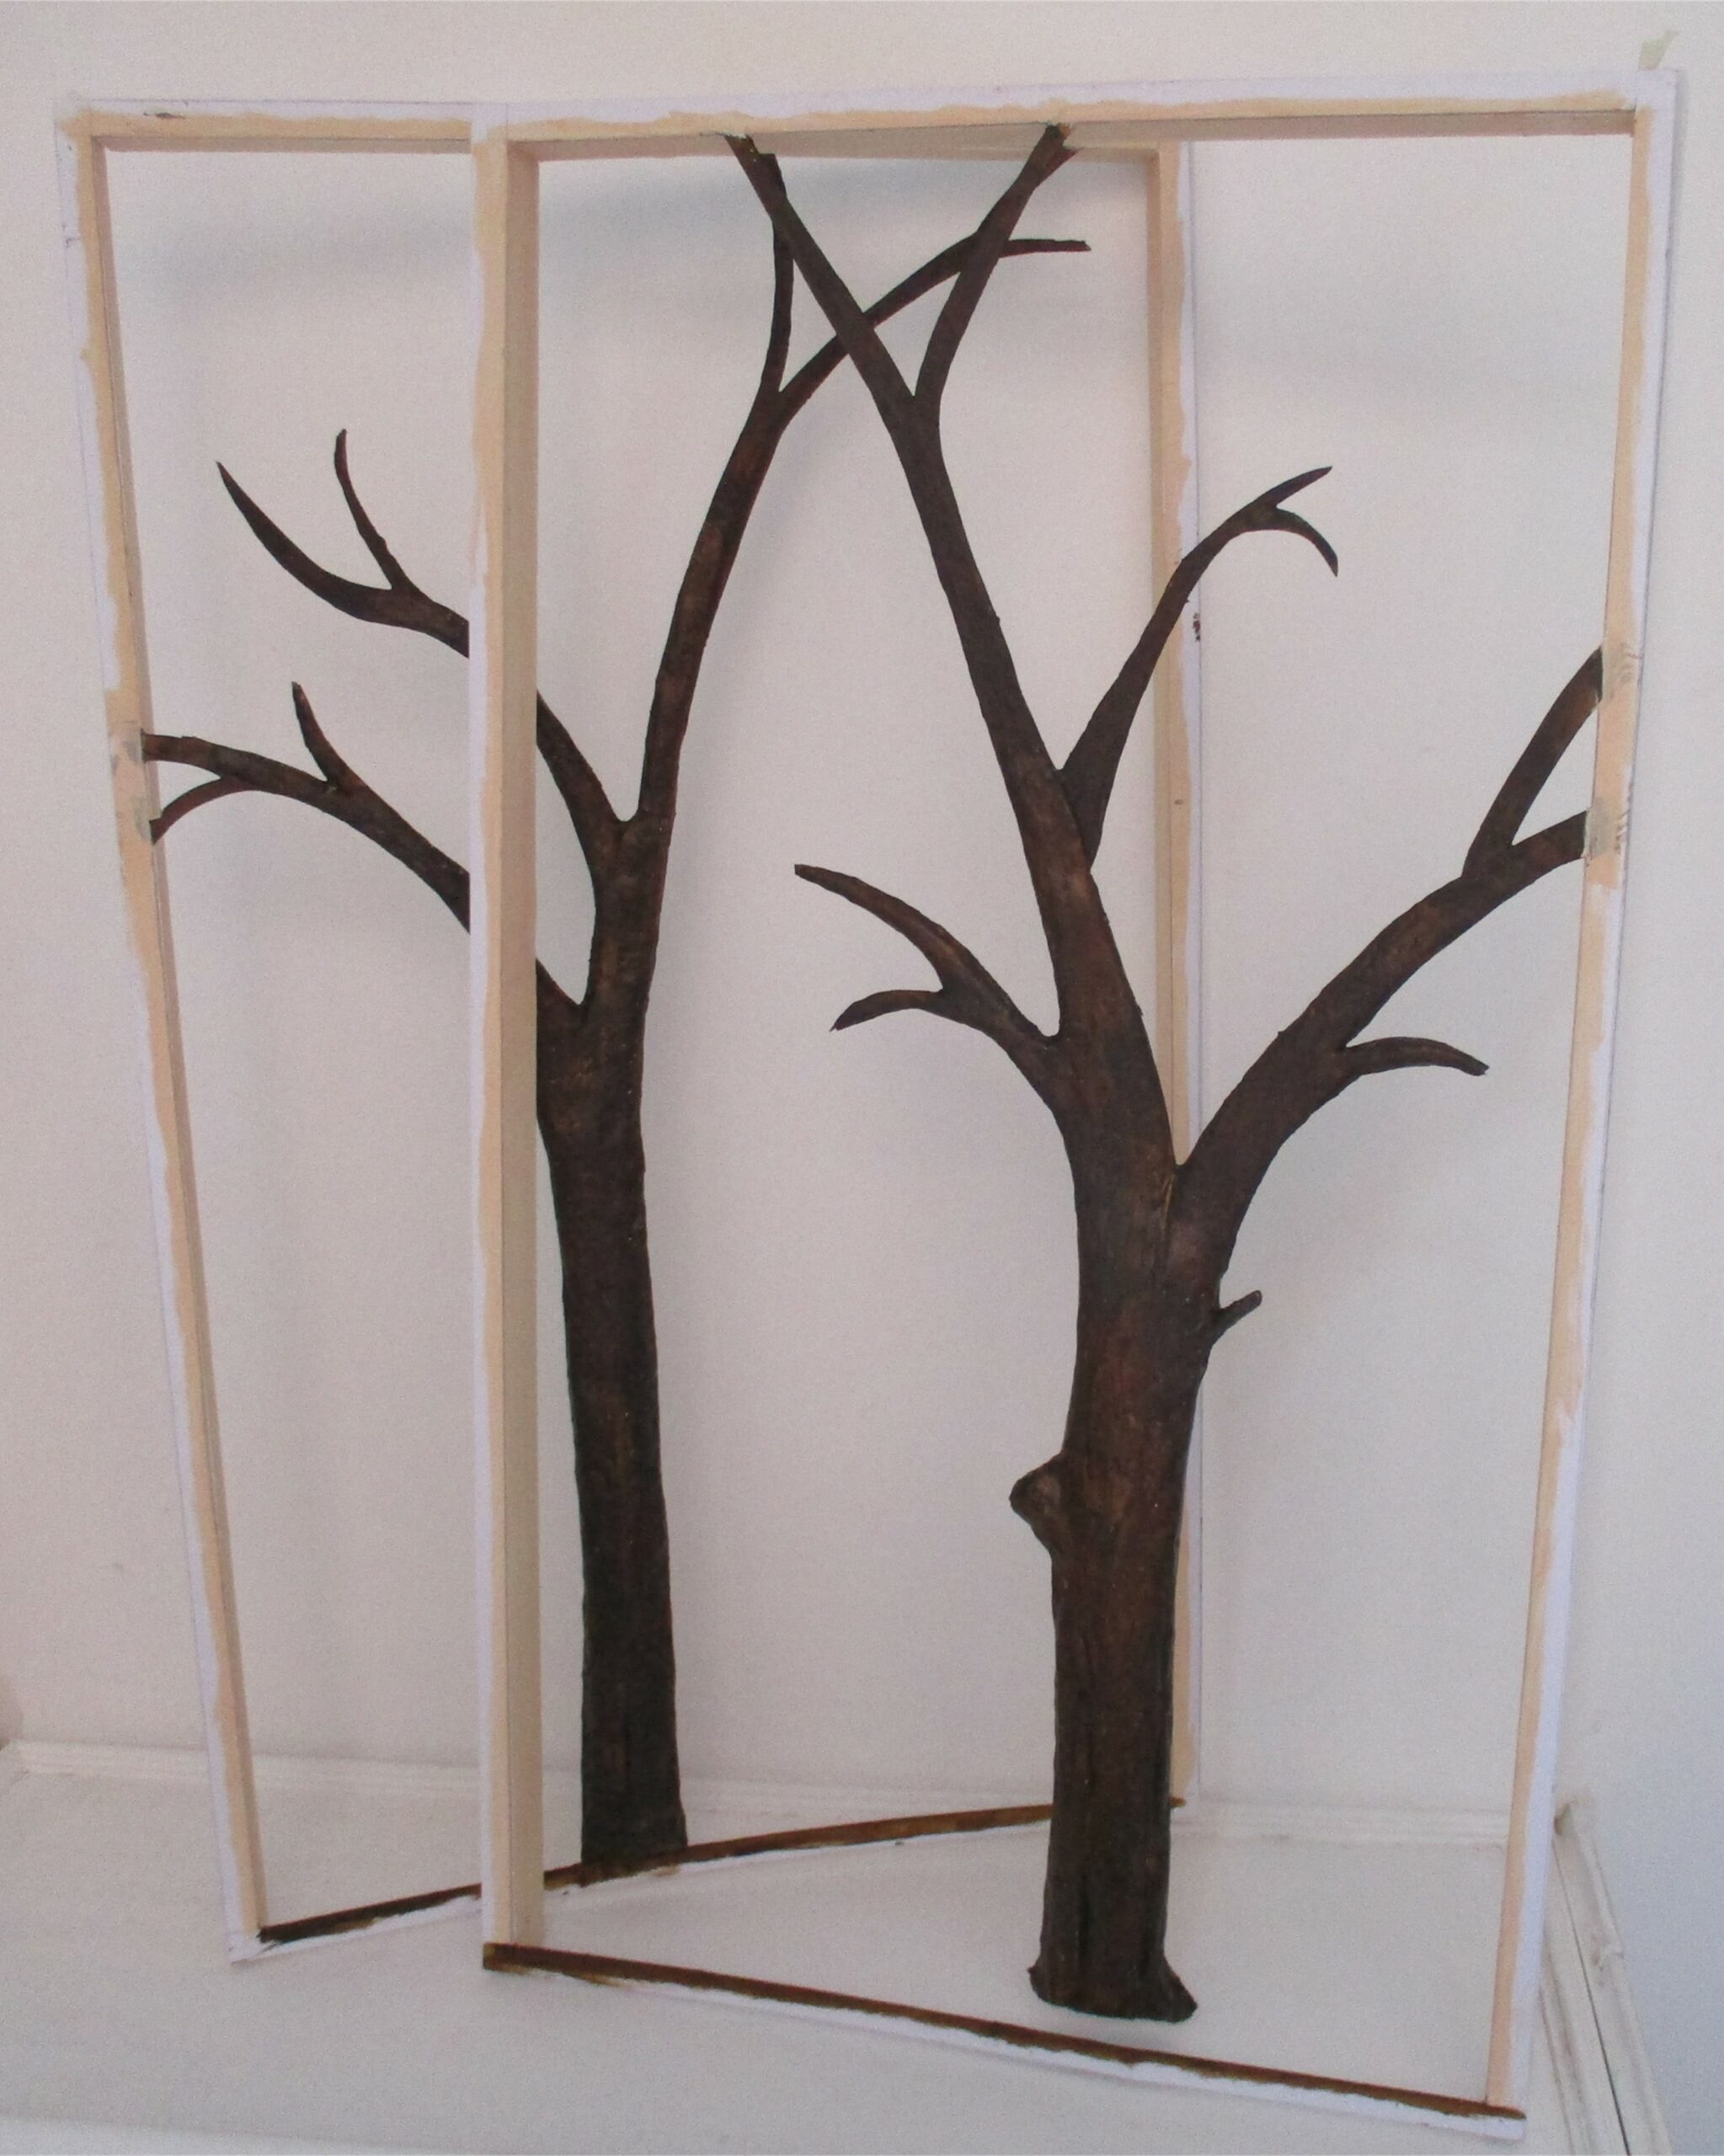
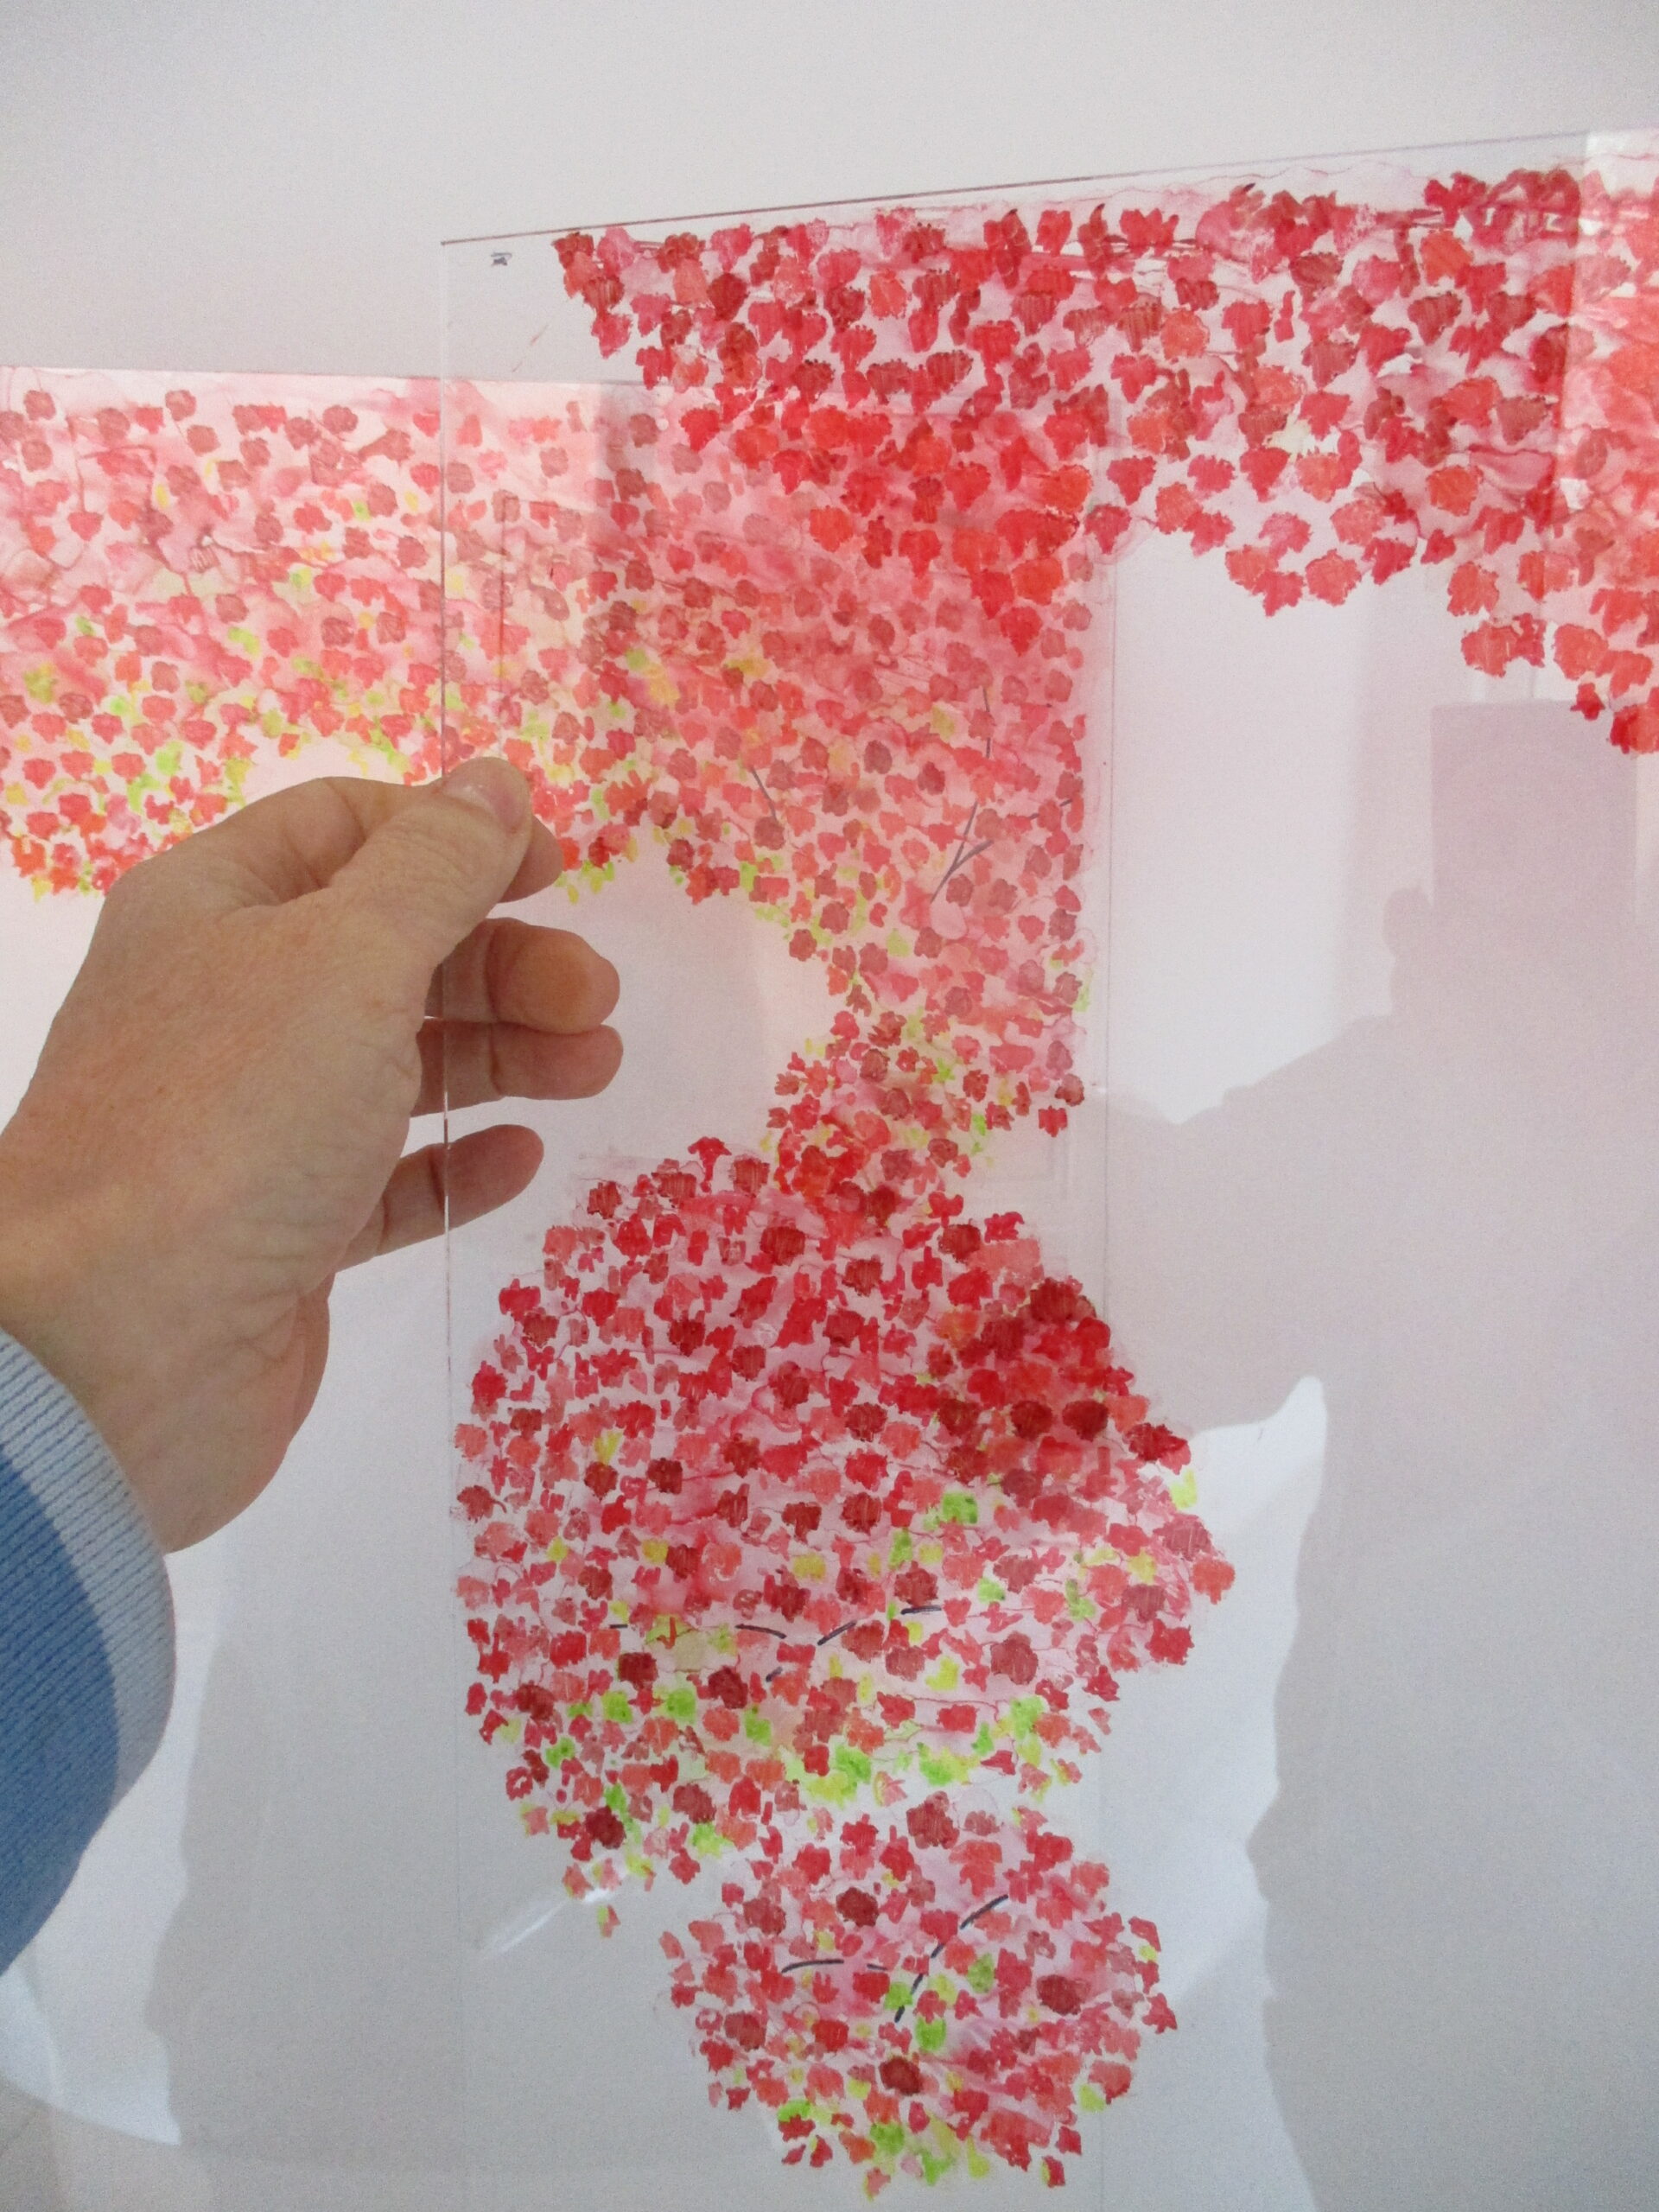
The picture is created in five transparent layers (see diagram below). The trunks are made from moulded paper pulp, supported on cardboard armatures and painted with sealer and acrylic paints. The leaves are painted with alcohol inks onto the glass and acrylic layers. The effect is finished with tiny cut and embossed paper vellum maple leaves on the lower branches and falling to the ground.
Construction layers
Creating the sculpture mould
Sculpture layers
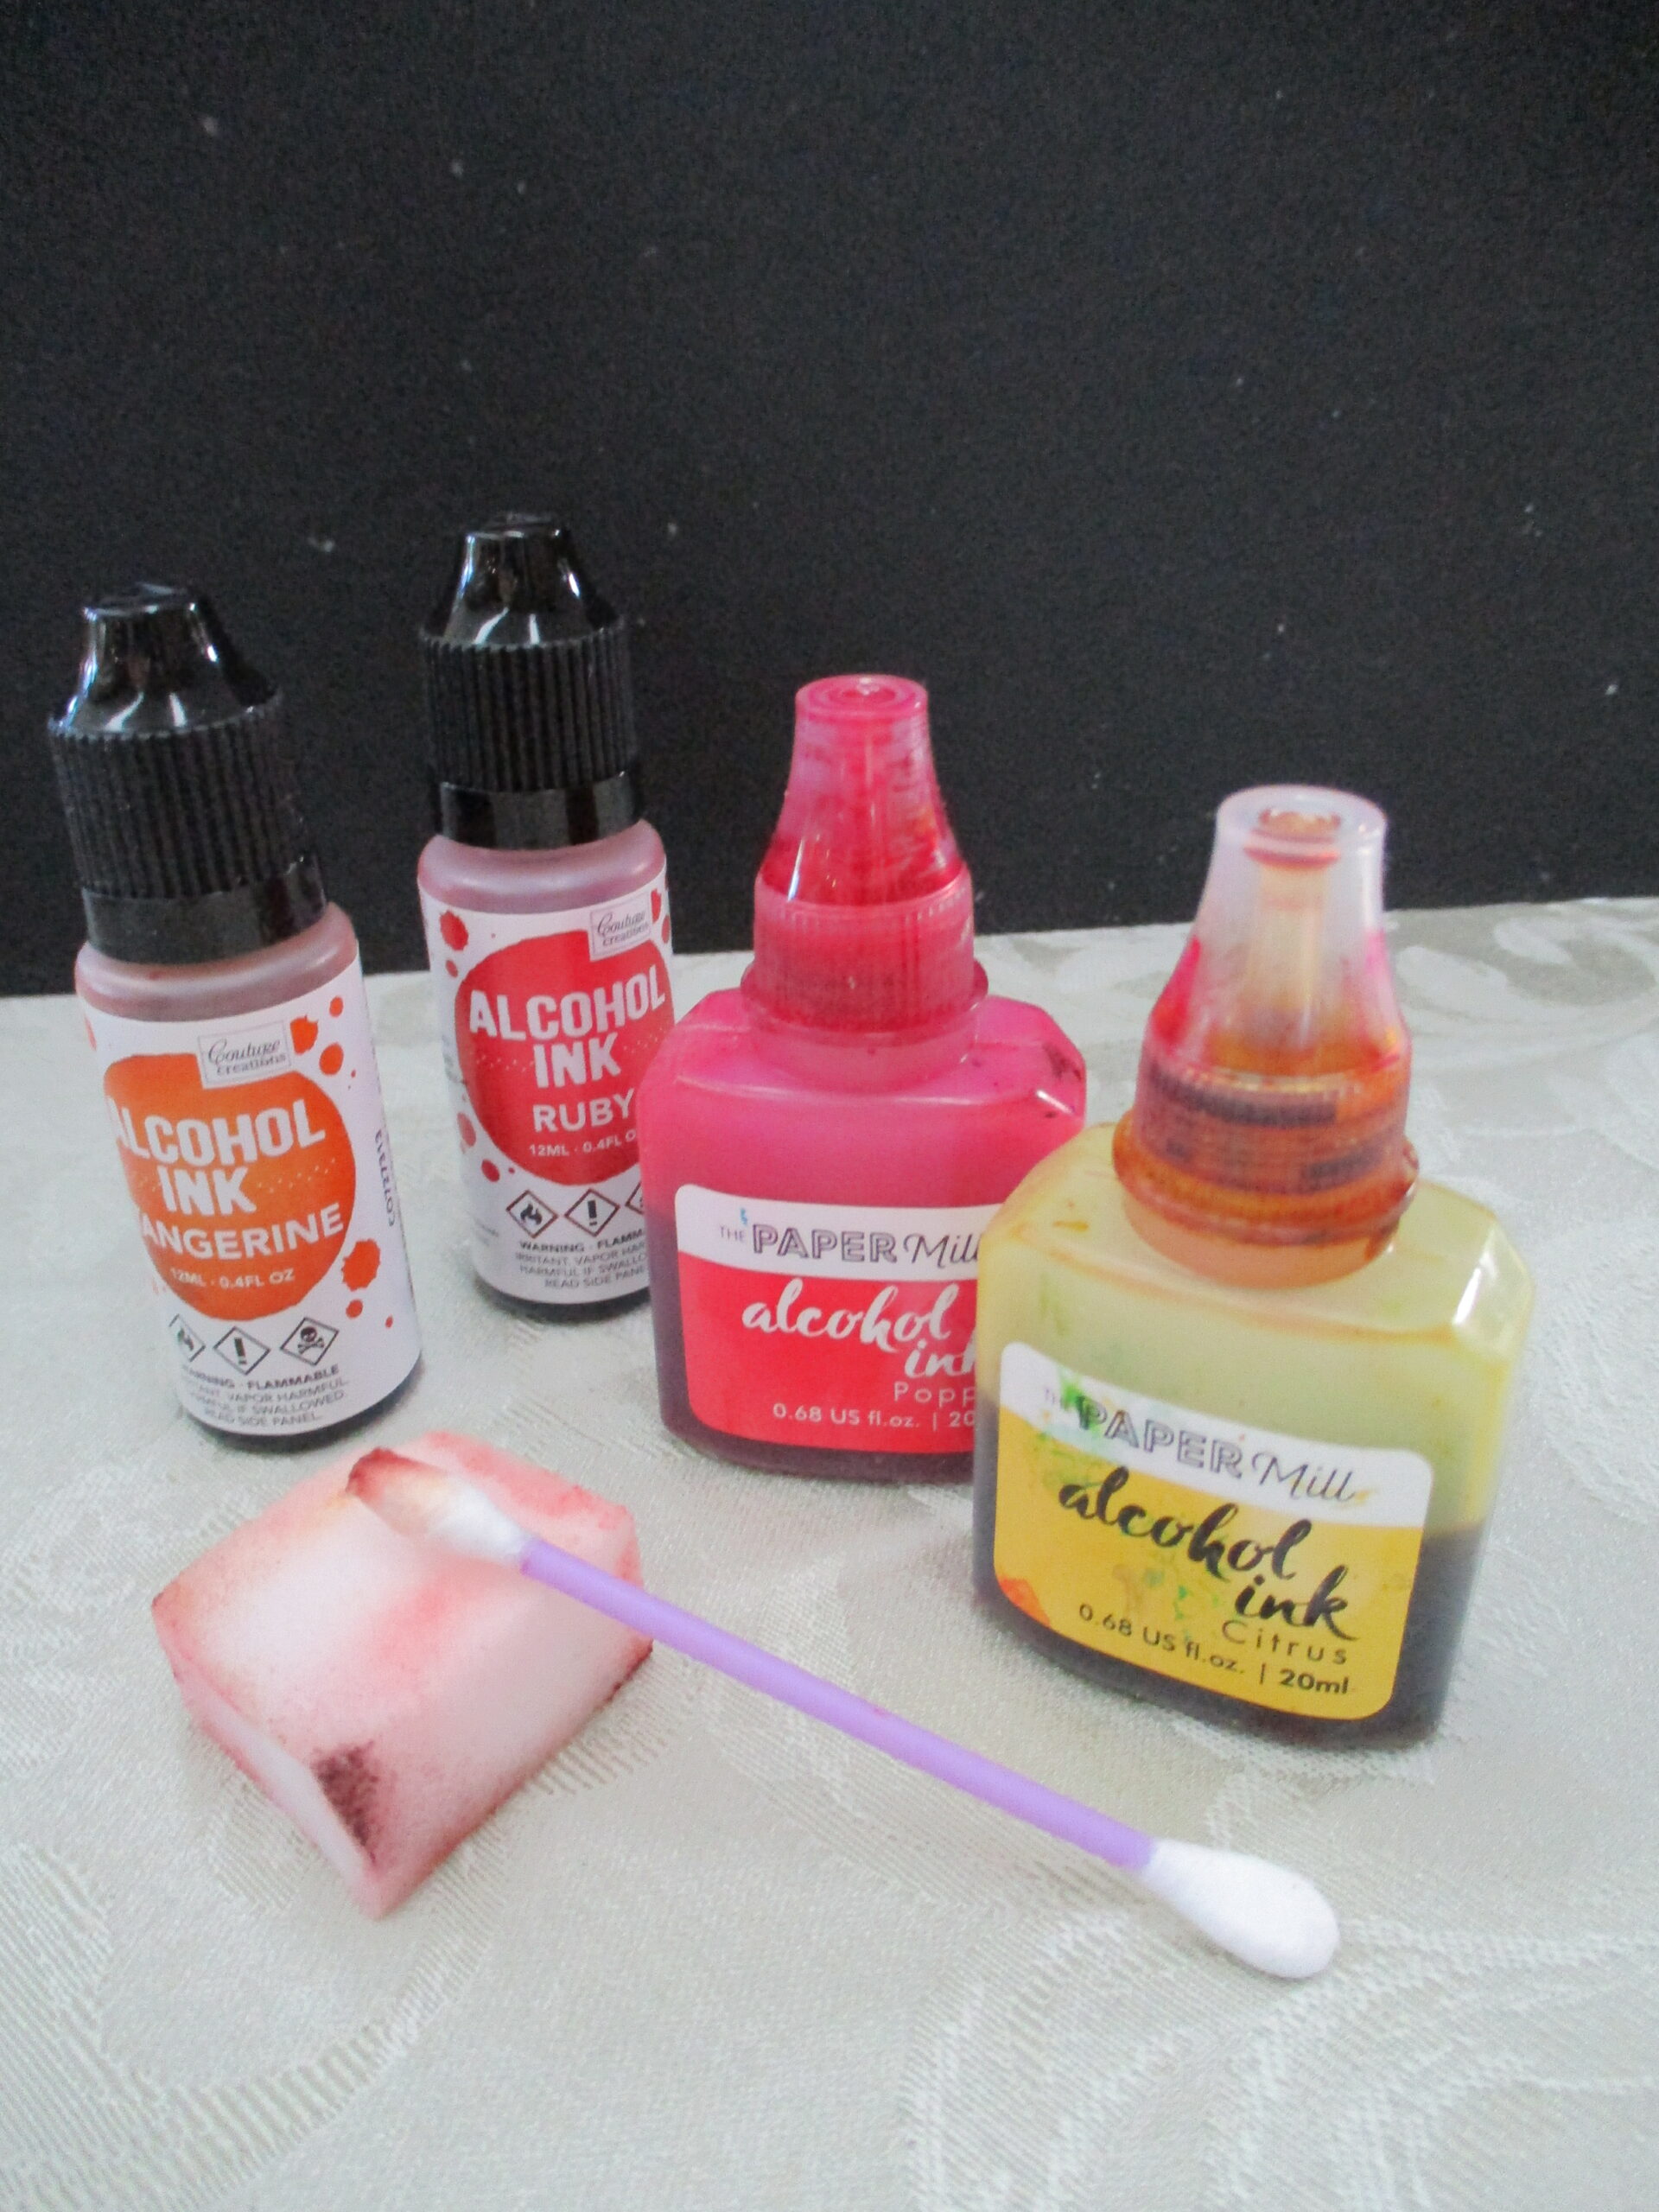
Inks used to paint the glass and acrylic layers
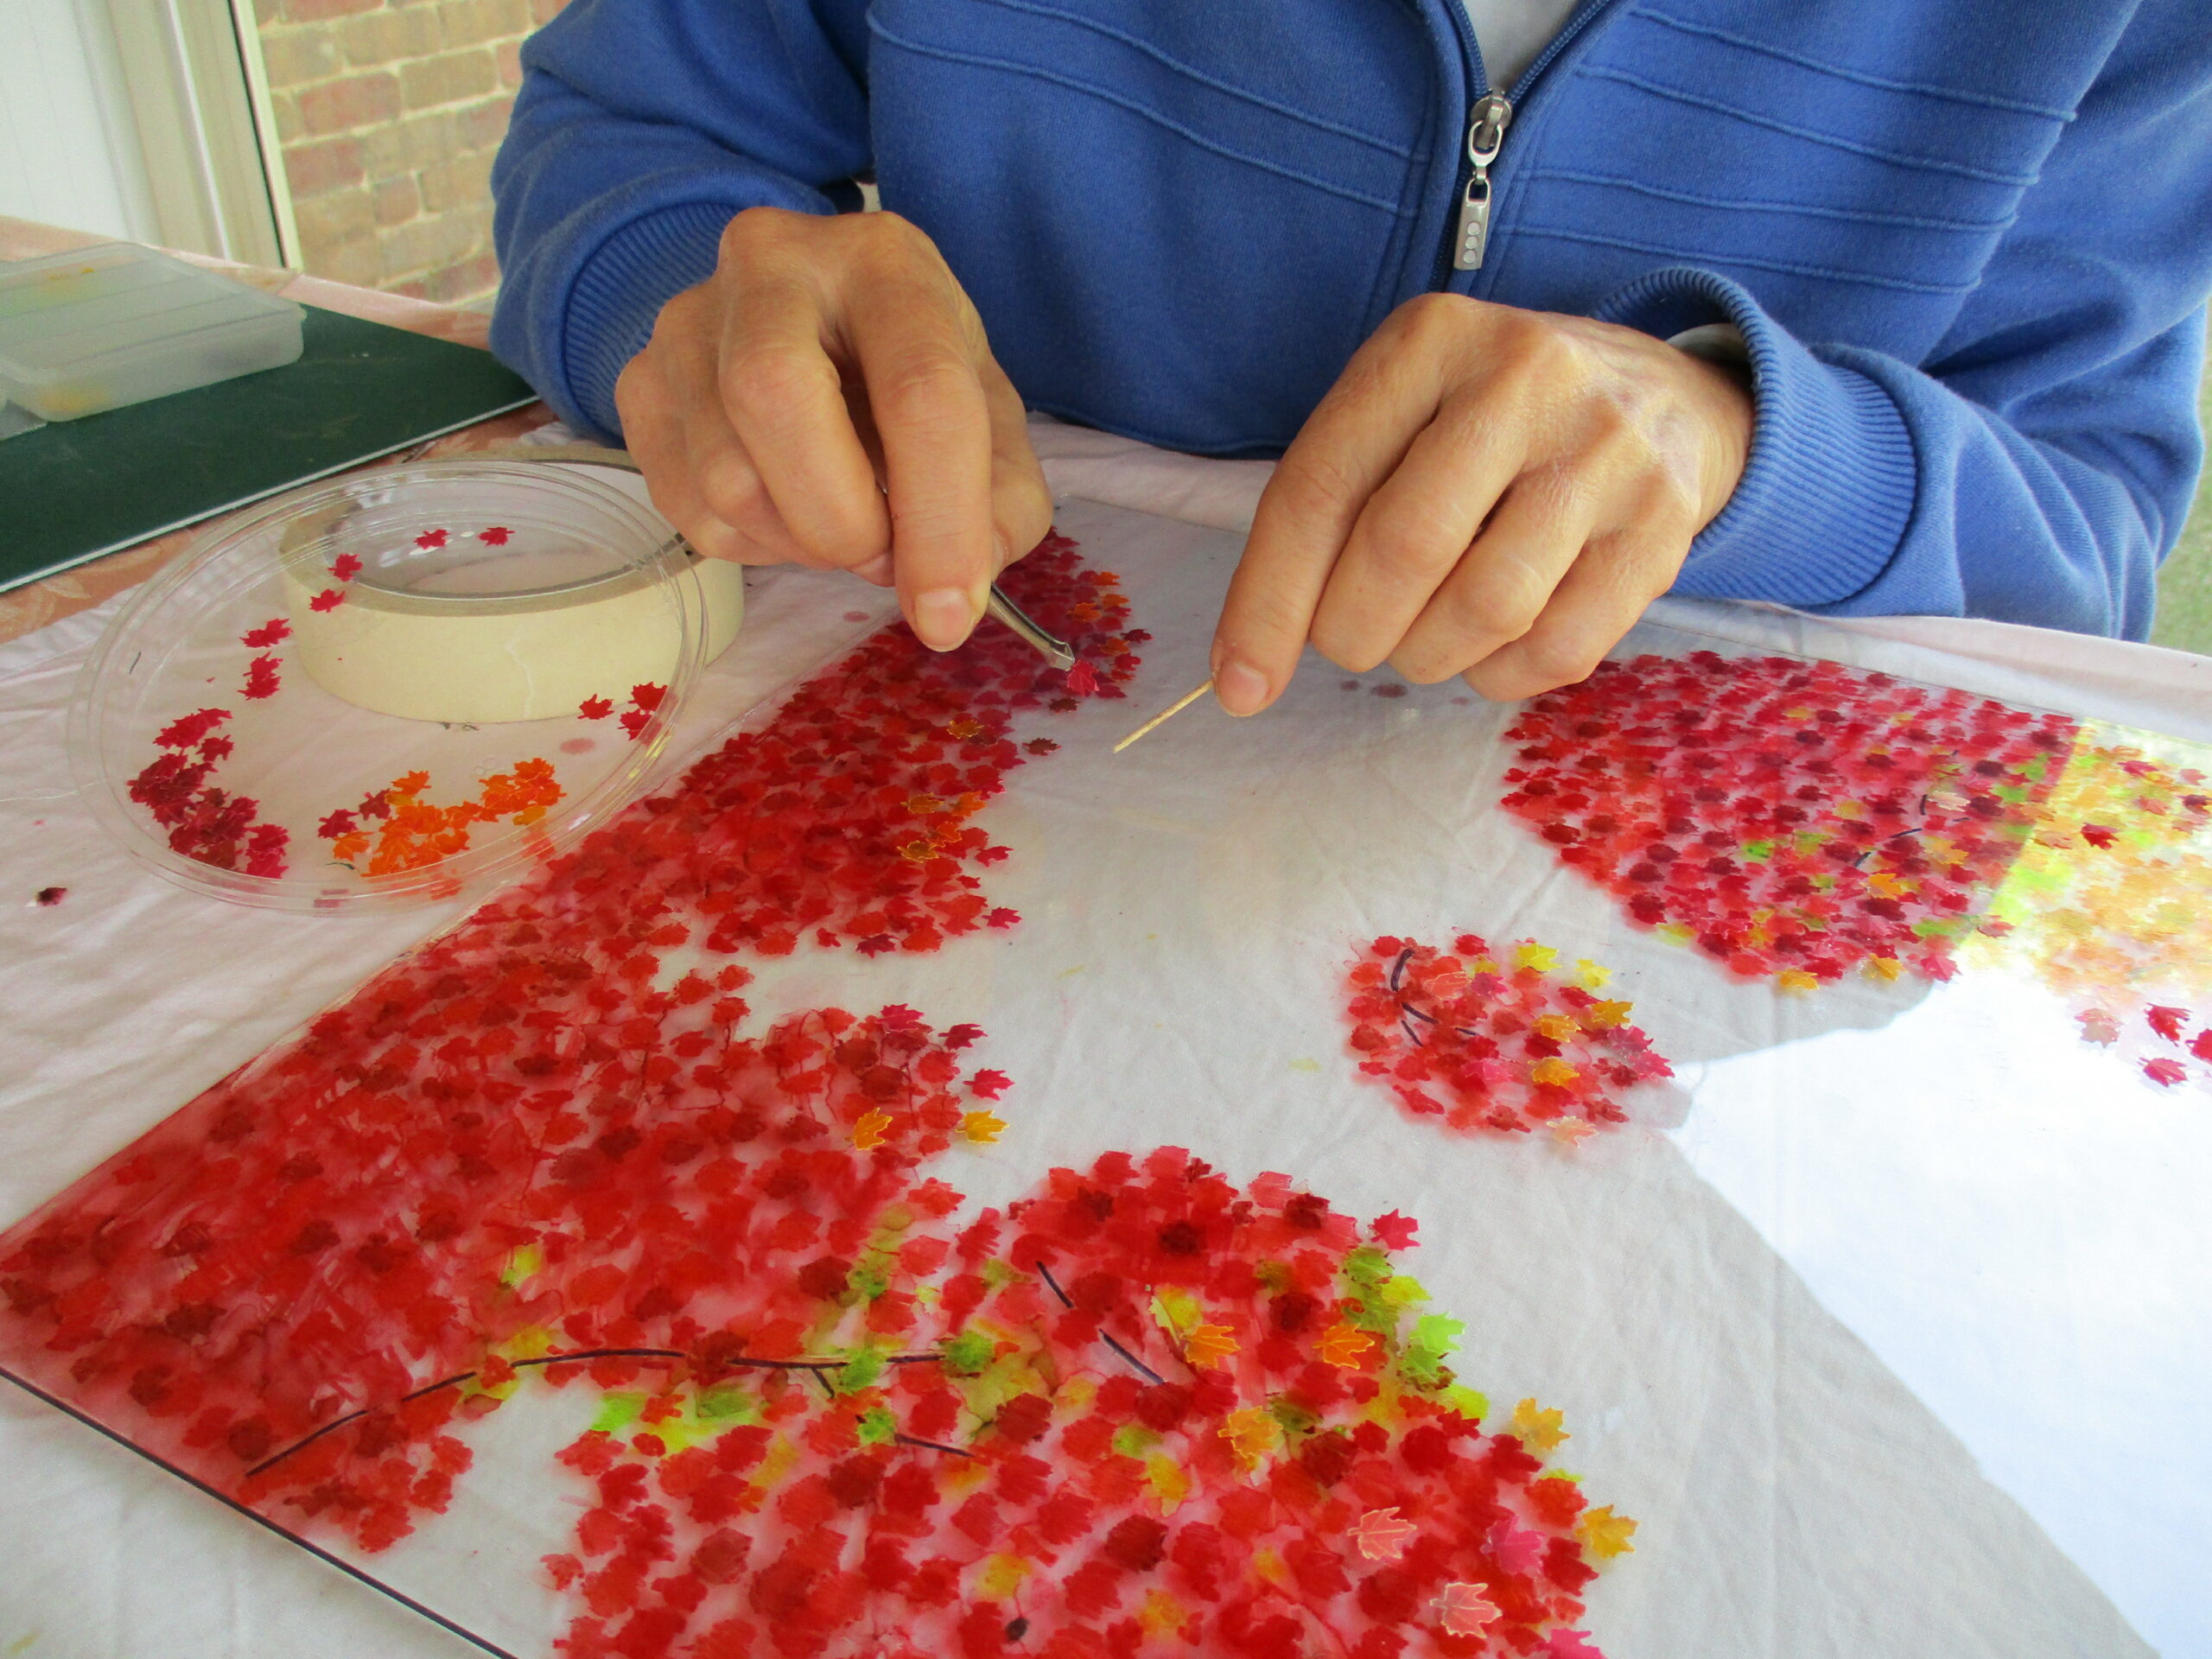
Layering the leaves
Adding tiny paper leaves
The biggest challenge was the transparency, especially the glass backing. The picture had to look (almost) as neat from the back as the front! The transparency also created problems in gluing on the tiny leaves as even after trialing 5 types of glue, it can still be detected in certain light, so I had to work very carefully. The deep solid wooden frame, together with 2 layers of glass also make the picture heavier than average. It’s also very difficult to photograph art that is behind glass!
The picture looks particularly nice with some light behind it, but still quite effective on a white or light coloured wall. [Click the images below to see close up details]
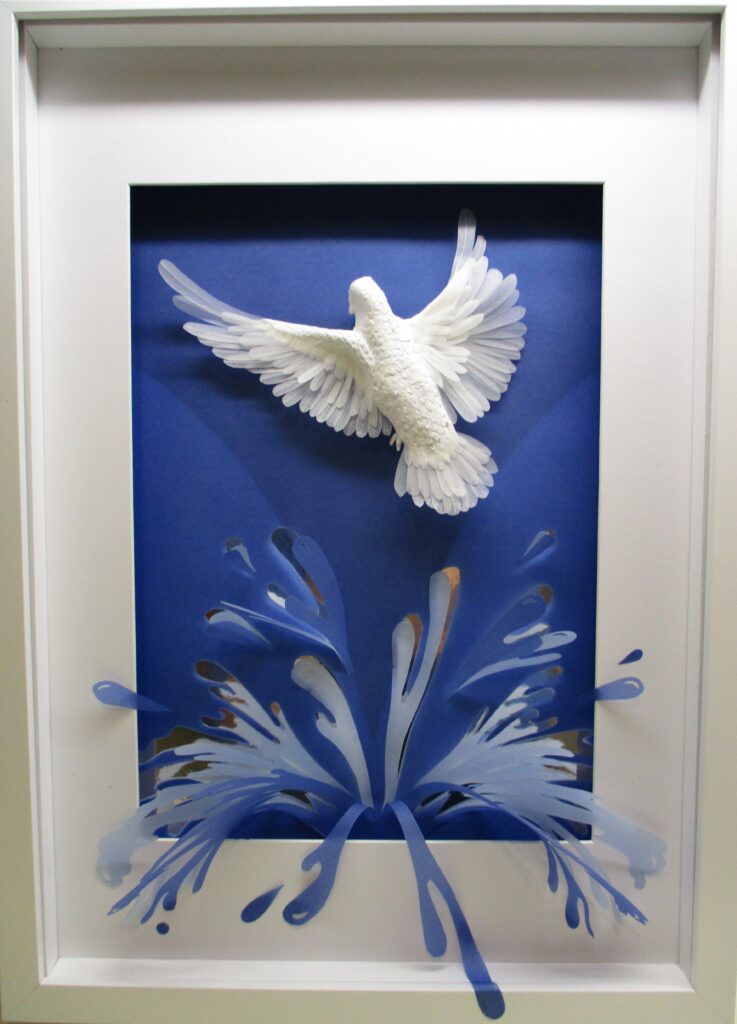
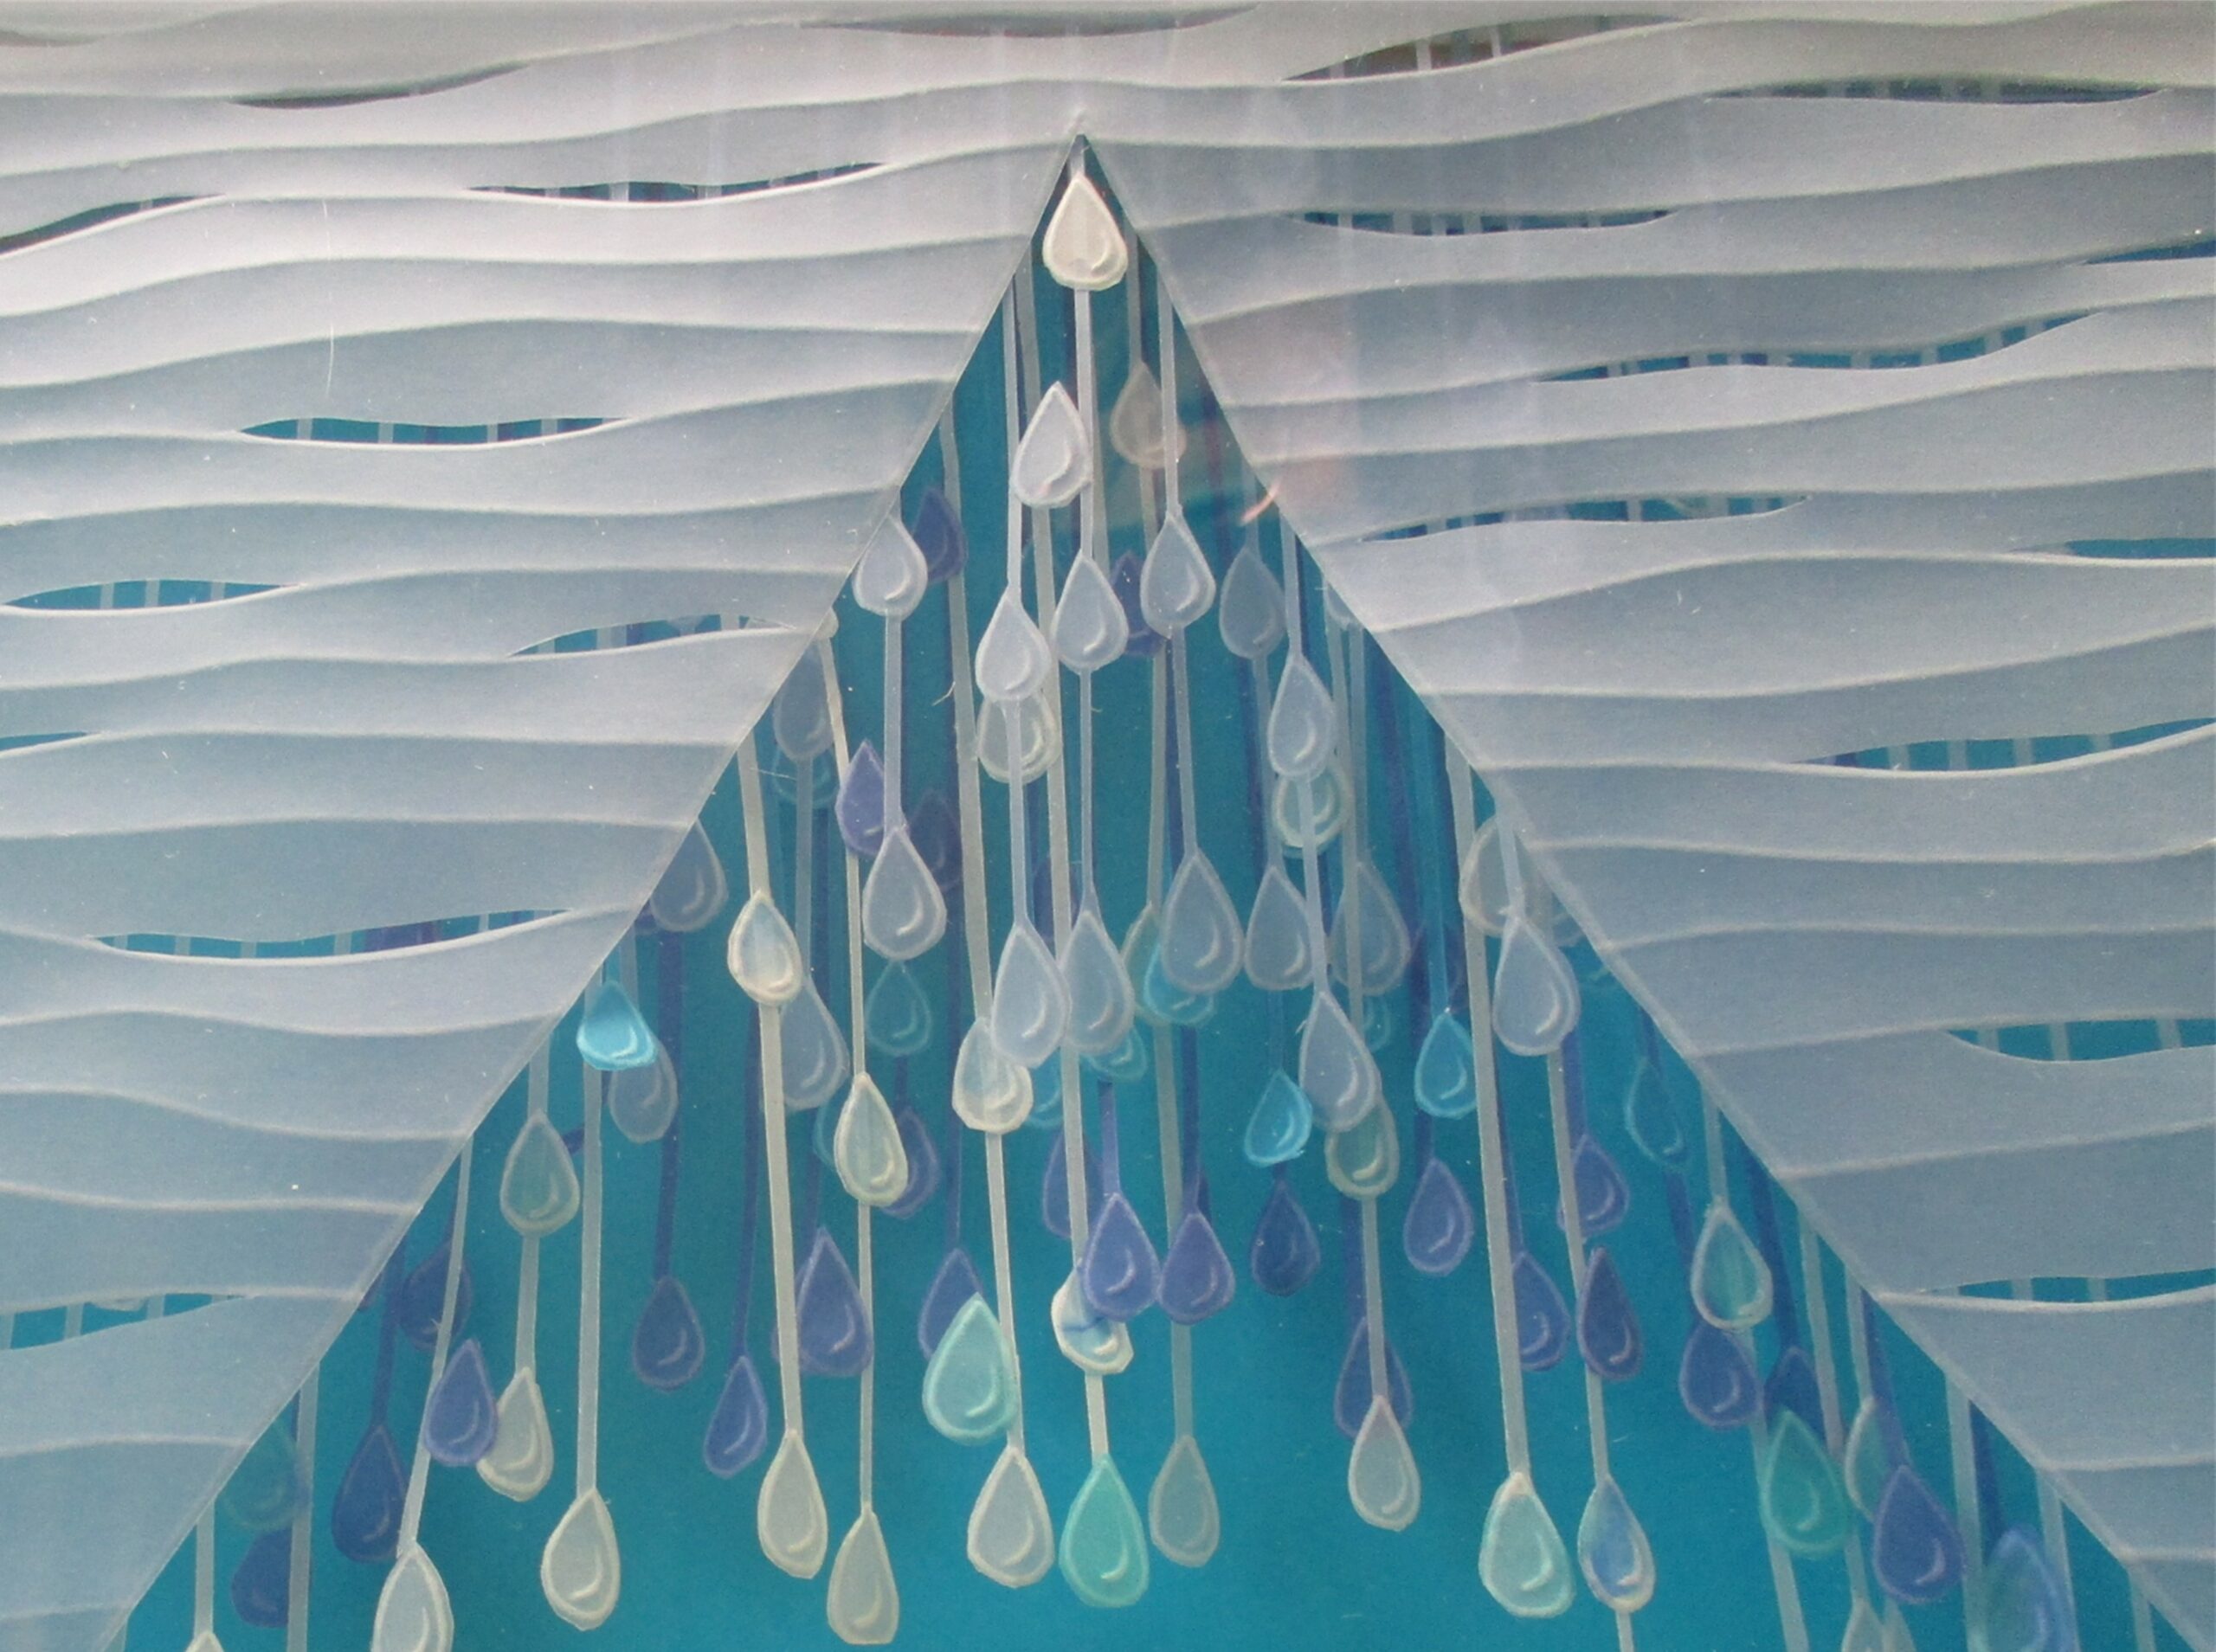
This is the second paper sculpture I’ve created for the “Living Water” SALA exhibition.
Depicting the joyful Living Water of baptism, water is symbolically linked to the Holy Spirit (dove). All efforts to keep the water within the picture failed! Living water can’t be contained – it insists on overflowing boundaries to give life to the world!
The dove was sculptured using the technique I created for Moments in Flight
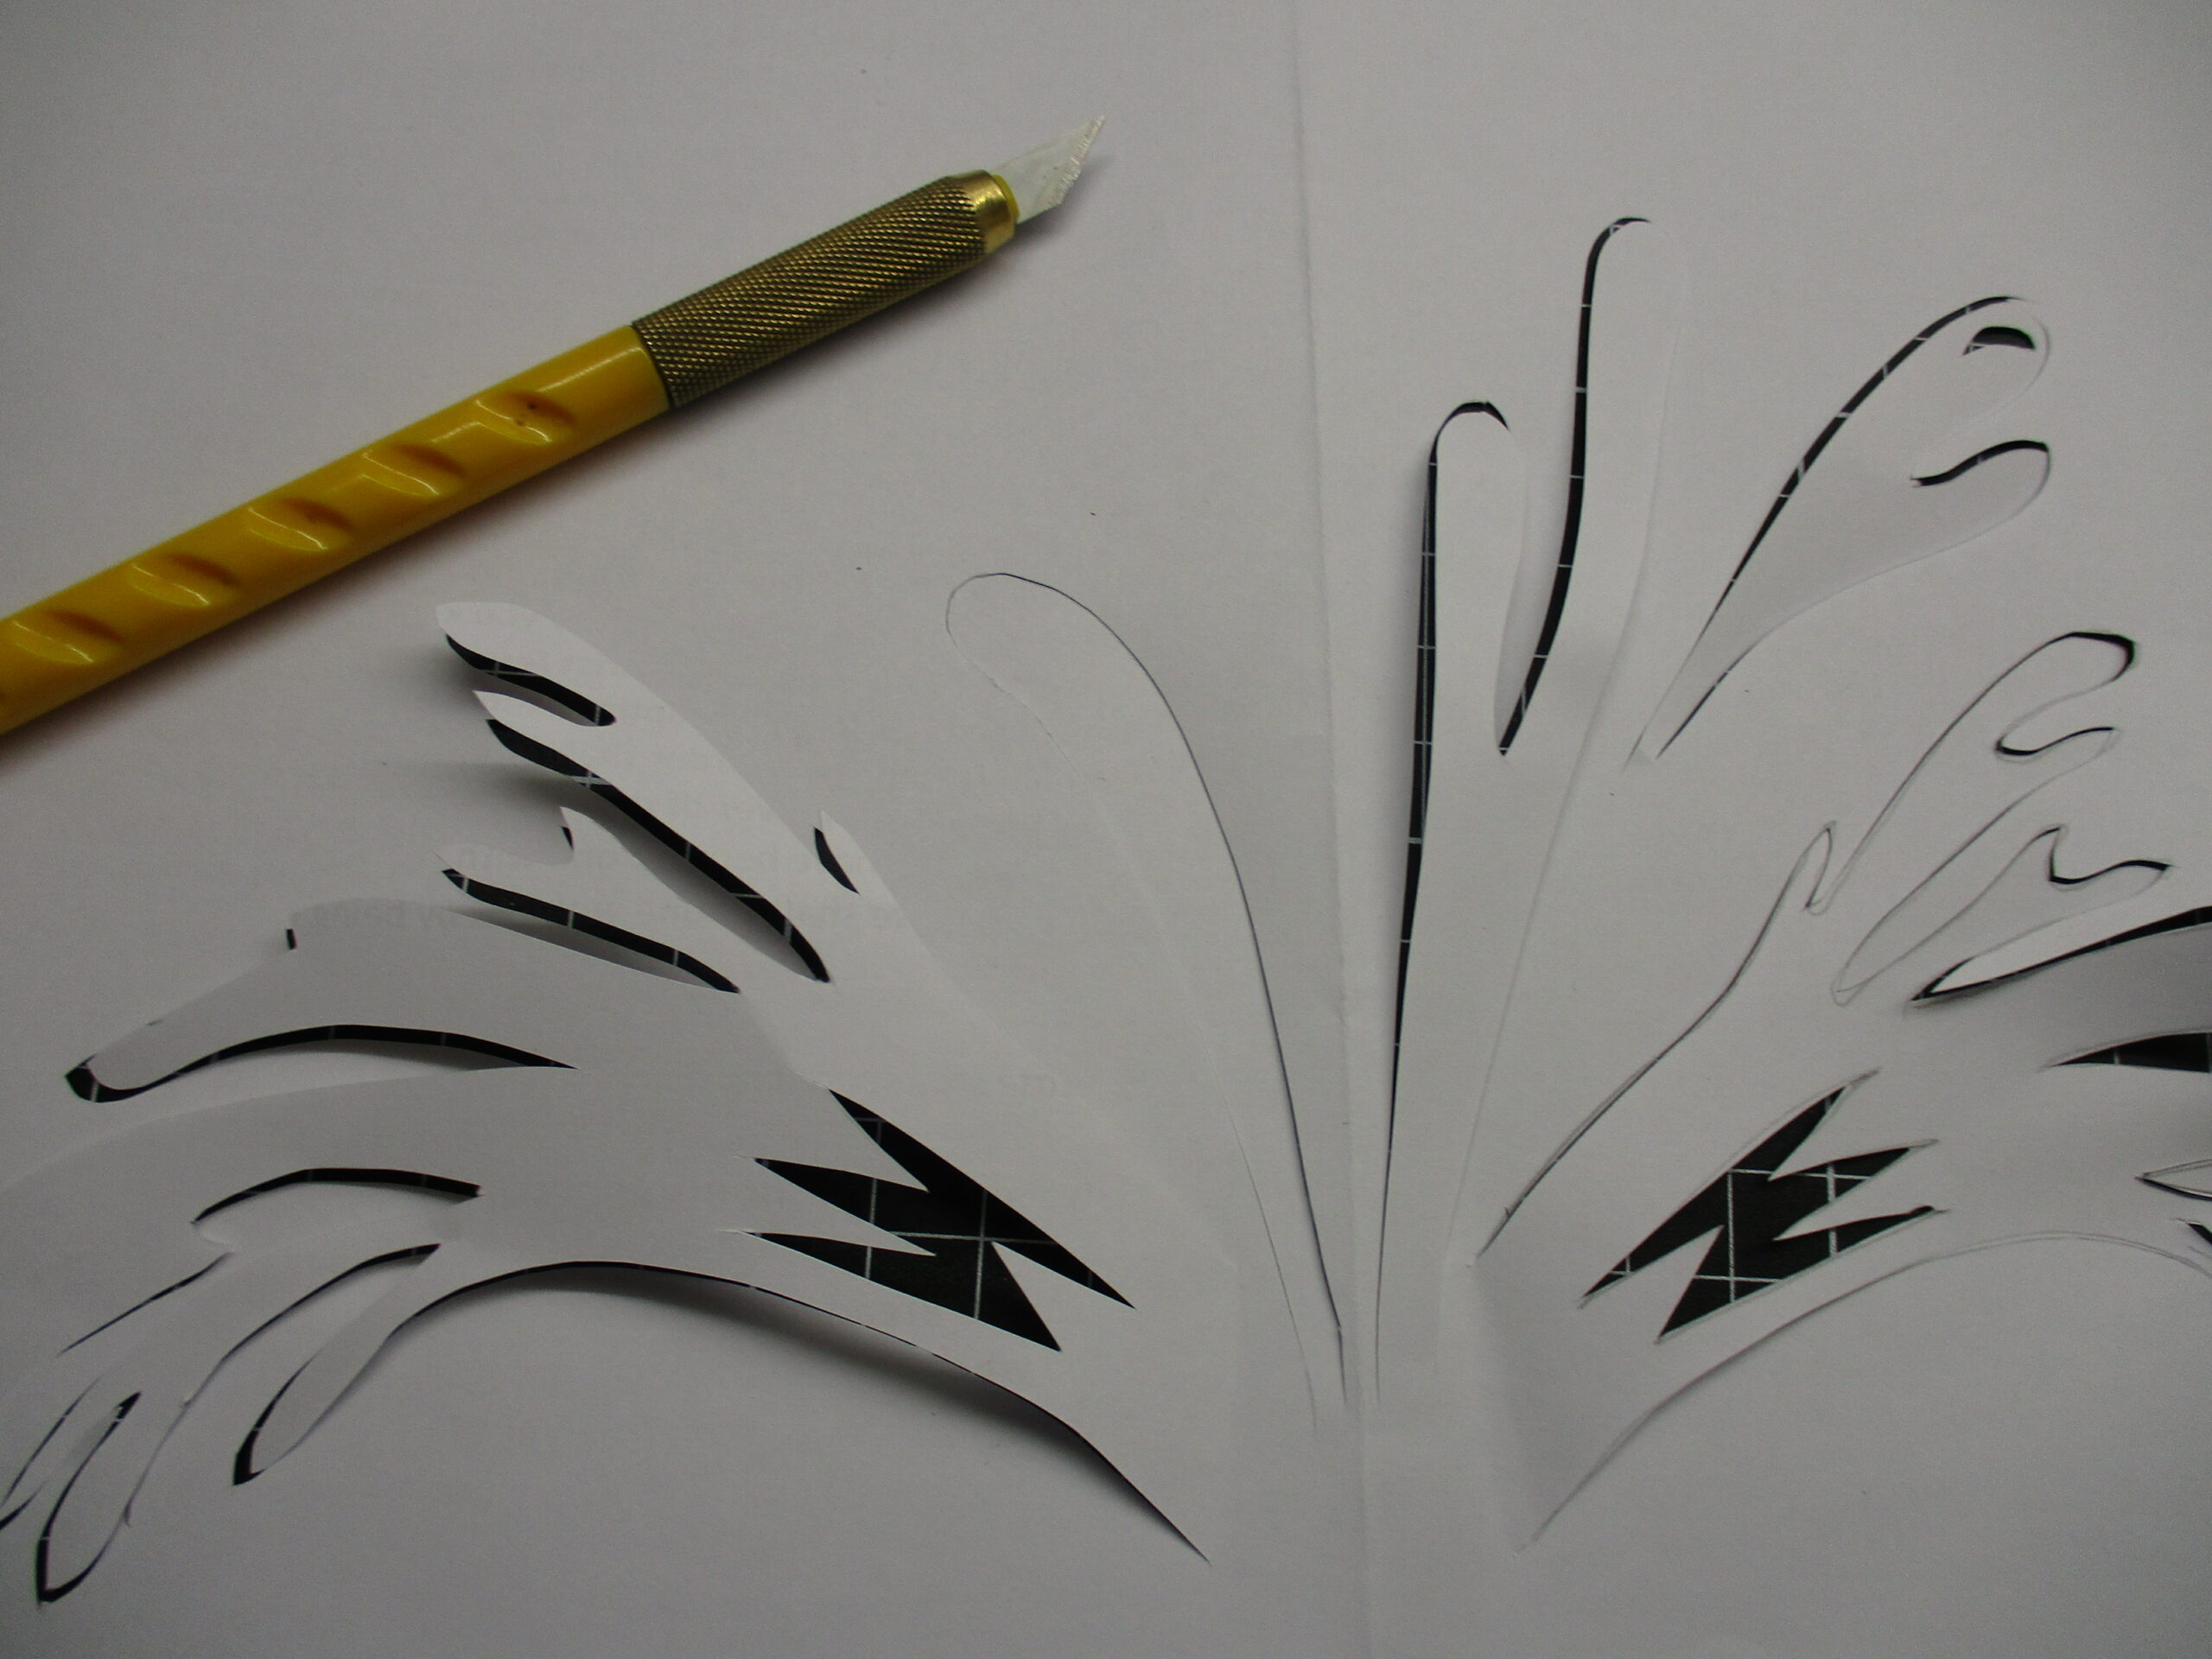
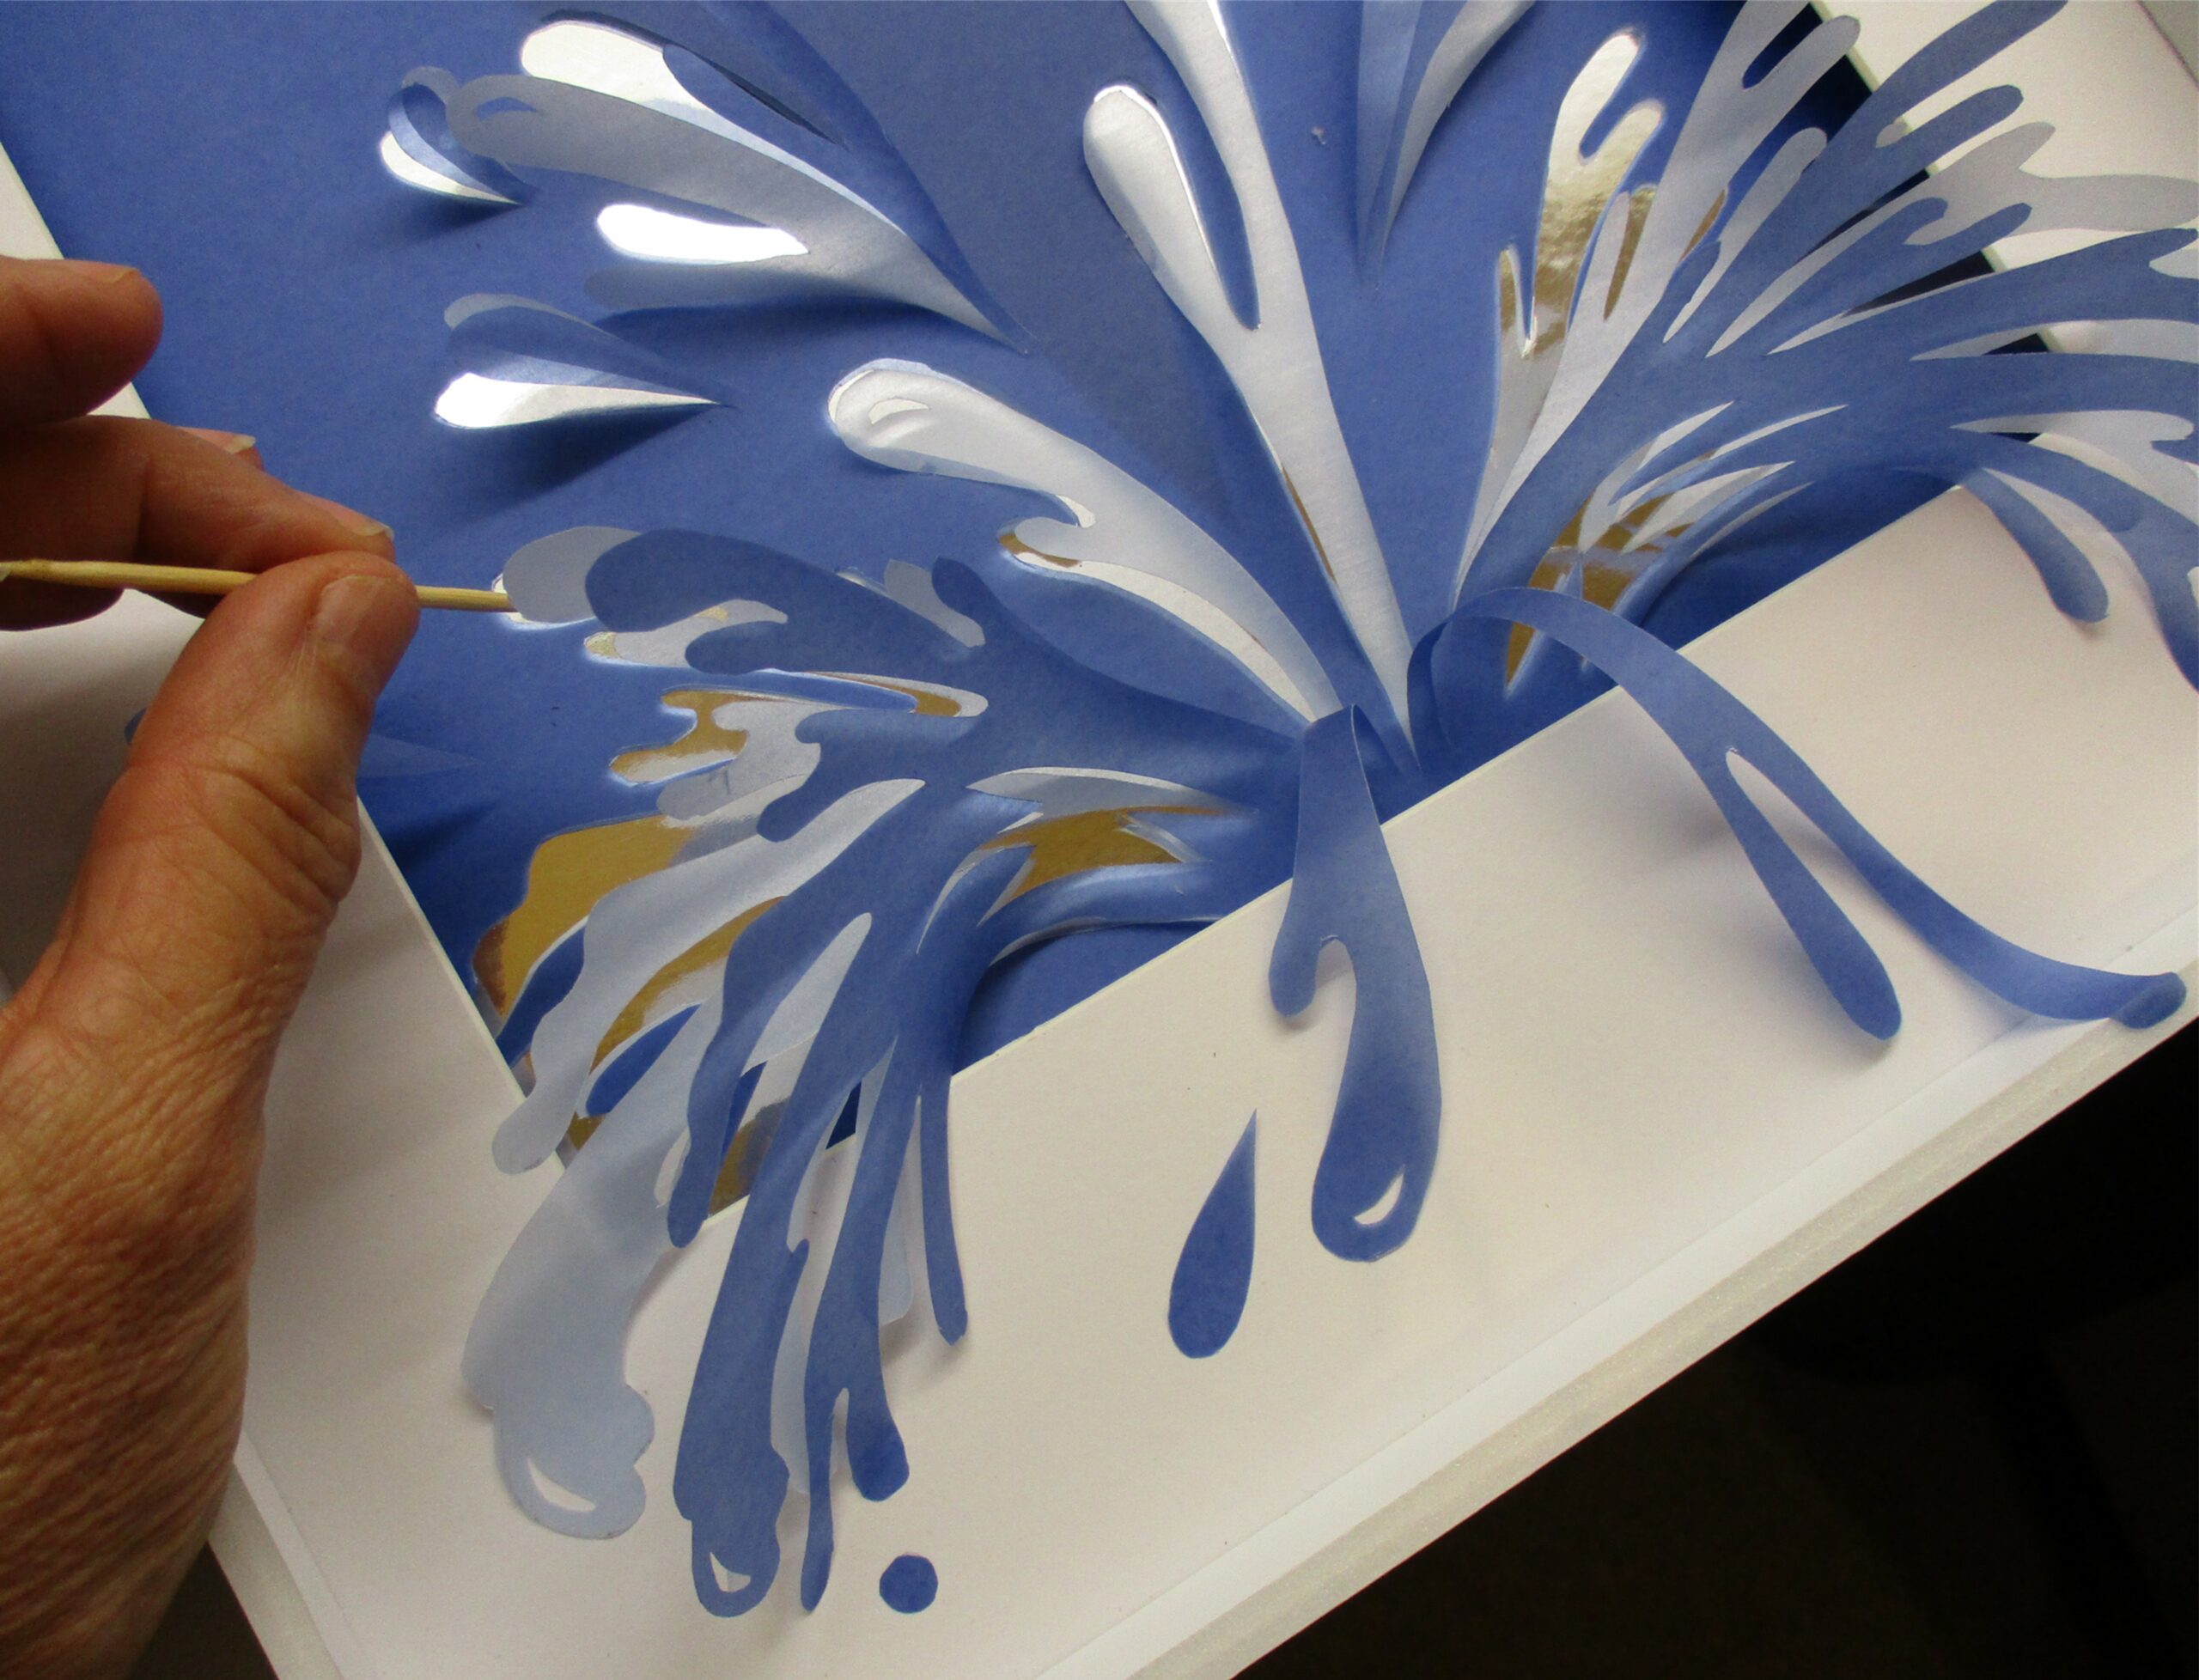
The water was inspired by my Splash! table centerpiece, but it’s a new design created with three layers of vellum paper in shades of grey, blue and white. Behind the layered cut-outs is silver foil, to give the impression of water sparkle.
Once again, the complex framing of the piece was a challenge to accommodate the delicate layering and 3D images.
“Living Water” is a SALA (South Australian Living Artists) exhibition, hosted by the Lutheran Church of Australia that ran throughout August 2021. Artists were encouraged to explore the influences faith plays in artwork. This is the first of two paper sculptures I’ve created in response to the theme.
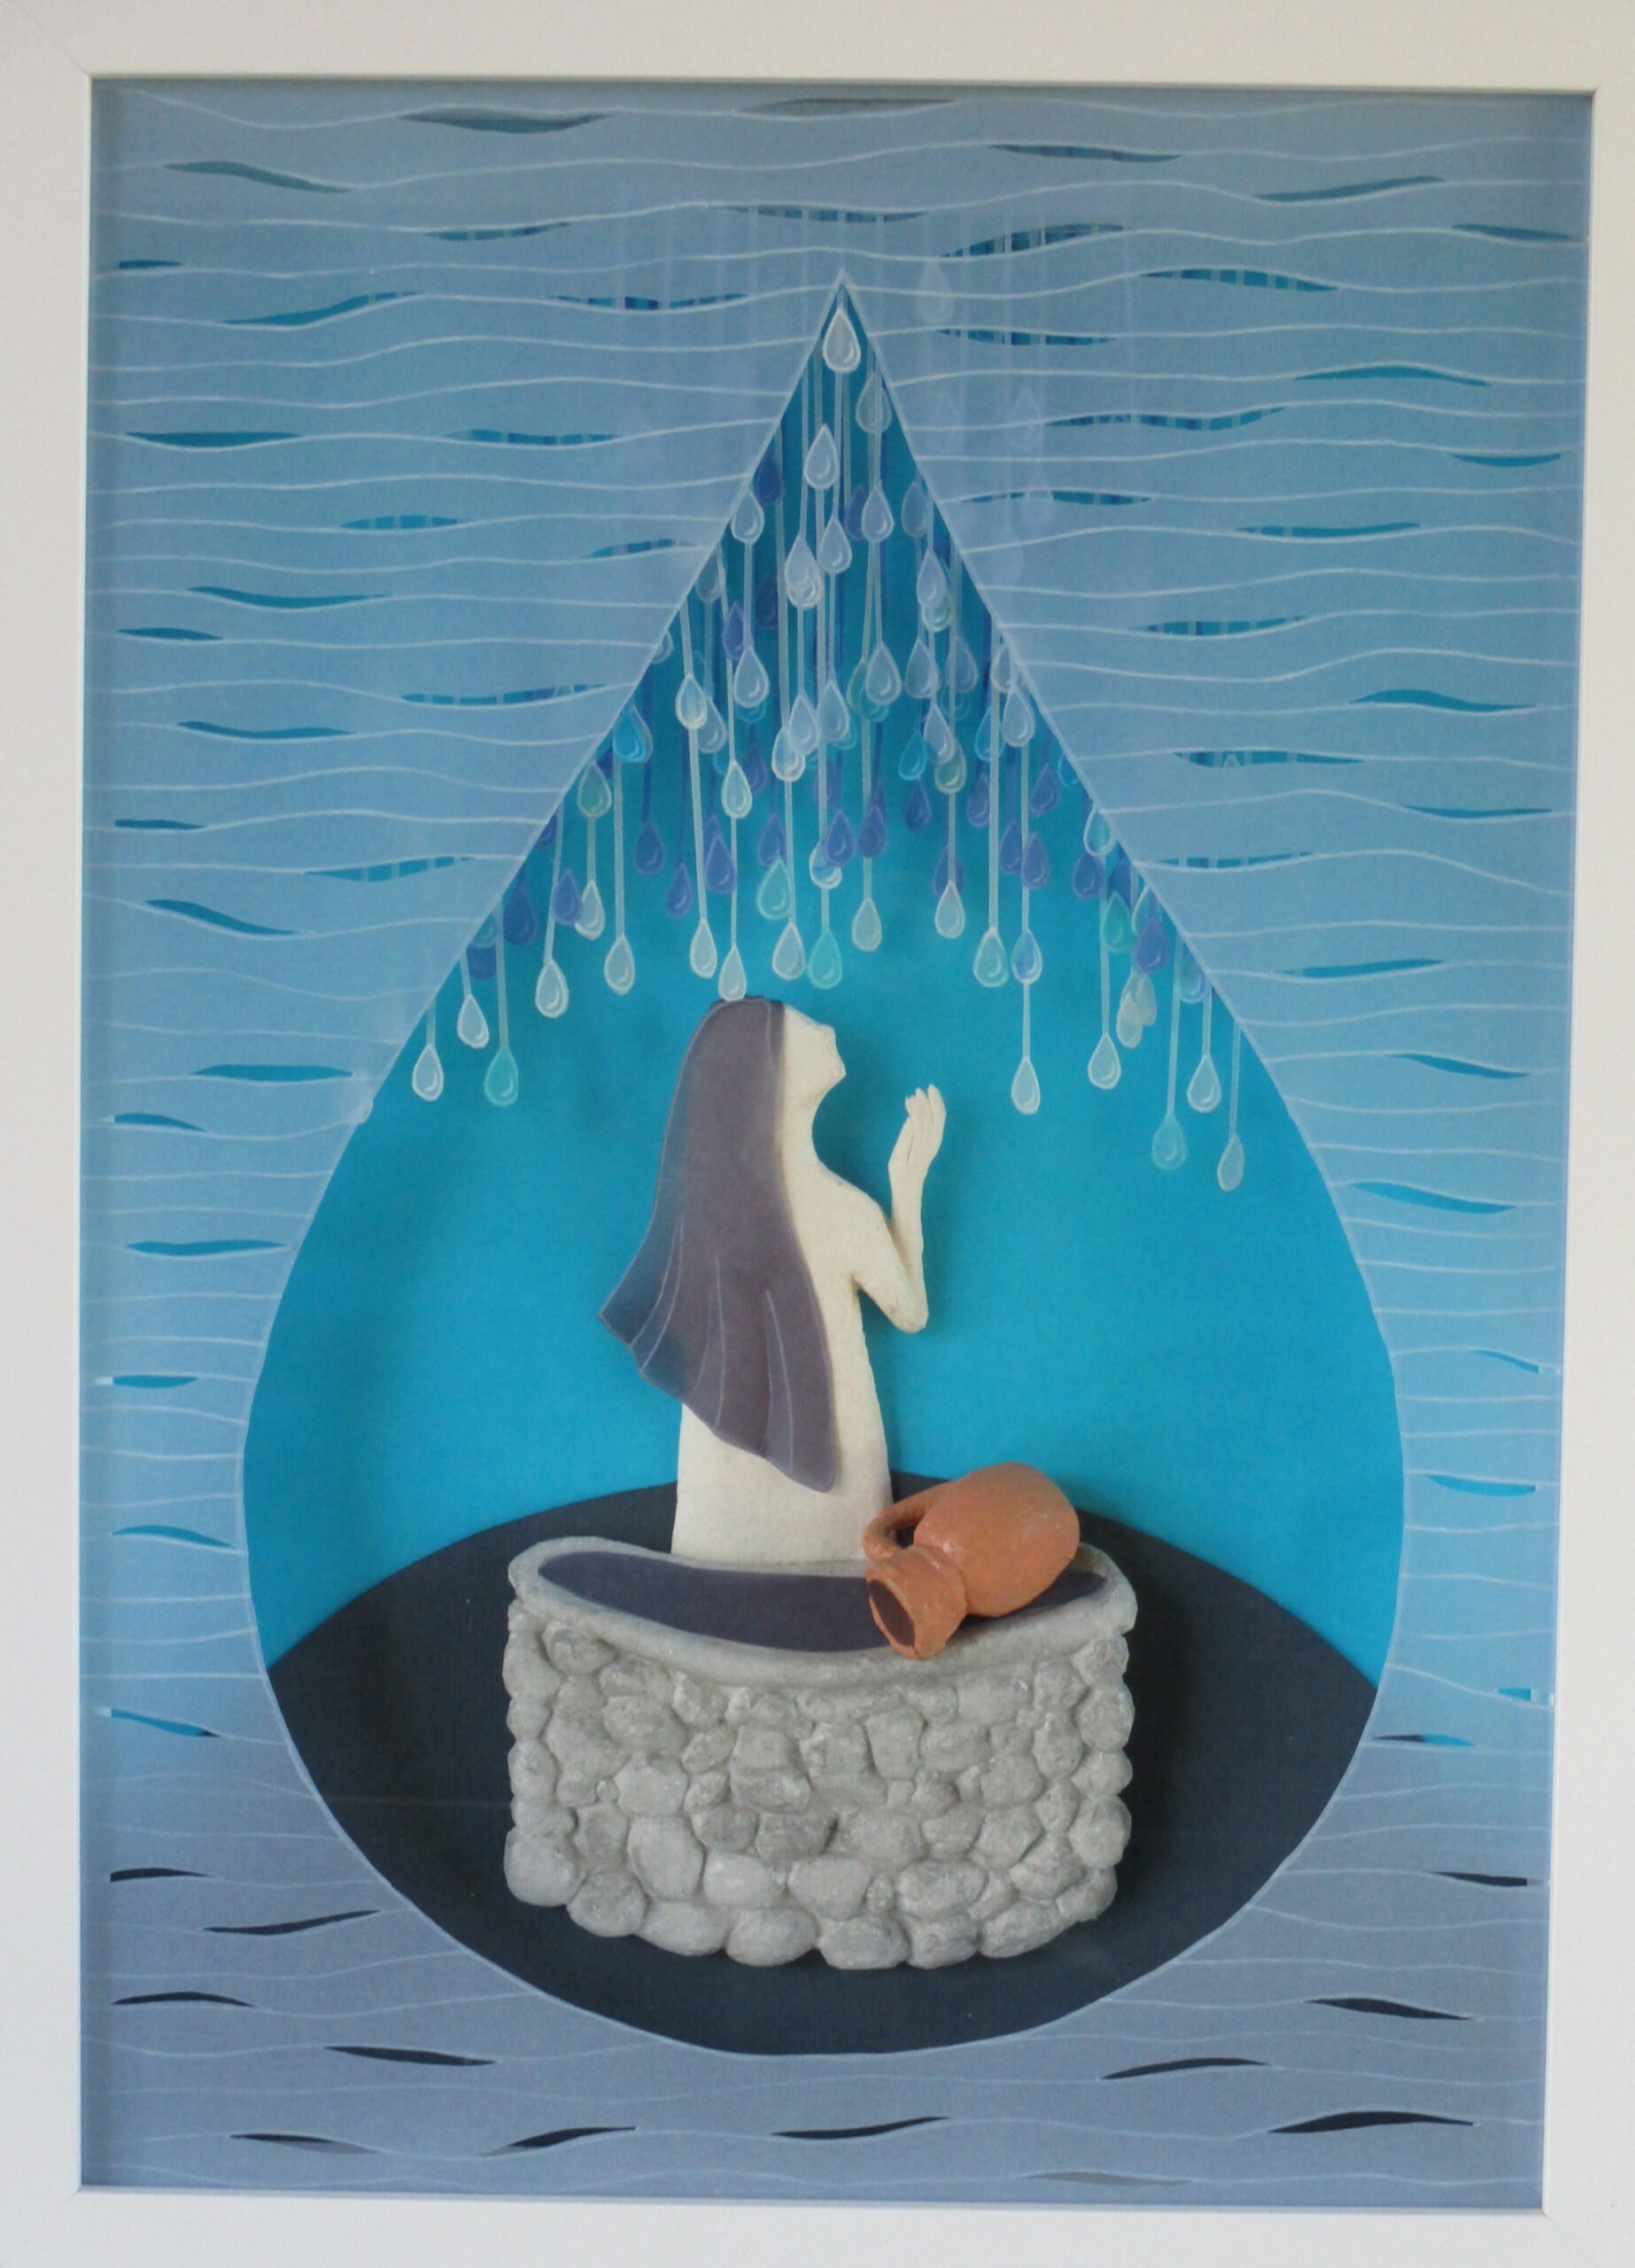
Based on the Bible story in John 4, a woman comes to the well to draw water. But through her encounter with Jesus she’s captivated by Living Water, her life changes direction and she returns home without her water jar.
The water jar, well and woman are sculpted with cast recycled paper. Images are modelled in plasticine and plaster molds are created into which paper pulp is pressed. This process is detailed in my Paper Sculptured Photographs post.
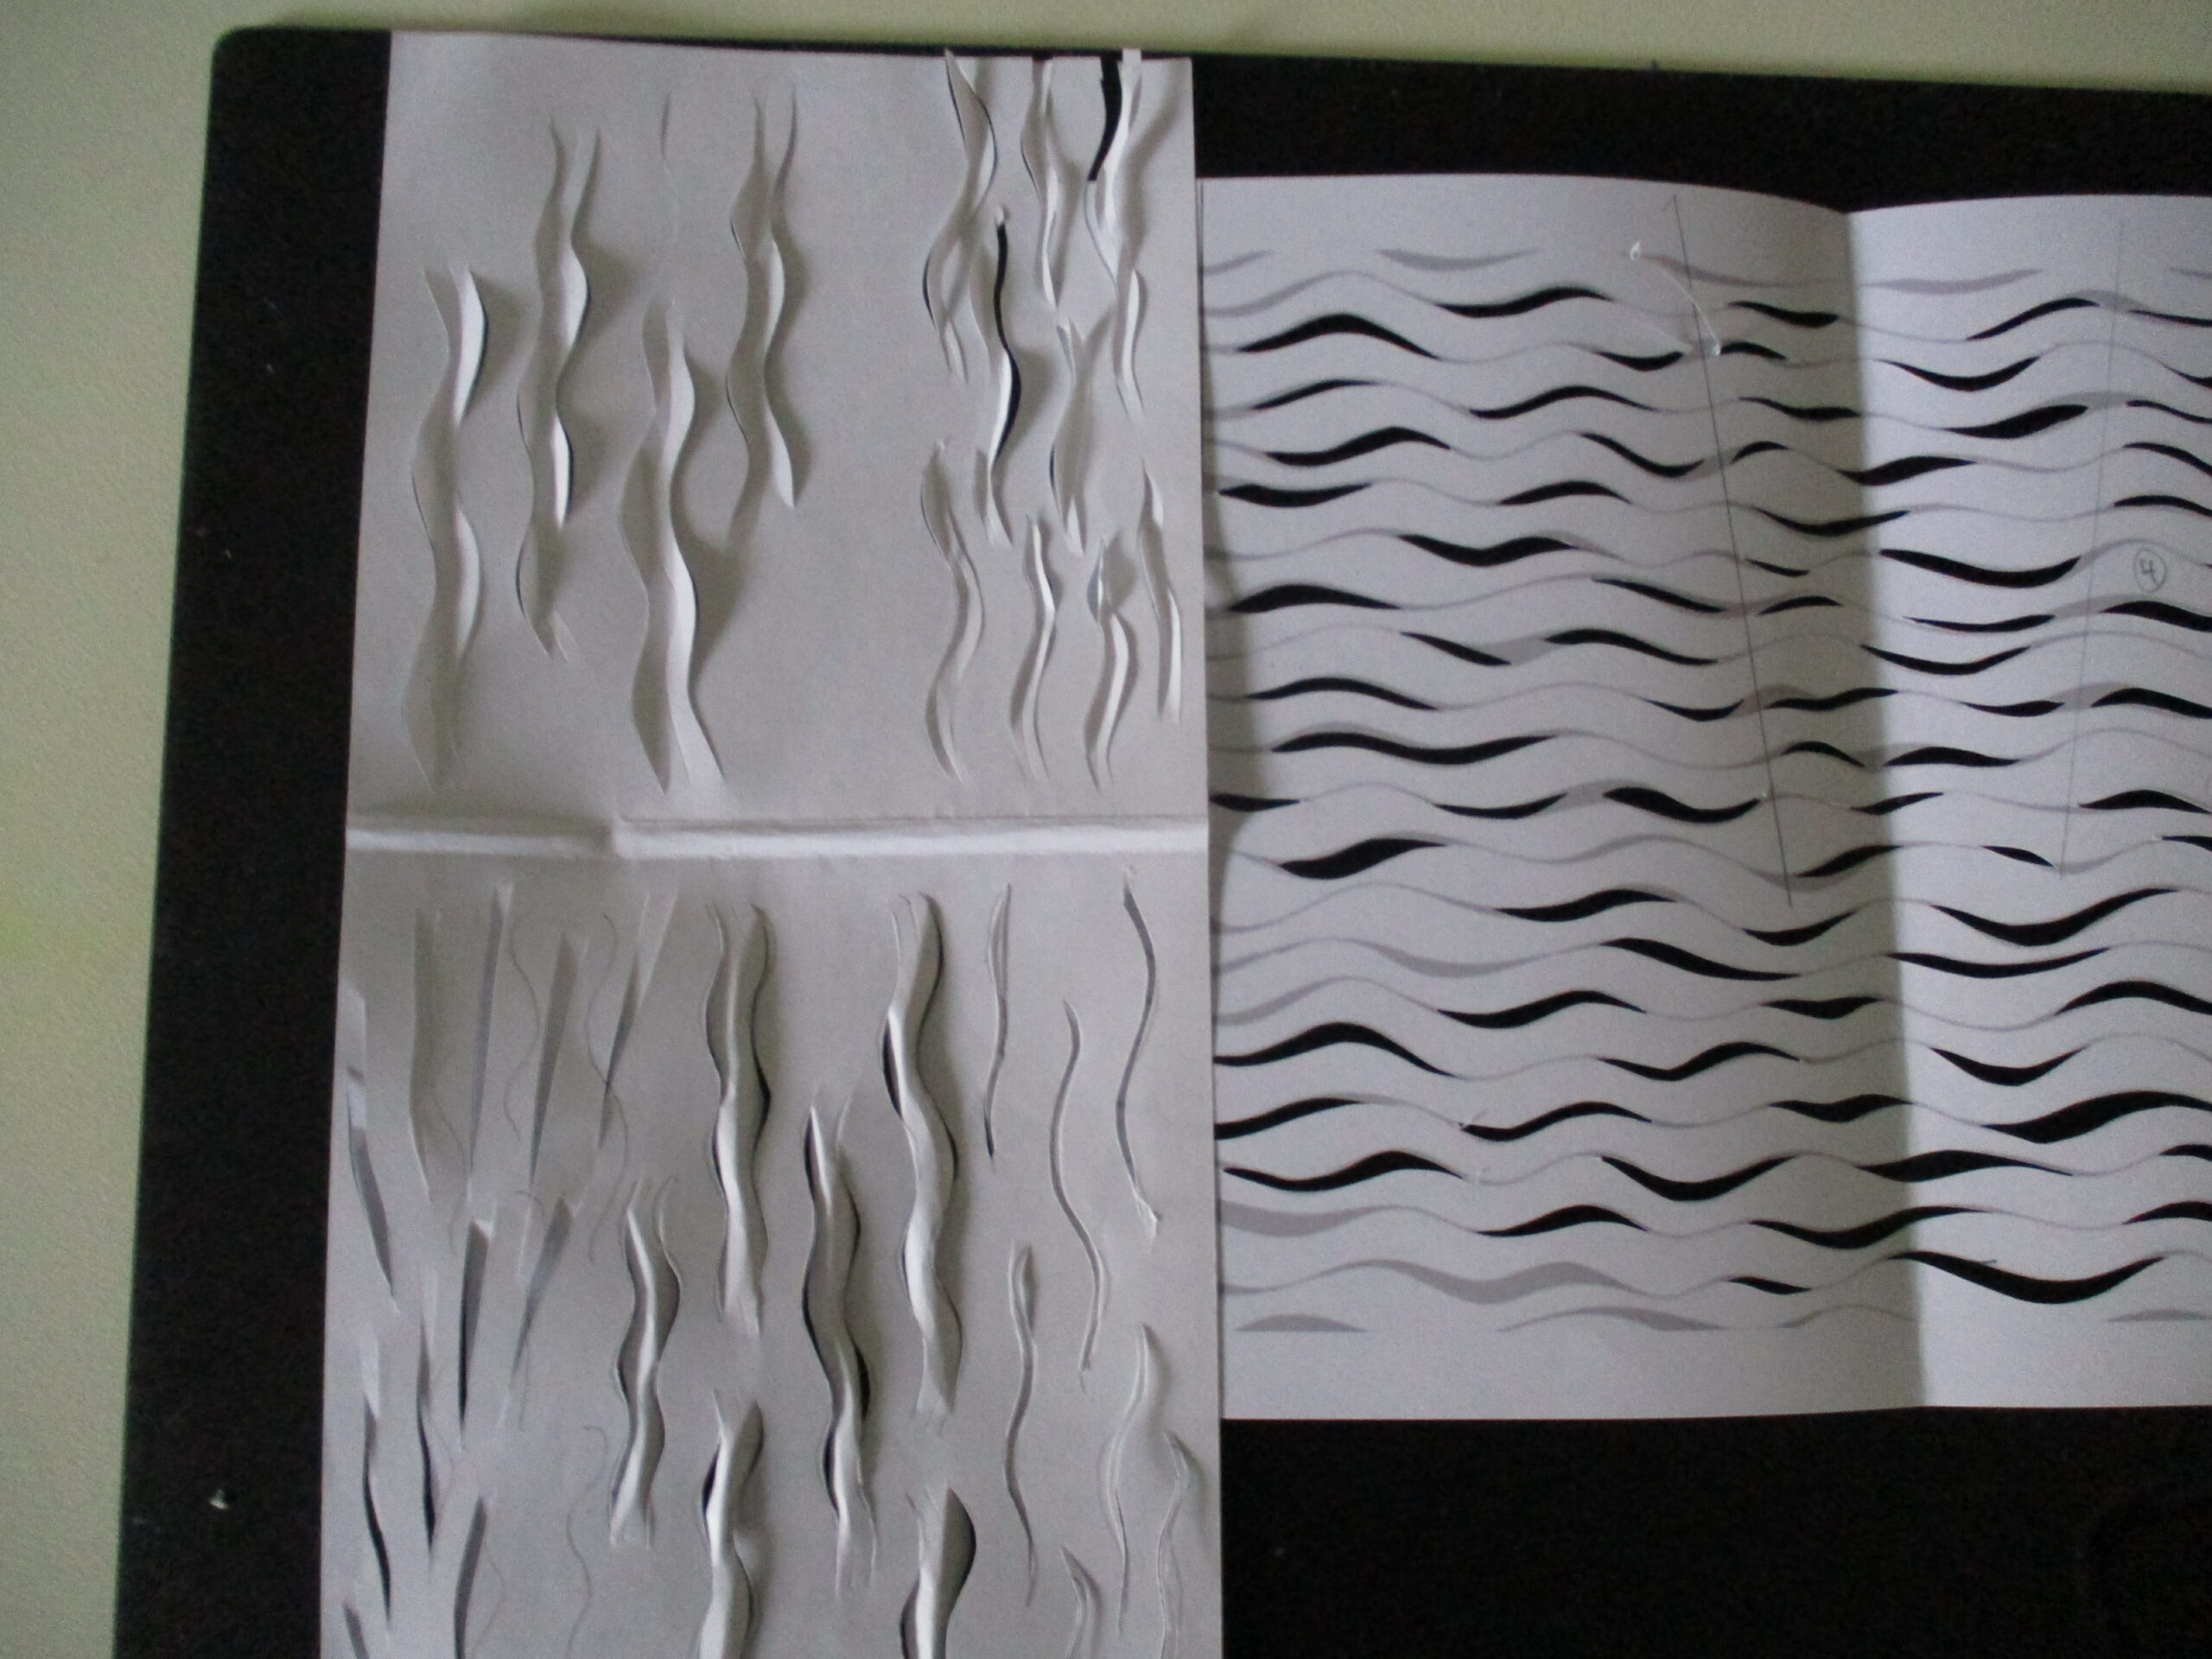
The scene is set within a water drop and I experimented with cutting and embossing to decide how best to represent the gentle water ripples that surround it. This sculpture also includes ‘behind the scenes’ three layers of cut and embossed droplets descending. Due to its translucency, I’ve chosen paper vellum to depict water.
It had its challenges! At A3 size, these are much larger than my usual paper sculptures, so working on and supporting larger sheets of paper was the first challenge. The second was the complex framing required for the bas-relief and layering.
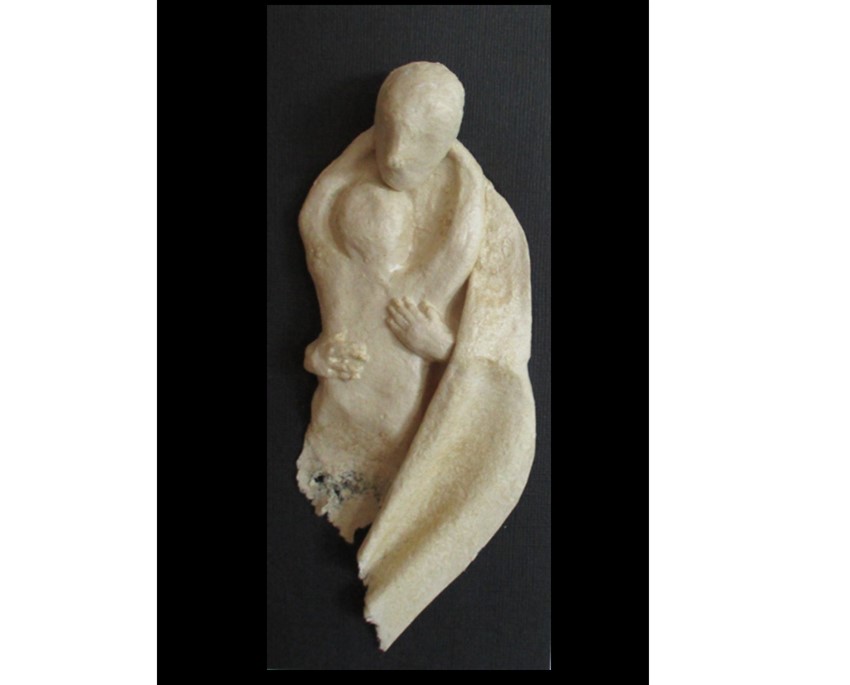
This sculpture was created in memory of a long time friend who died early this year. The Biblical story of the prodigal son (Luke 15) was one of his favourites, and this sculpture was inspired by a photo of a large clay rendition.
The image is small (180mm x 80mm), set on the front of a card. It was sculpted in two pieces with plasticine from which plaster moulds were made. Recycled paper pulp was pressed into the plaster cast and dried, then constructed and shaped. As the work is not behind glass, I’ve used several layers of sealant on the surface.
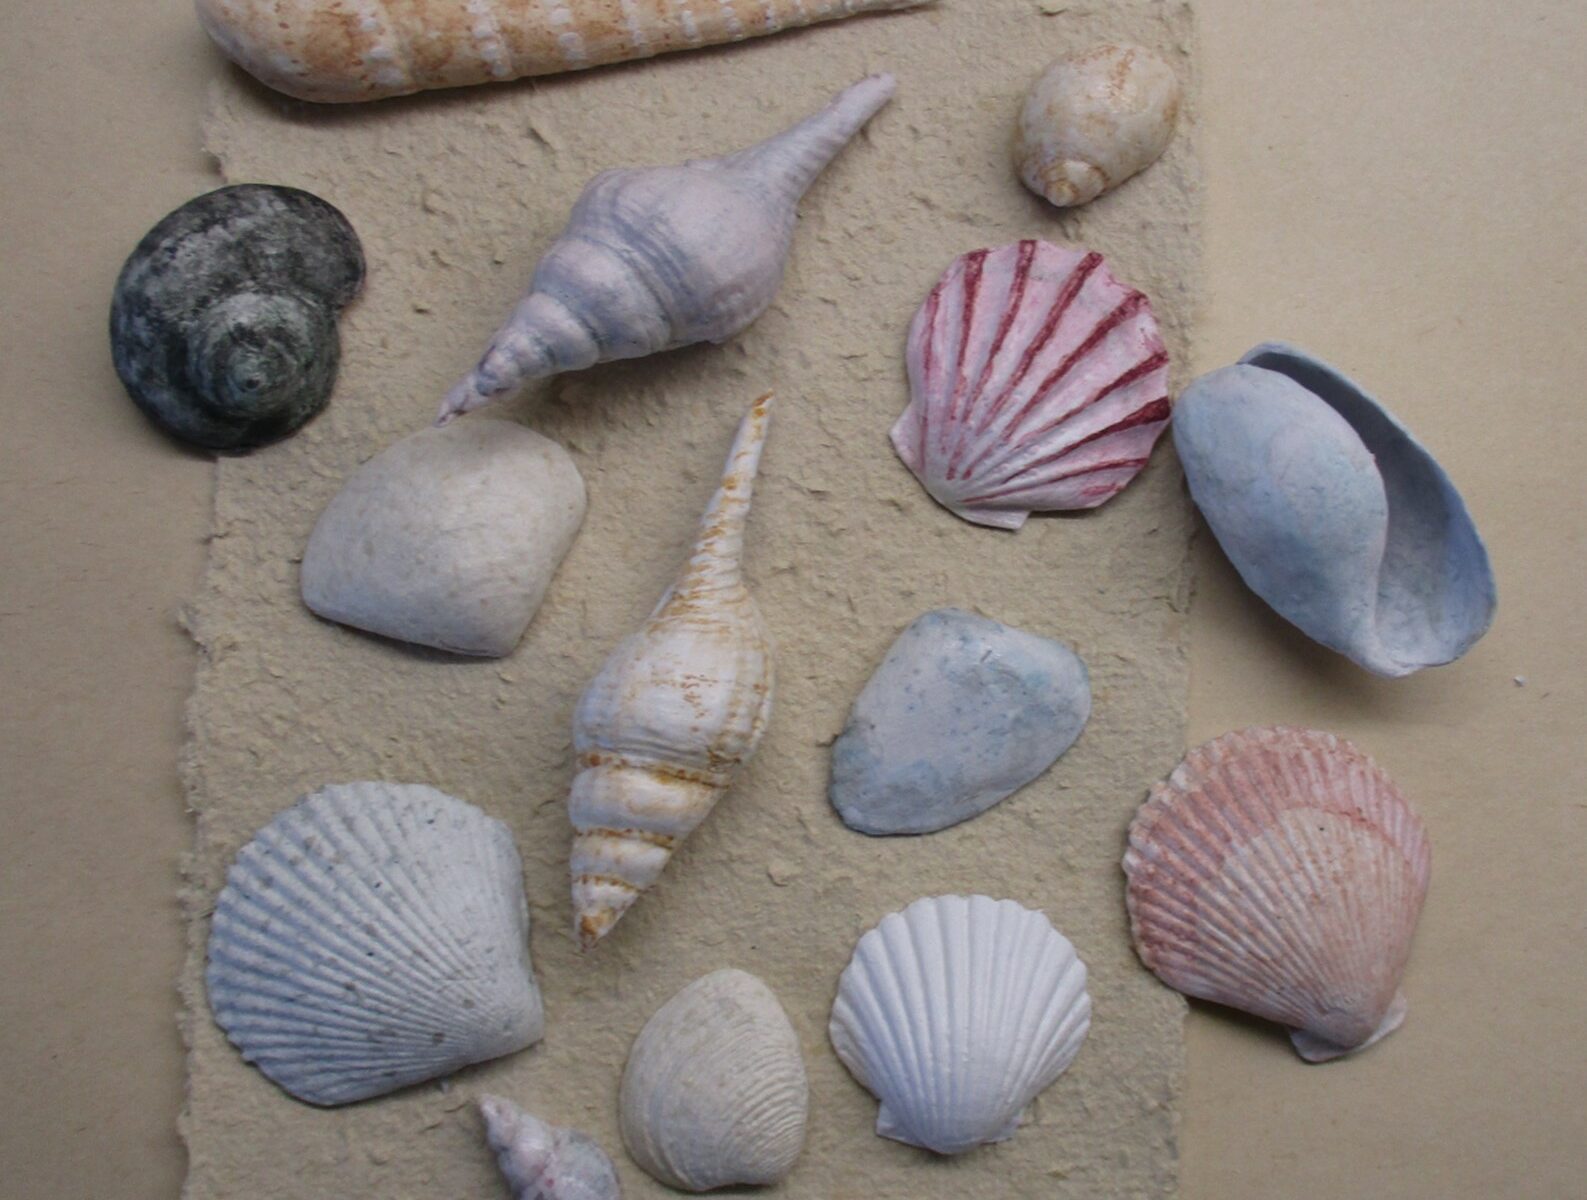
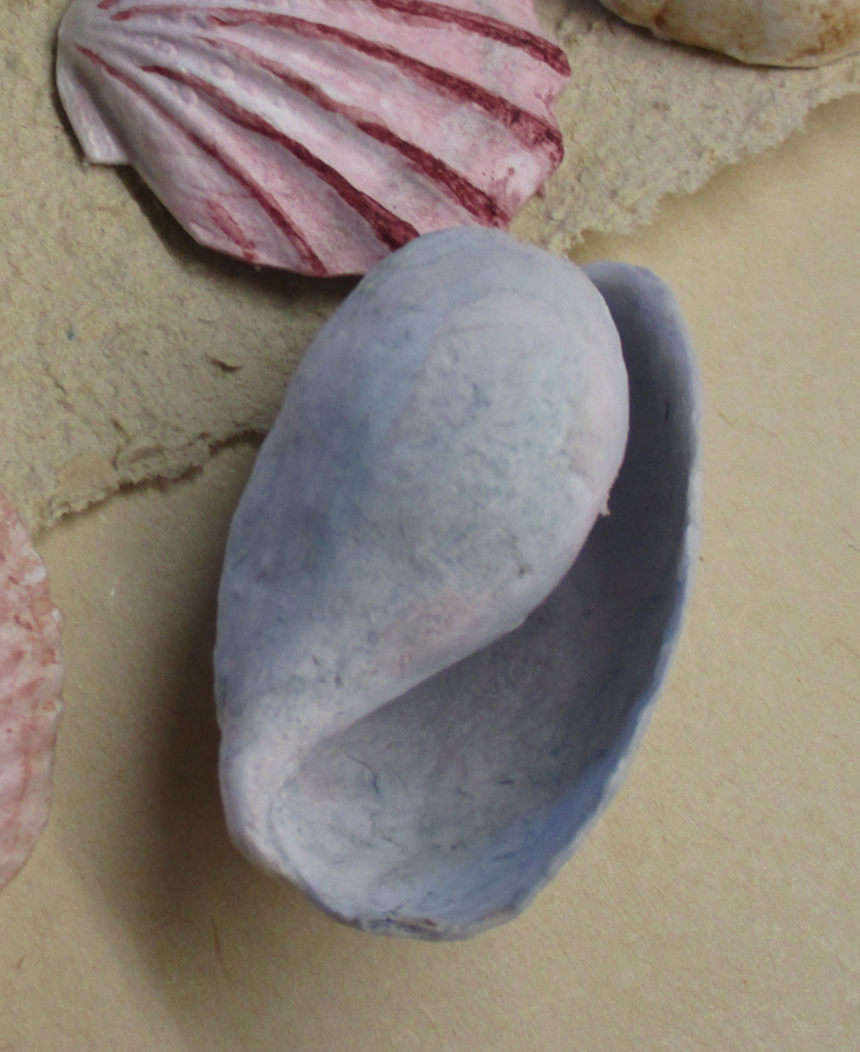
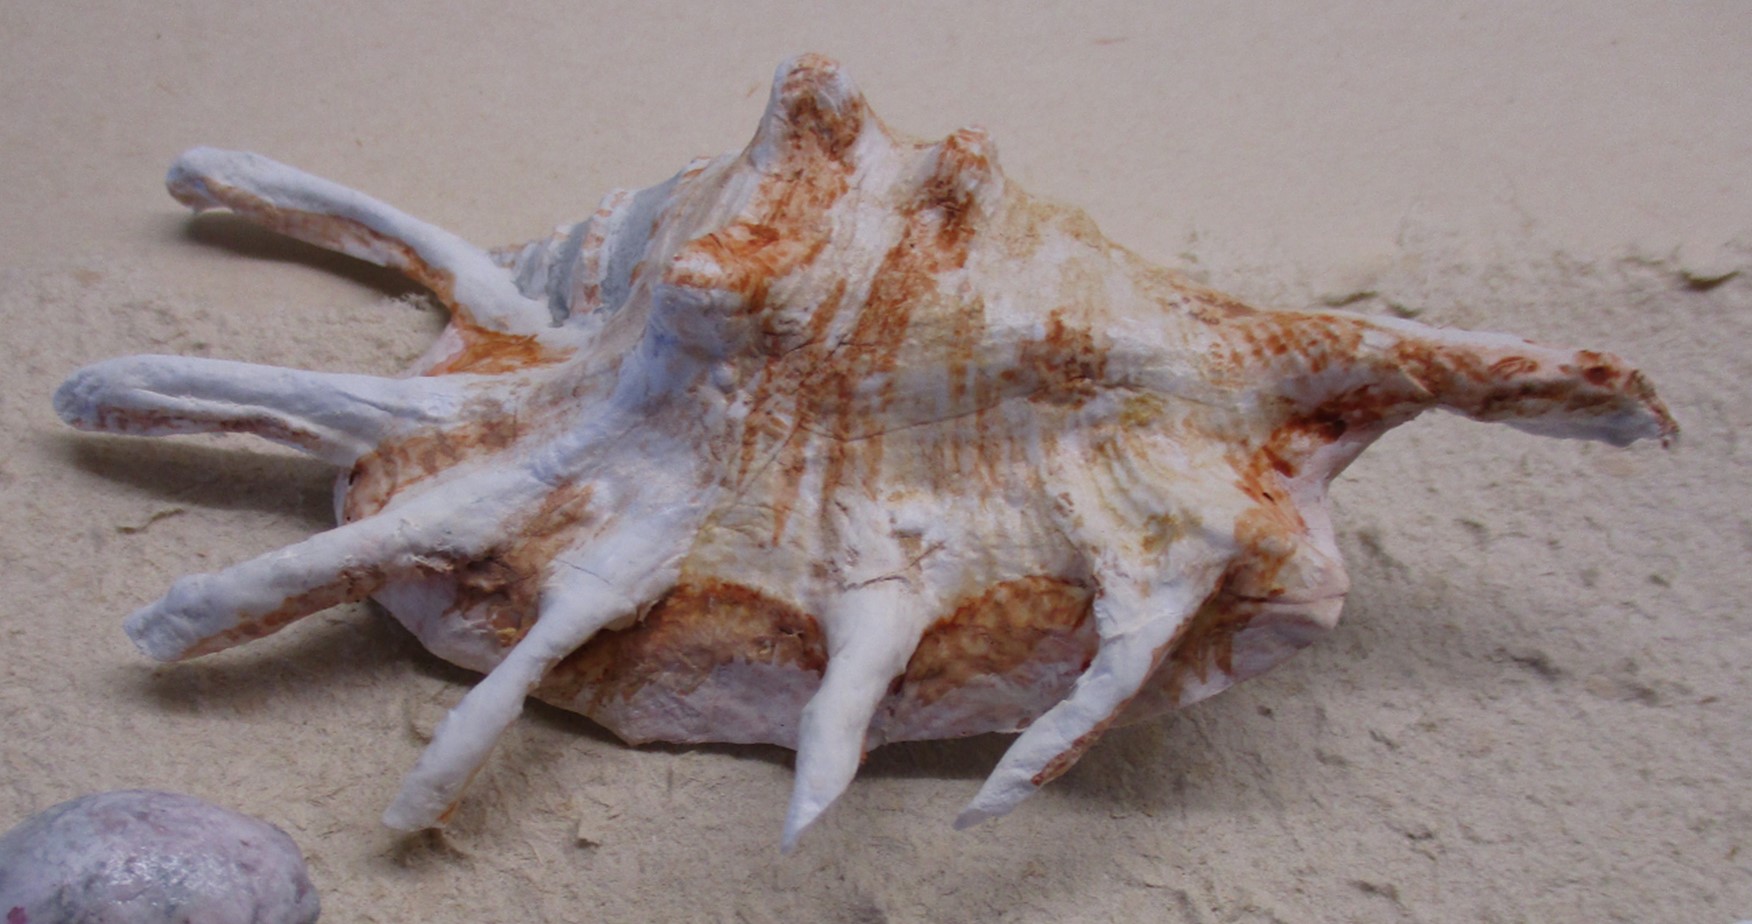
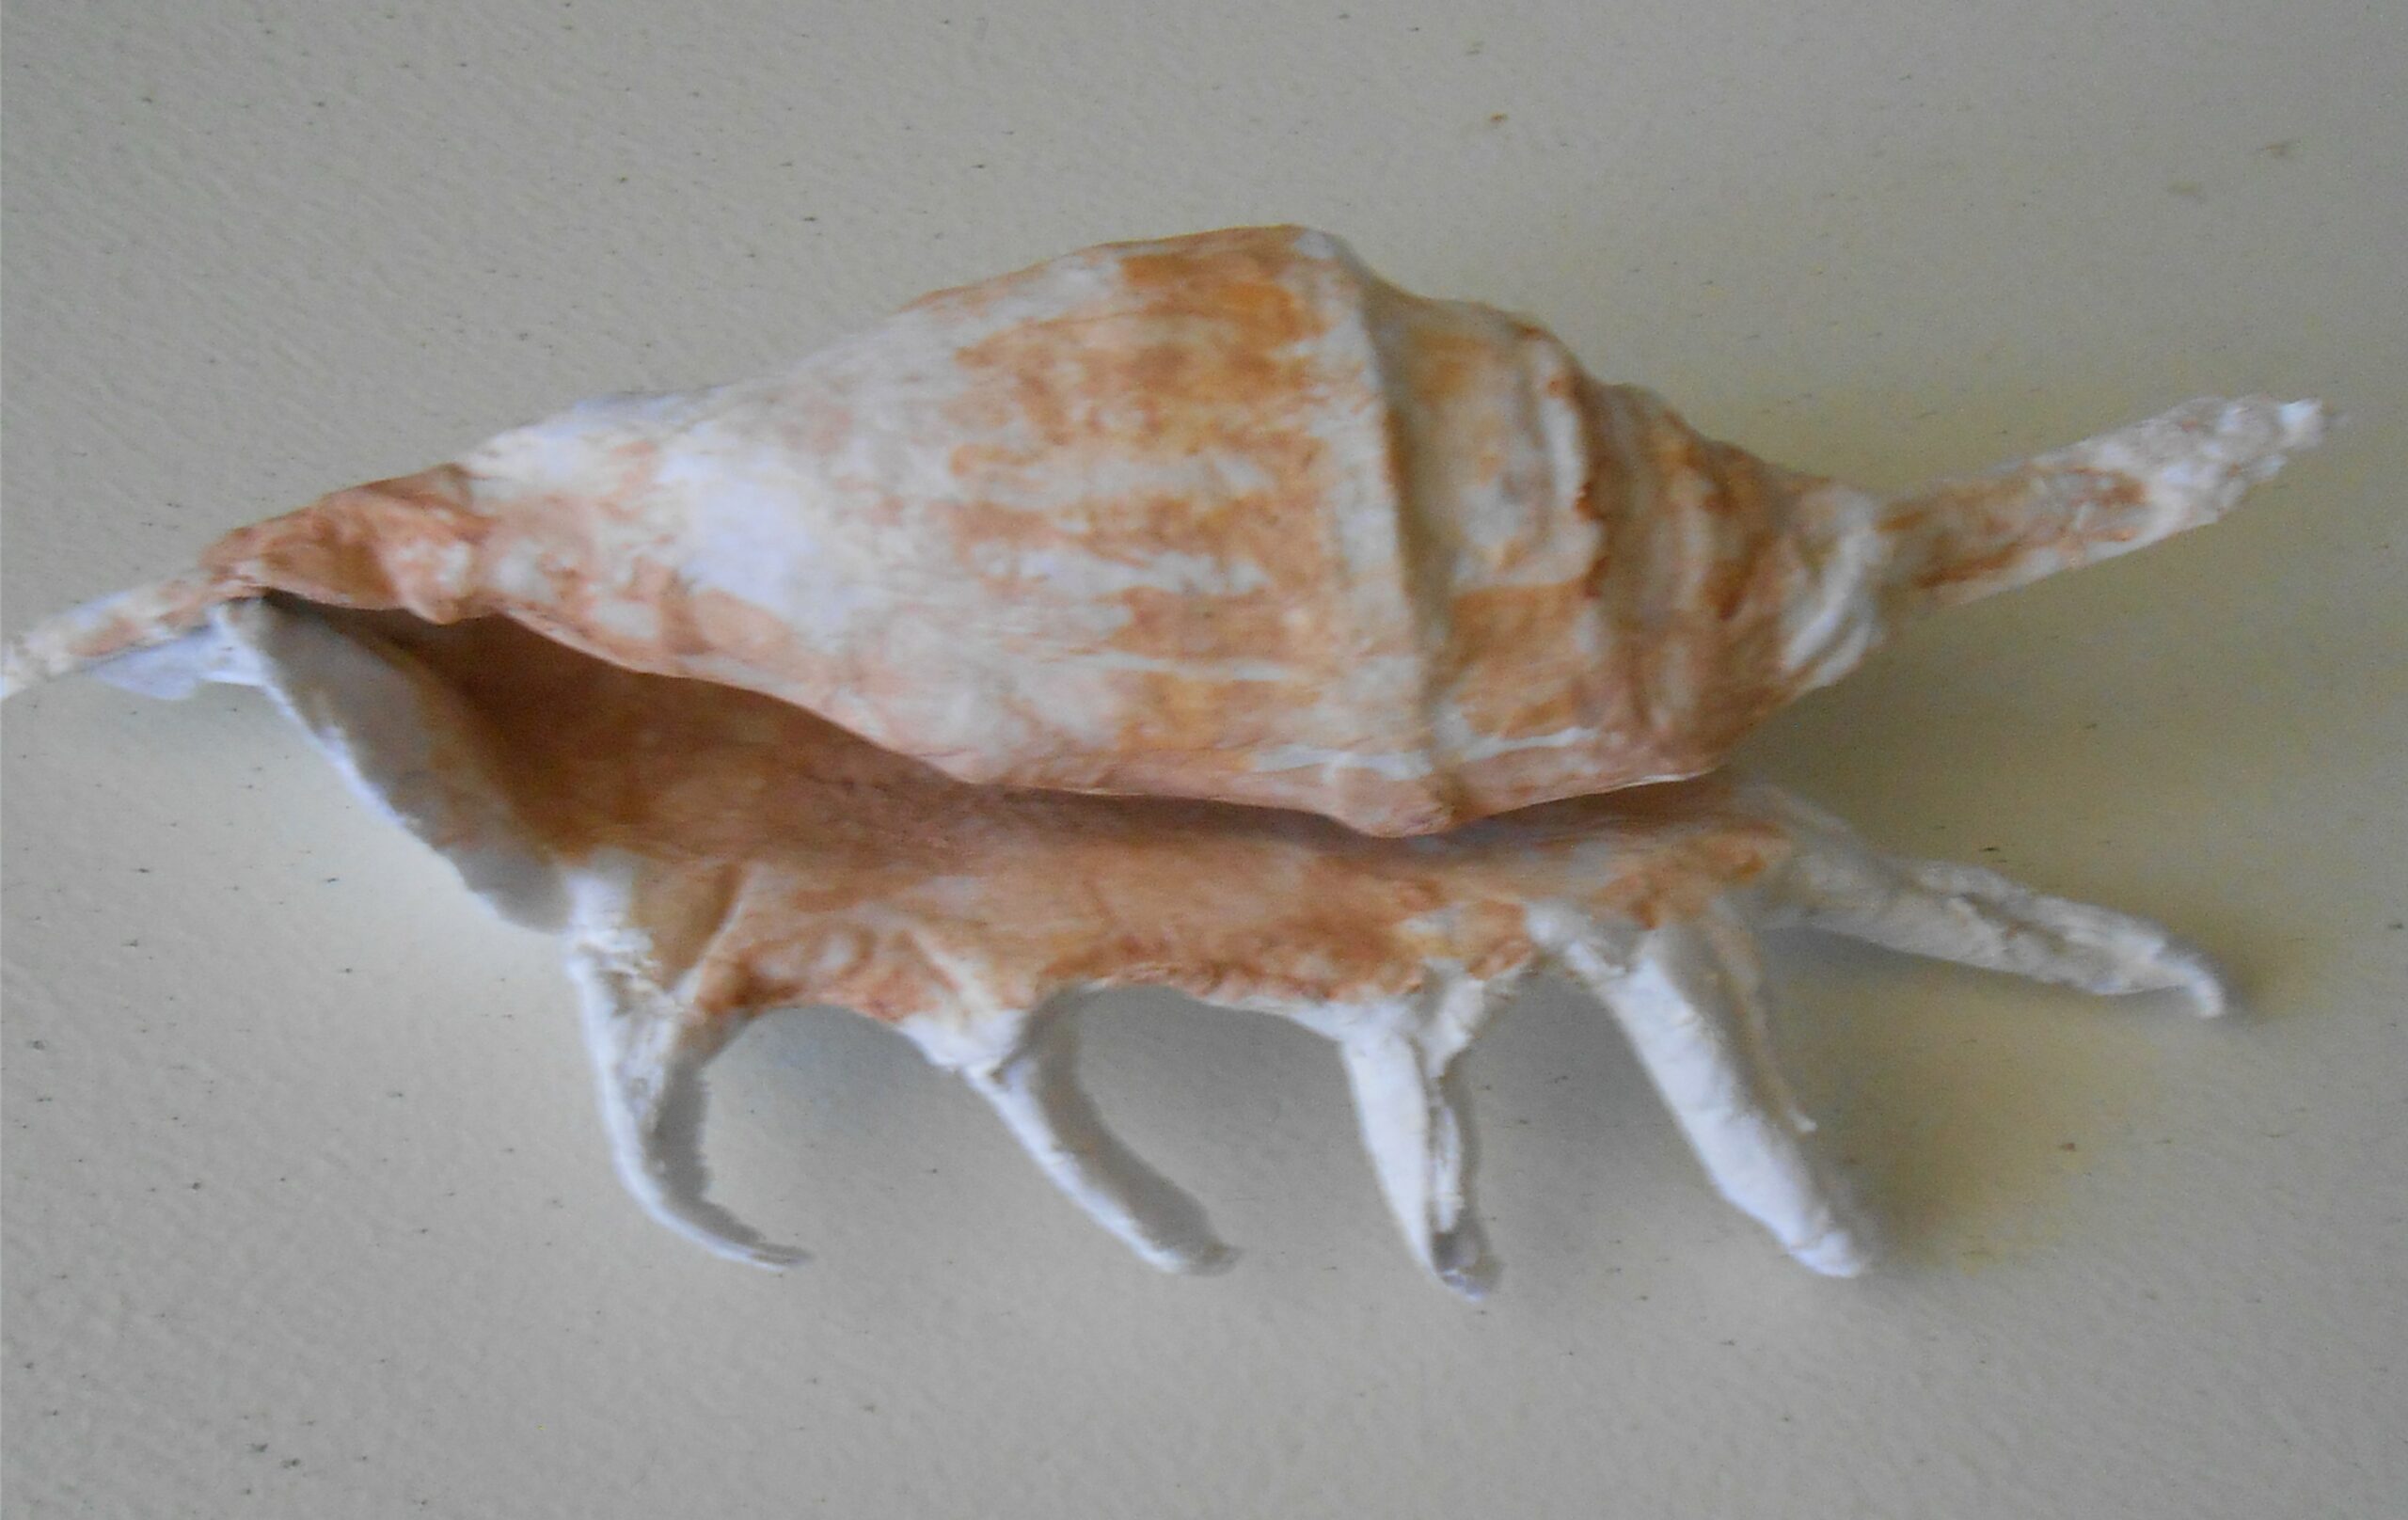
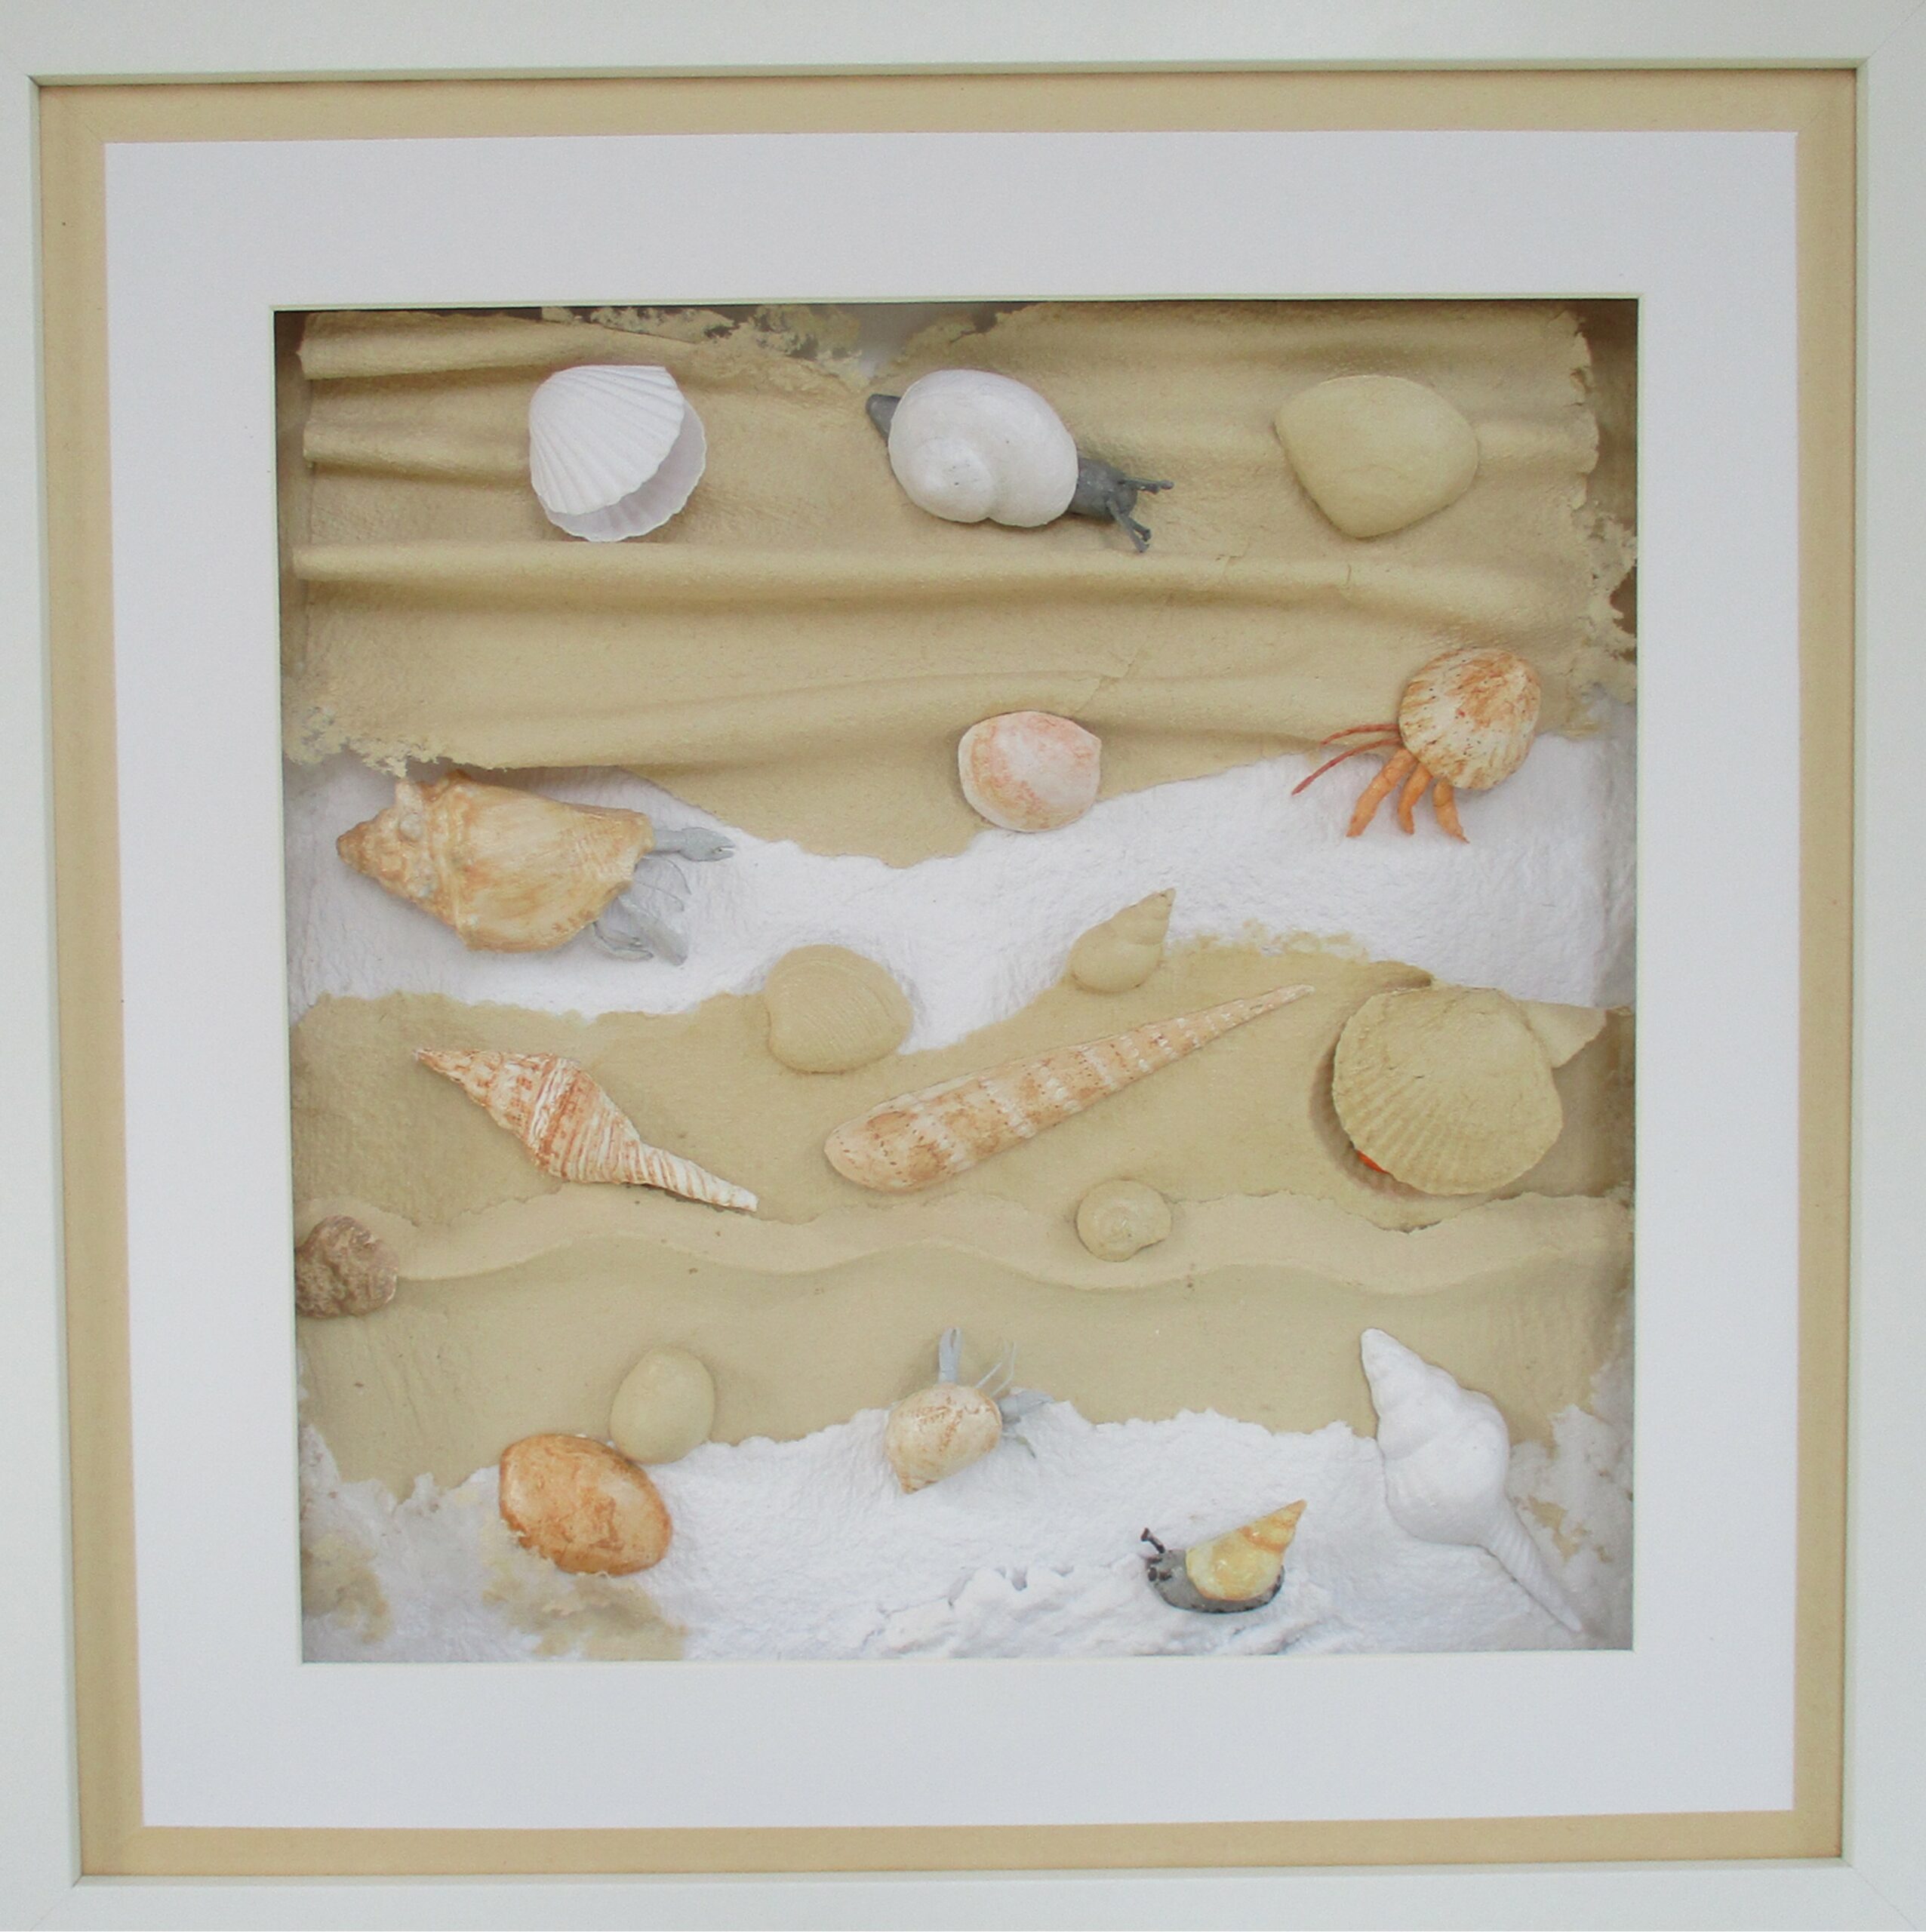
Over the years I’ve collected a number of shells and I’ve often wondered if they could be ReCreated in paper. Ultimately, my goal is to incorporate them into art pieces*, so this project is the first stage.
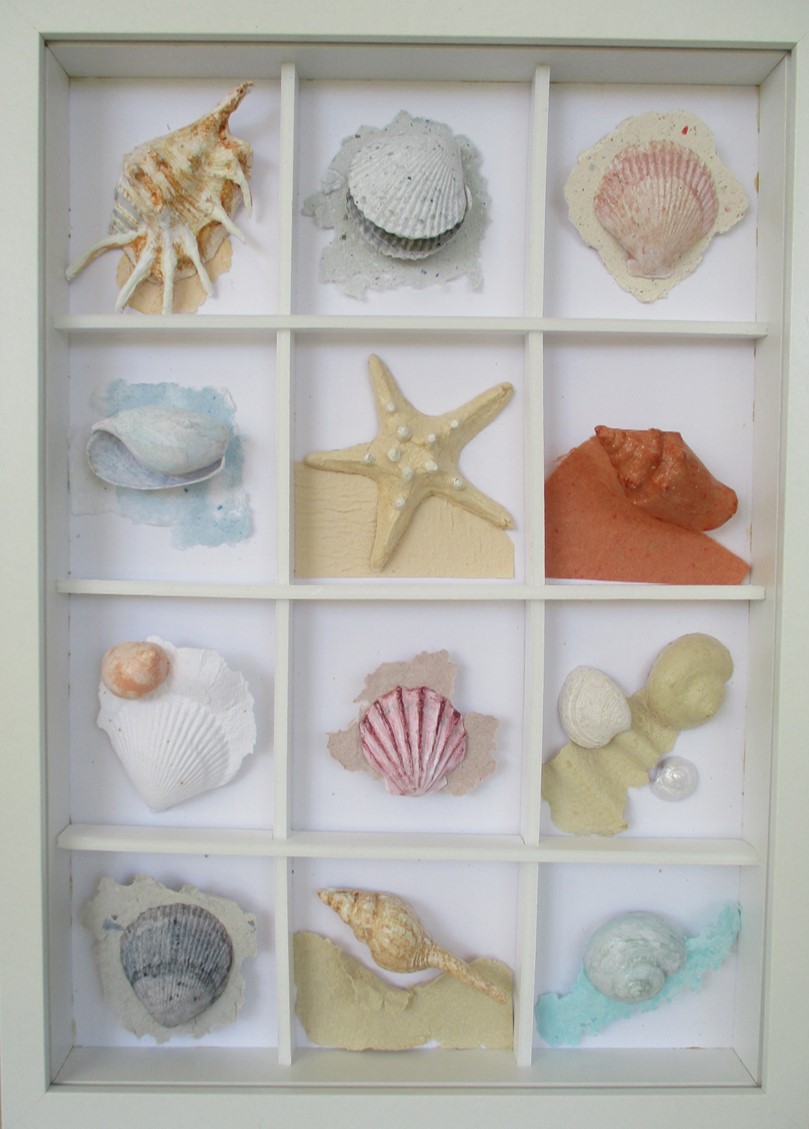
Q: Can you guess which of the shells in the image above are real and which are paper? (Answer is at the end of this post!)
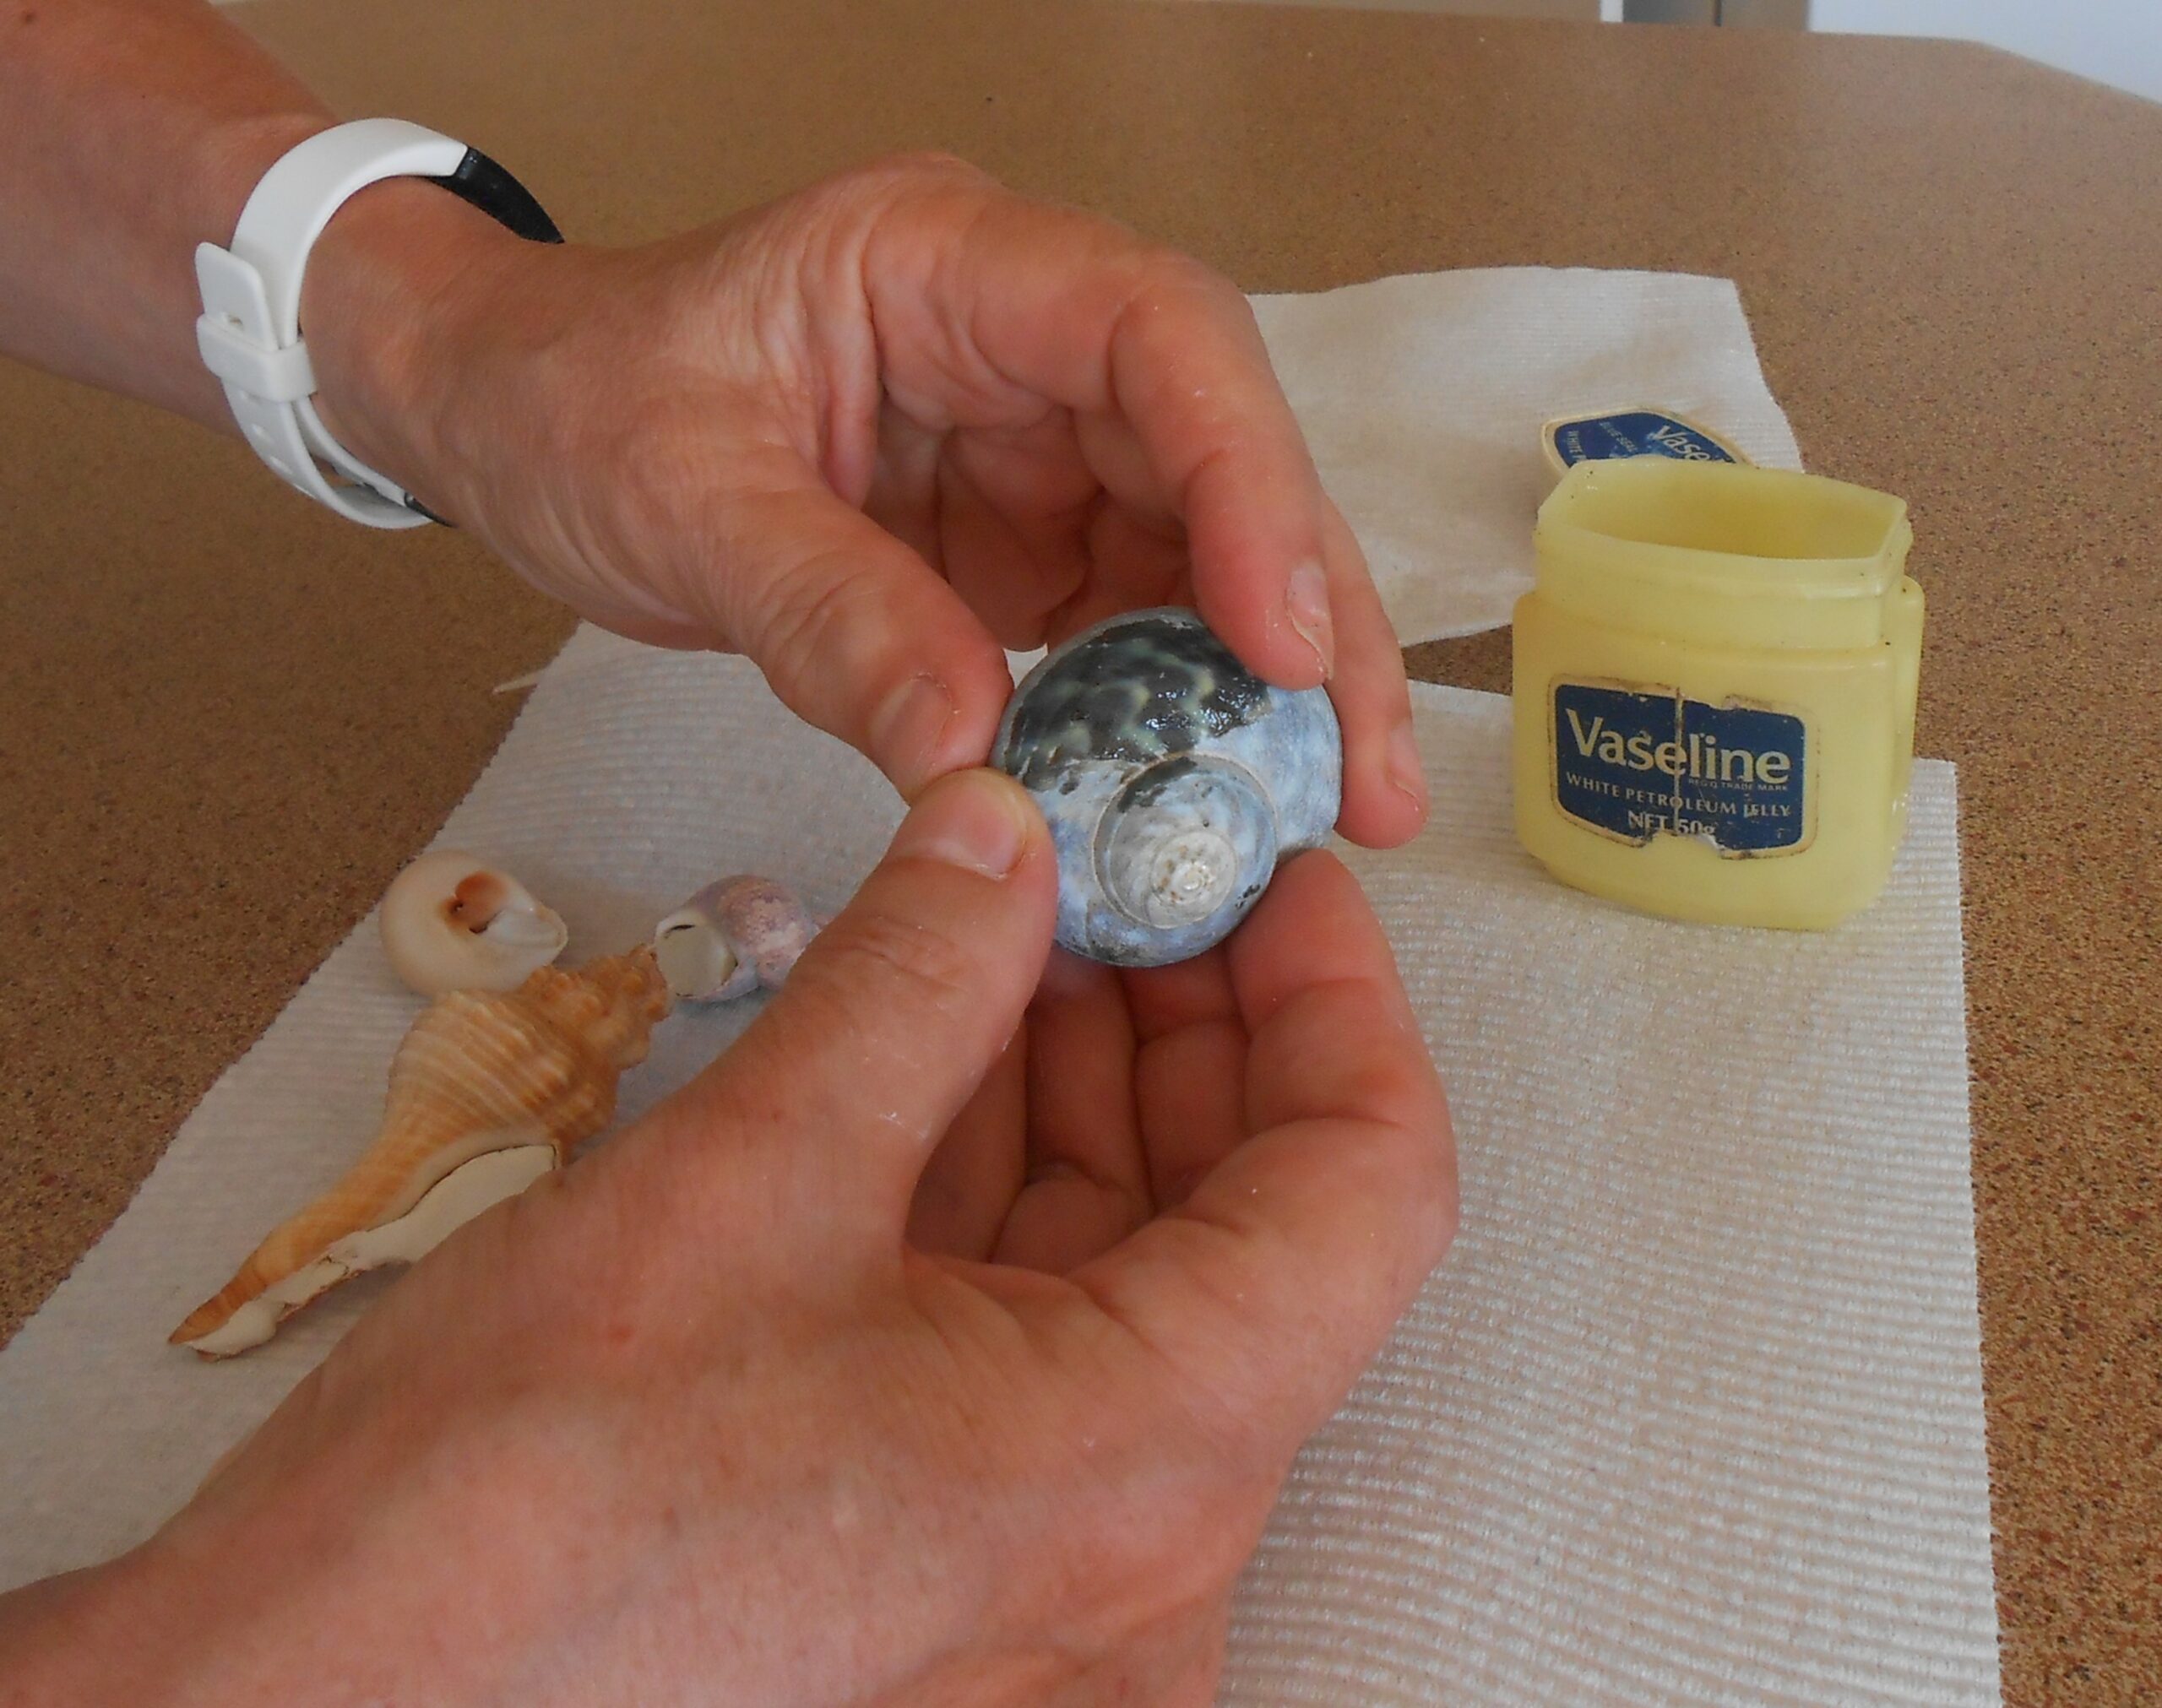
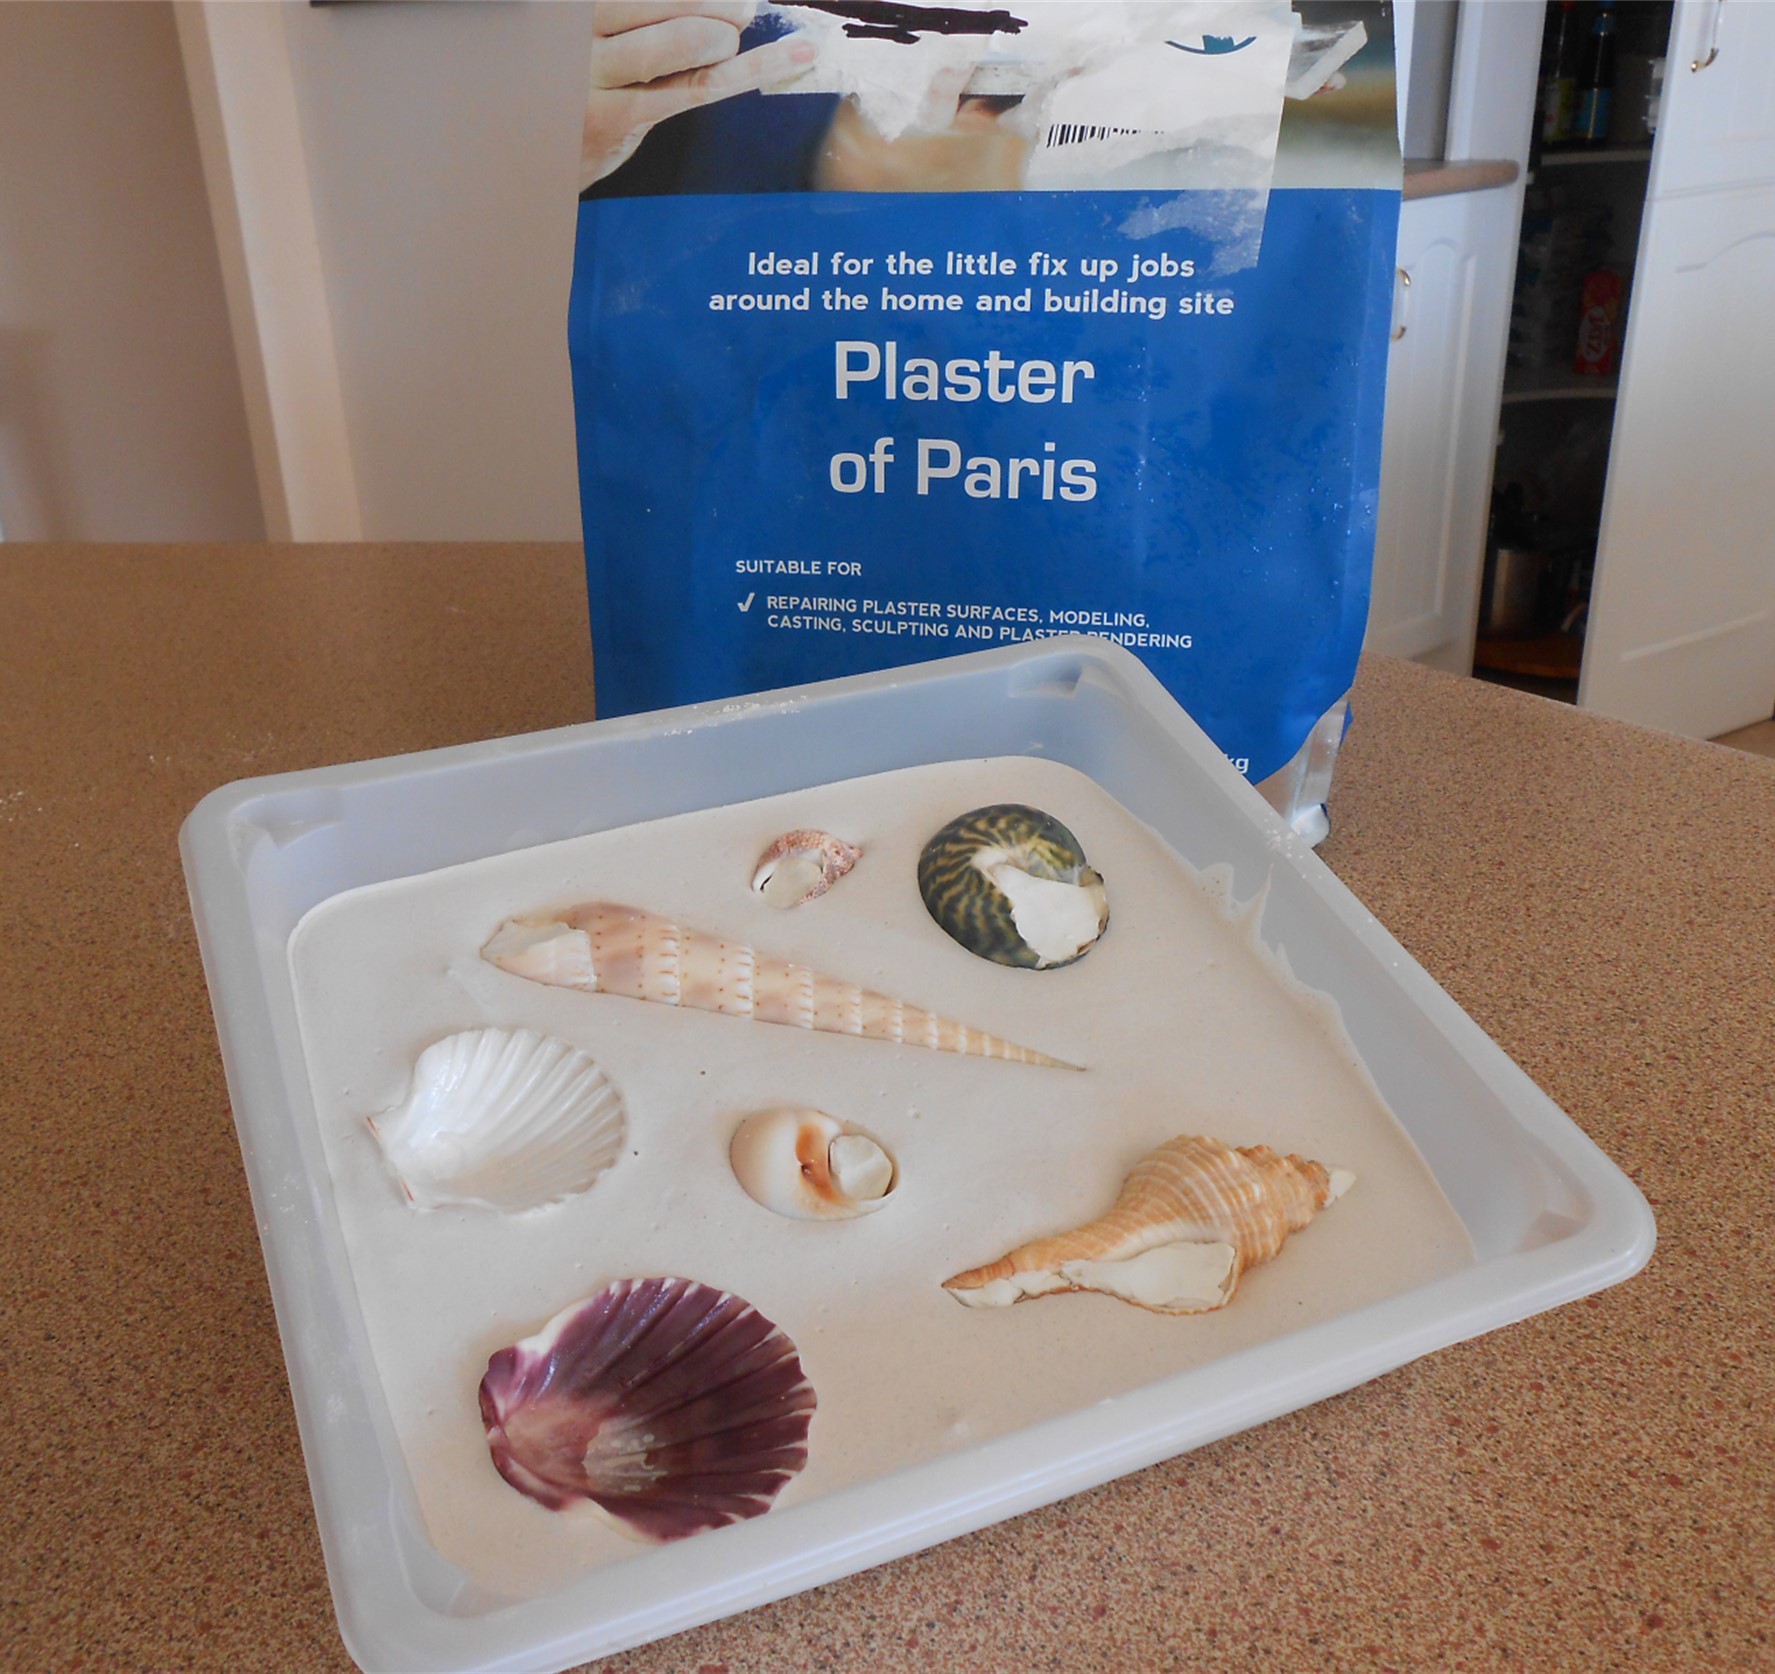
The shells are cast from recycled paper. I make a plaster cast by rubbing Vaseline over the surfaces of shells (cooking oil spray works too) and placing them into a bed of Plaster of Paris. It’s important to make the plaster thick enough so the shells don’t sink further than half way. It’s also important to choose shells that don’t have ridges or curves that will prevent the shell from being lifted when the plaster is dry. As a safeguard, I ‘plug’ the crevices where plaster may leak with plasticine – see image below.
Coating the shells
Plugging crevices
Creating the plaster cast
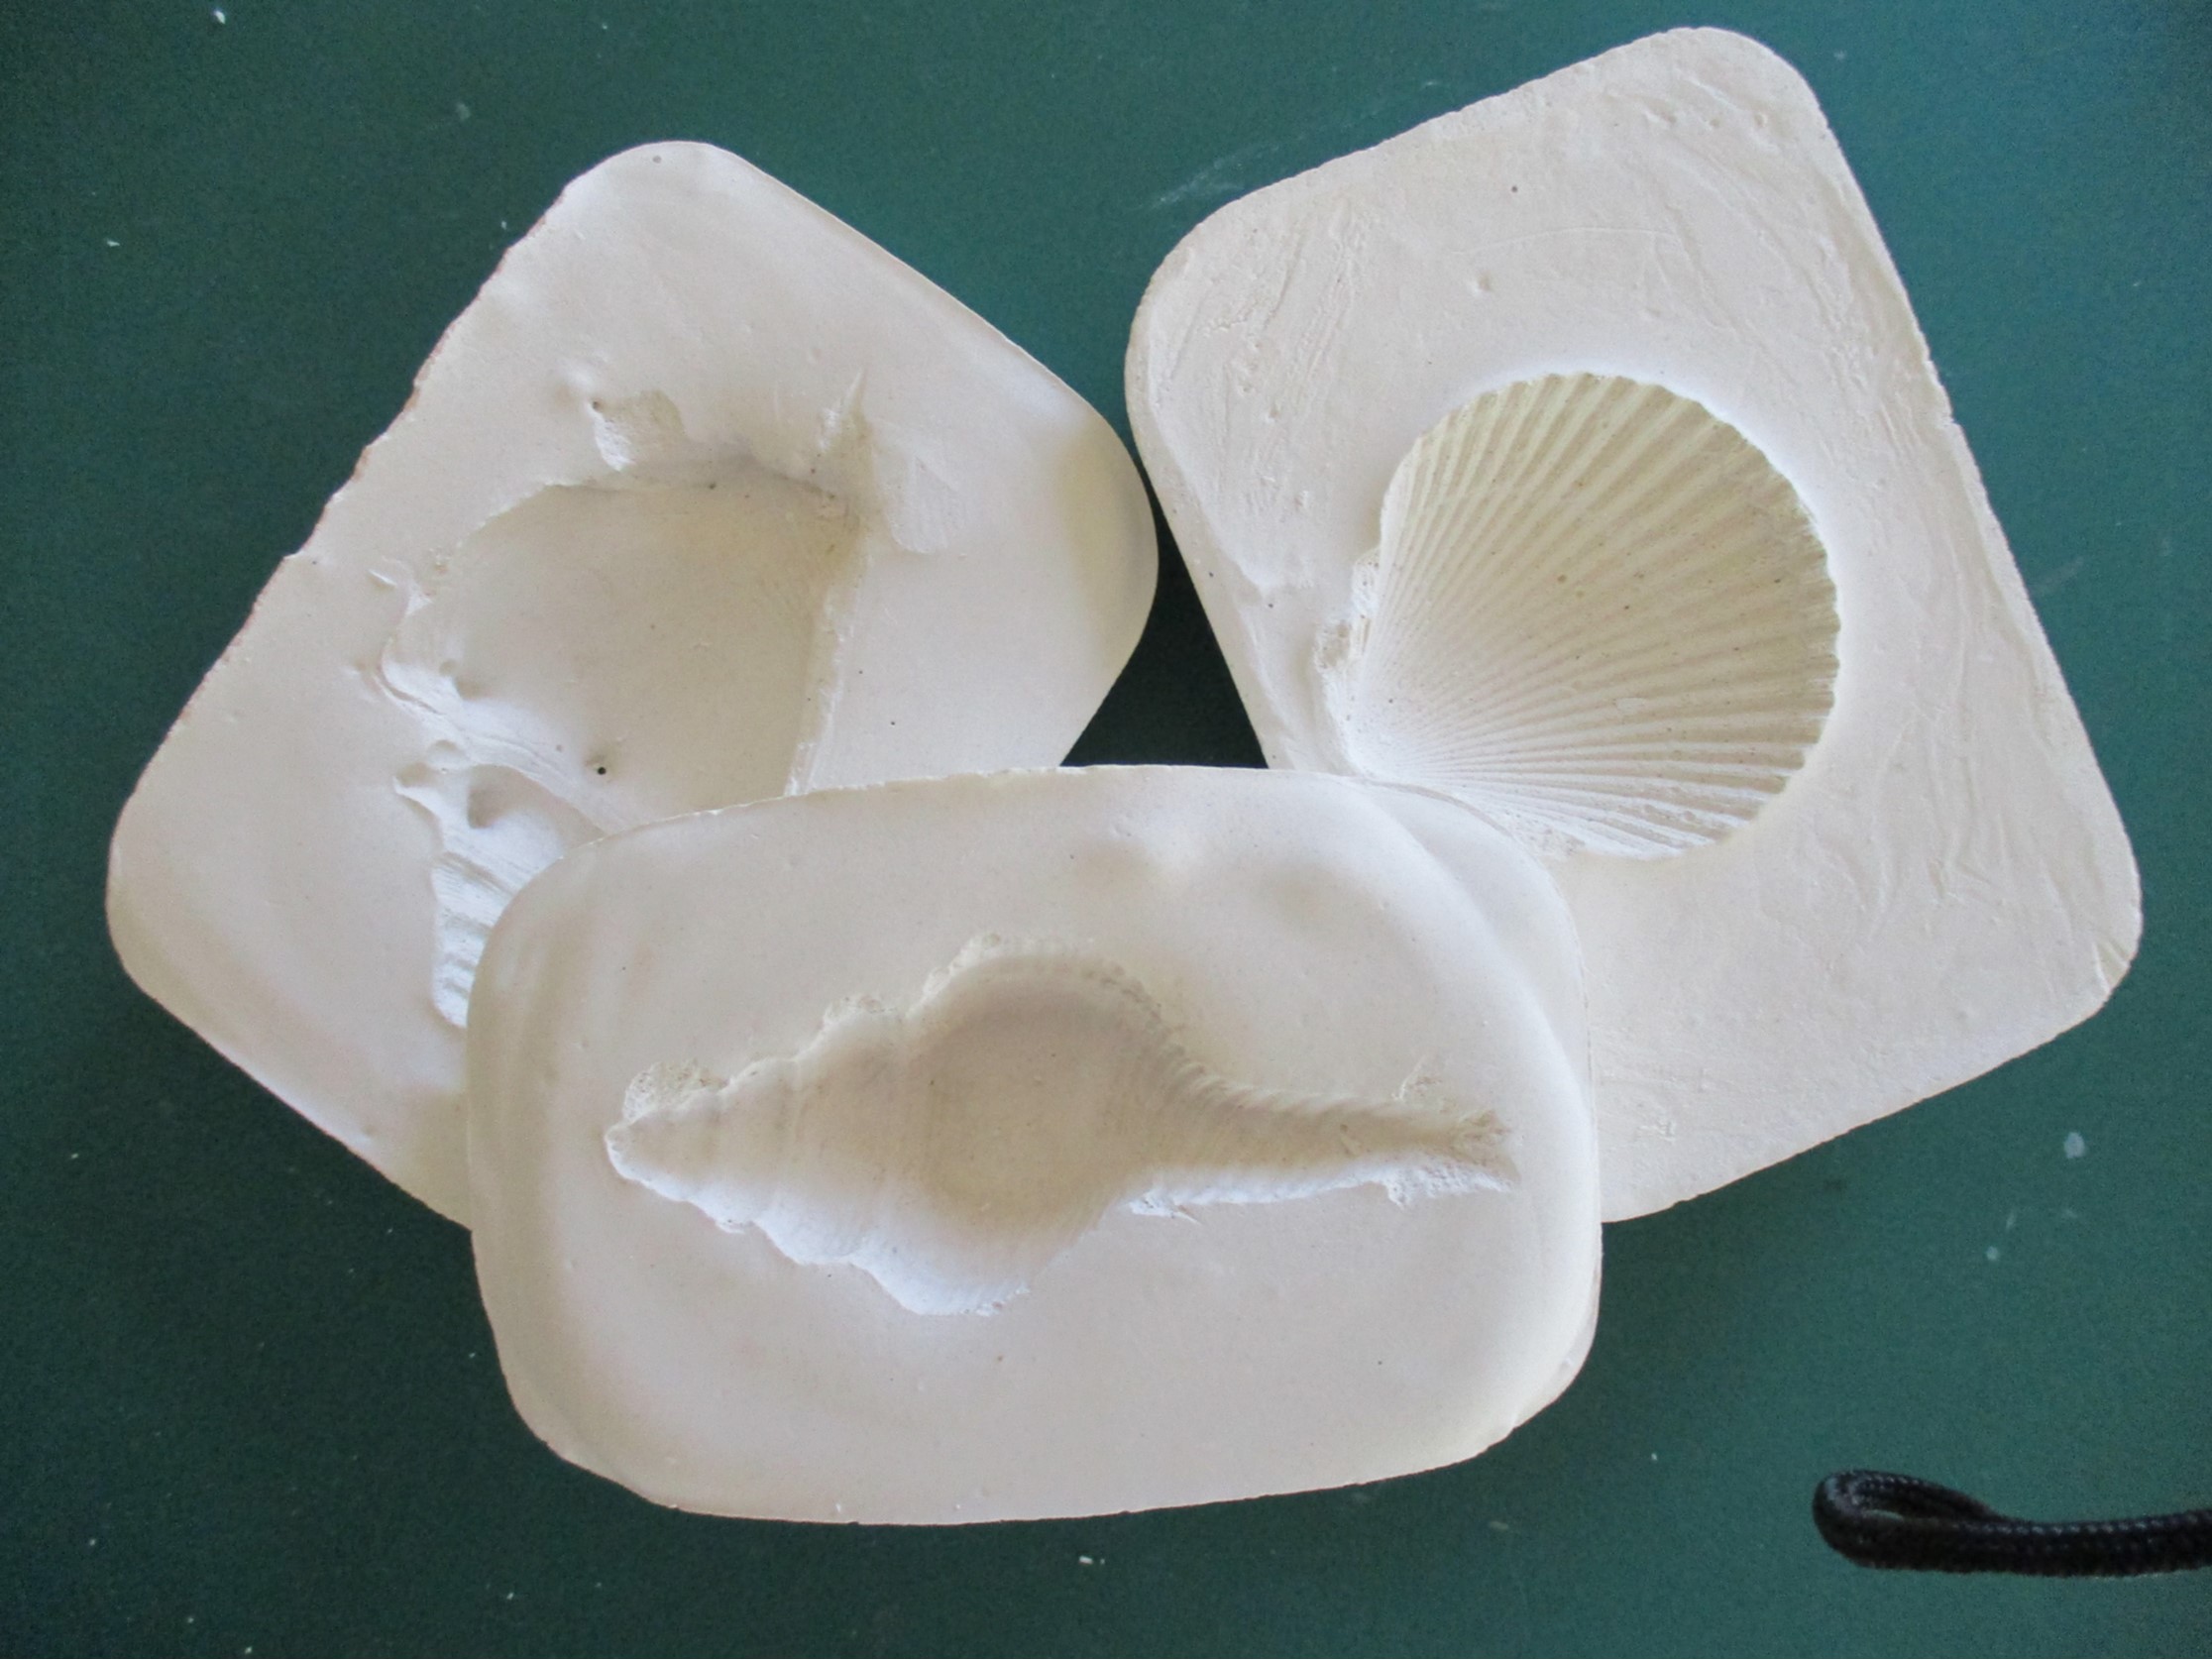
When the plaster is completely dry, the shells are gently lifted out. Recycled paper is is torn or shredded into small pieces, soaked in water for one or two days, and blended into paper pulp. Using a paper-making frame and deckle, sheets of paper are created and placed directly into the plaster mould, using a stiff brush to work the pulp into the crevices. The paper cast is set aside to thoroughly dry. Depending on the thickness and the weather, this can take several days. When dry, the paper can be gently prised out of the moulds.
The plaster moulds
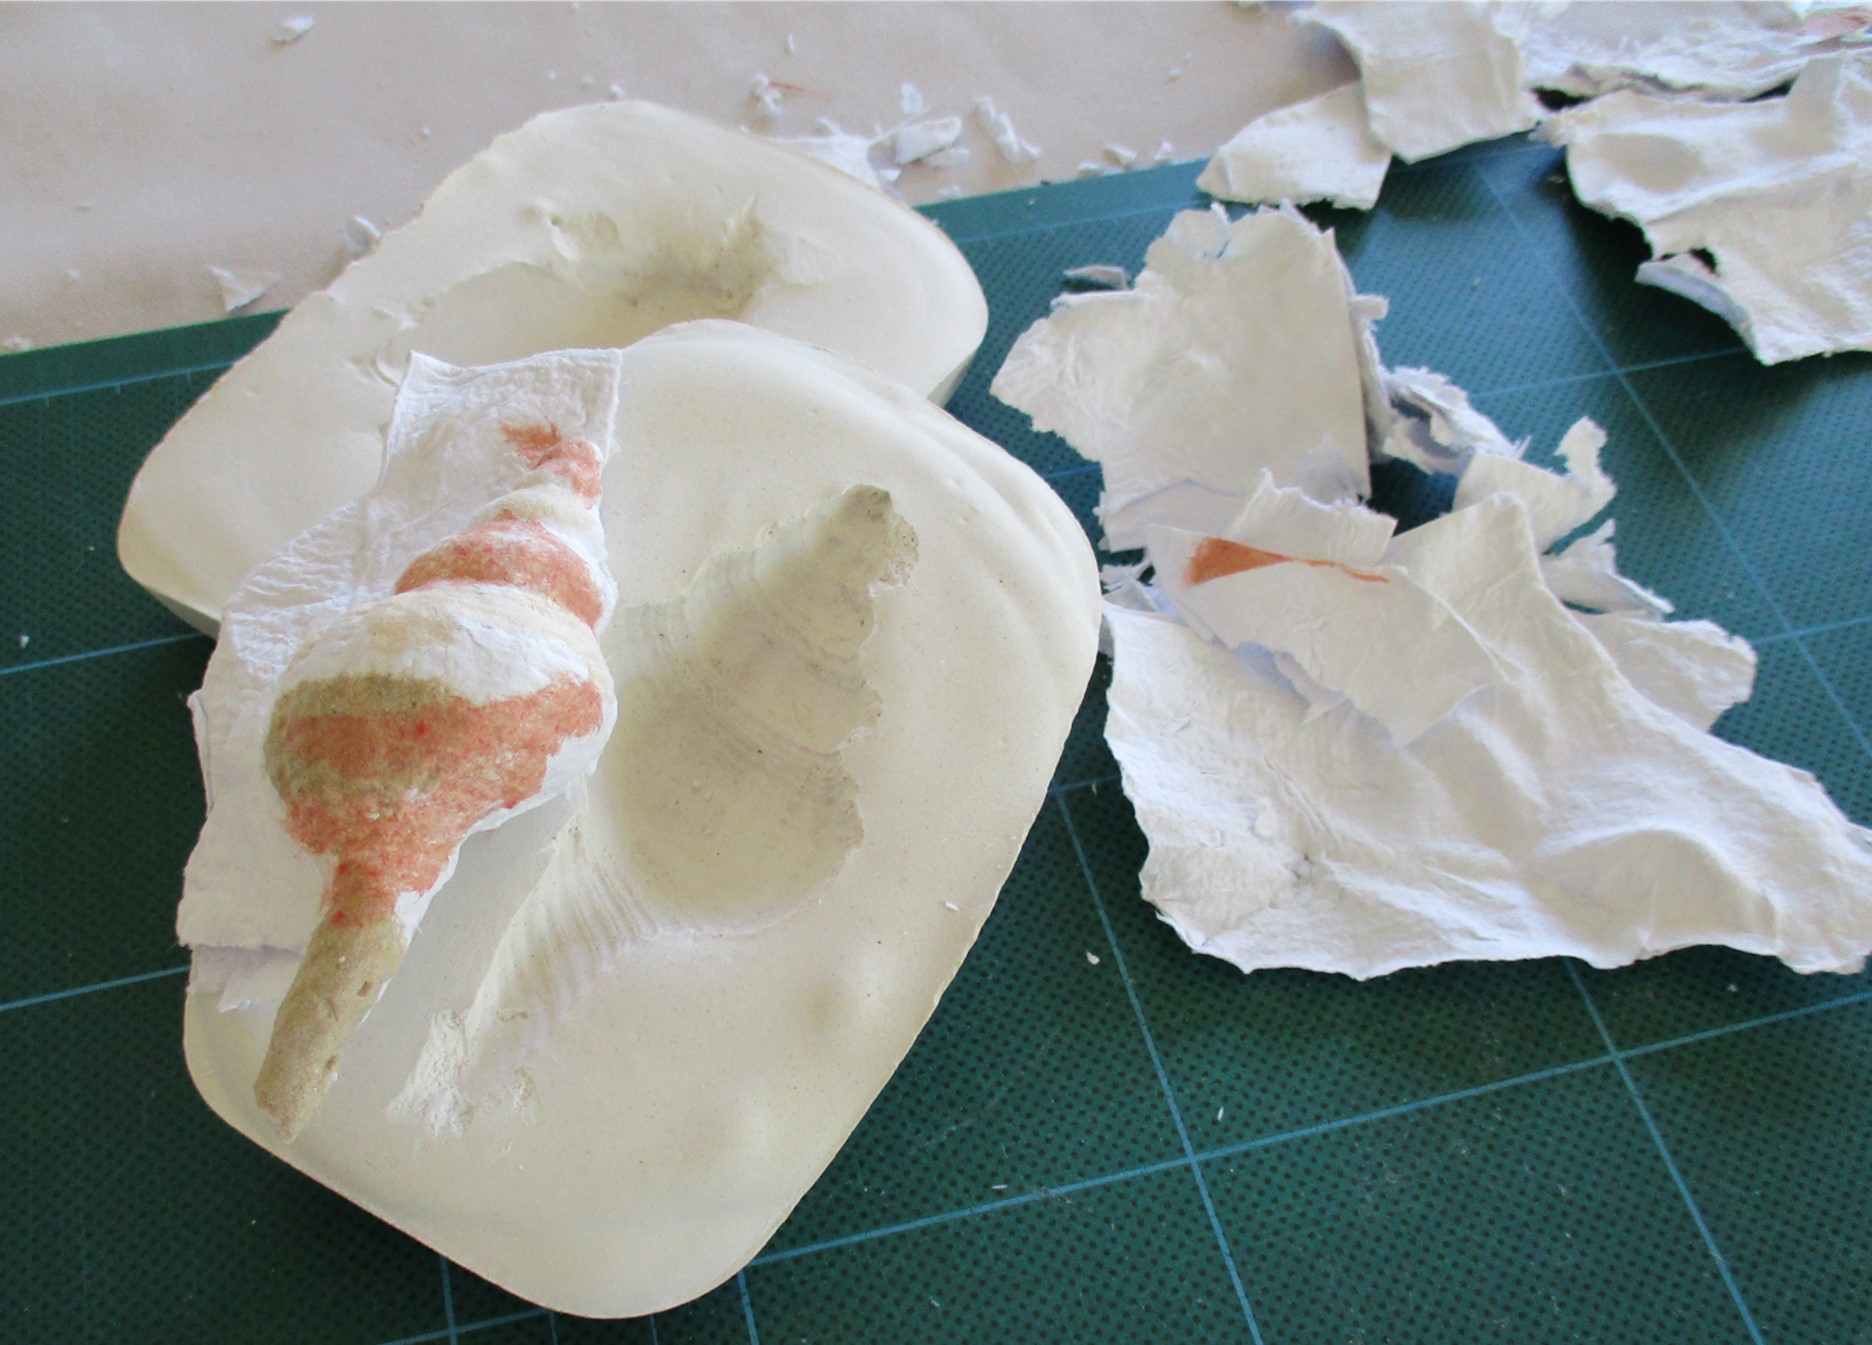
Removing the shell
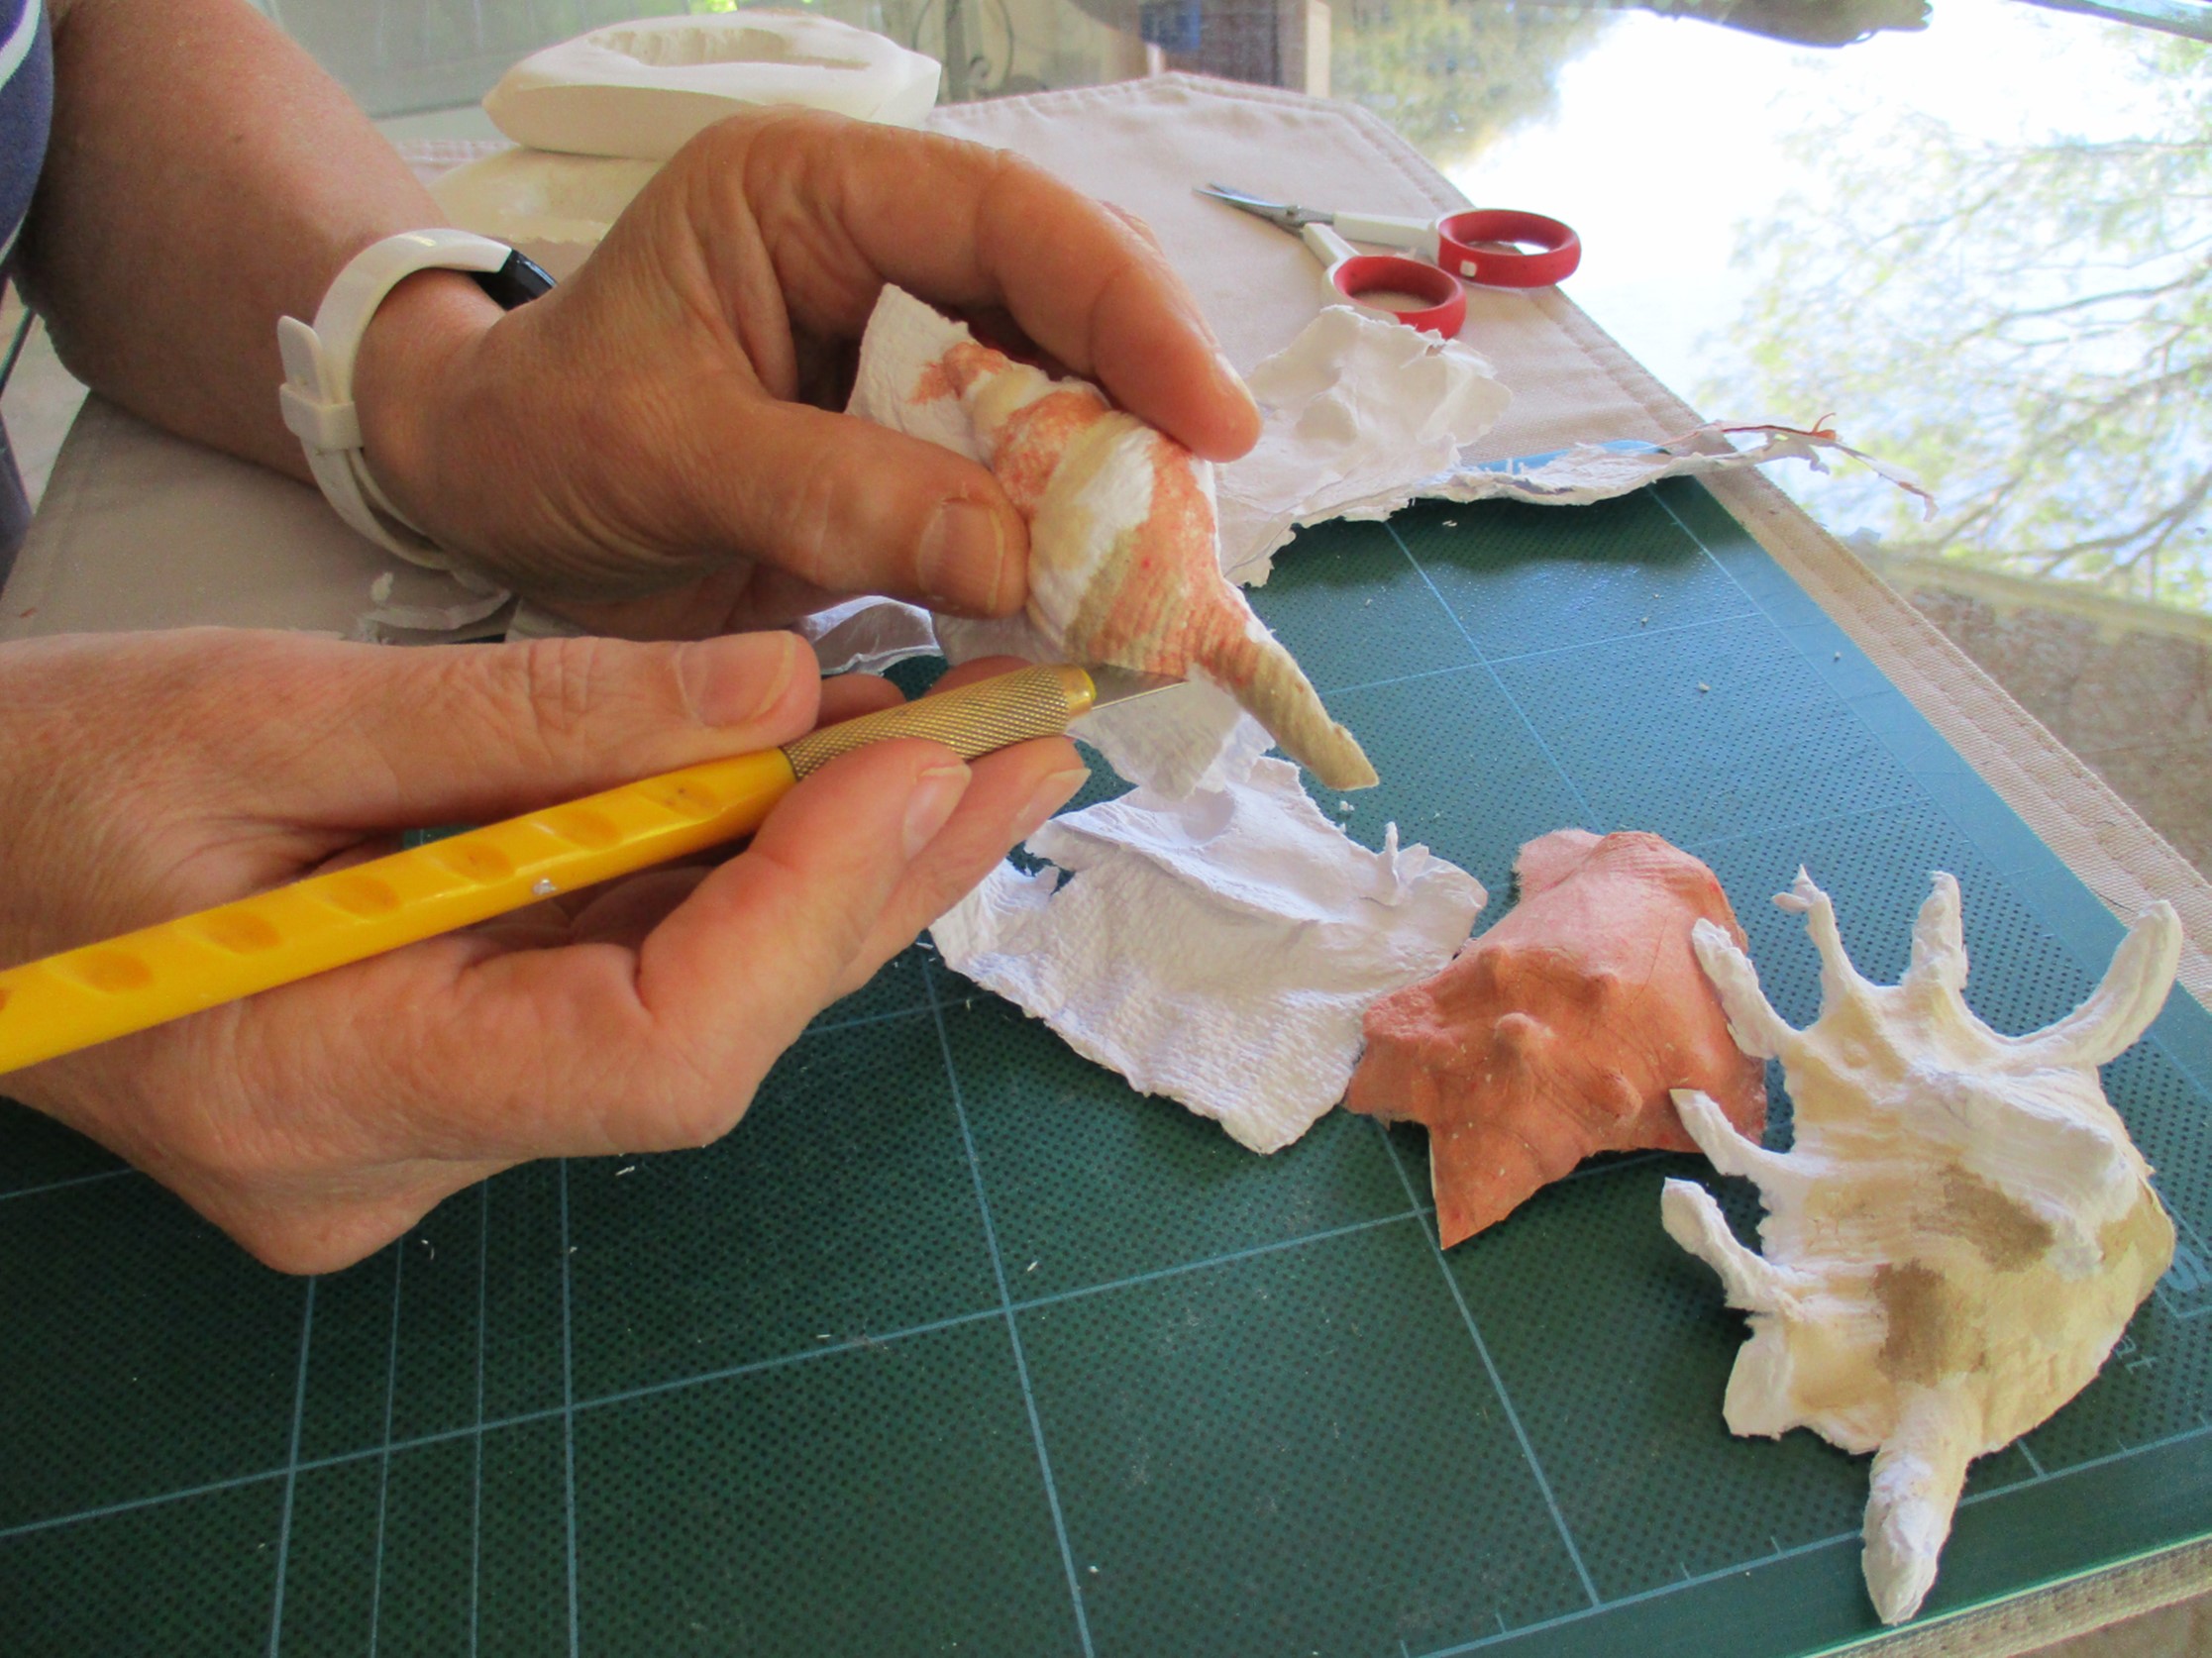
Trimming edges.
Paper overlap at the edges of the shells is carefully cut away with a small scissors or blade. If the paper layers separate in places at the edges, a very thin layer of glue can secure them. Coloured paper mulch can be used in the casting process (as in the image above) but most shells I’ve cast in white paper and painted. The best method for painting them is to coat them in a sealer (e.g. Mod Podge) and allow to dry. I’ve used diluted watercolour paint over the sealer to pick out natural colours.
After making a few flat shells, I experimented with creating a full 3D shell, using a cast of both sides. I had some success, but need to practise and develop this further. Examples of my first tries are below.
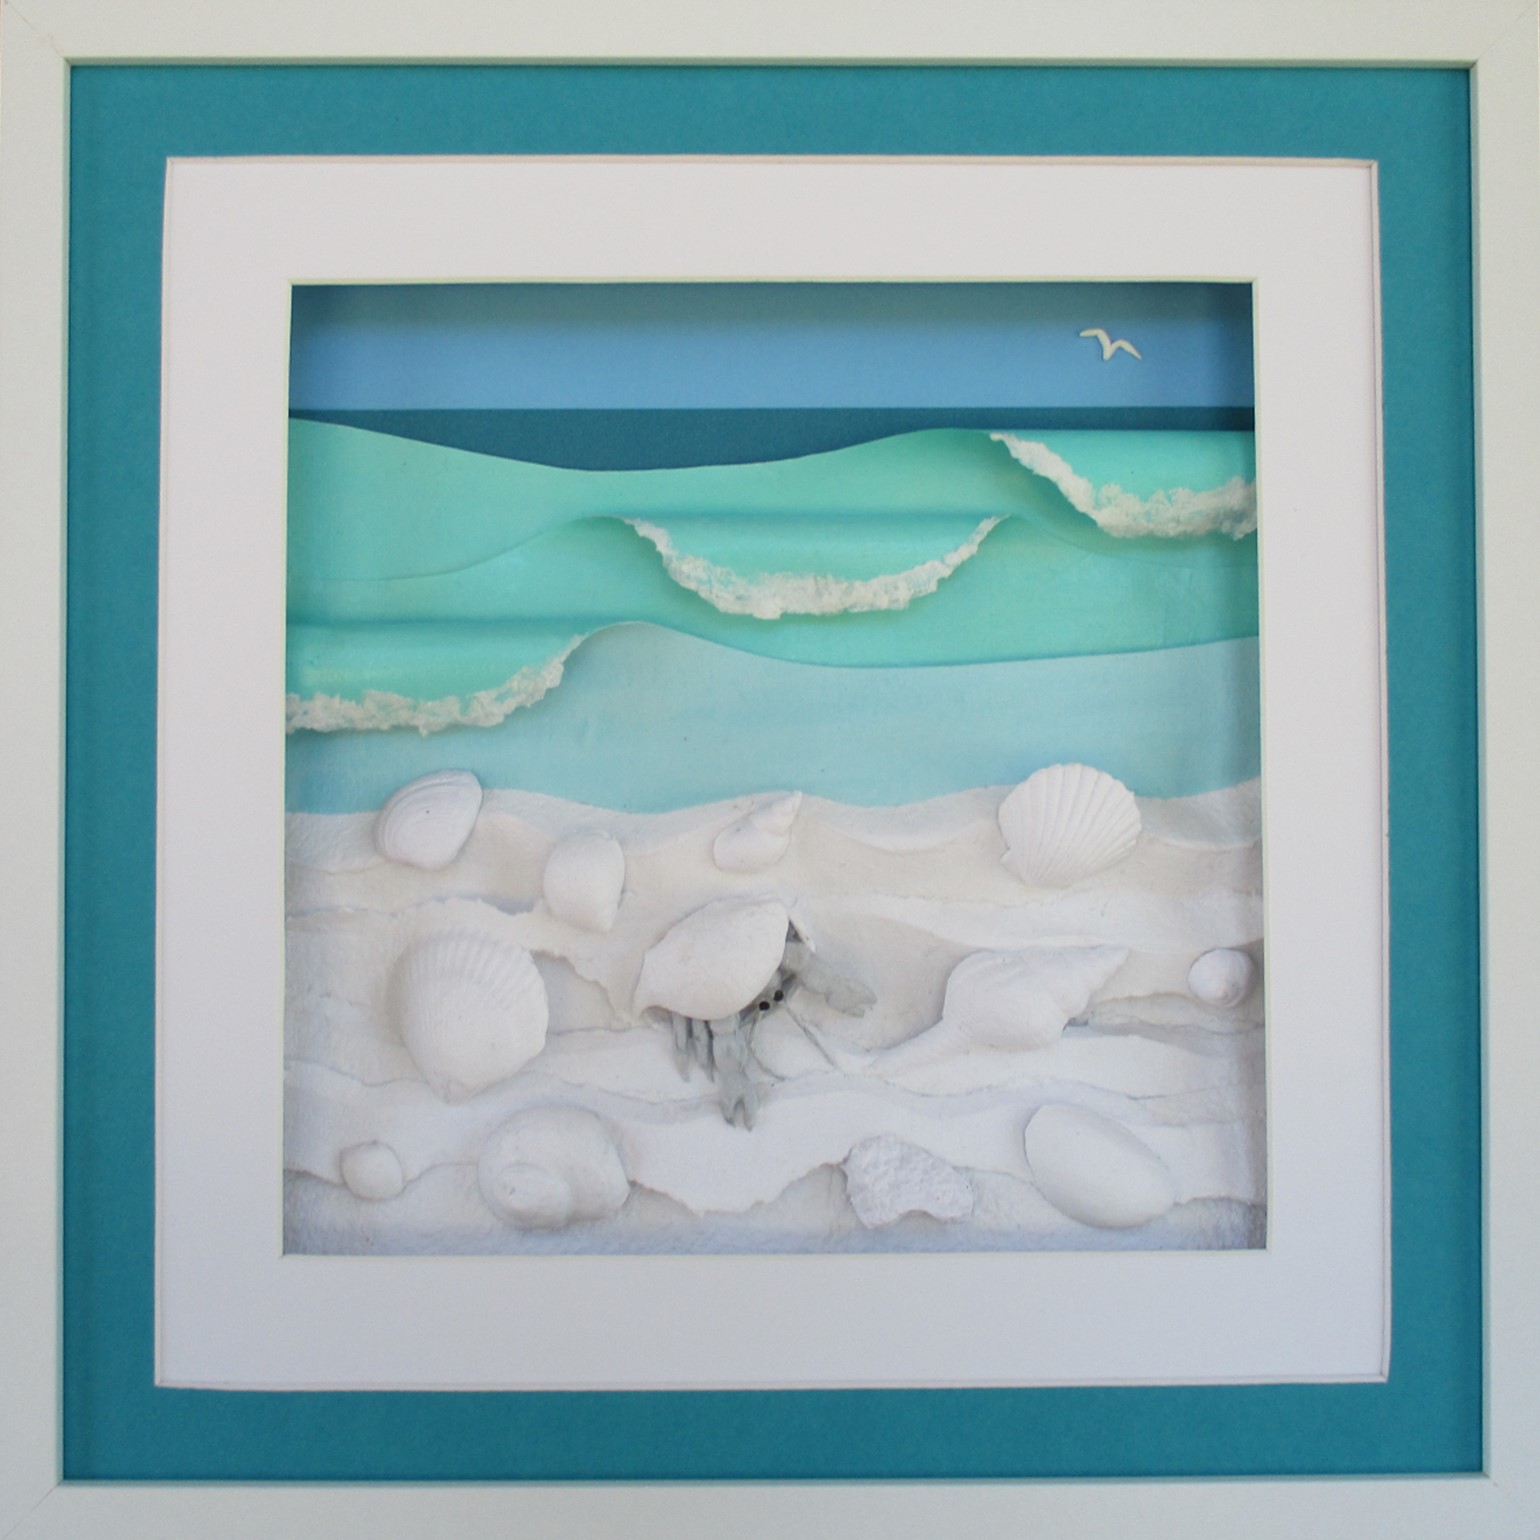
A: All the shells in the top image are paper. —————————————————————————————————— After nearly 2 years of experiments I finally put my shells into pictures. These pictures were on display at the Pepper Street Arts Centre SALA ‘Remake’ Exhibition during August 2023. Click the images below to enlarge.
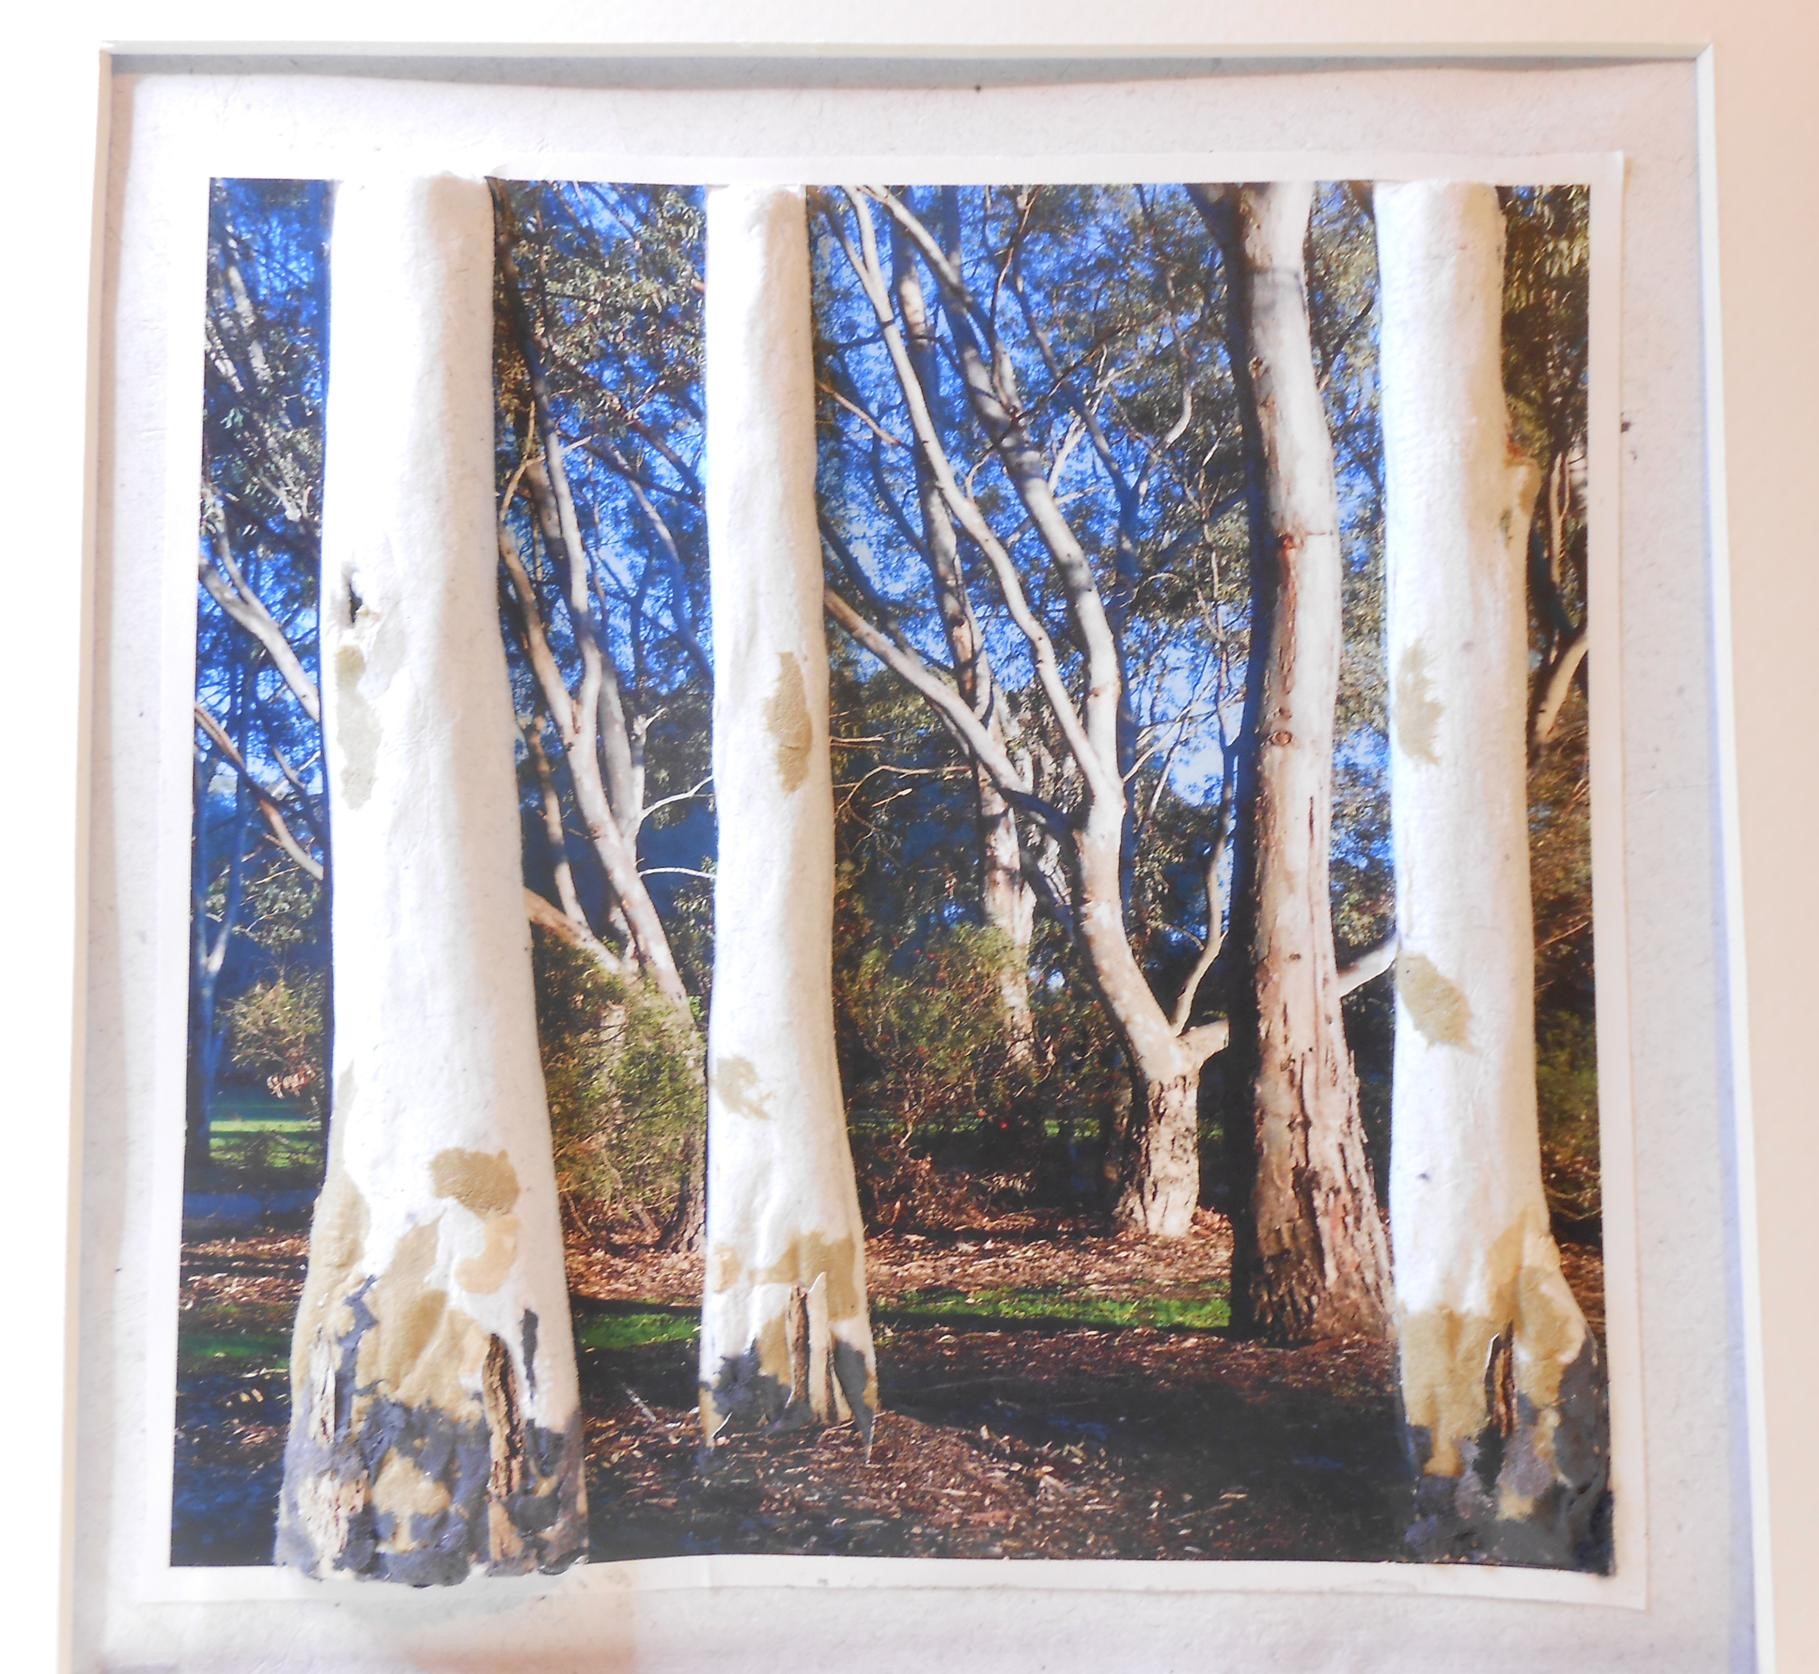
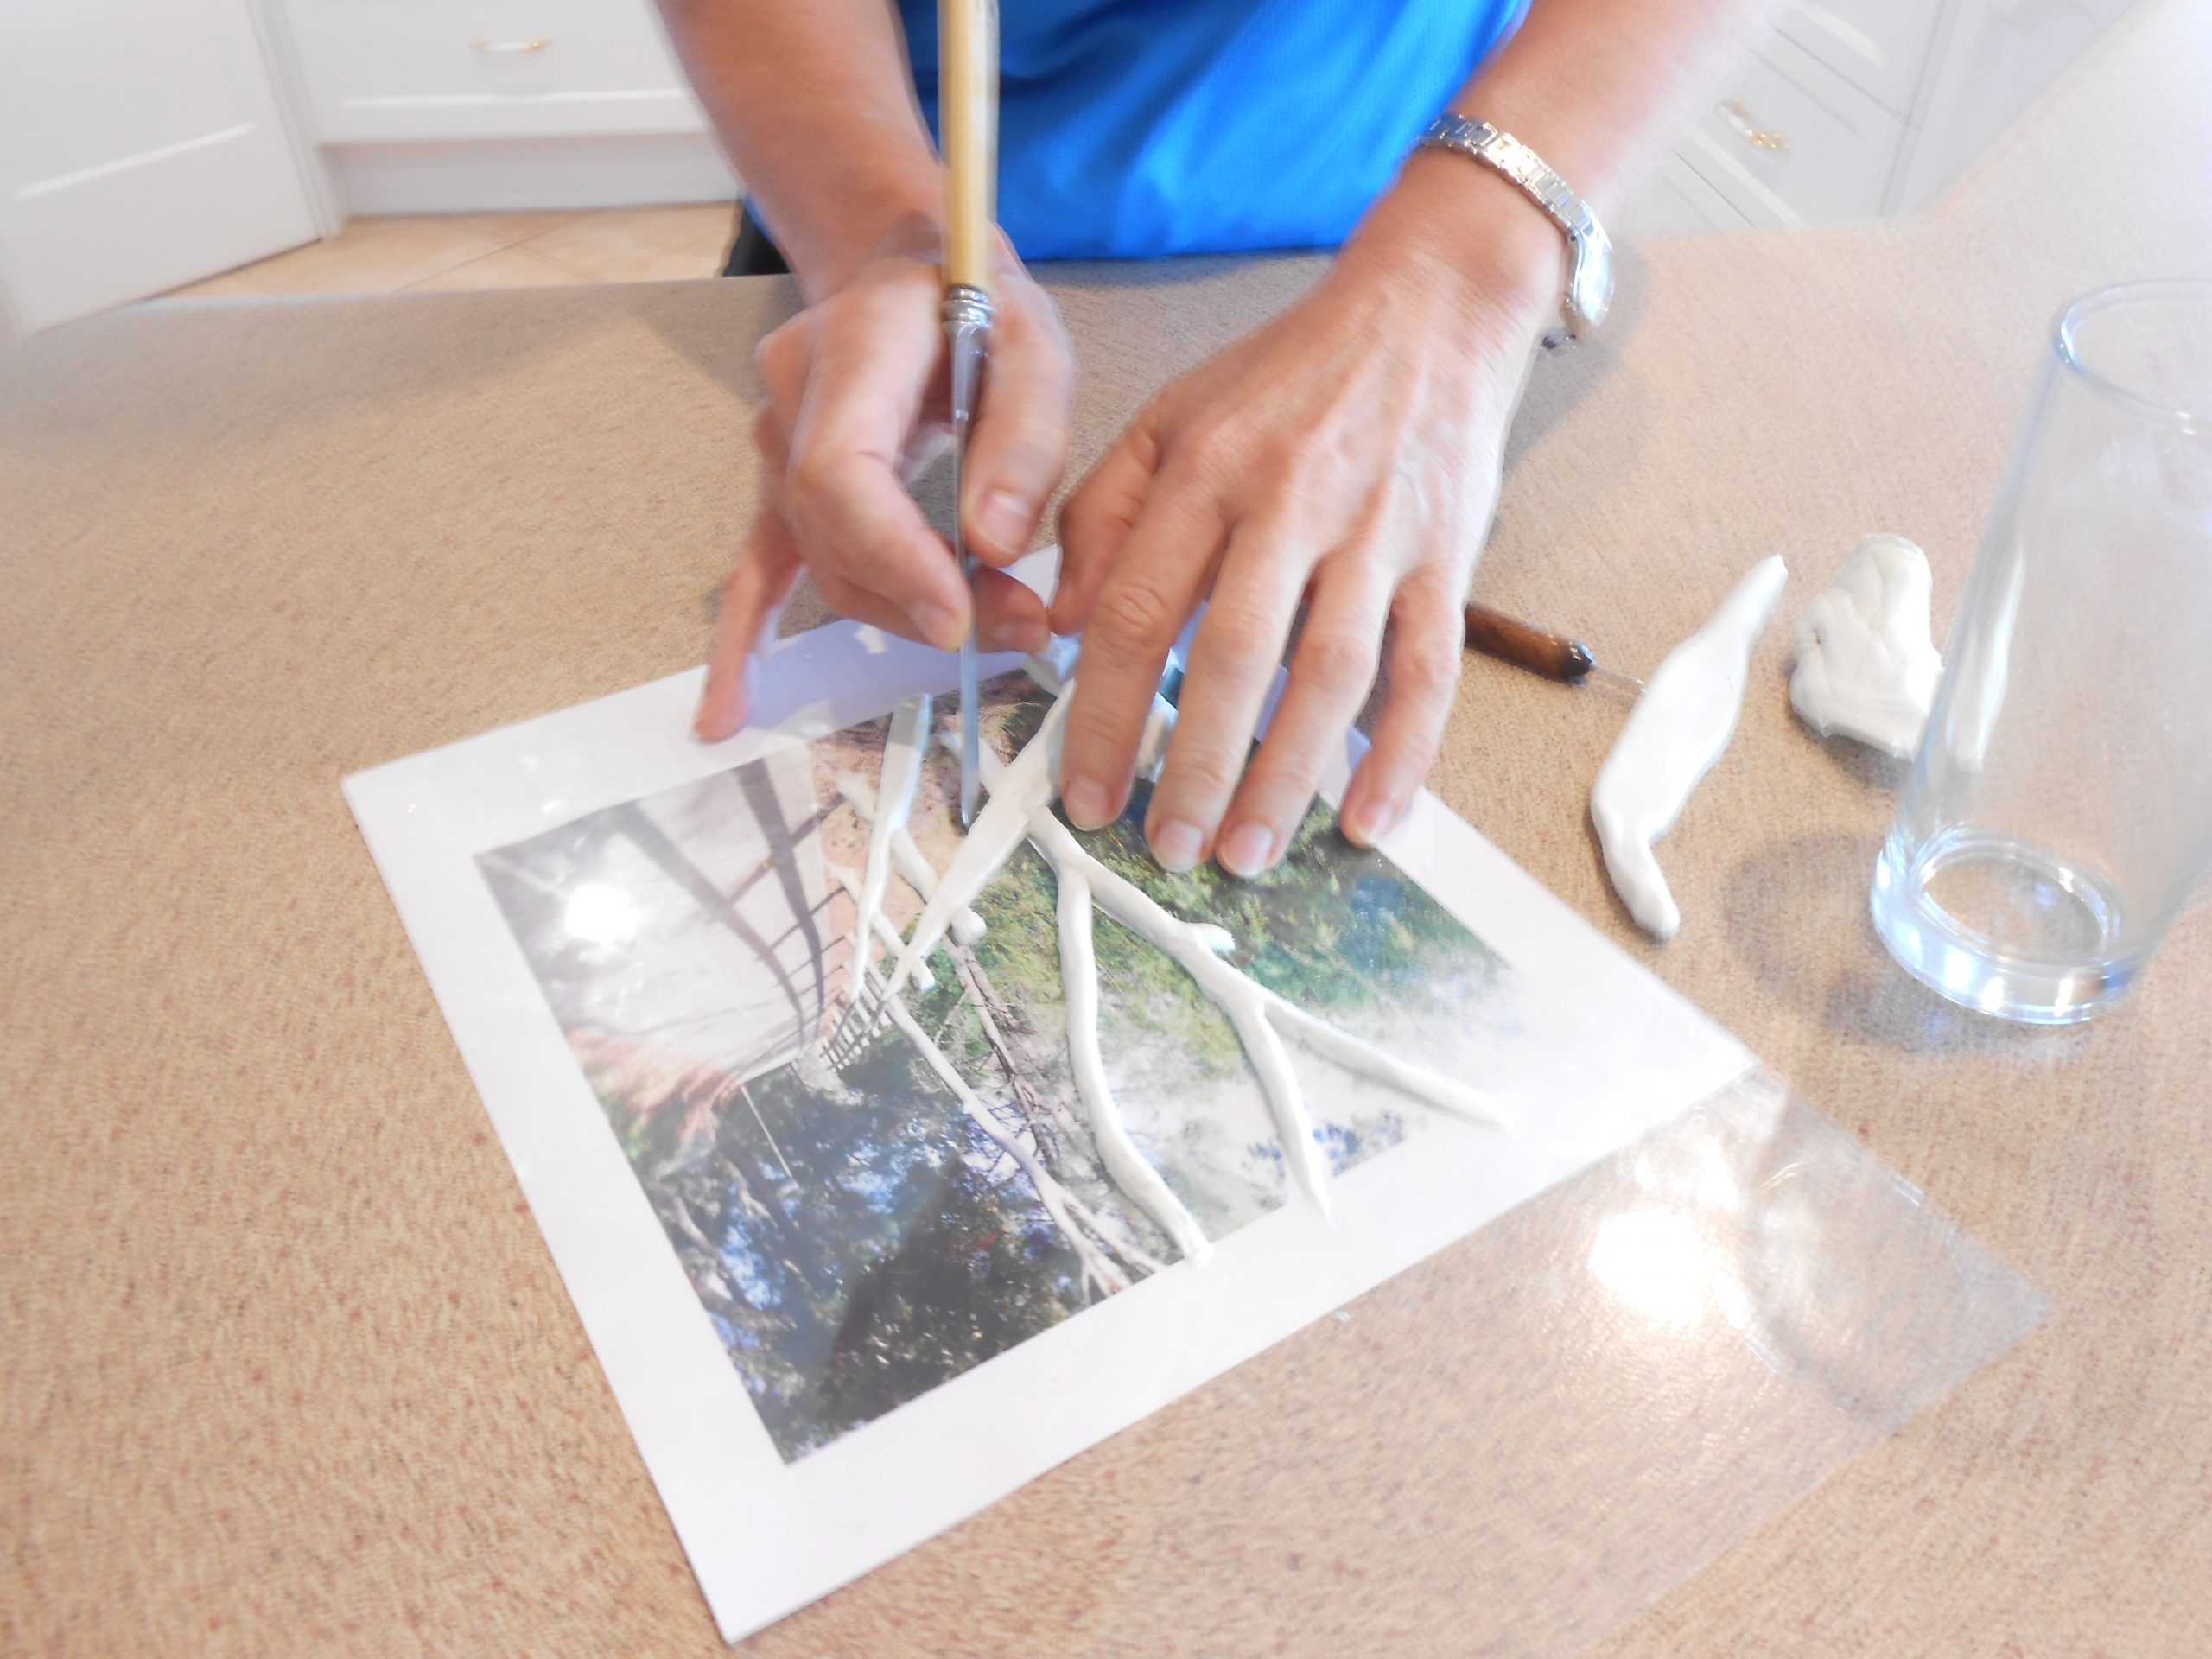
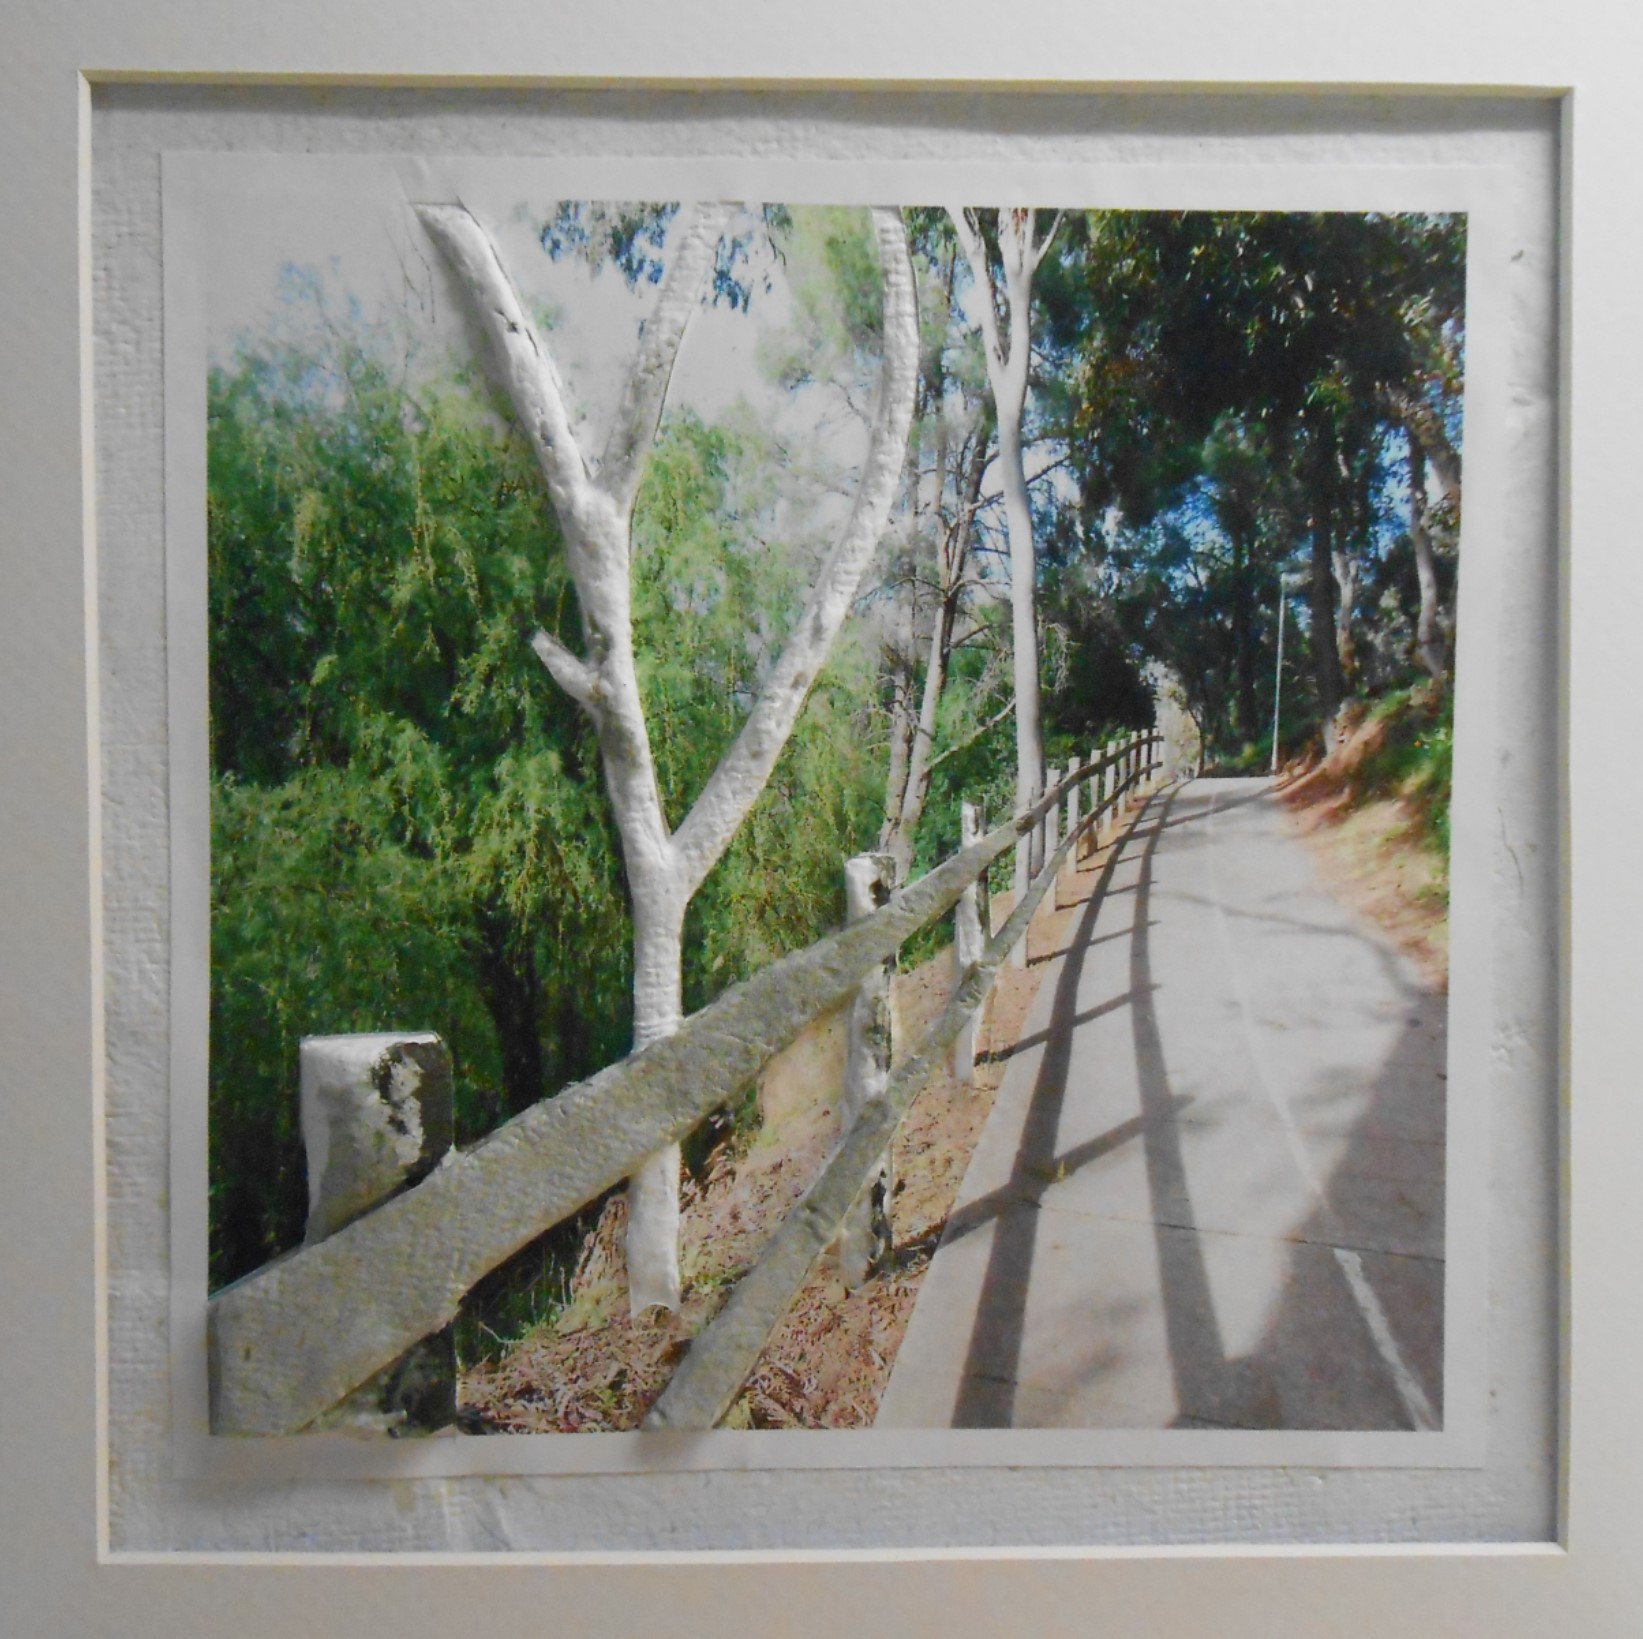
This experiment in three dimensional paper craft involves building up the foreground of a photograph in bas-relief with cast recycled paper. The result gives the photograph interest and depth and a ‘life like’ appearance.
Photos are taken that lend themselves to this technique. They need to have a prominent foreground focus and ideally, features where the bas-relief can ’blend back’ into the photo, for example, branches projecting from a tree trunk. Photos are edited to size and printed on matt paper.
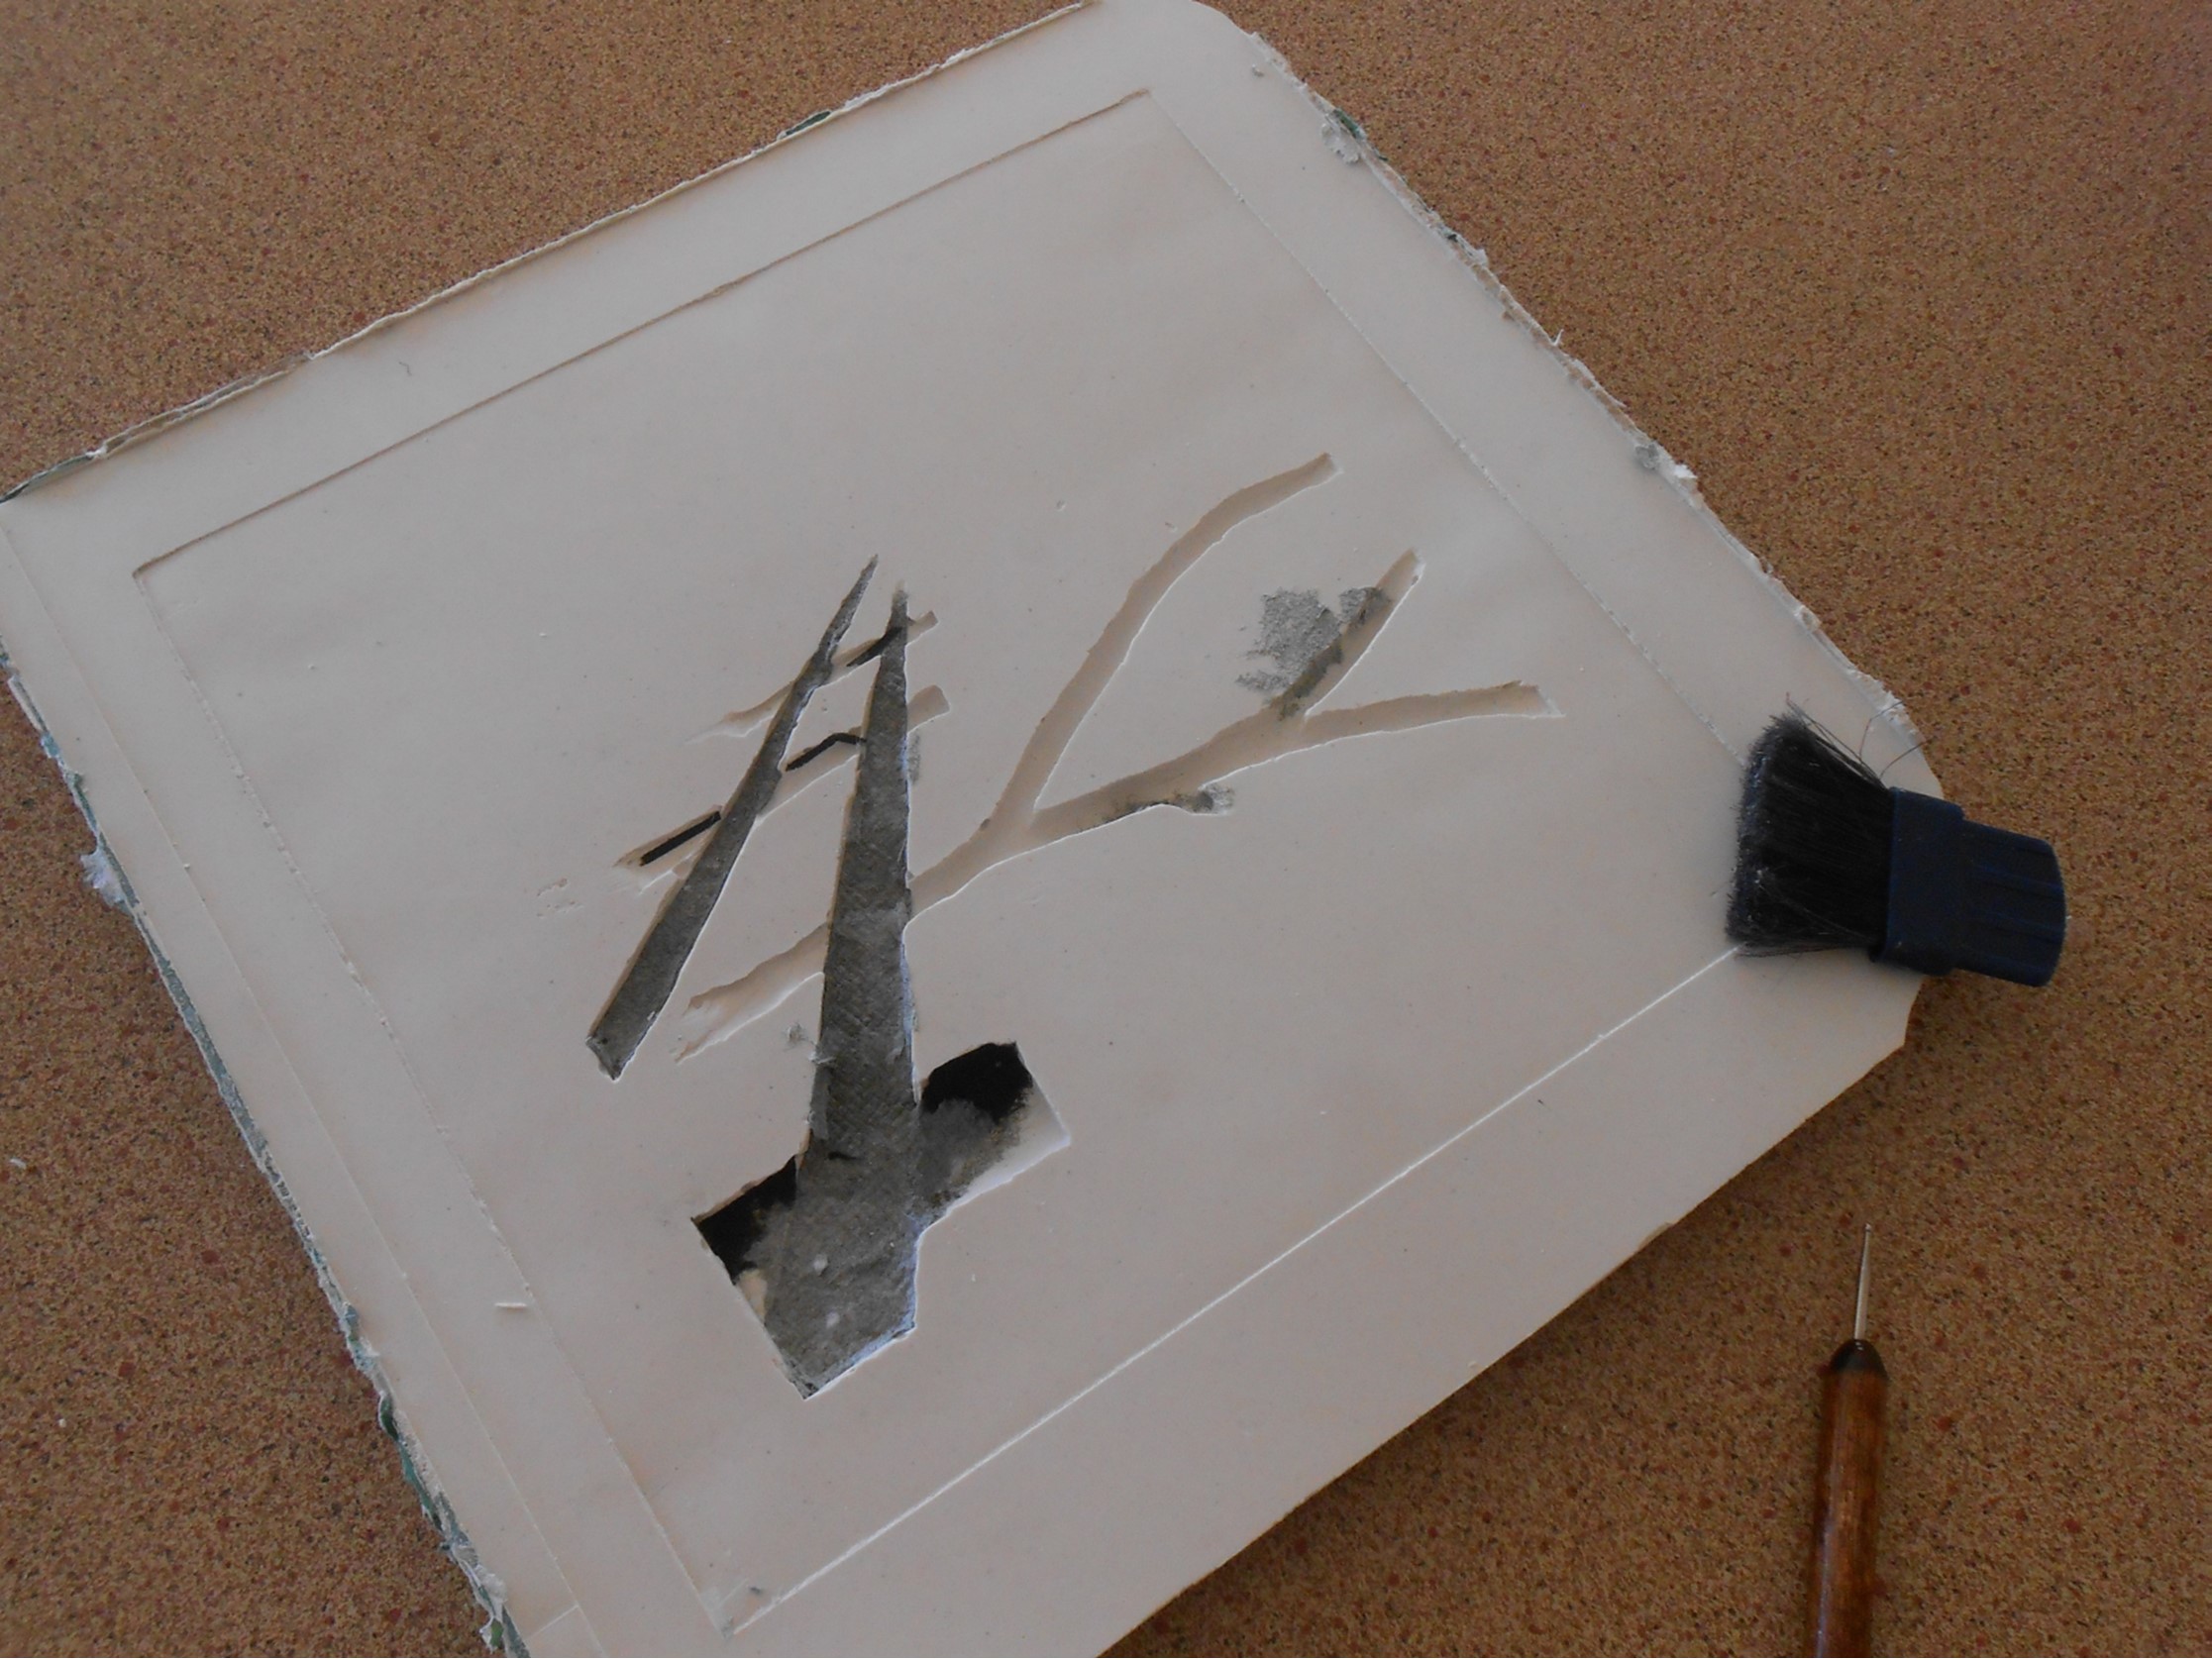
Moulding the image A bas-relief image of objects that are to stand out is created by moulding plasticine over the photograph.
This is done by placing a transparent sheet of acetate over the entire photograph. The acetate also creates a very smooth surface for the cast which aids in adhering the photo in the last stage.
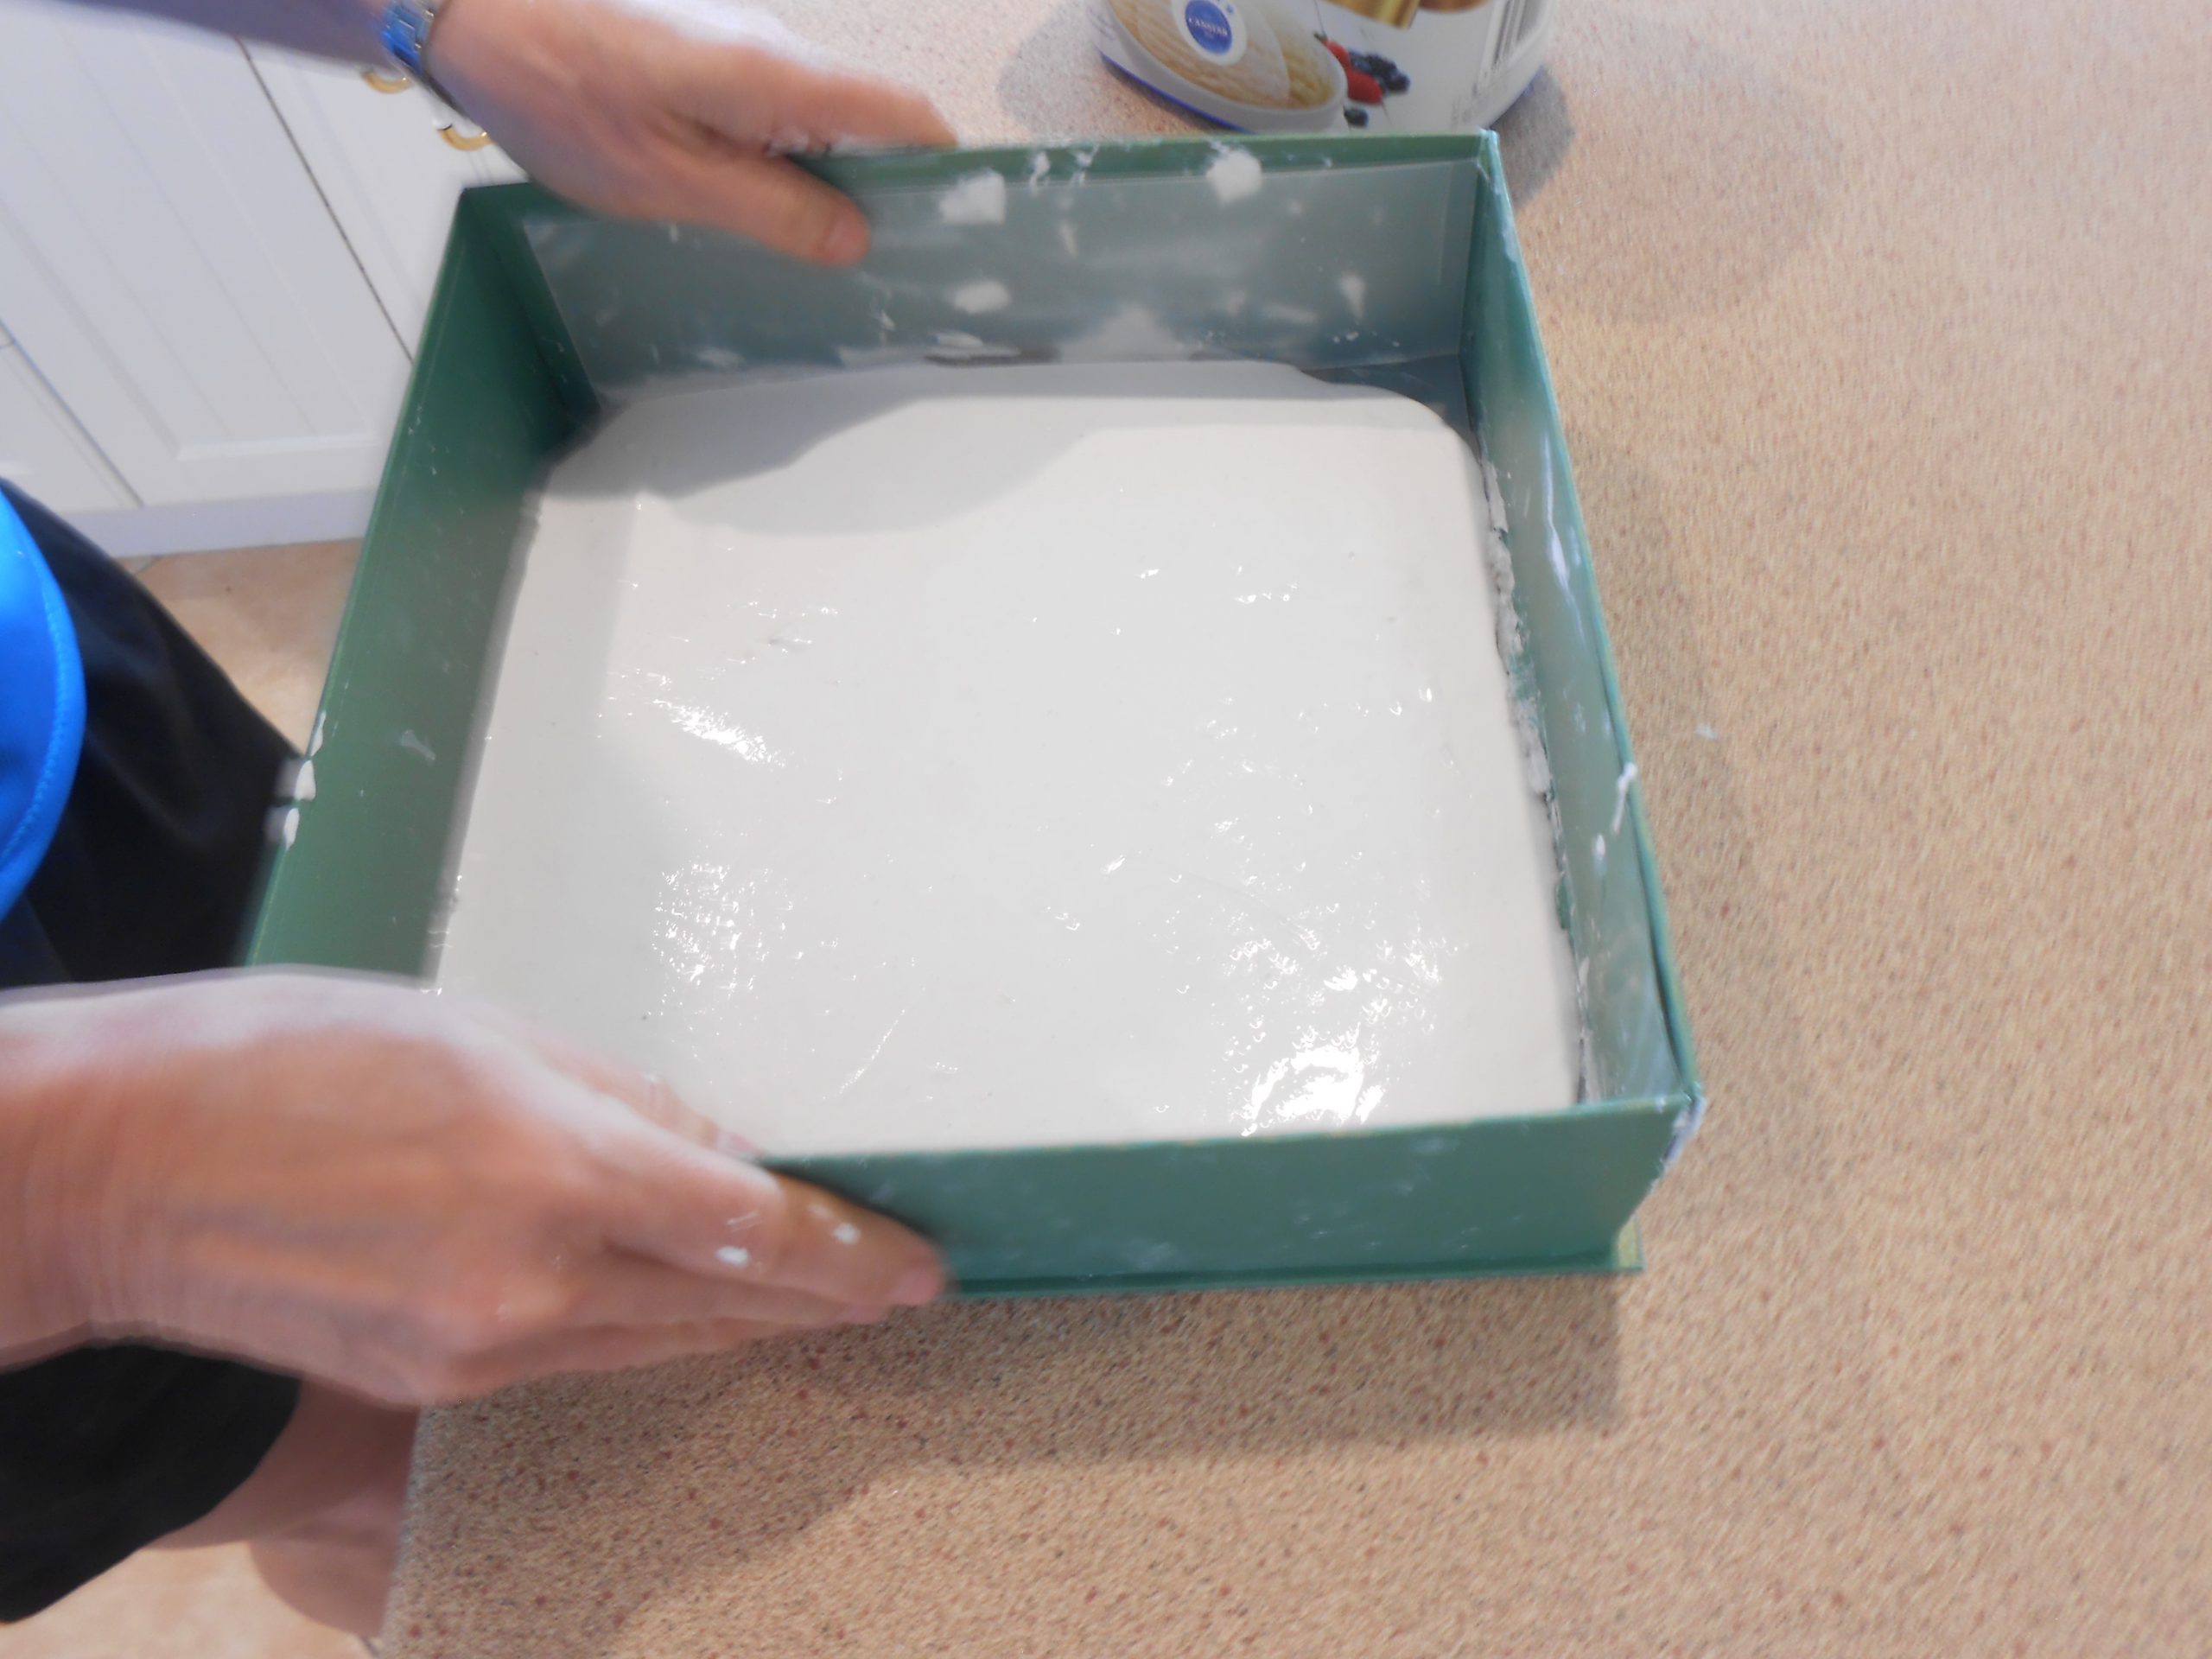
The acetate sheet with the plasticine bas-relief is then placed into a deep container, large enough to have a margin around the edges of the acetate.
2. Creating the Cast. Plaster of Paris is mixed to a pouring consistency and poured into the container. This can be done in stages, ensuring the container is jolted gently from time to time, to enable air bubbles to escape and the plaster to run into grooves in the mouldings. The image is covered to a depth at least 1cm above the plasticine, ensuring the top is relatively flat to prevent cracking during paper casting.
The container is then left in a dry place until the plaster is completely set.
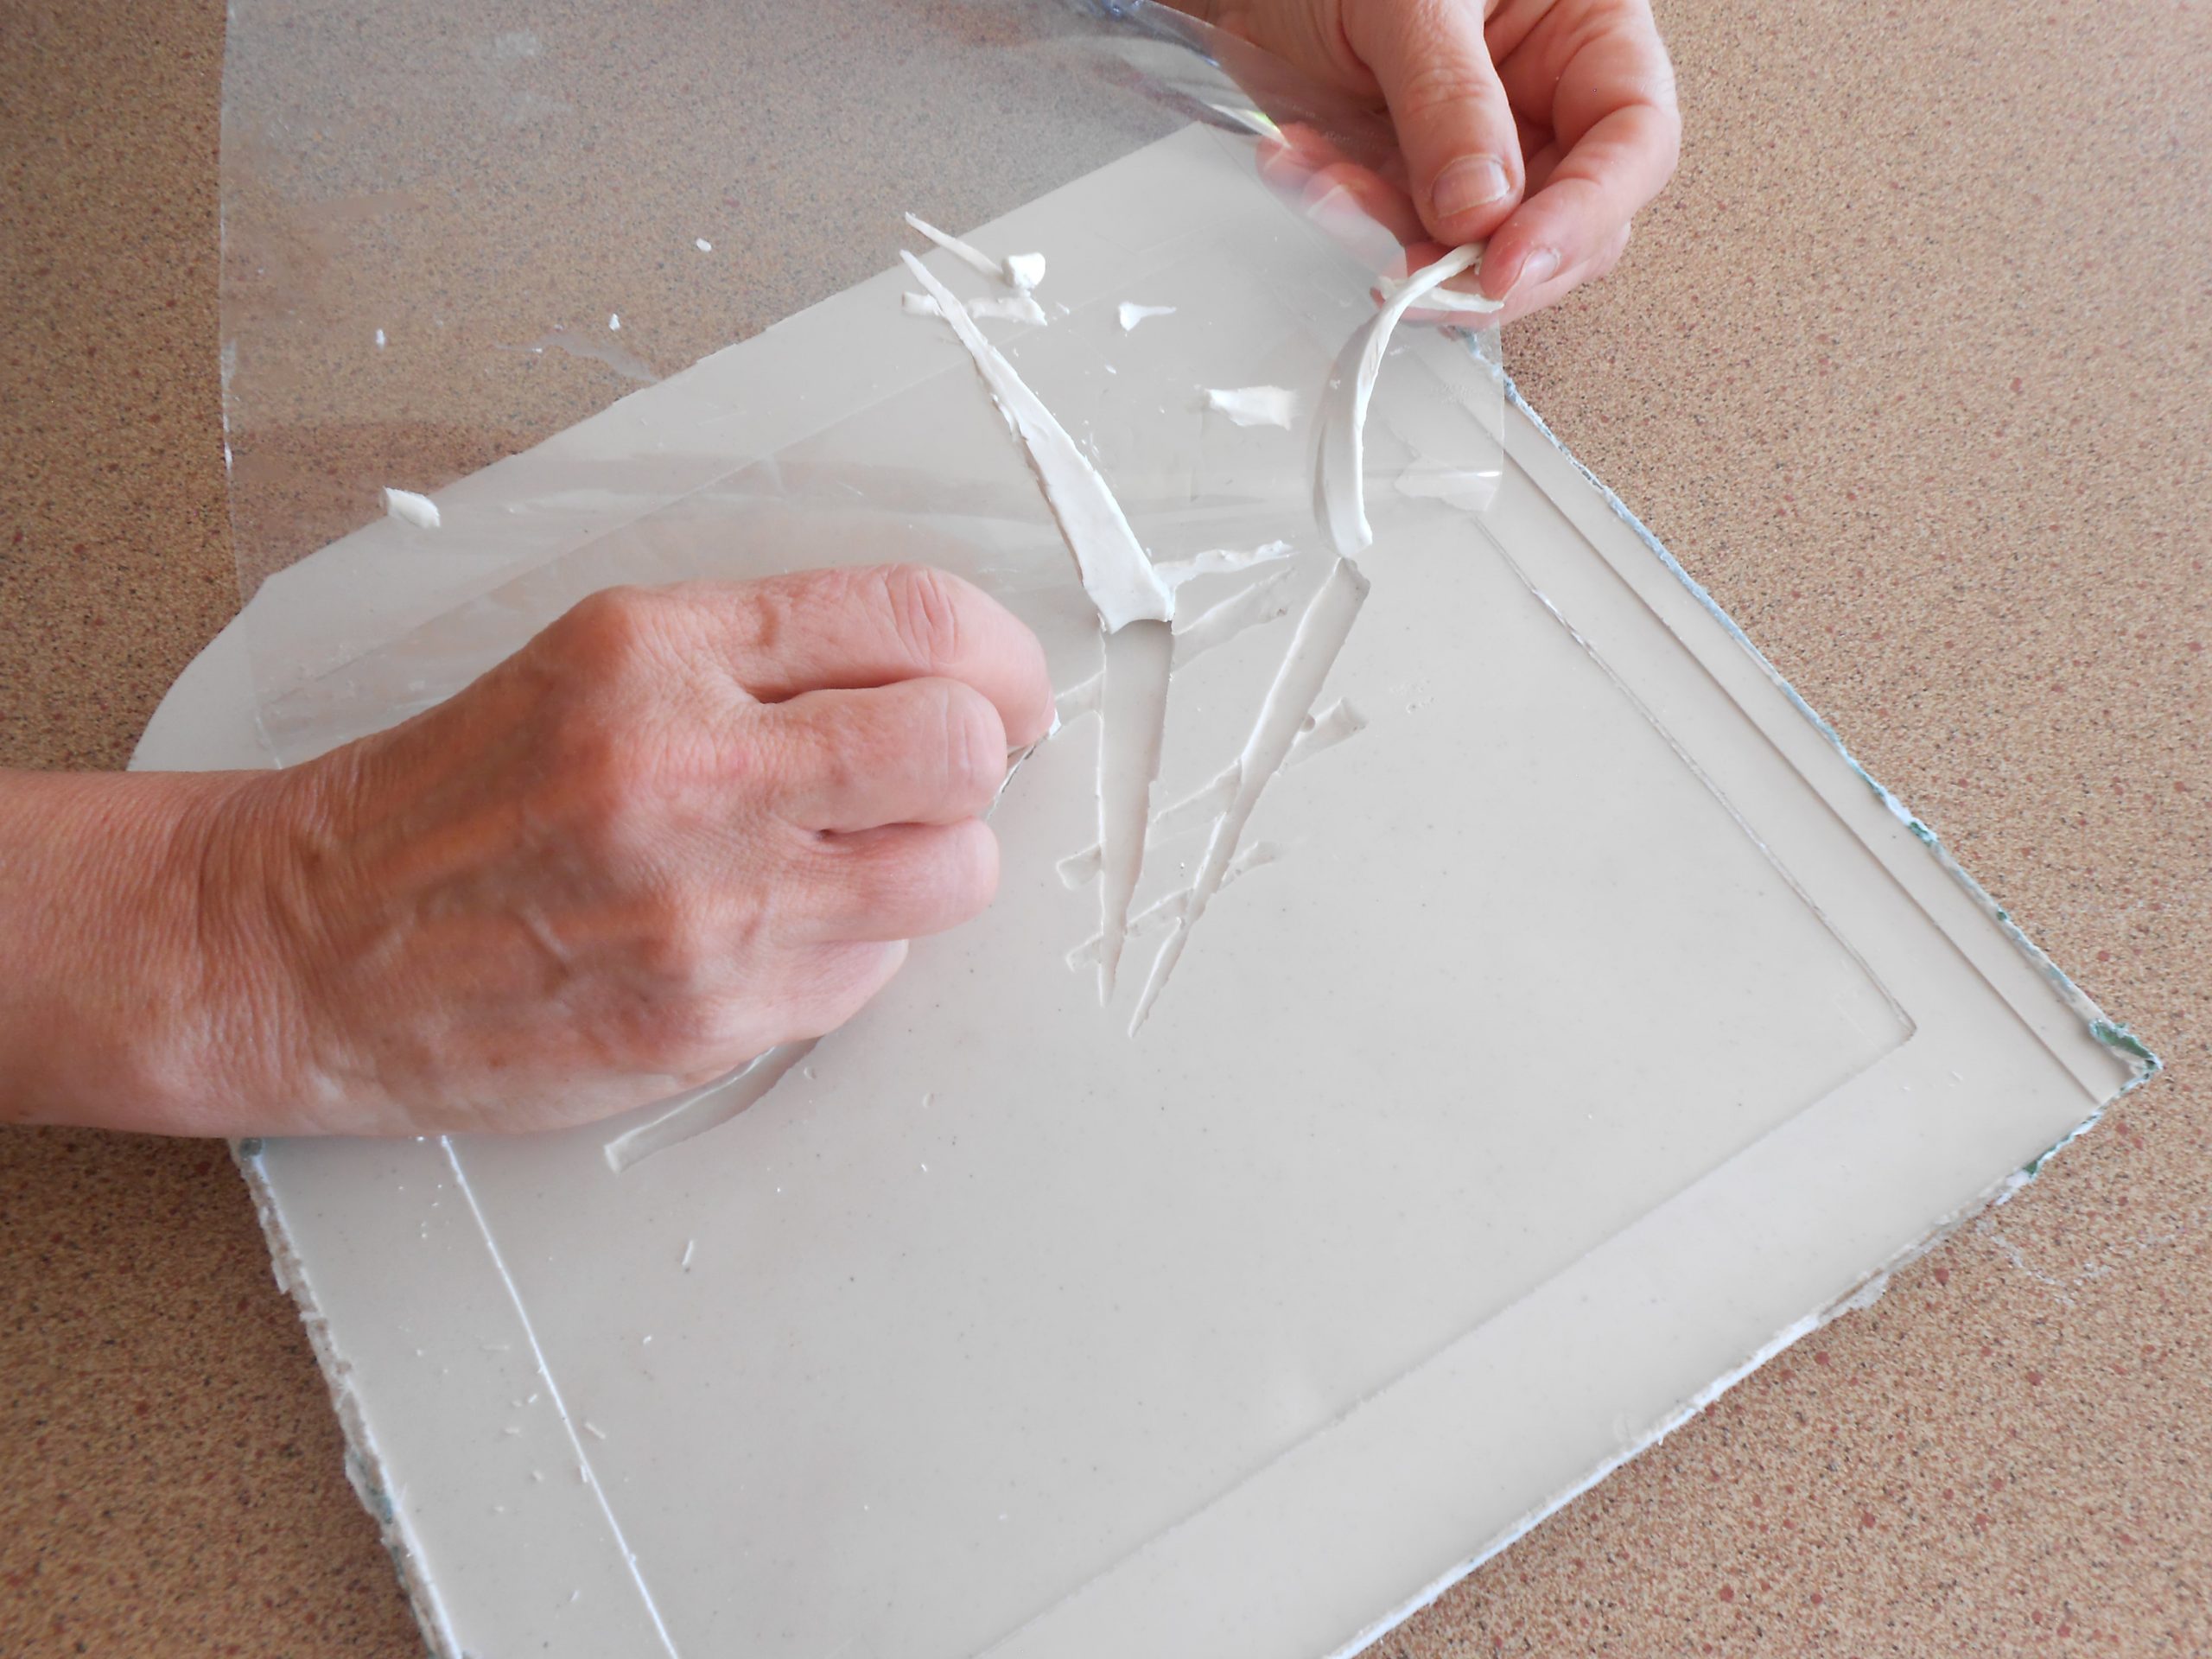
The plaster cast is removed from the container, and the acetate and plasticine is removed thoroughly from the plaster. It may be necessary to use a fine blade to neaten edges if plaster has under-run the plasticine in spots.
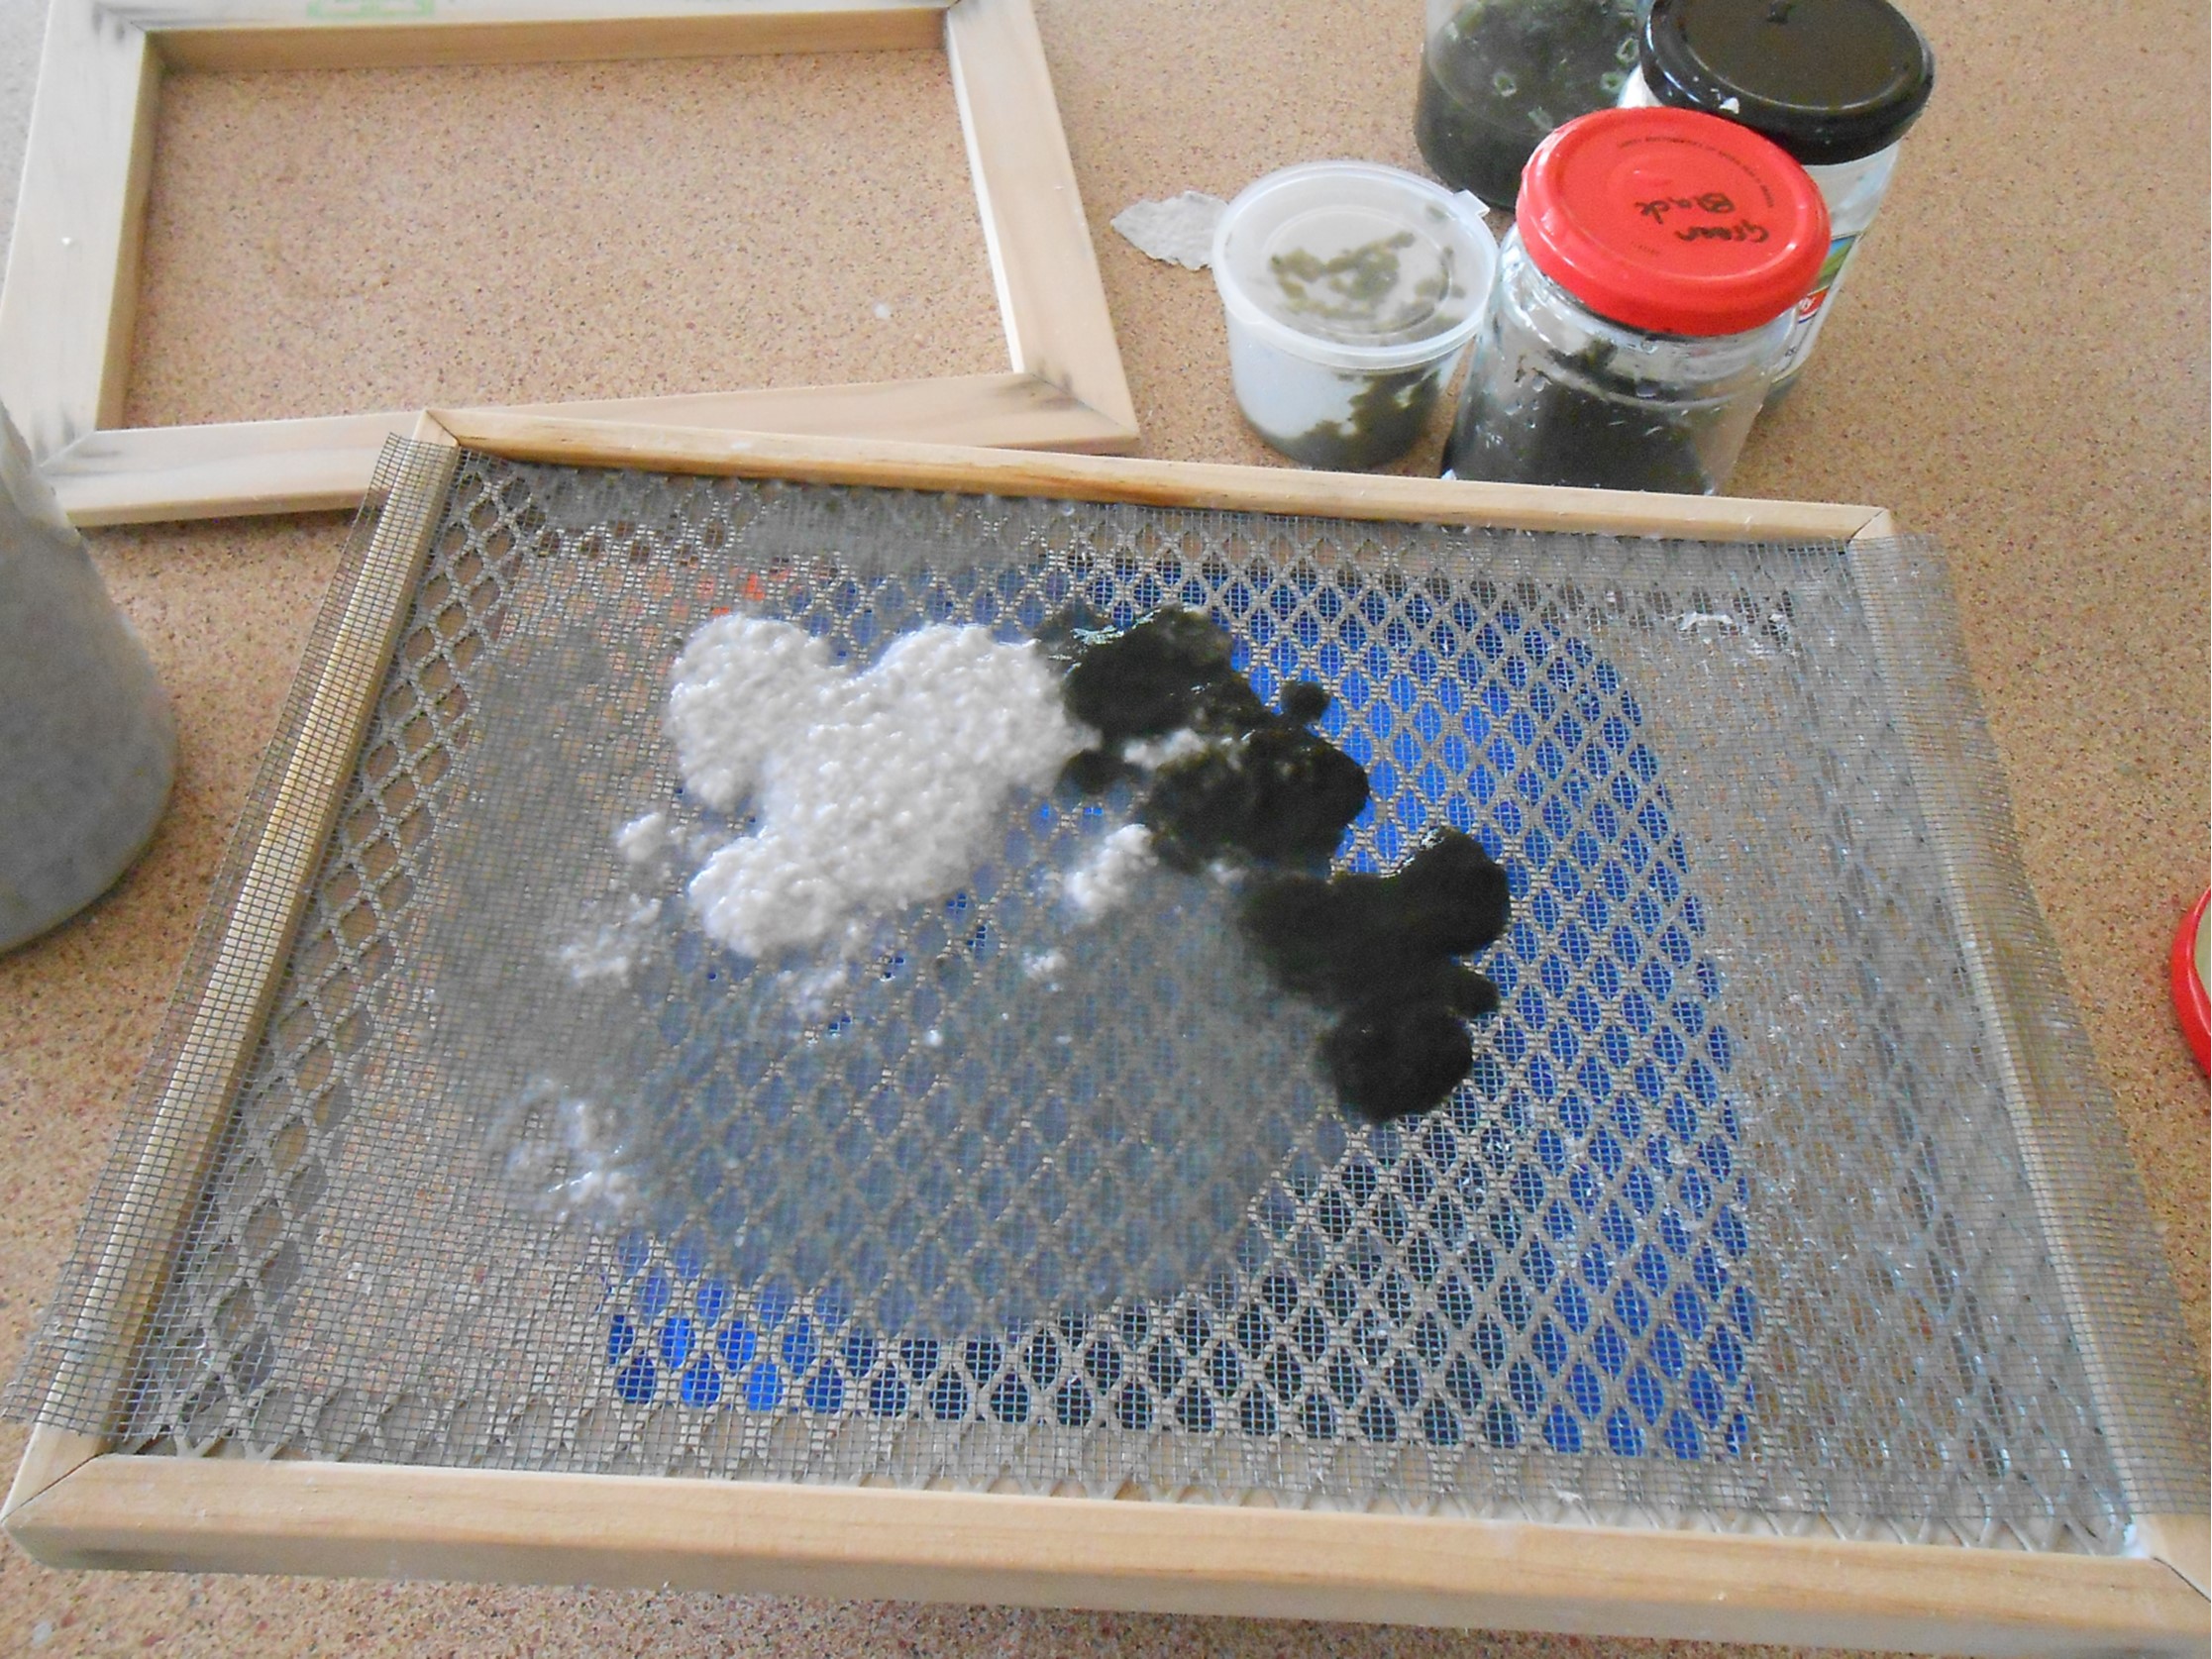
3. Making paper mulch Recycled paper is chosen to best match the colours in the photograph. Paper is torn or shredded into small pieces, soaked in water for one or two days, and blended into paper pulp.
Batches of paper in various colours can be made and blended together at this stage to best colour match the photo. To accurately replicate blended colours, a sample is blended and dried, as the dry result will appear lighter.
4. Casting the paper
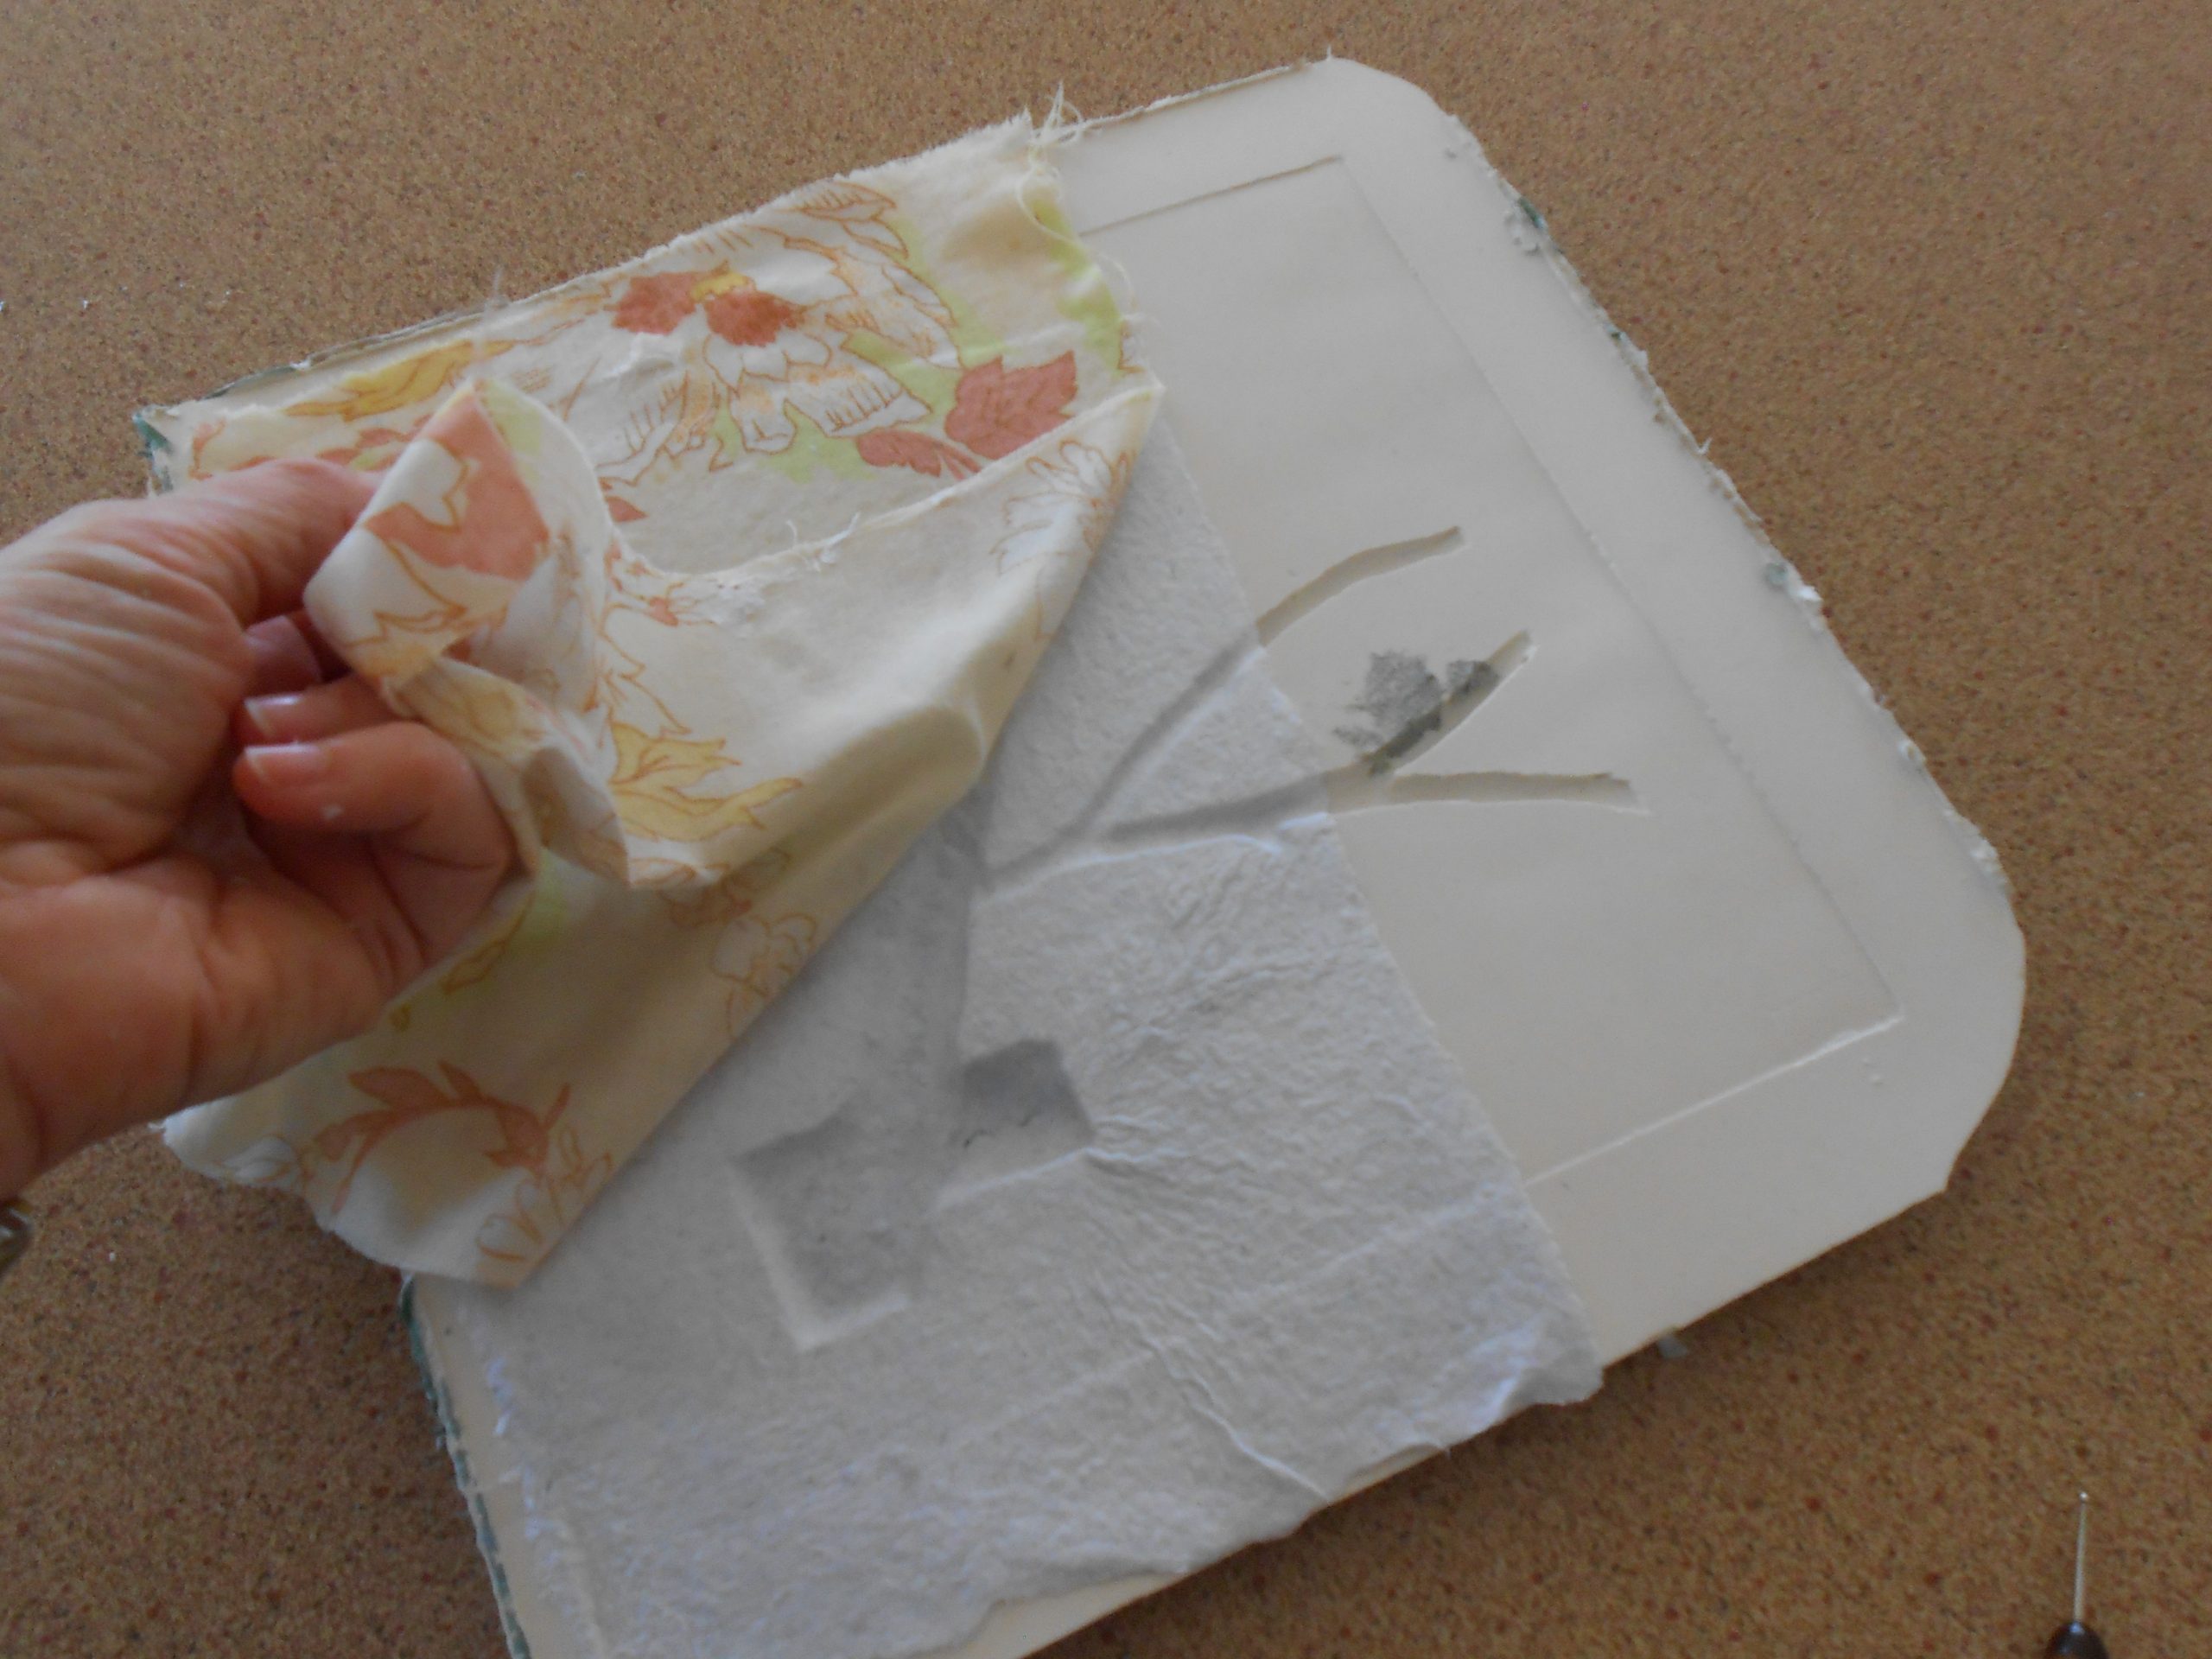
The first step is to lay any surface contrast colour into the mould (e.g. tree bark) using small pieces of mulch and spraying with water to keep damp.
The main colour paper mulch is mixed with water in a deep basin or container. Dipping a paper-making frame and deckle, sheets of paper are created and placed directly into the plaster mould, overlapping as necessary to fill the mould to extend beyond the acetate edges.
A small brush is used to work the paper carefully into the crevices and to blend together any overlaps of the wet paper sheets.
A substantial thickness needs to be built up to support the image, particularly in deep areas and on fragile edges, using a cloth or sponge to absorb as much moisture as possible between layers. The paper cast is set aside to thoroughly dry. Depending on the thickness and the weather, this can take several days.
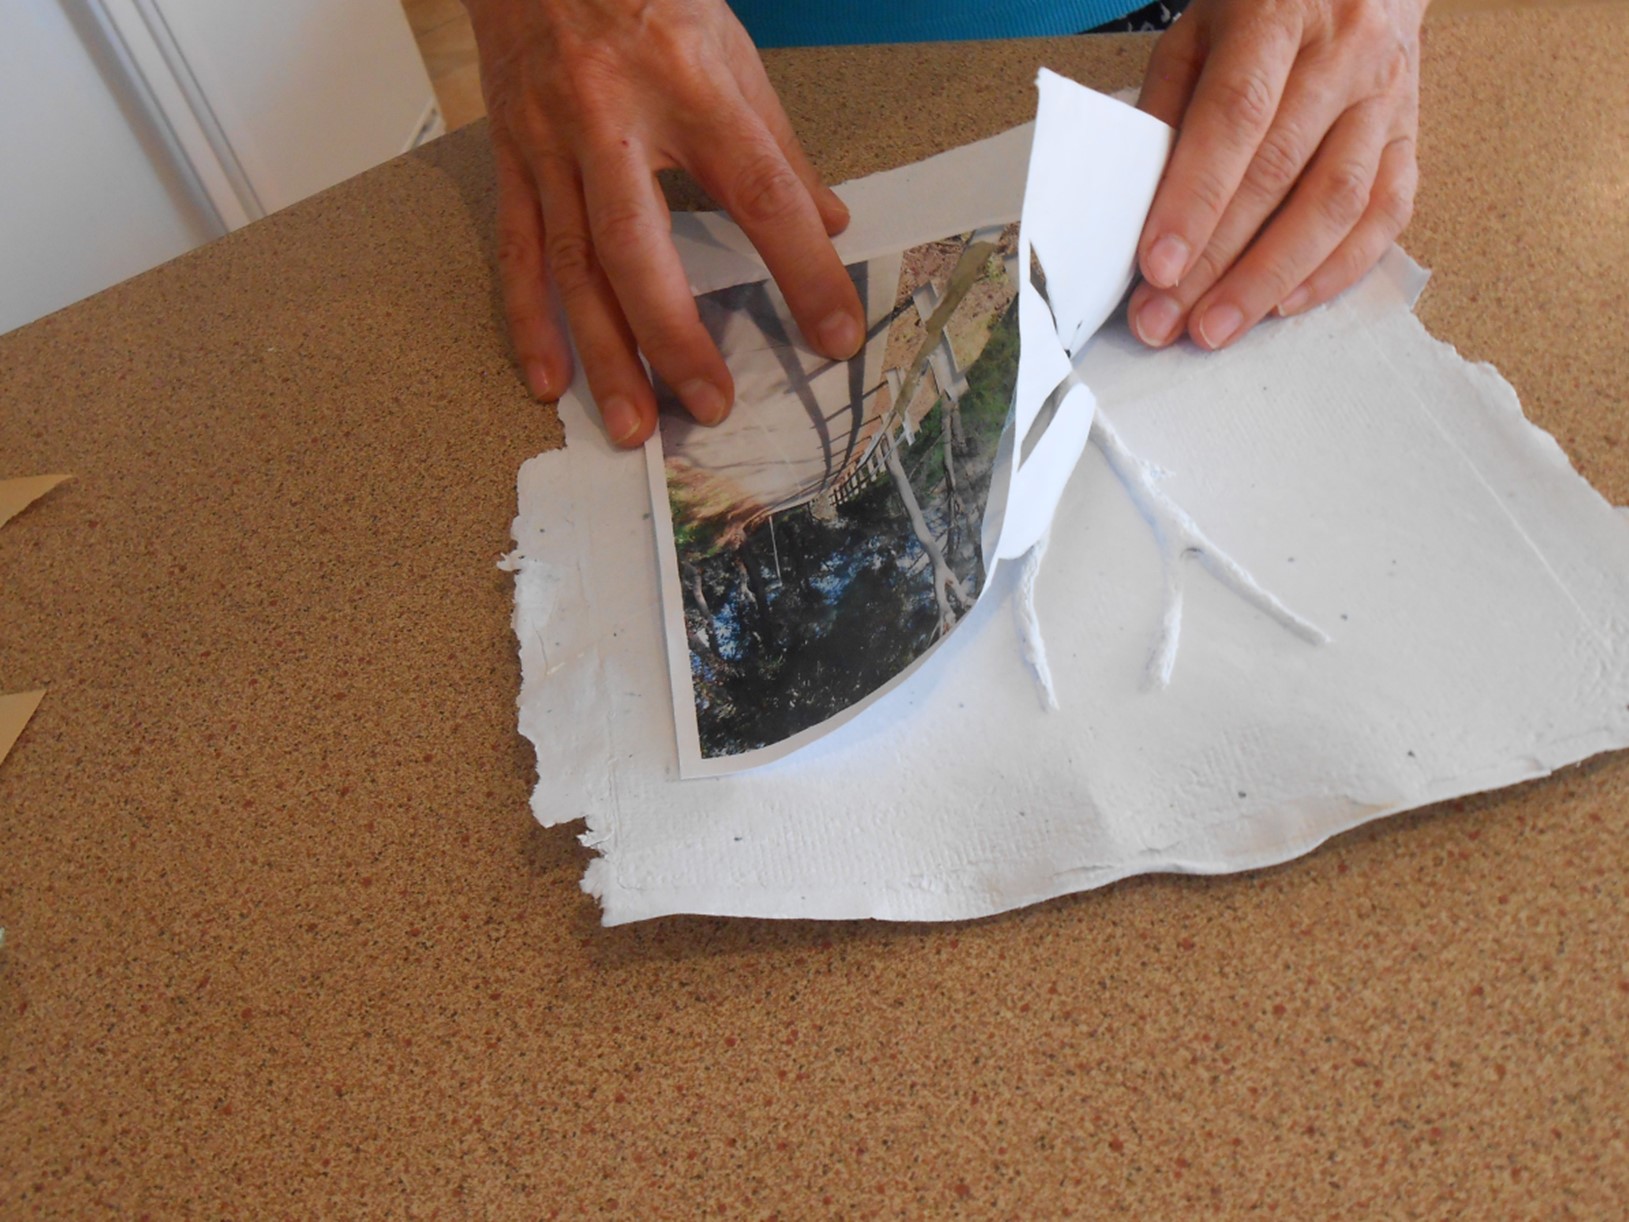
5. Applying the photograph to the cast
The paper cast is gently removed from the plaster mould. Any loose or fragile pieces that did not adhere completely can be secured with a clear paper glue at this stage.
Using the plaster mould, a tracing is made of the bas-relief areas which is then transferred to the back of the photograph.
These sections are cut out. Pieces of the photo are placed around the bas-relief cast and glued to the paper mould. The edges are trimmed and the picture framed.
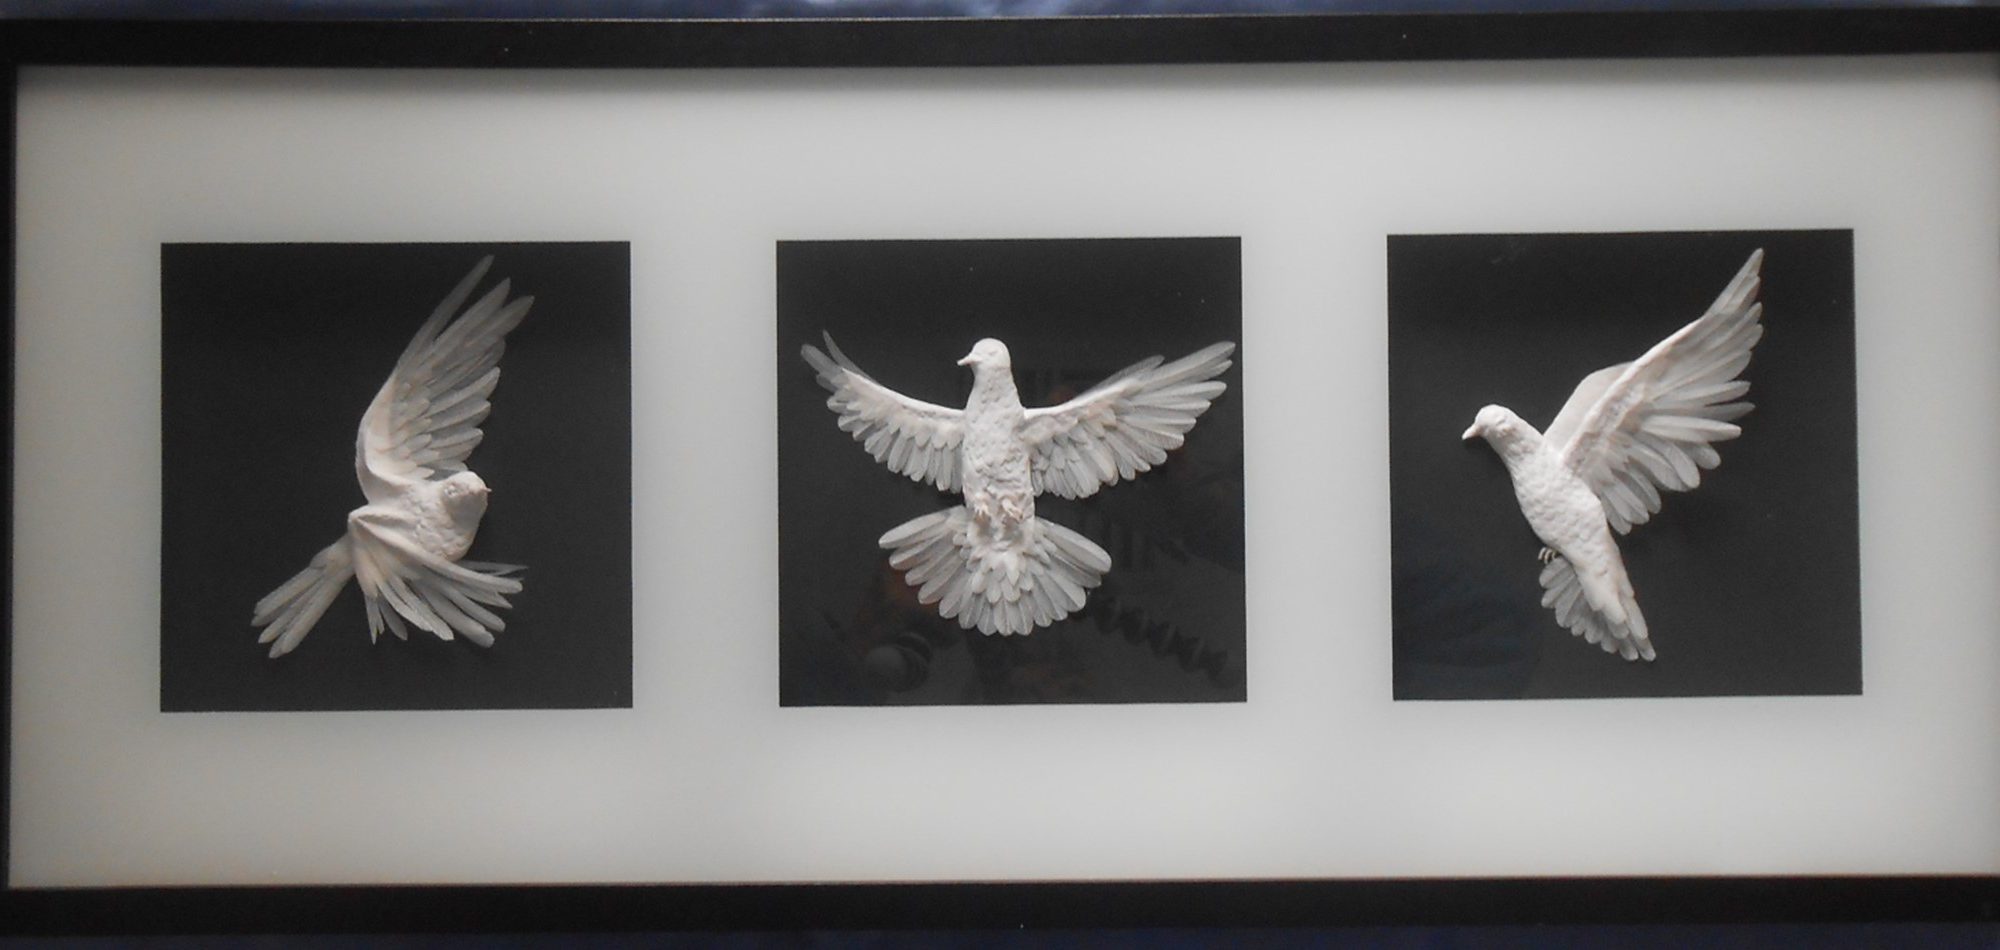
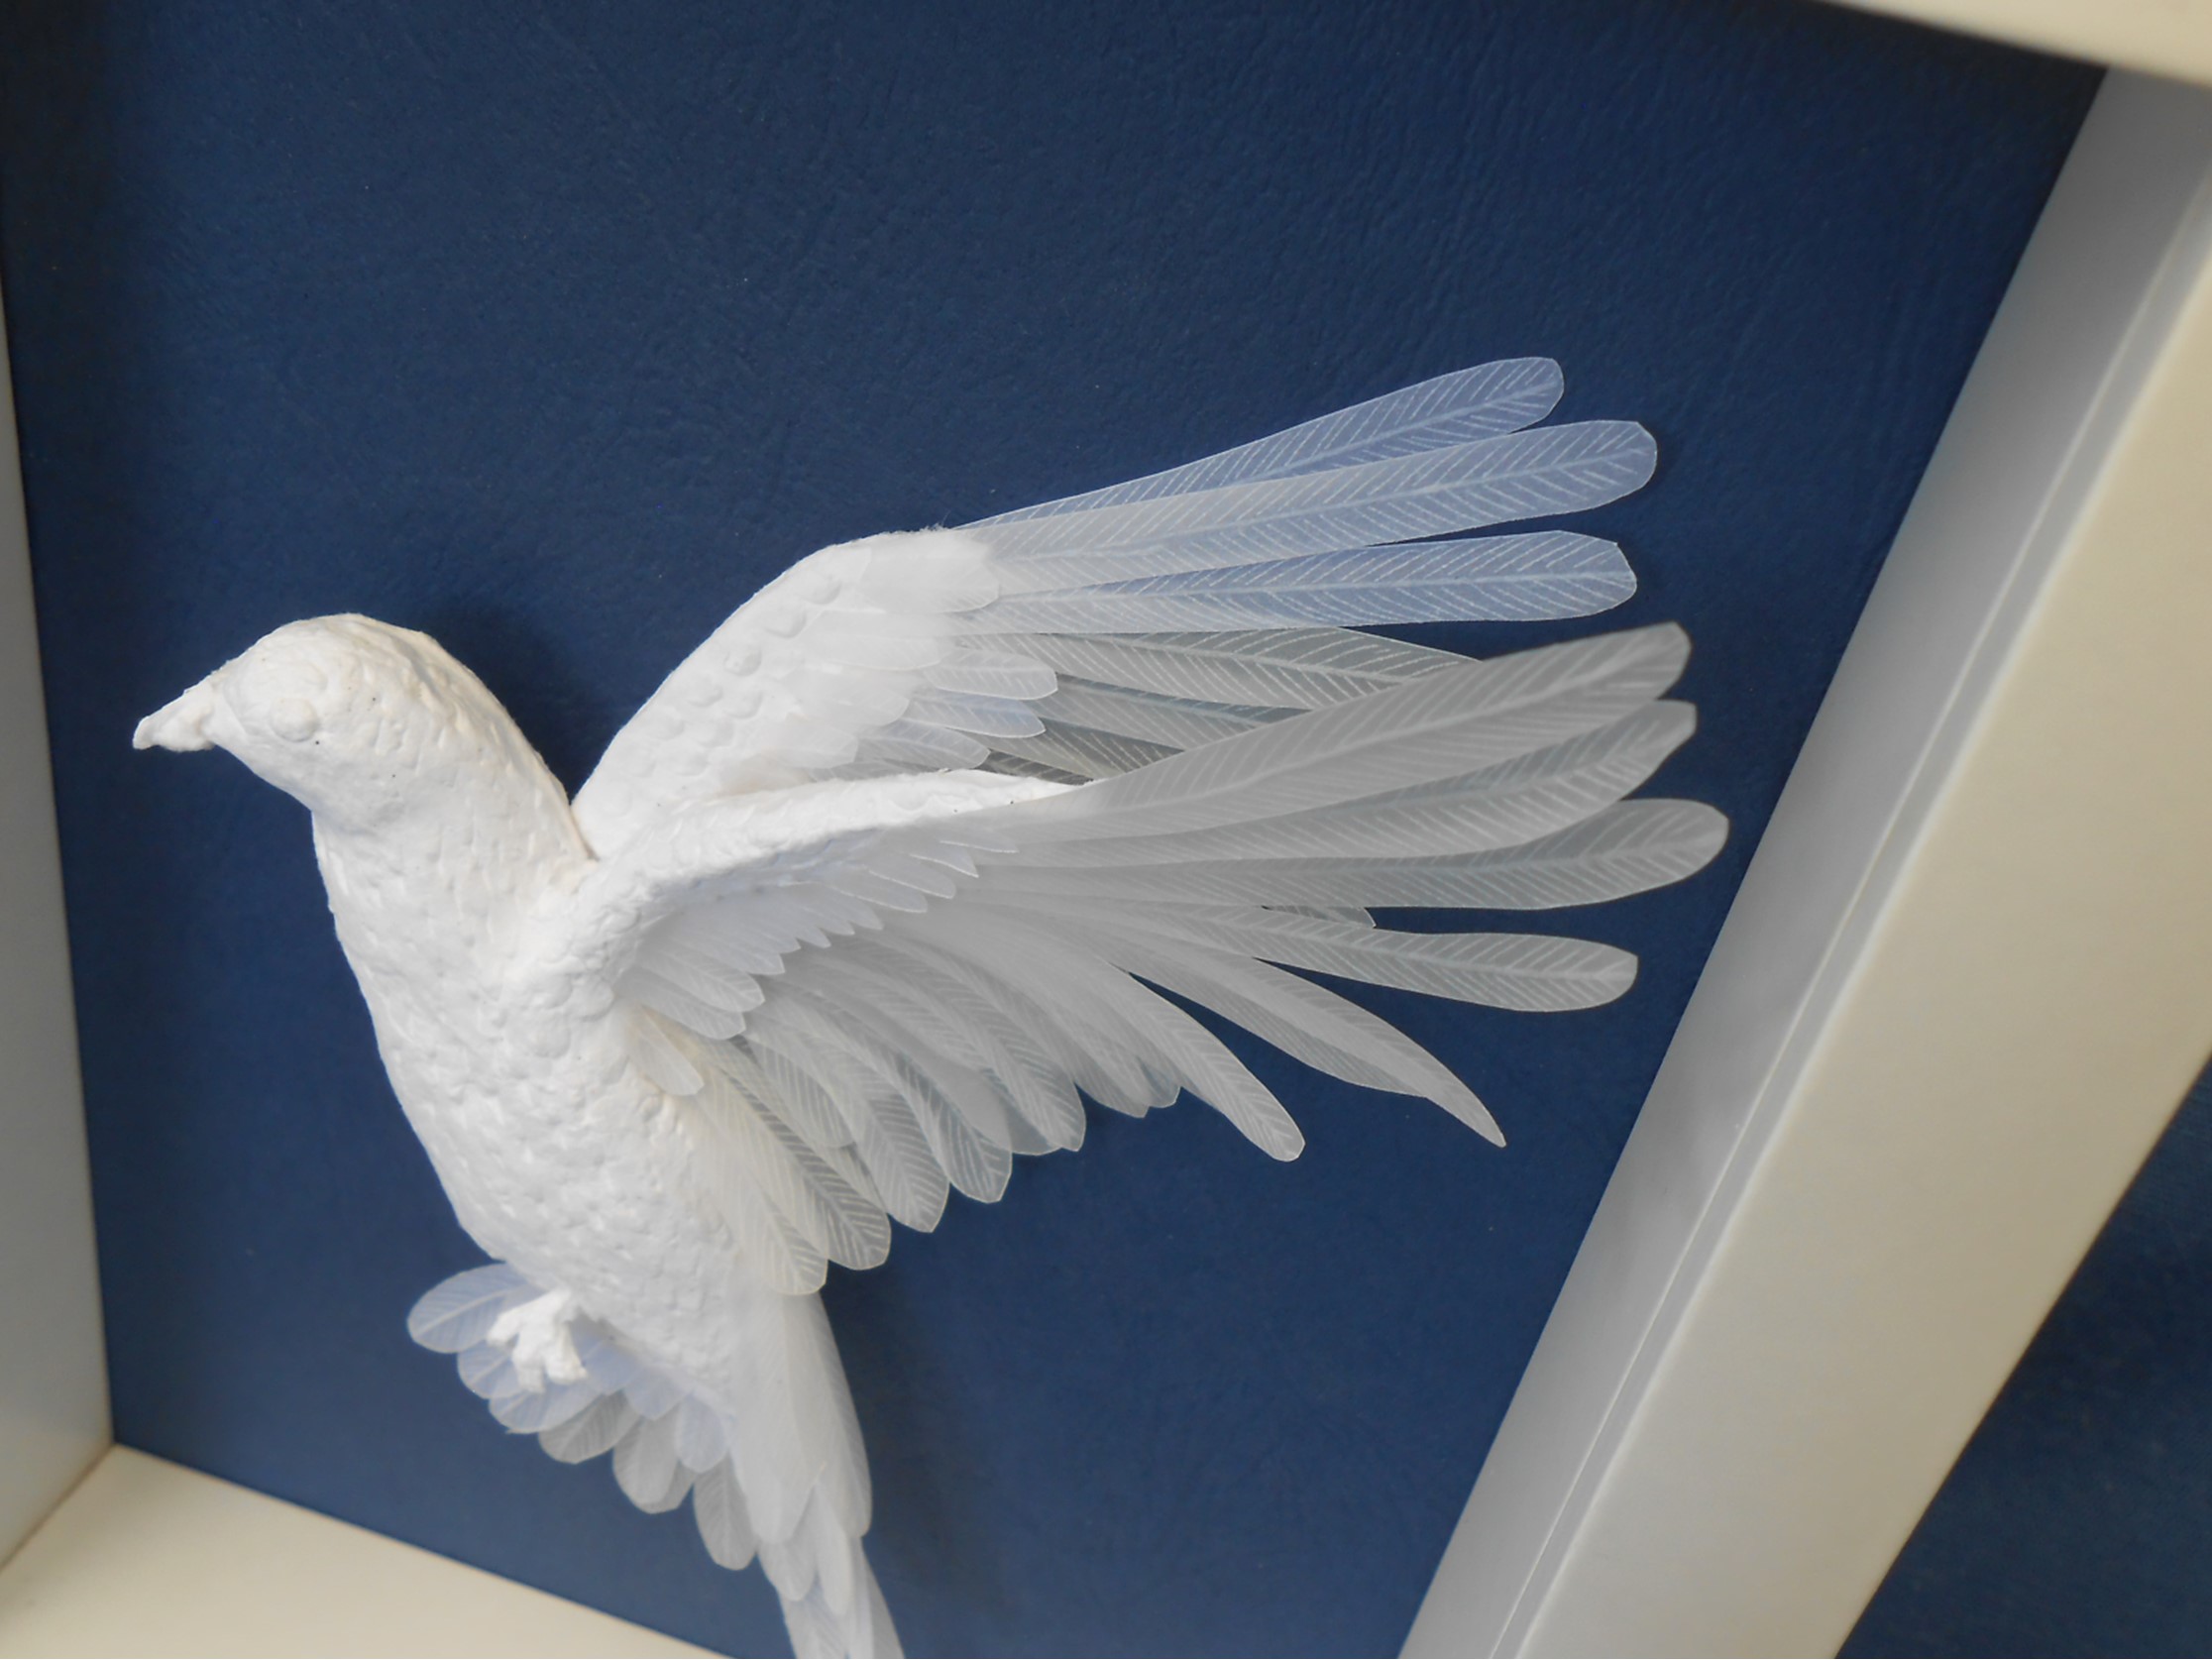
I saw a photograph of a bird in flight with sunlight behind, making its wings almost transparent. I experimented to see if a similar effect could be achieved with paper and finally settled on paper vellum which is strong enough for fine cutting and marking and yet has a slightly transparent quality which shows up when layered.
The bodies of the birds are cast recycled paper. Using plasticine to form the shape, I then make a mold from plaster of Paris. Paper mulch is pressed into the mold and dried. The next step is to individually cut and mark each feather before layering them and gluing them to the body. More details of the cast and feathers are in the illustrations below.
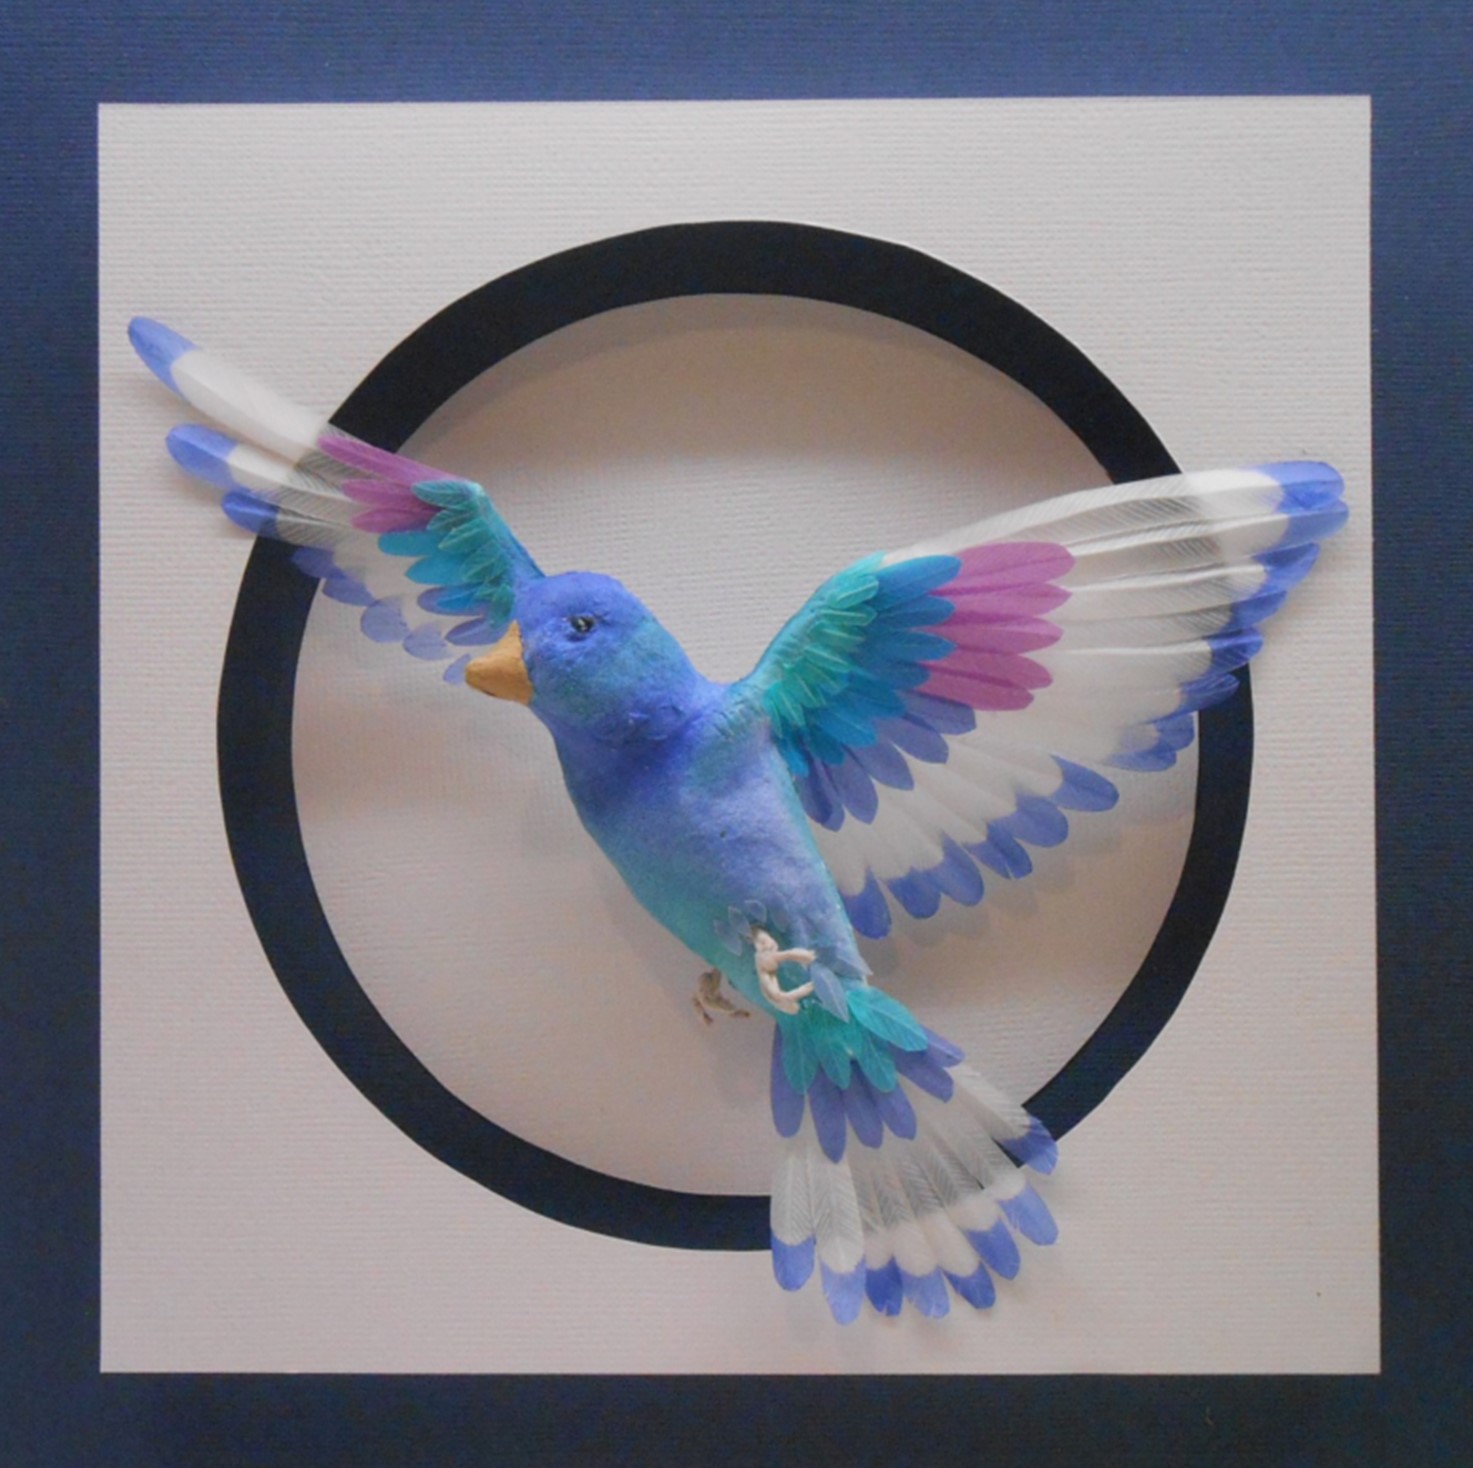
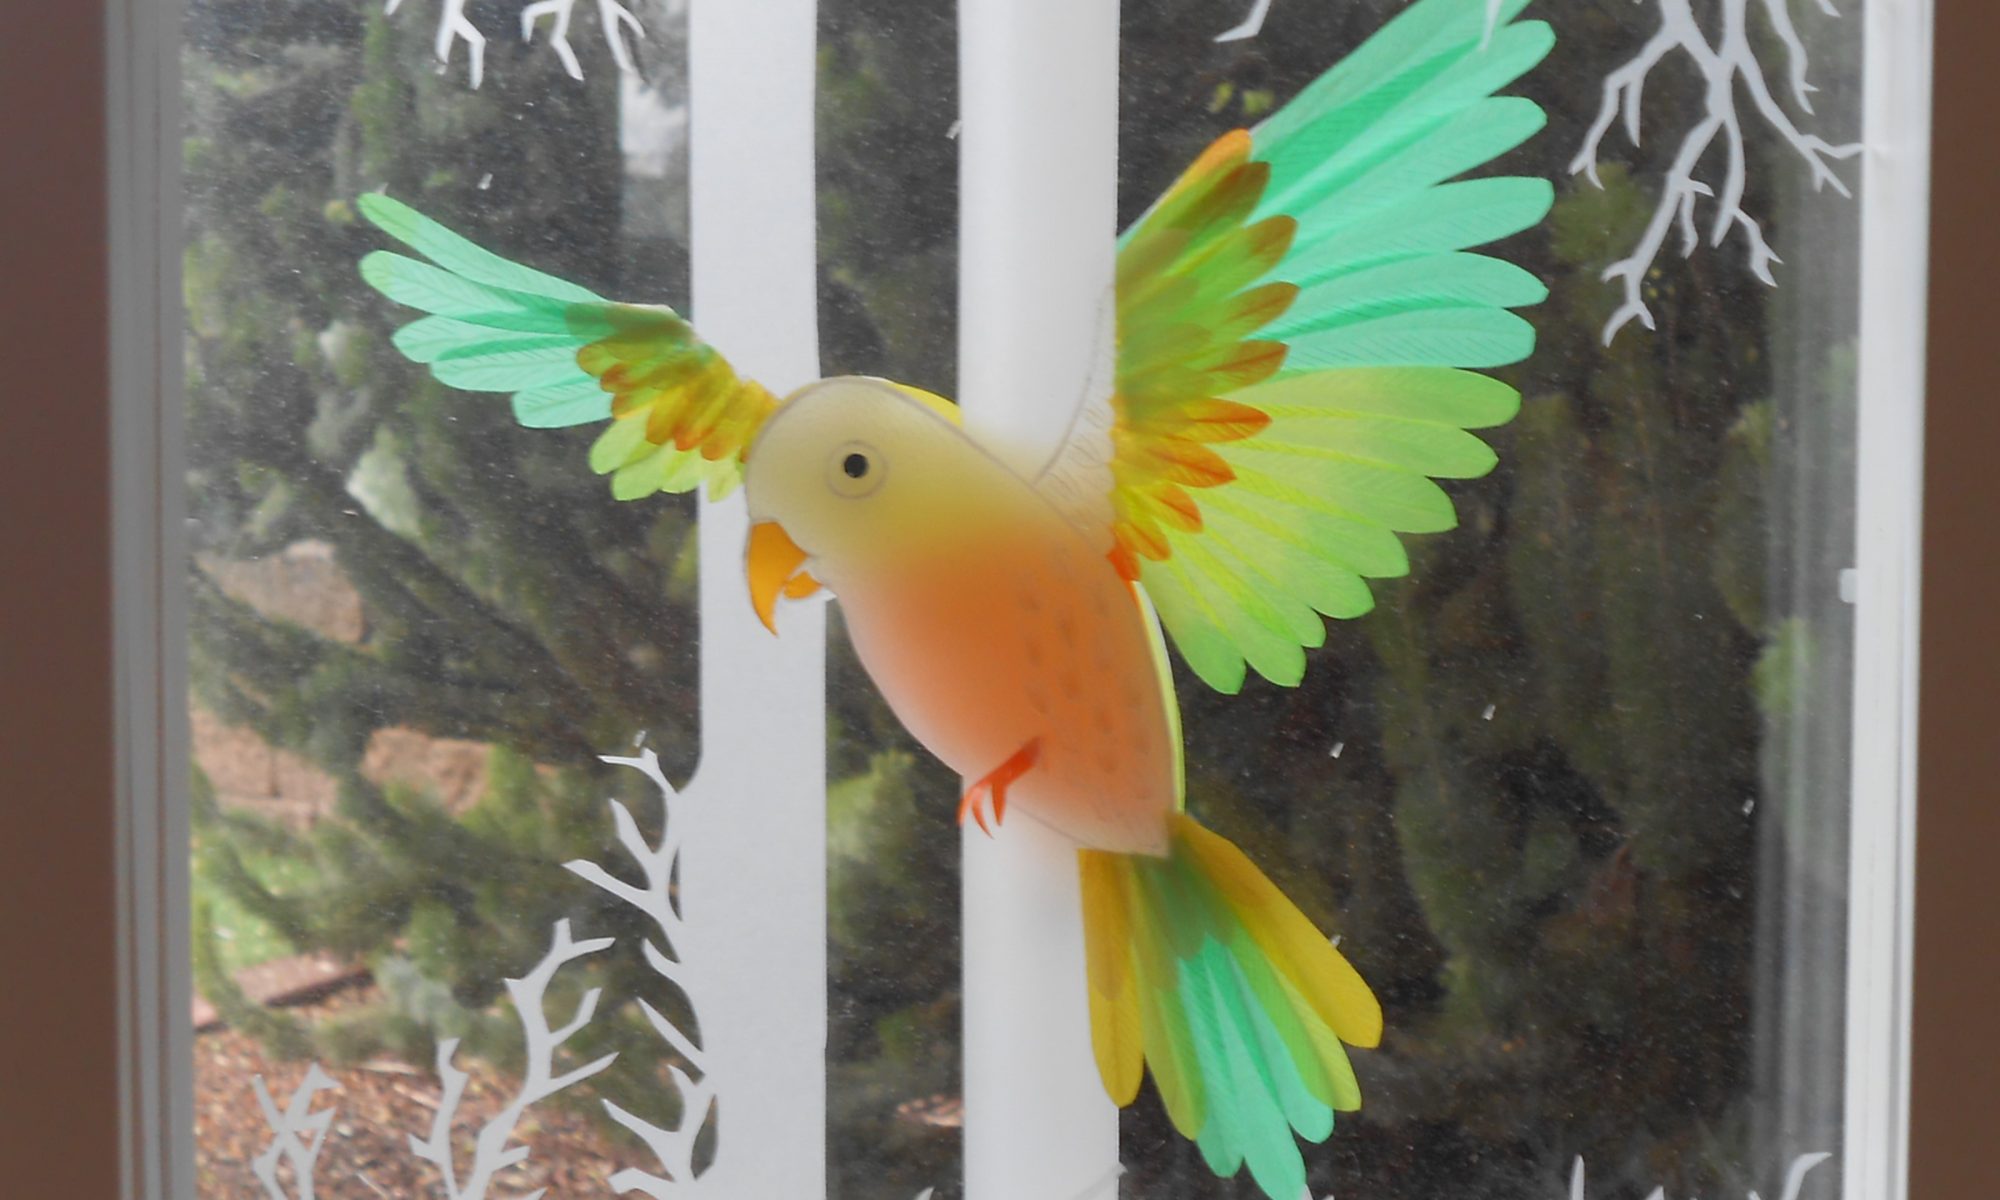
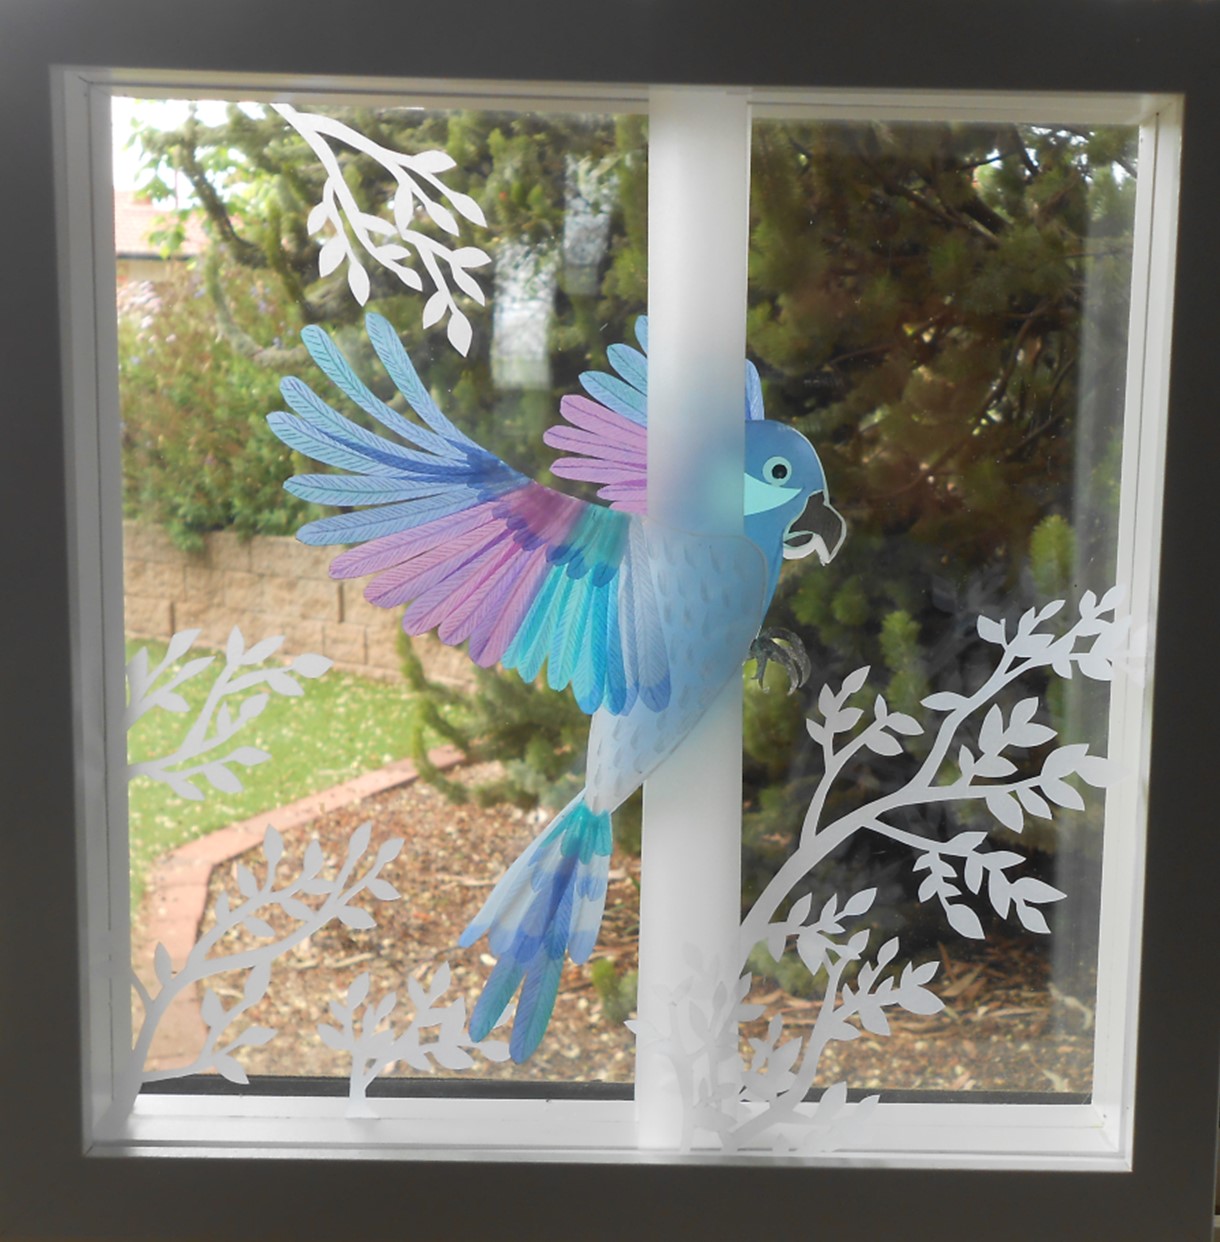
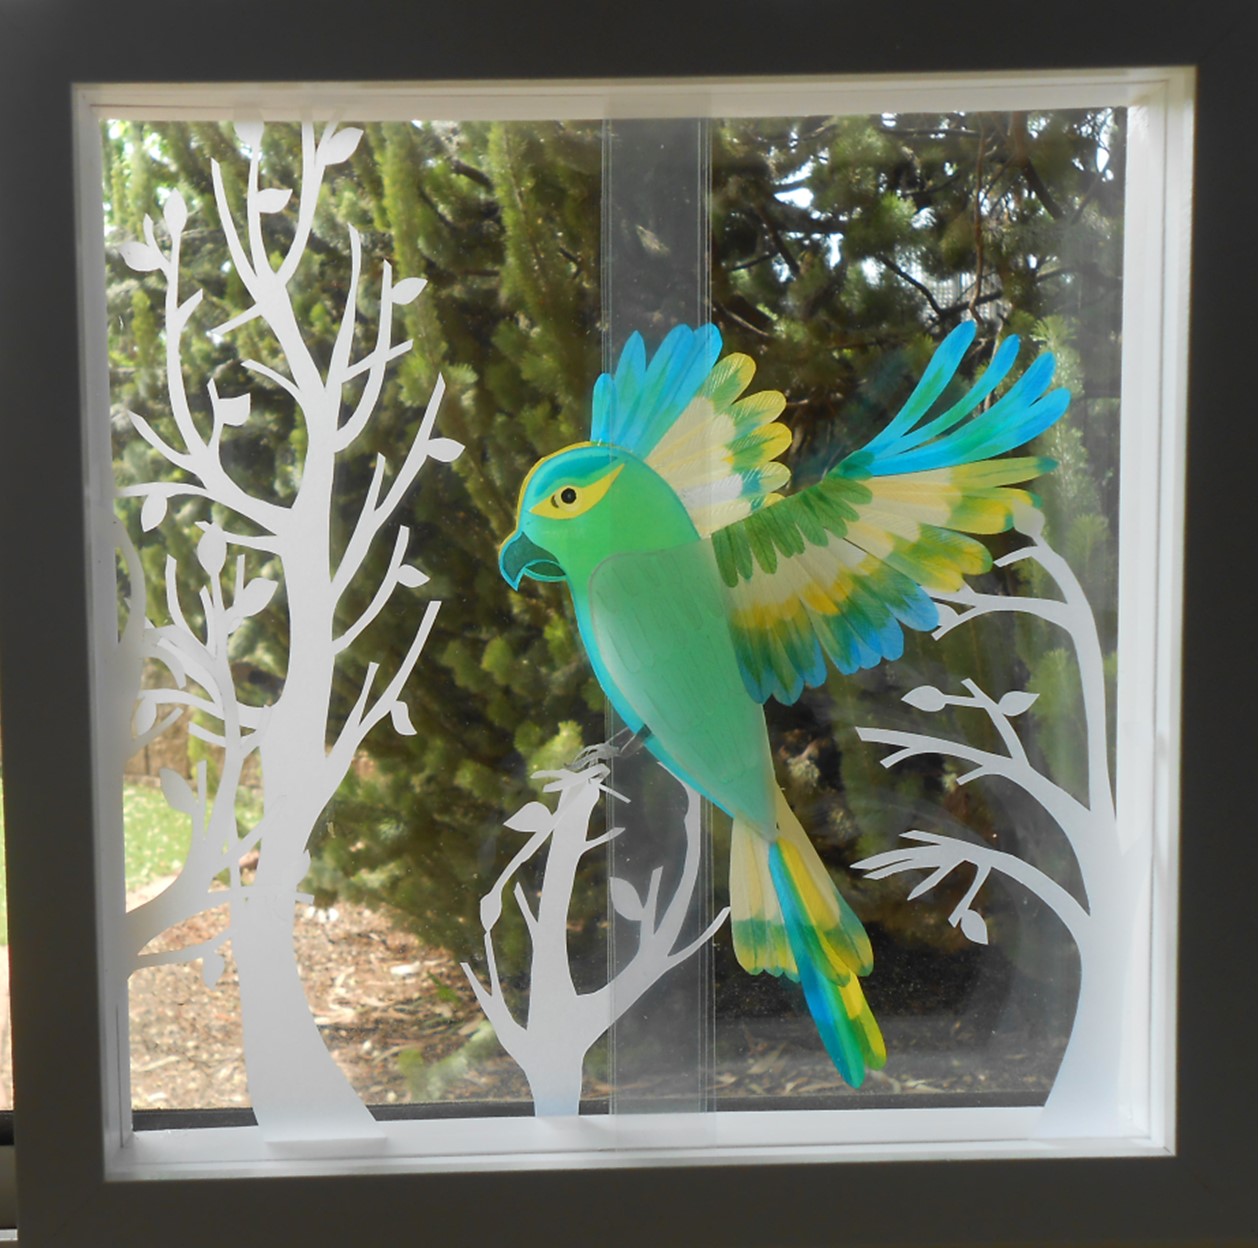
Once this project was completed, I began experimenting with colour. More about this in my Layered Papercut Parrots post.
Creating birds with paper is delightful as they share many characteristics. My objective with this project was to illustrate the delicacy, lightness, colour and movement of birds.
Following my white “Moments in Flight” sculptures, I designed these layered paper cuts to experiment with colour. While I mainly used coloured paper vellum, I wanted to blend colours on the feathers. The biggest challenge with vellum is trying to paint it! As vellum hates water or any liquid (it resists the colour and curls up) I finally managed to “stain” the feathers using small amounts of airbrush ink on rags, and gently rubbing it in.
These pictures consist of three layers mounted in a box frame. Each layer has a body piece on a central ‘post’ and some white foliage. The back layer features the back wing , the centre layer features the tail and the front layer features the front wing. This gives a 3D effect.
The pieces are framed with glass backing and are designed to stand in front of a window or light source. The photo at the top of this post (or click on the images below to enlarge) to see how light brightens and blends the layered colours.