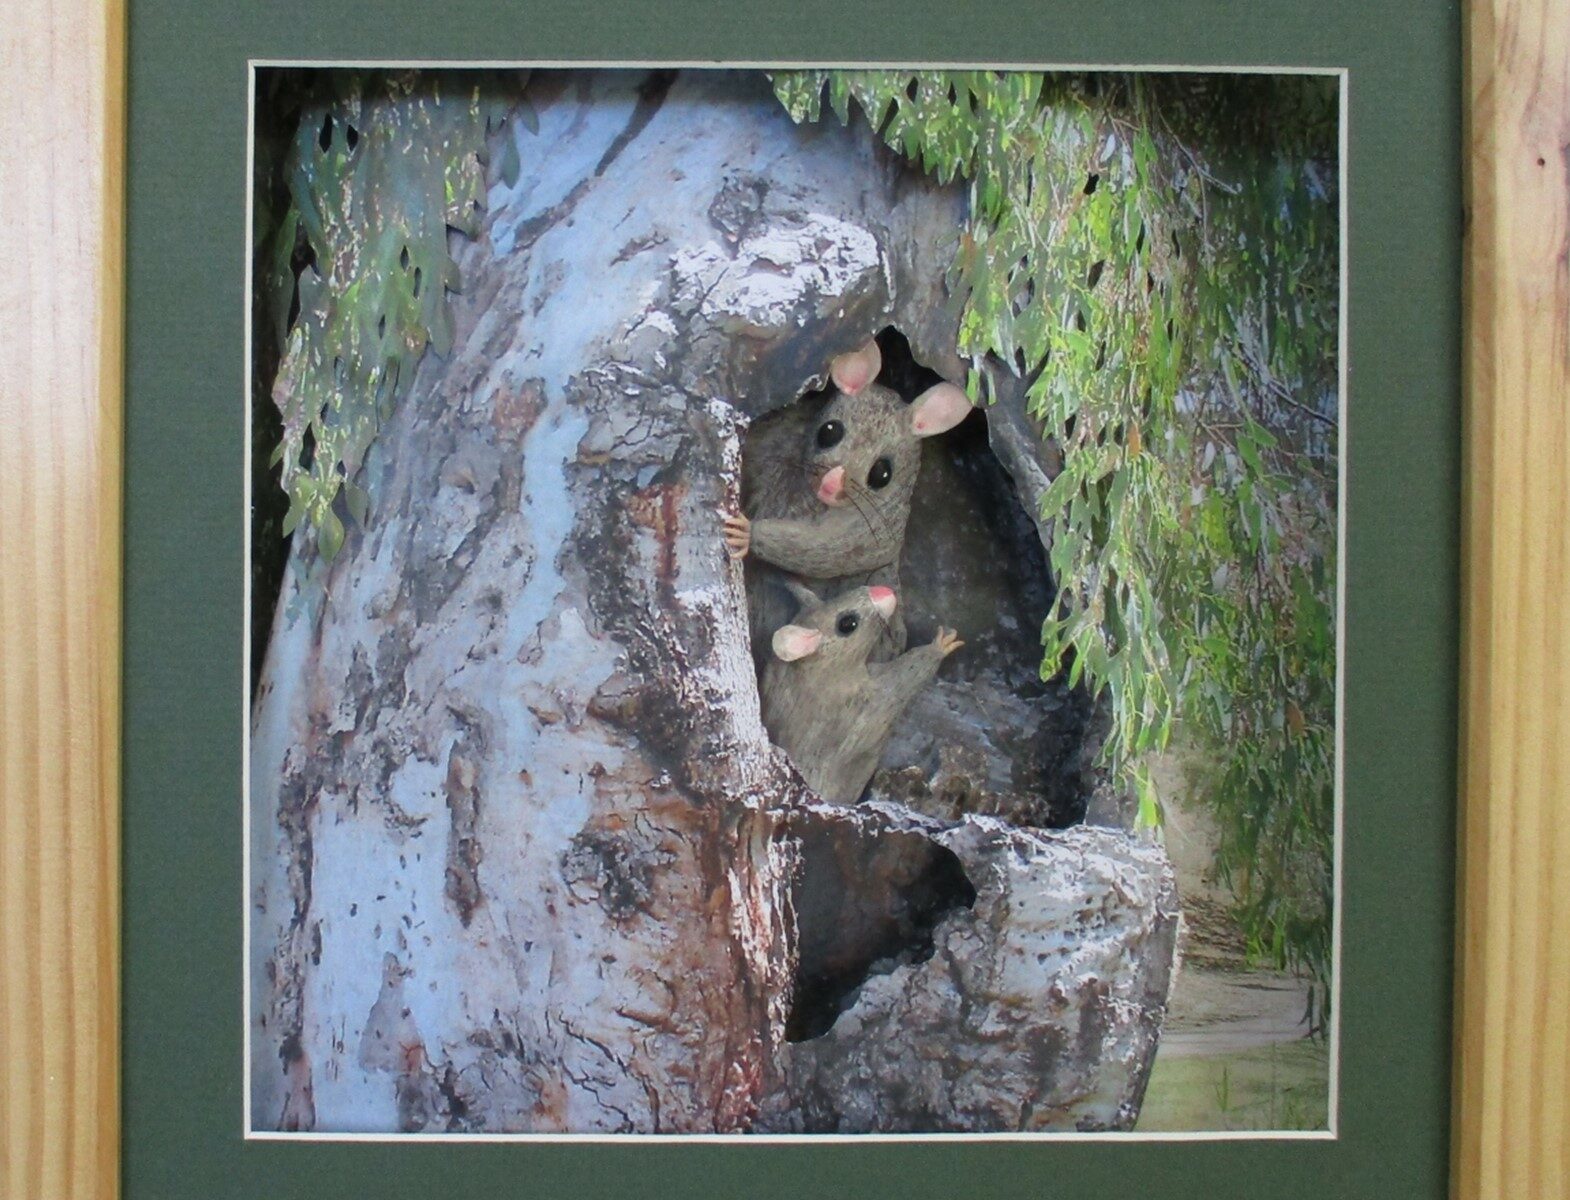
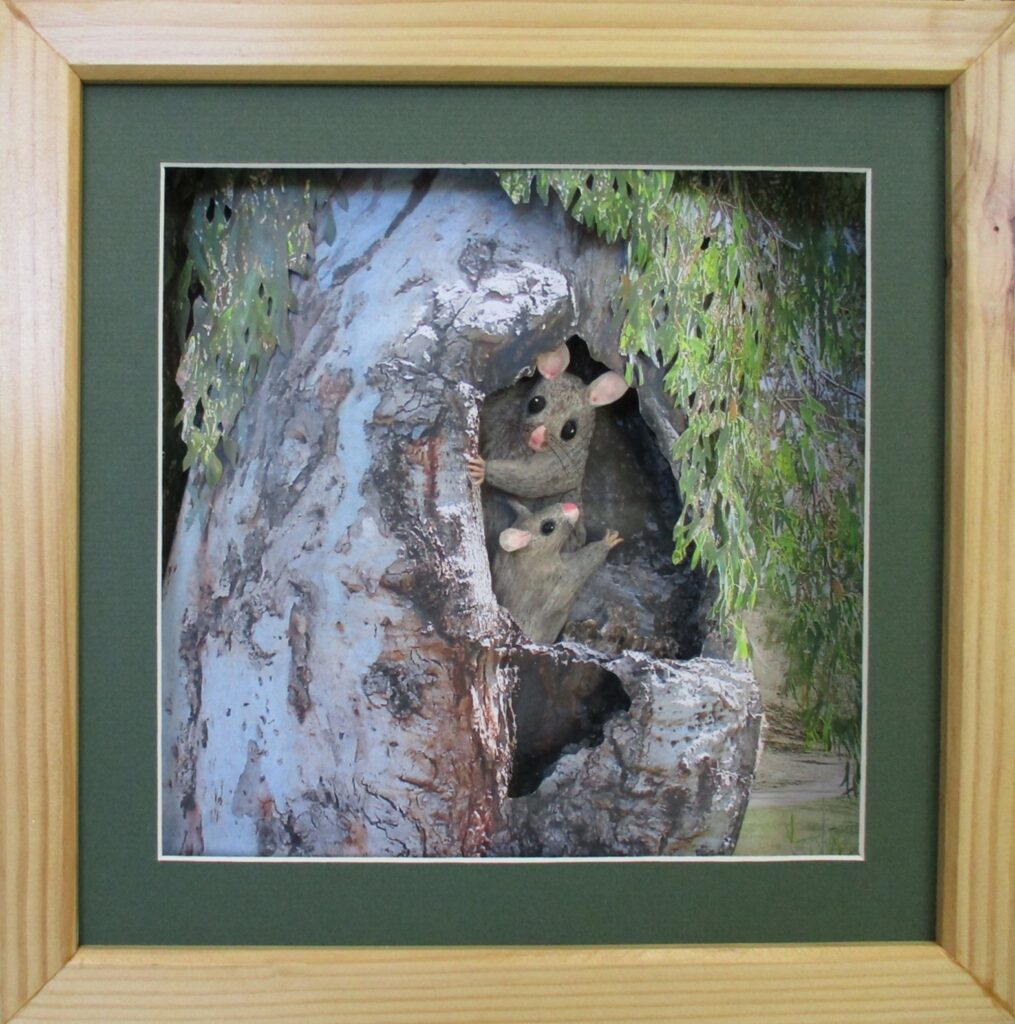
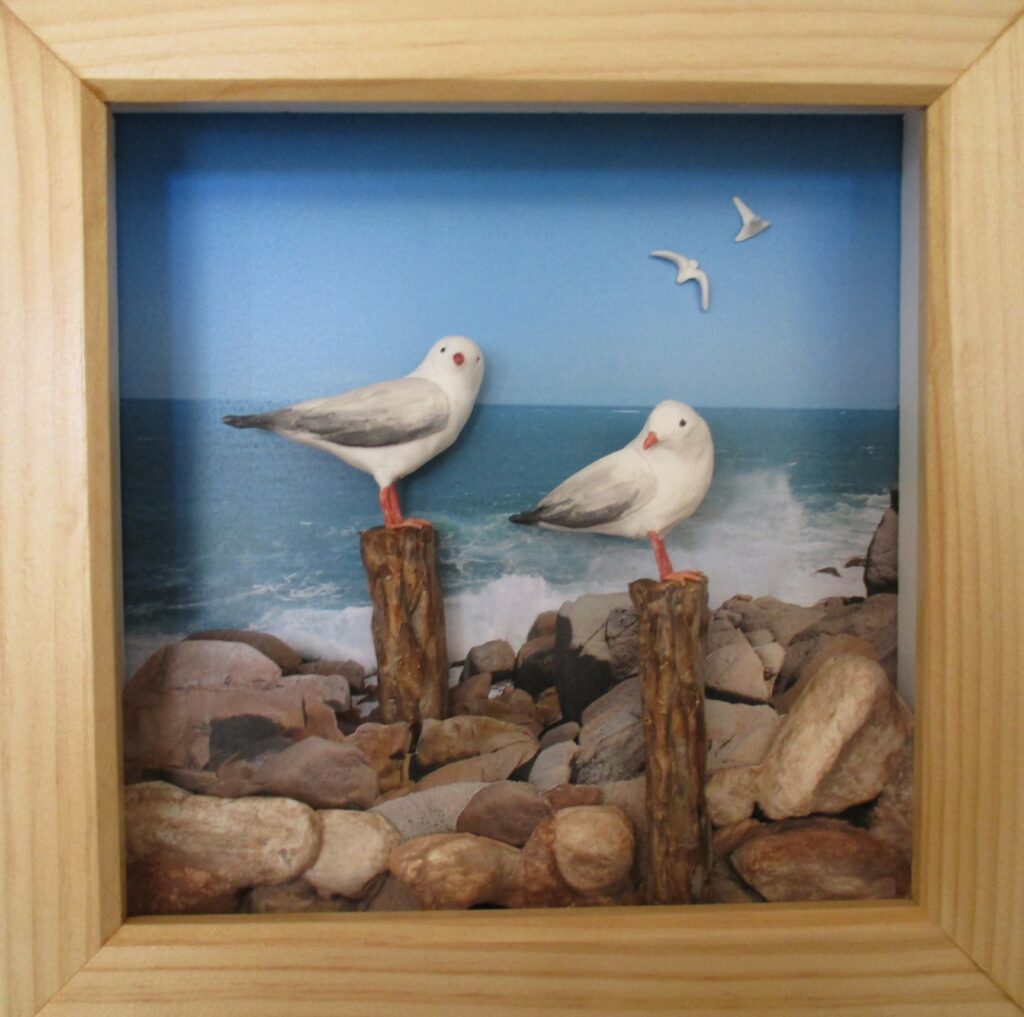
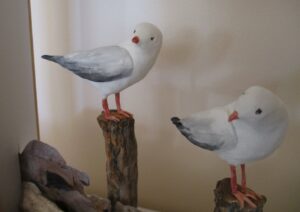
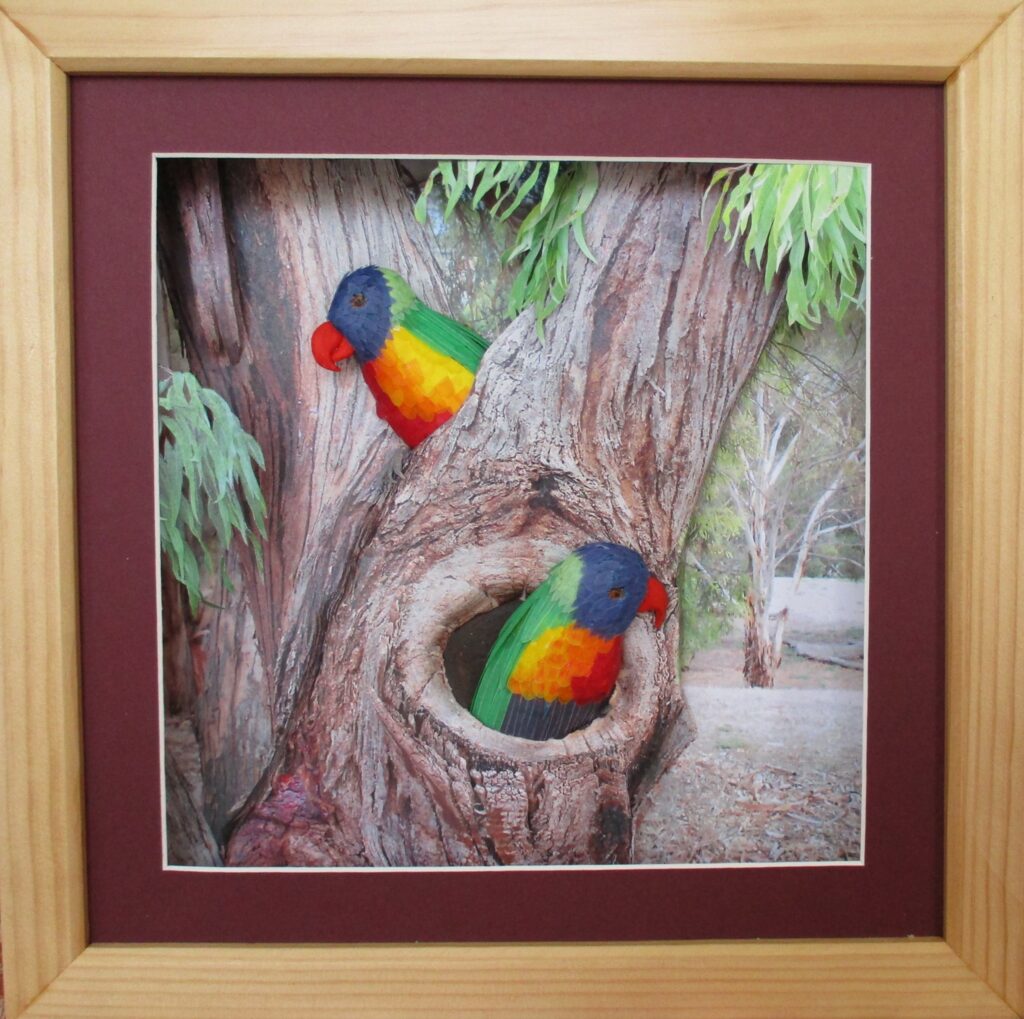
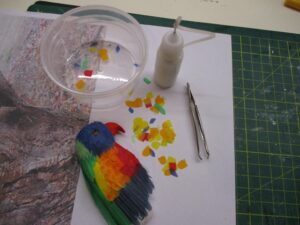
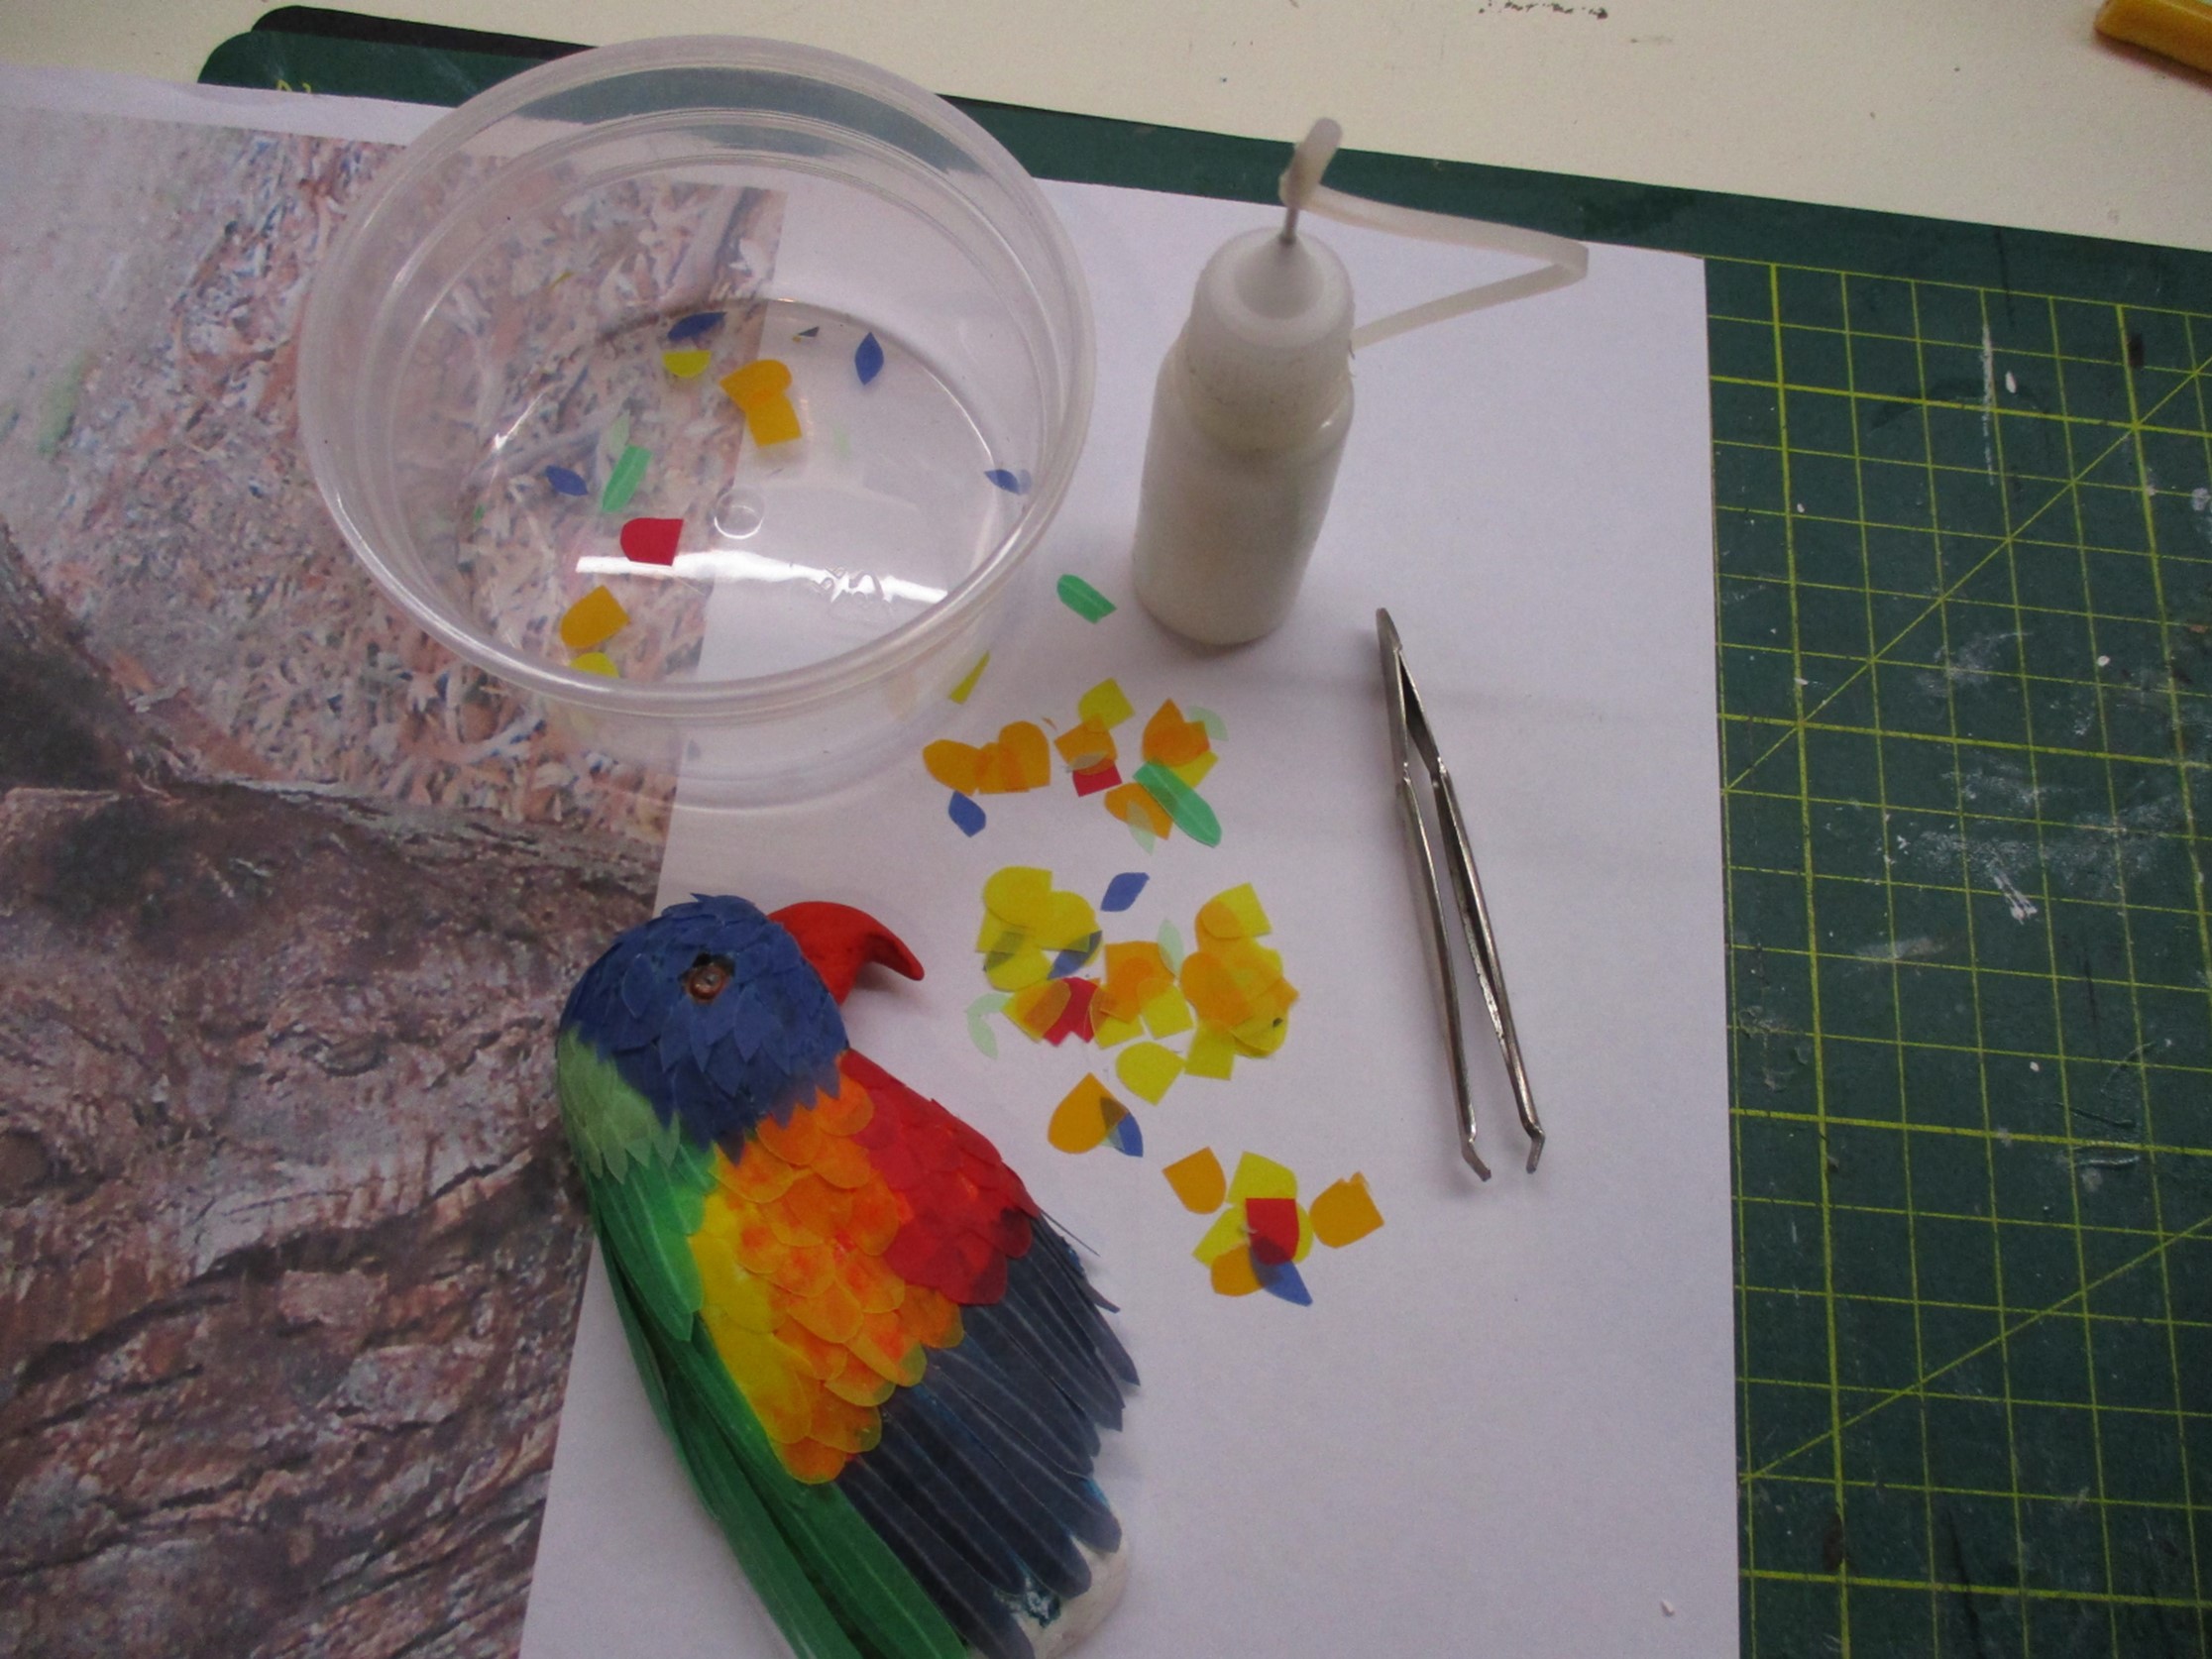
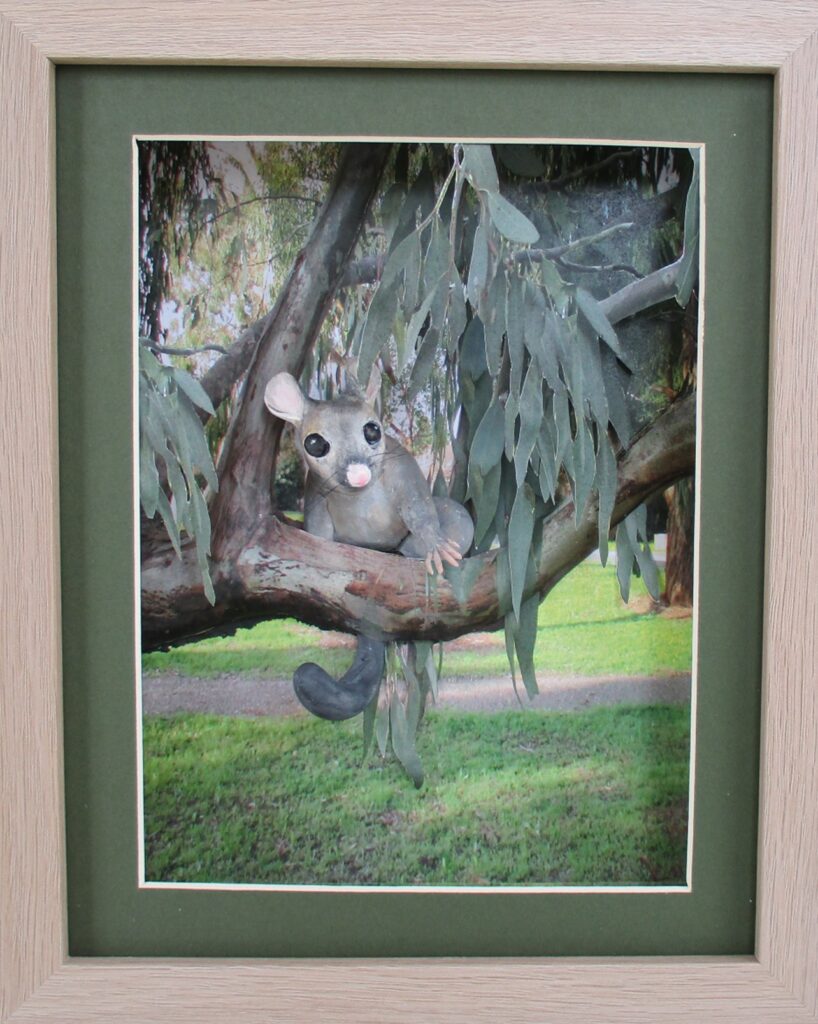
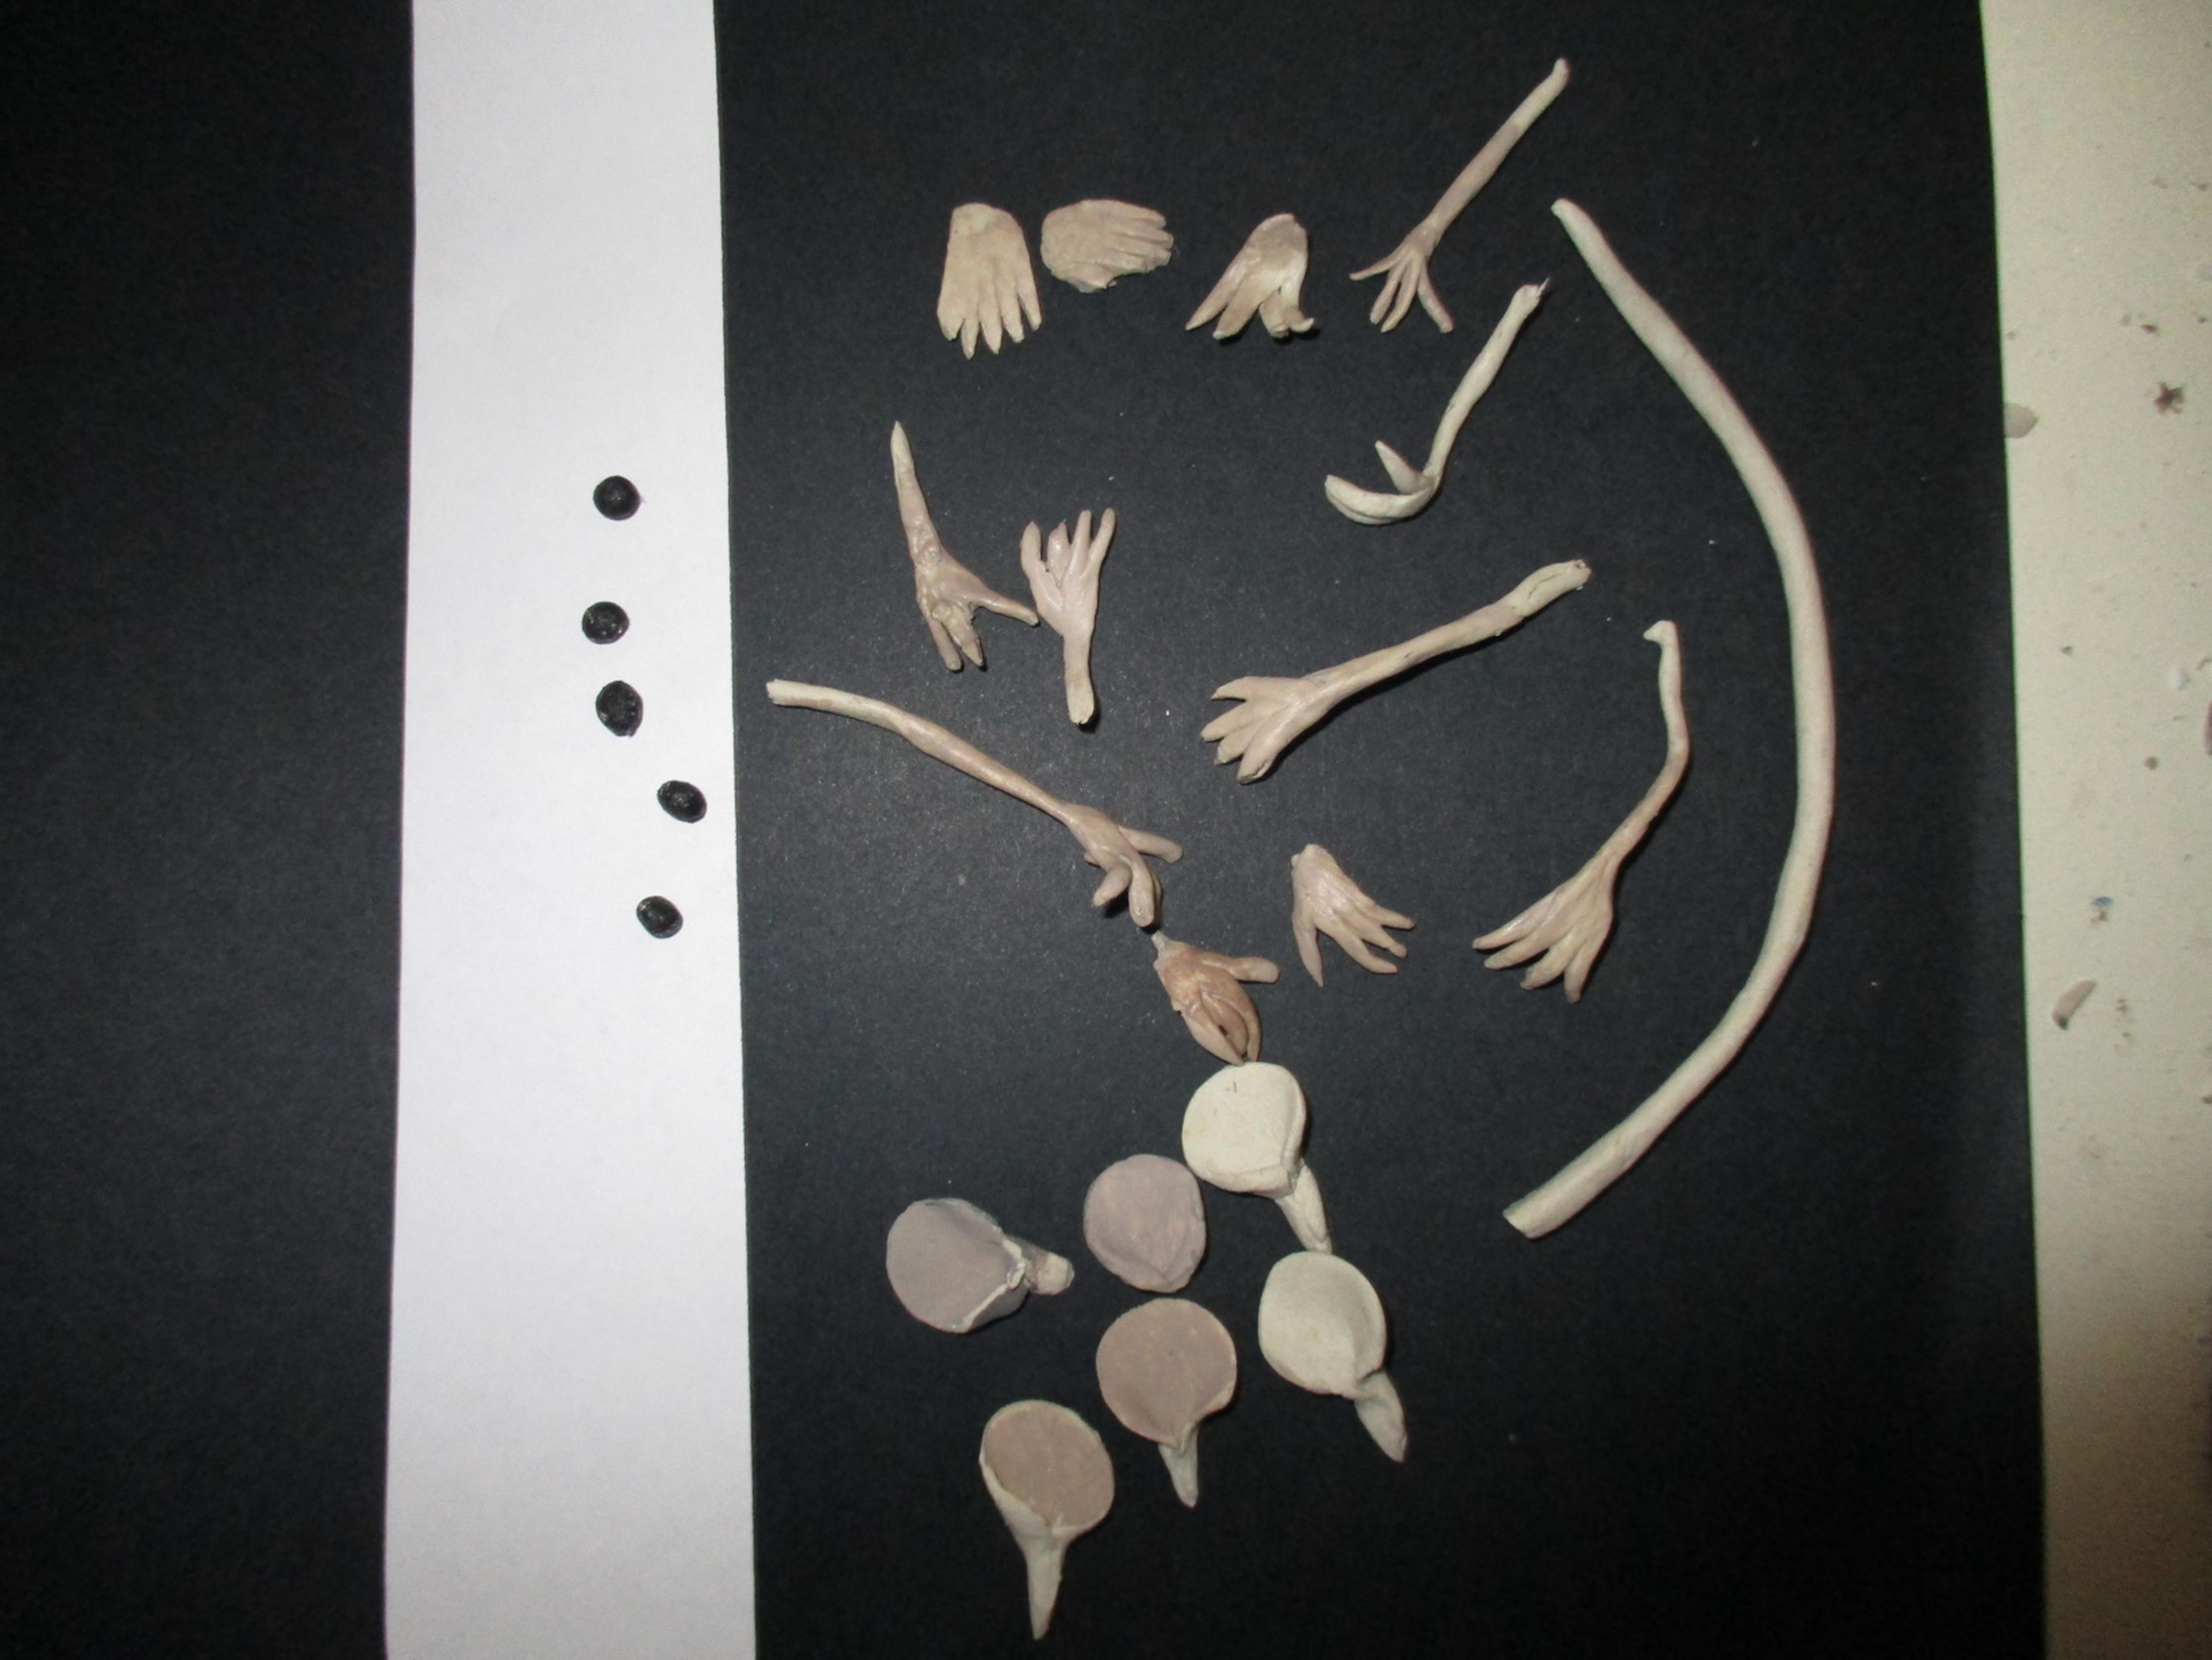
This set of 4 new paper sculptures began as photographs I took recently along walks near the river and sea. By layering and shaping prints of the photos and using cast paper mulch to build them out, I’ve created 3D settings for little creatures made from paper clay. The parts added to the photos (the paper mulch bark and stones, and paper clay creatures) are painted and sealed. As I wasn’t pleased with the painted results on the lorikeets, I finished them with tiny paper feathers. One of the most difficult aspects of these pieces is constructing the whole thing into a frame! (Click near the top of the pictures below to enlarge)
Don’t store a blank canvas away, waiting for inspiration!
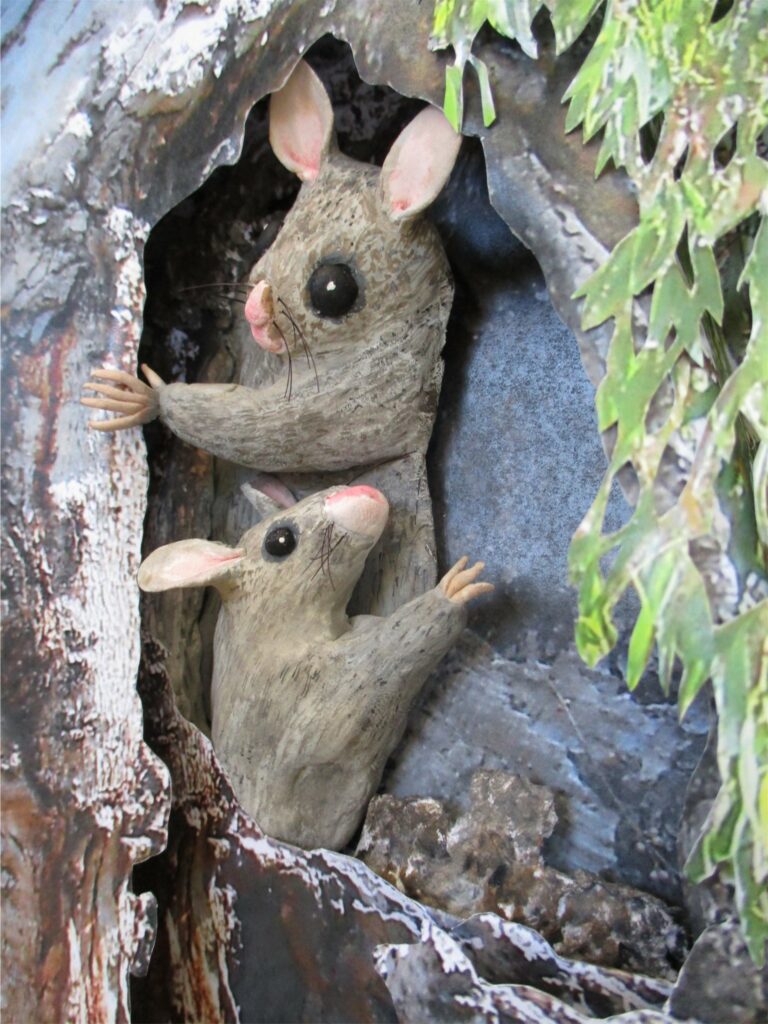
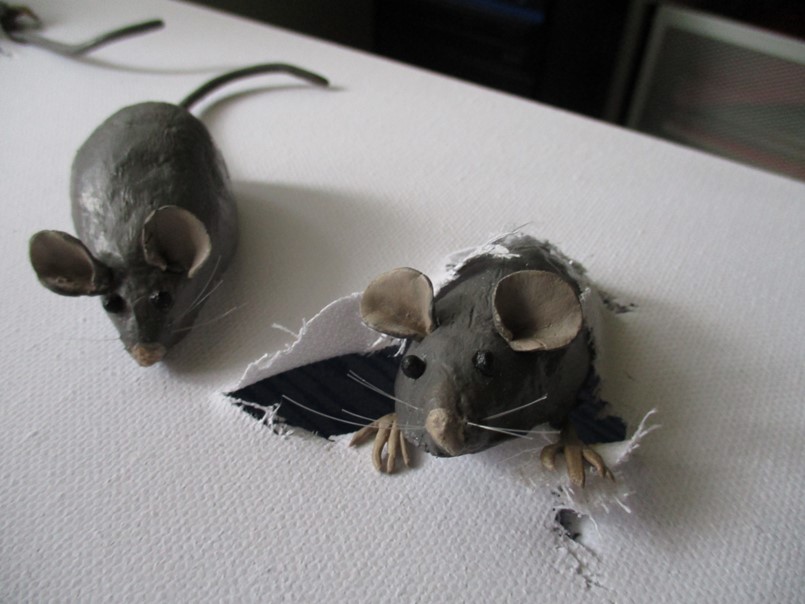
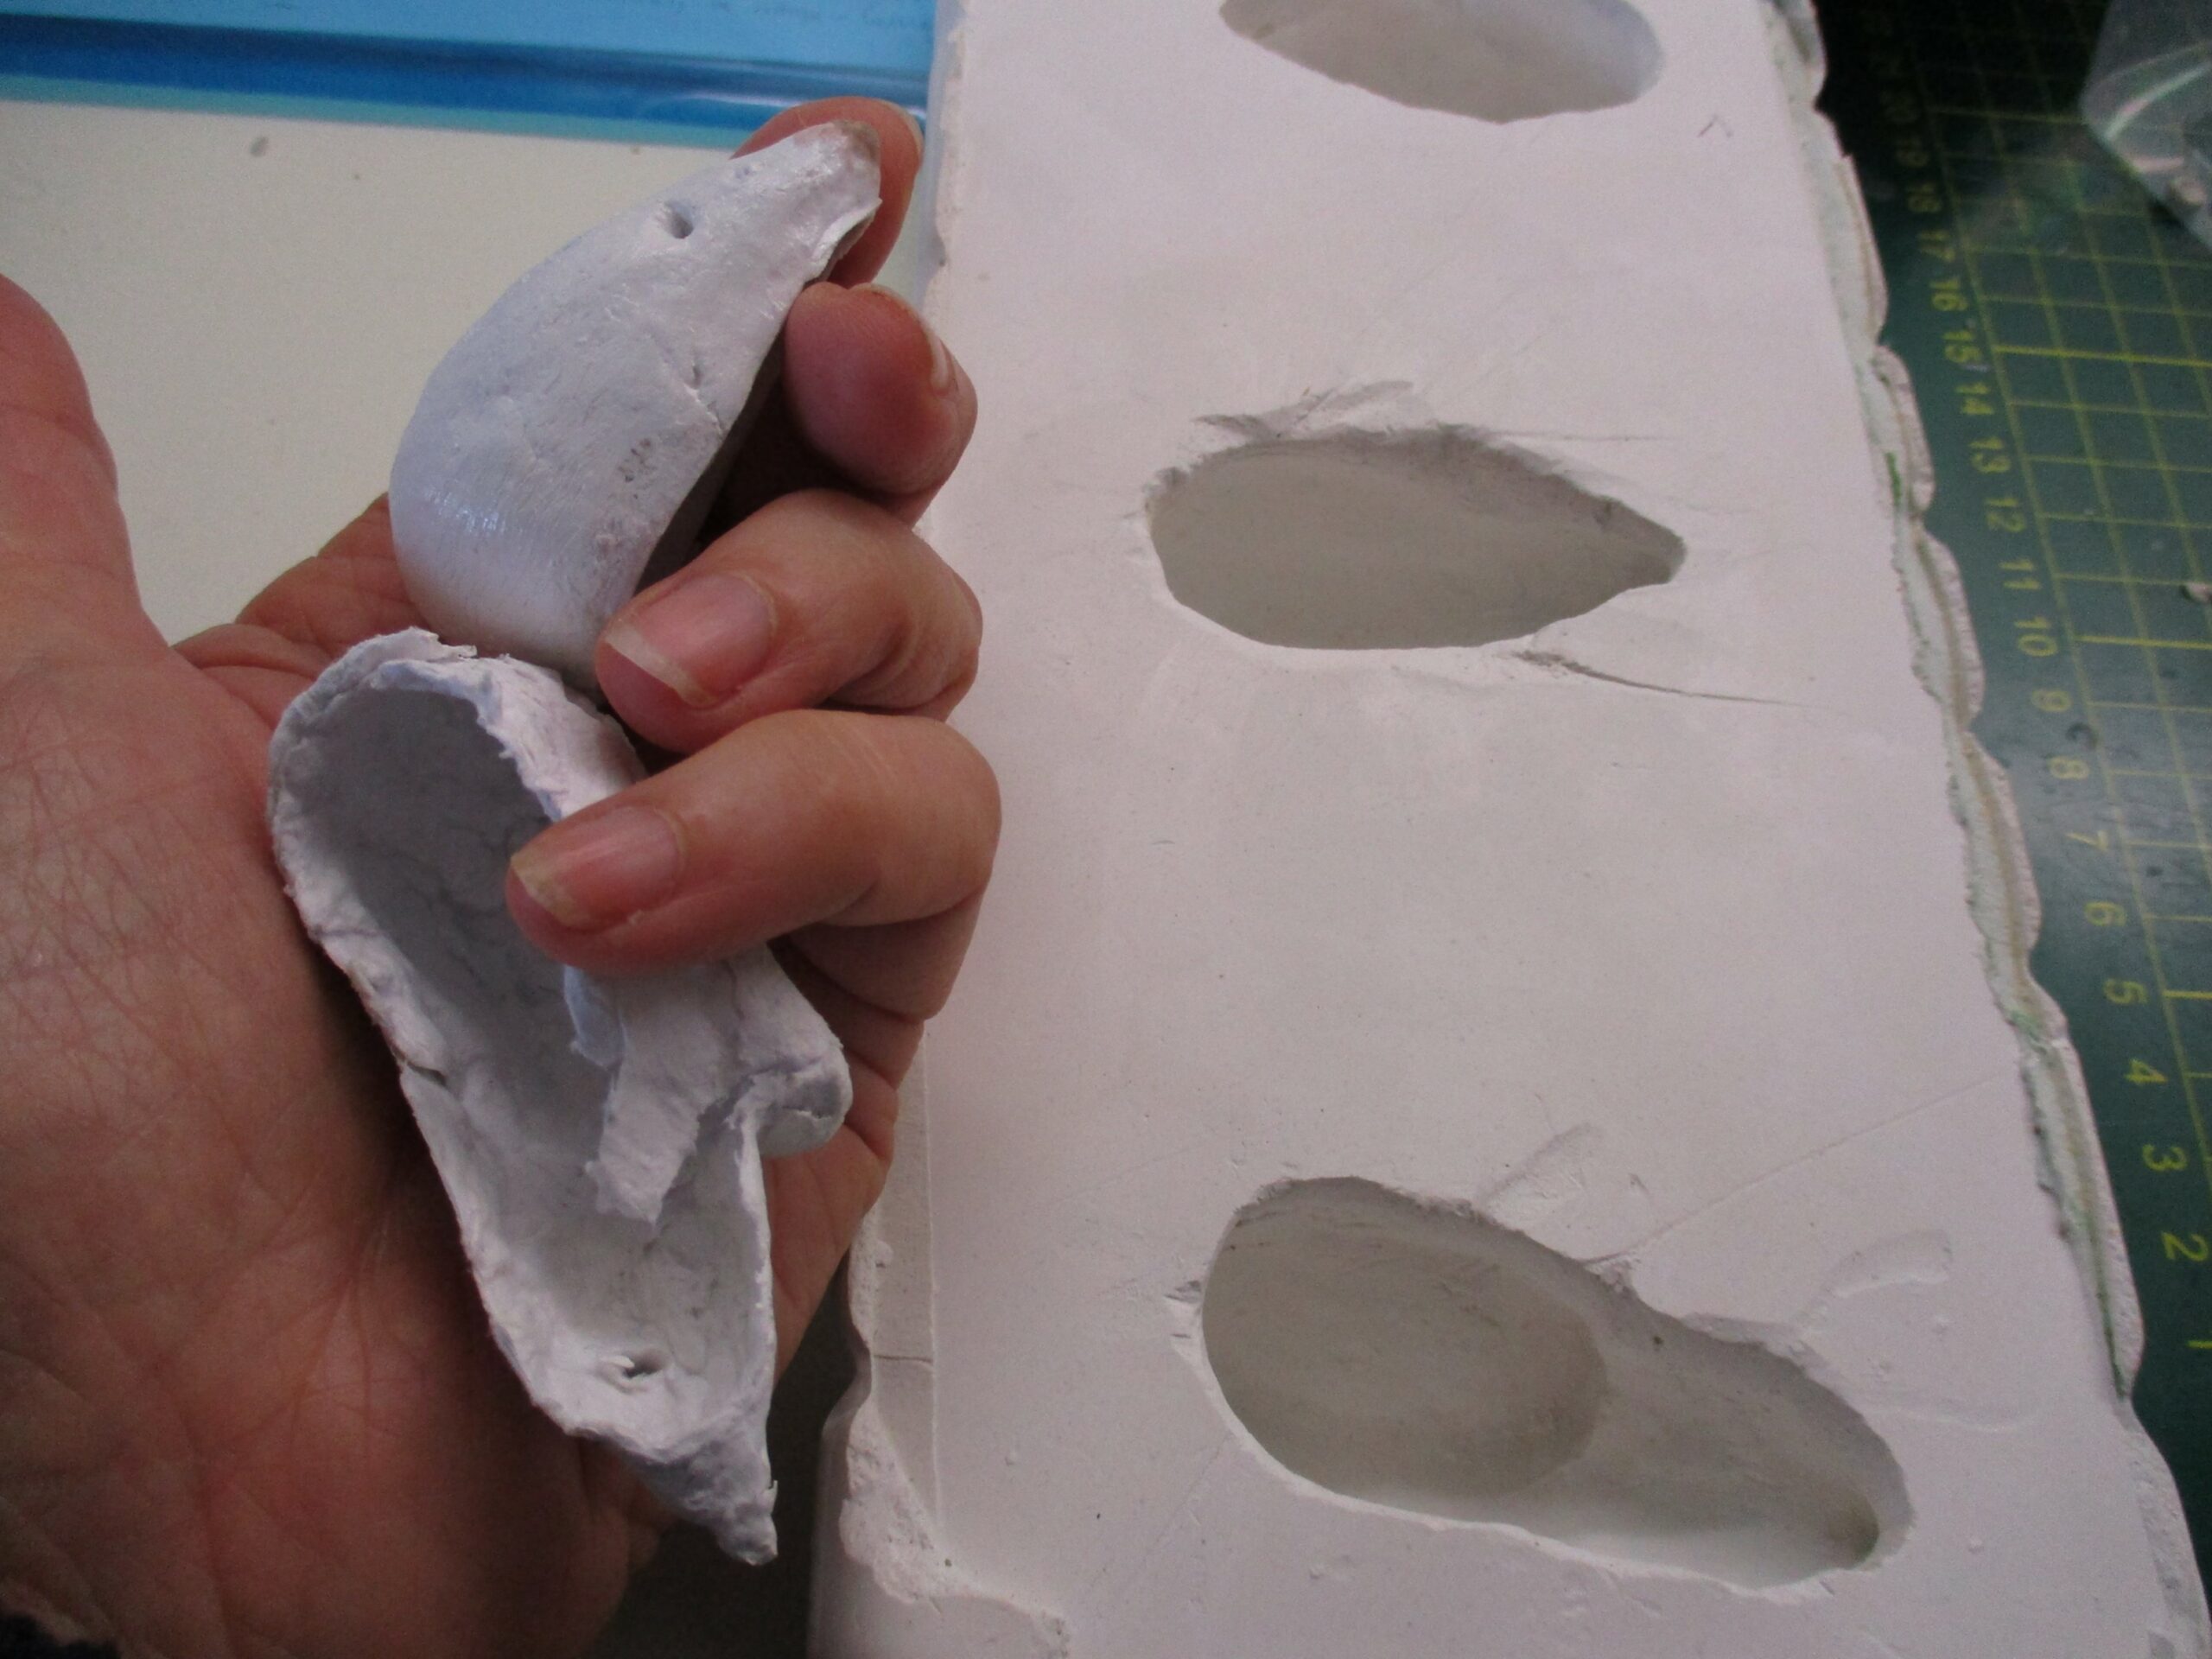
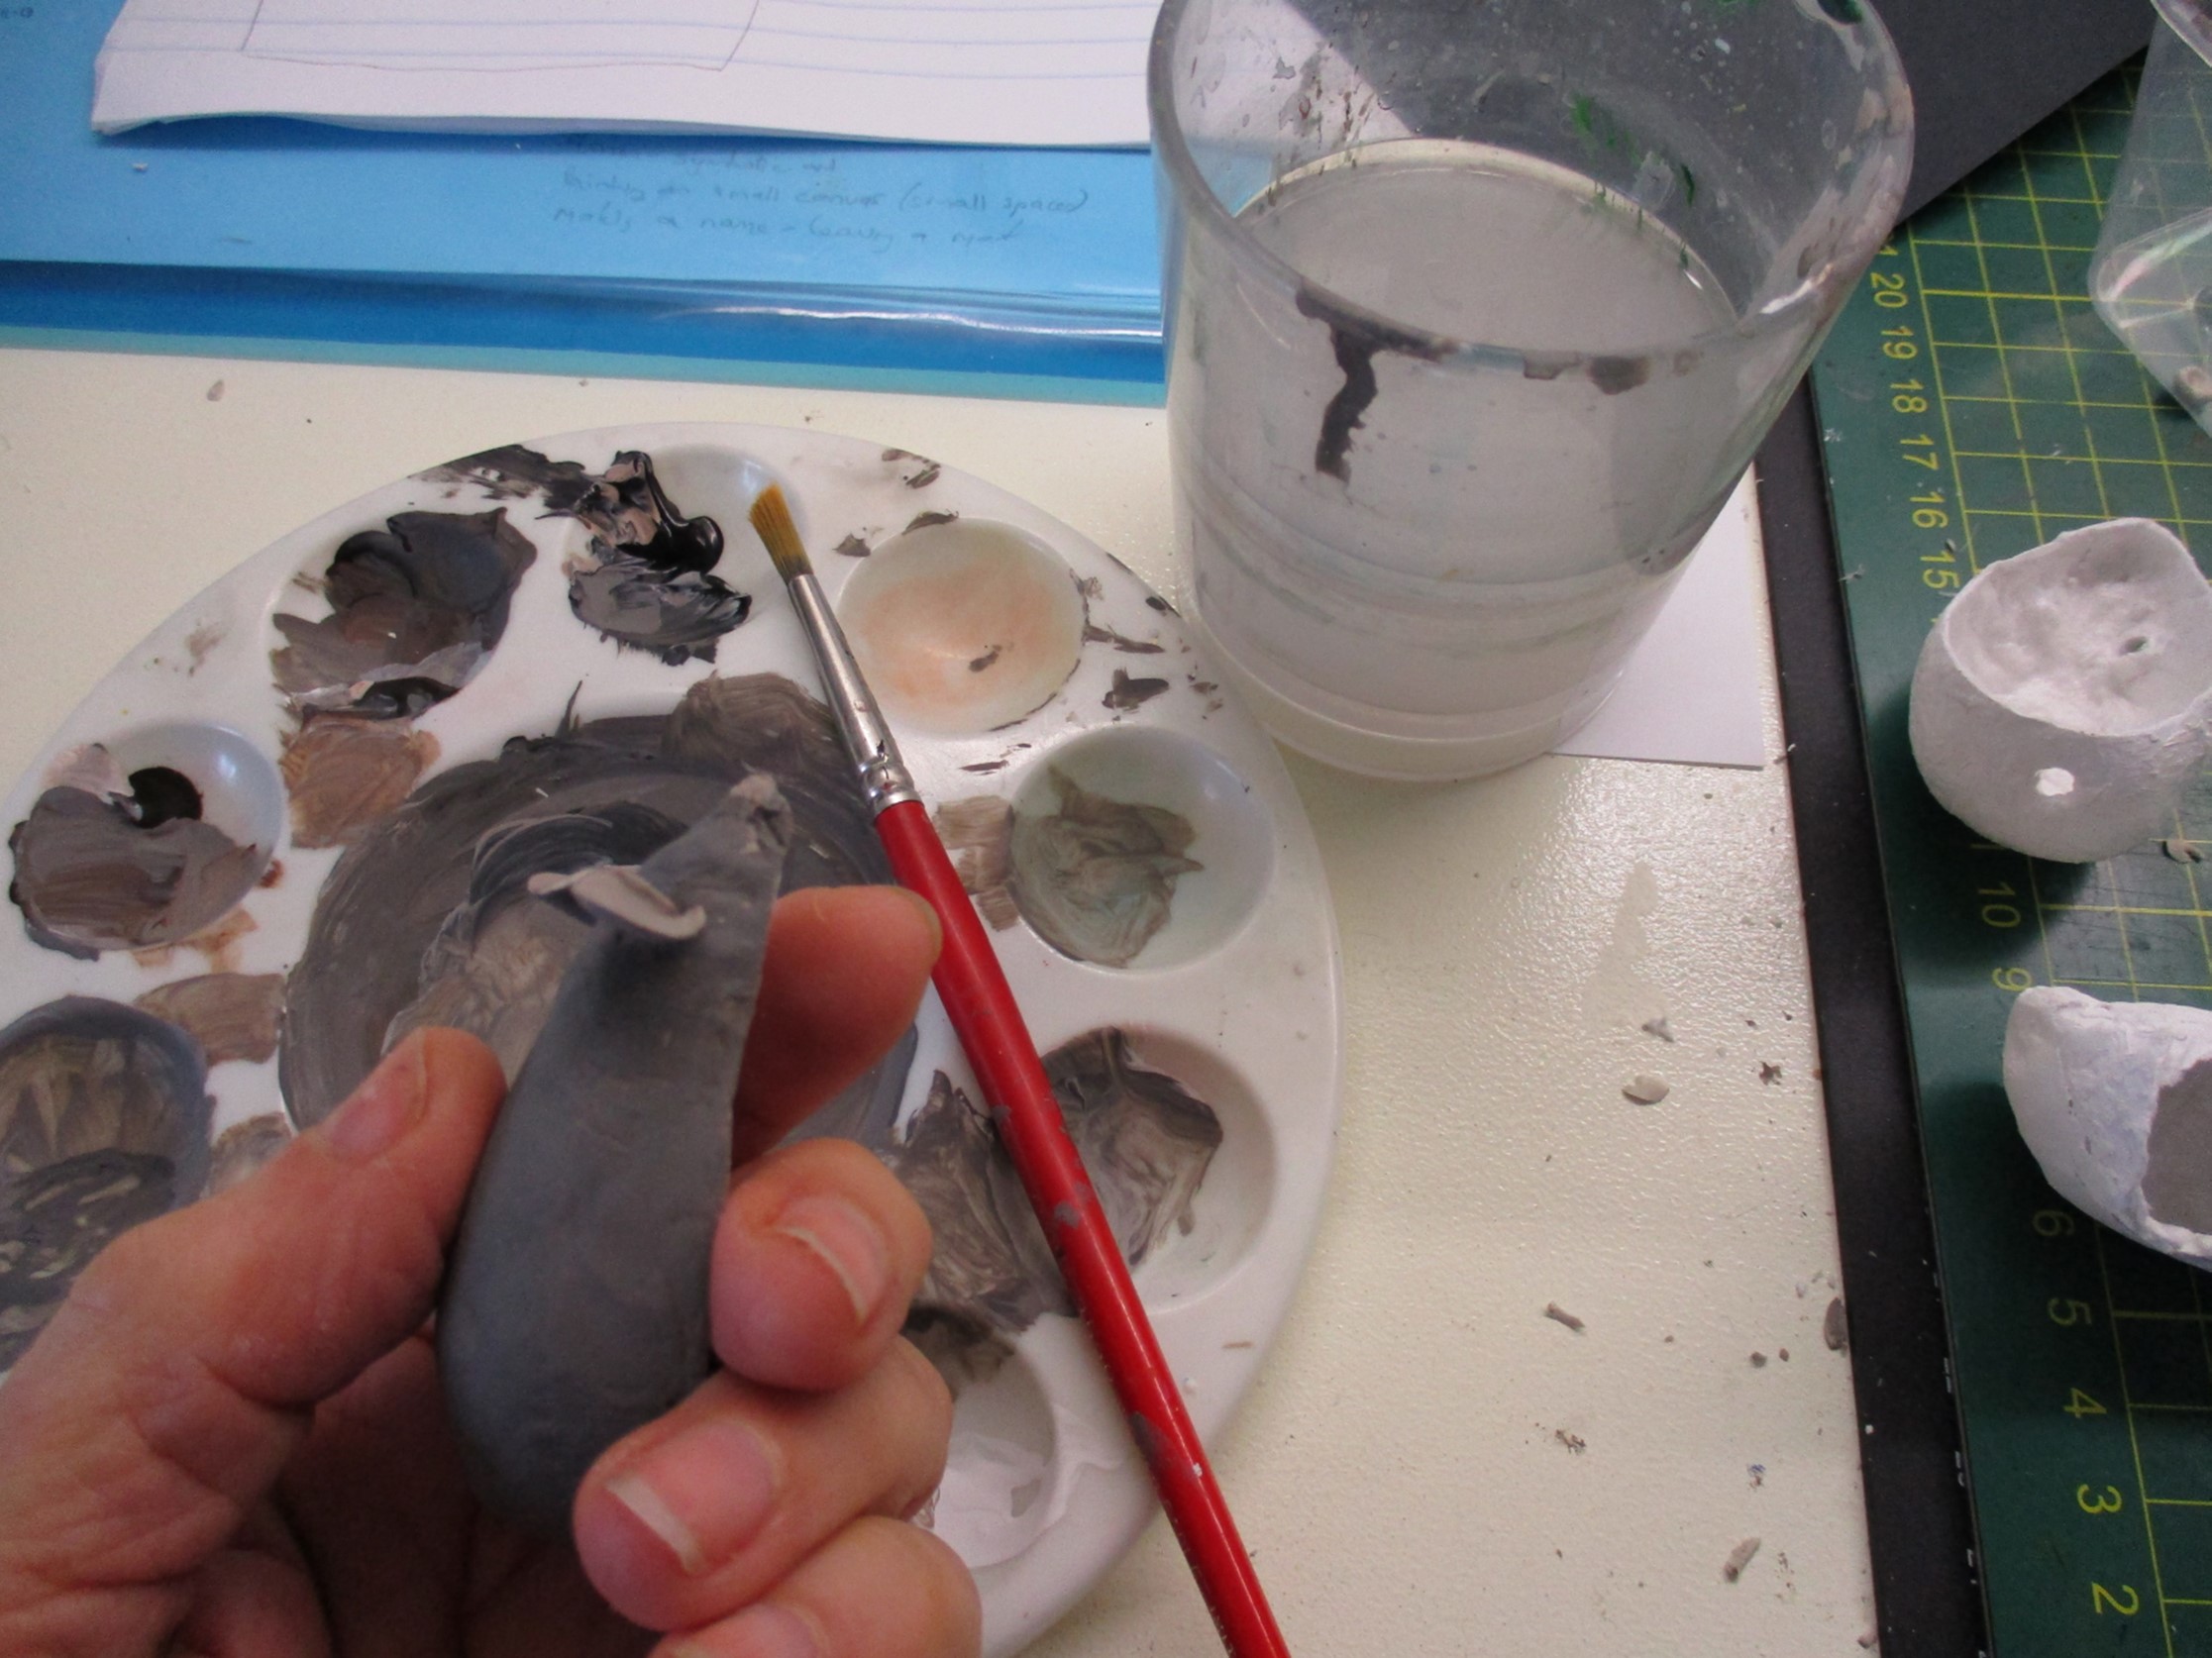
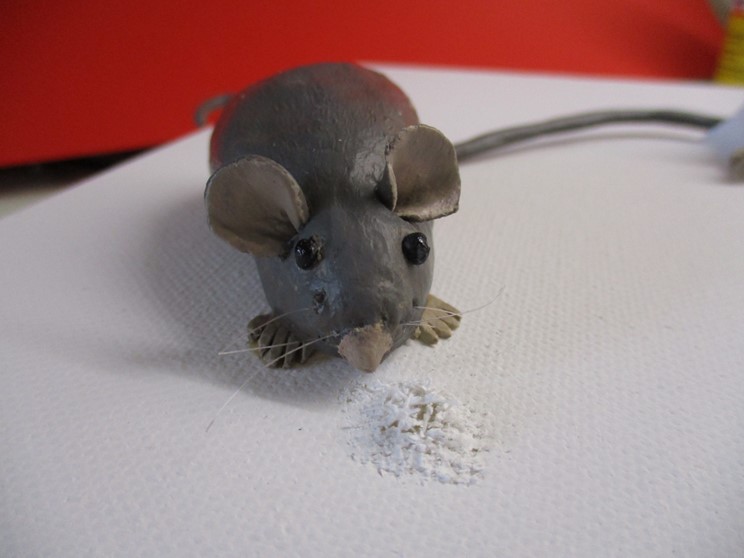
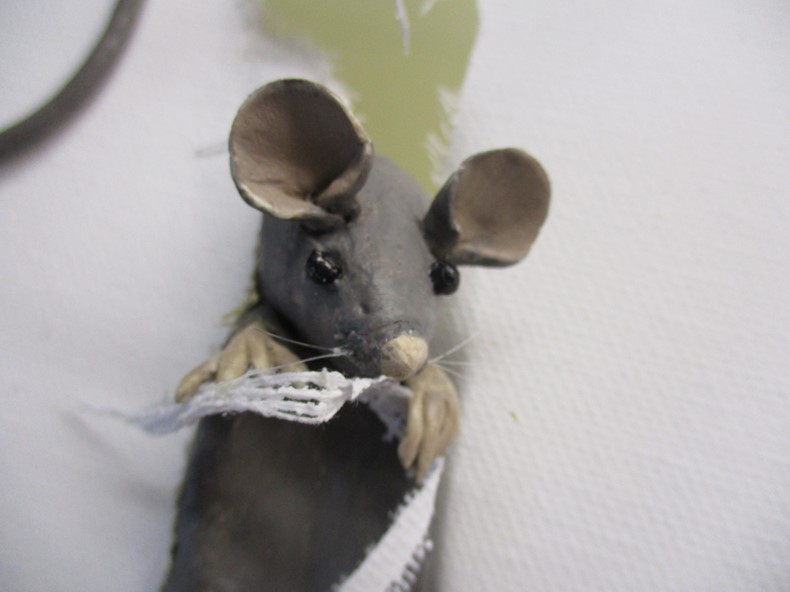
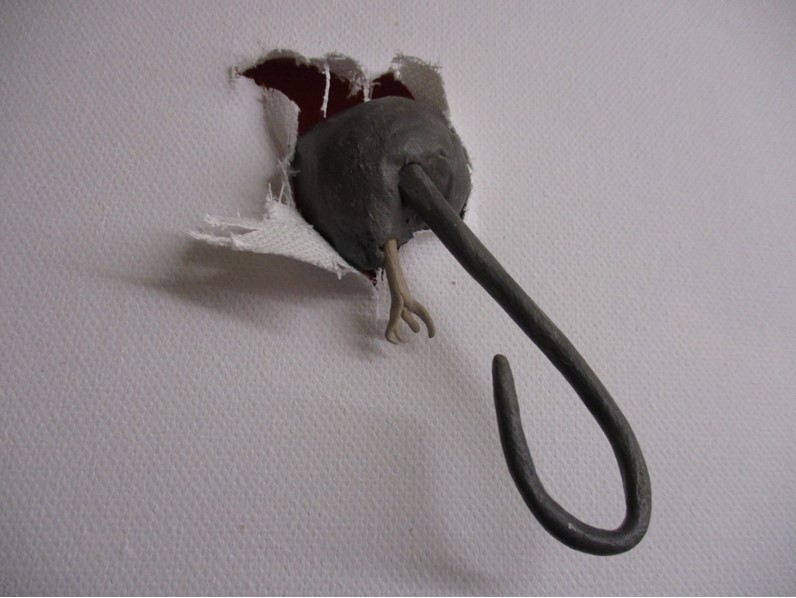
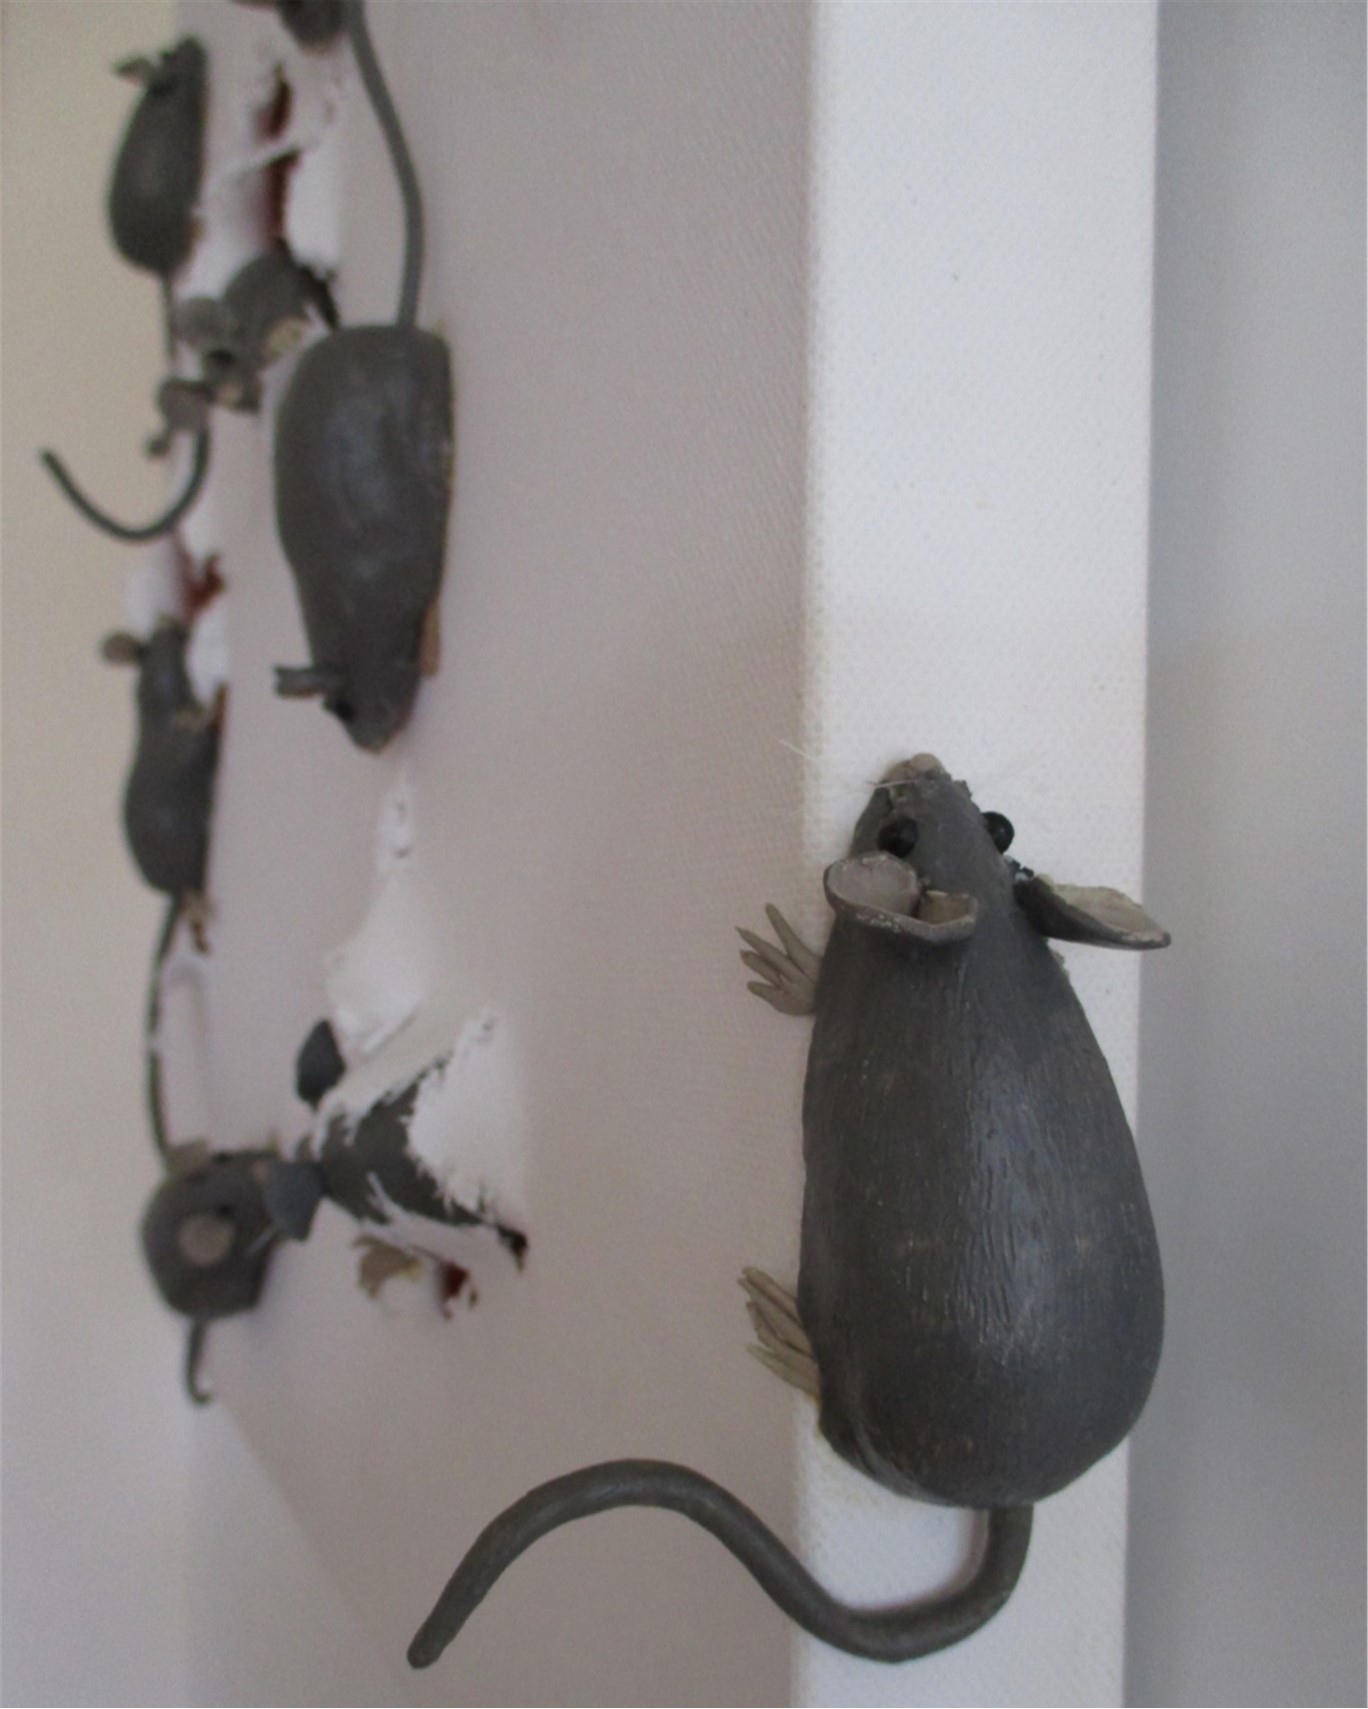
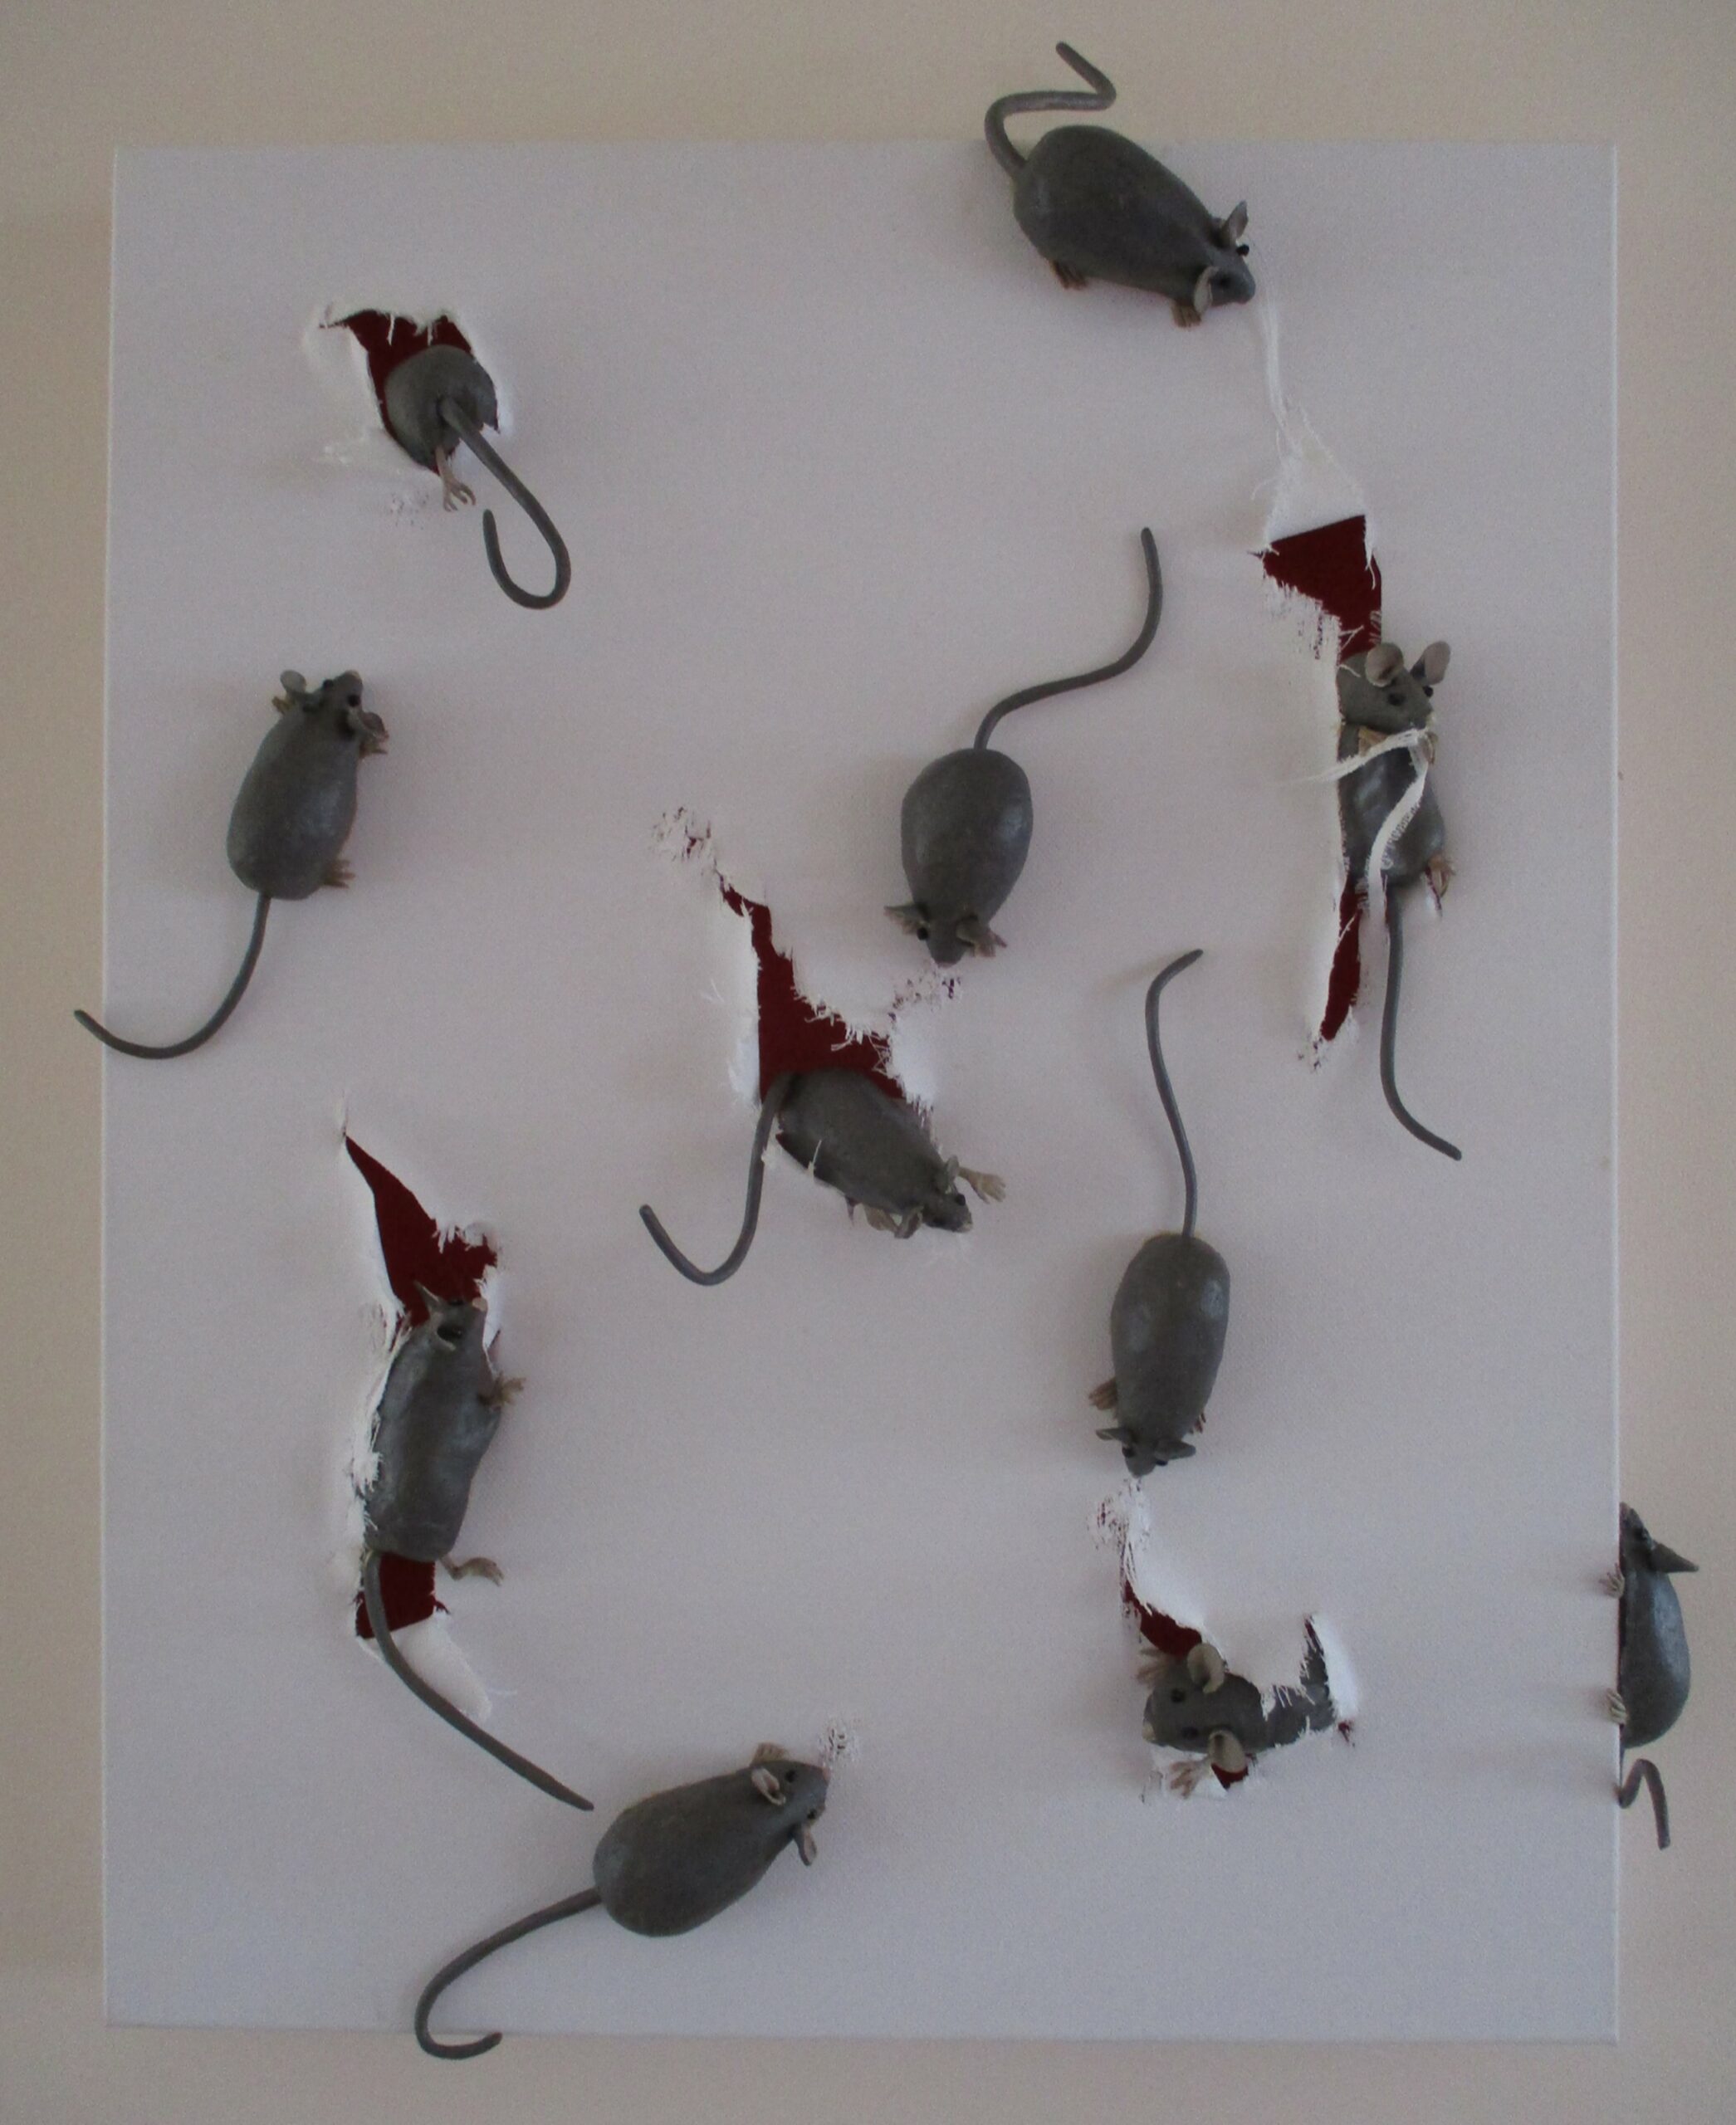
I’ve been imagining a mouse plague wreaking havoc in my craft cupboard! My mischievous mice are sculpted in paper and painted with acrylic colour and sealant. The bodies are recycled paper mulch, cast in plaster moulds which I made using plasticine and Plaster of Paris. The finer details, like ears, feet, eyes and tails are hand-shaped with paper clay. (Click the top of the pictures below to enlarge)
Forming the features
Casting moulds
Painting
Arghh!
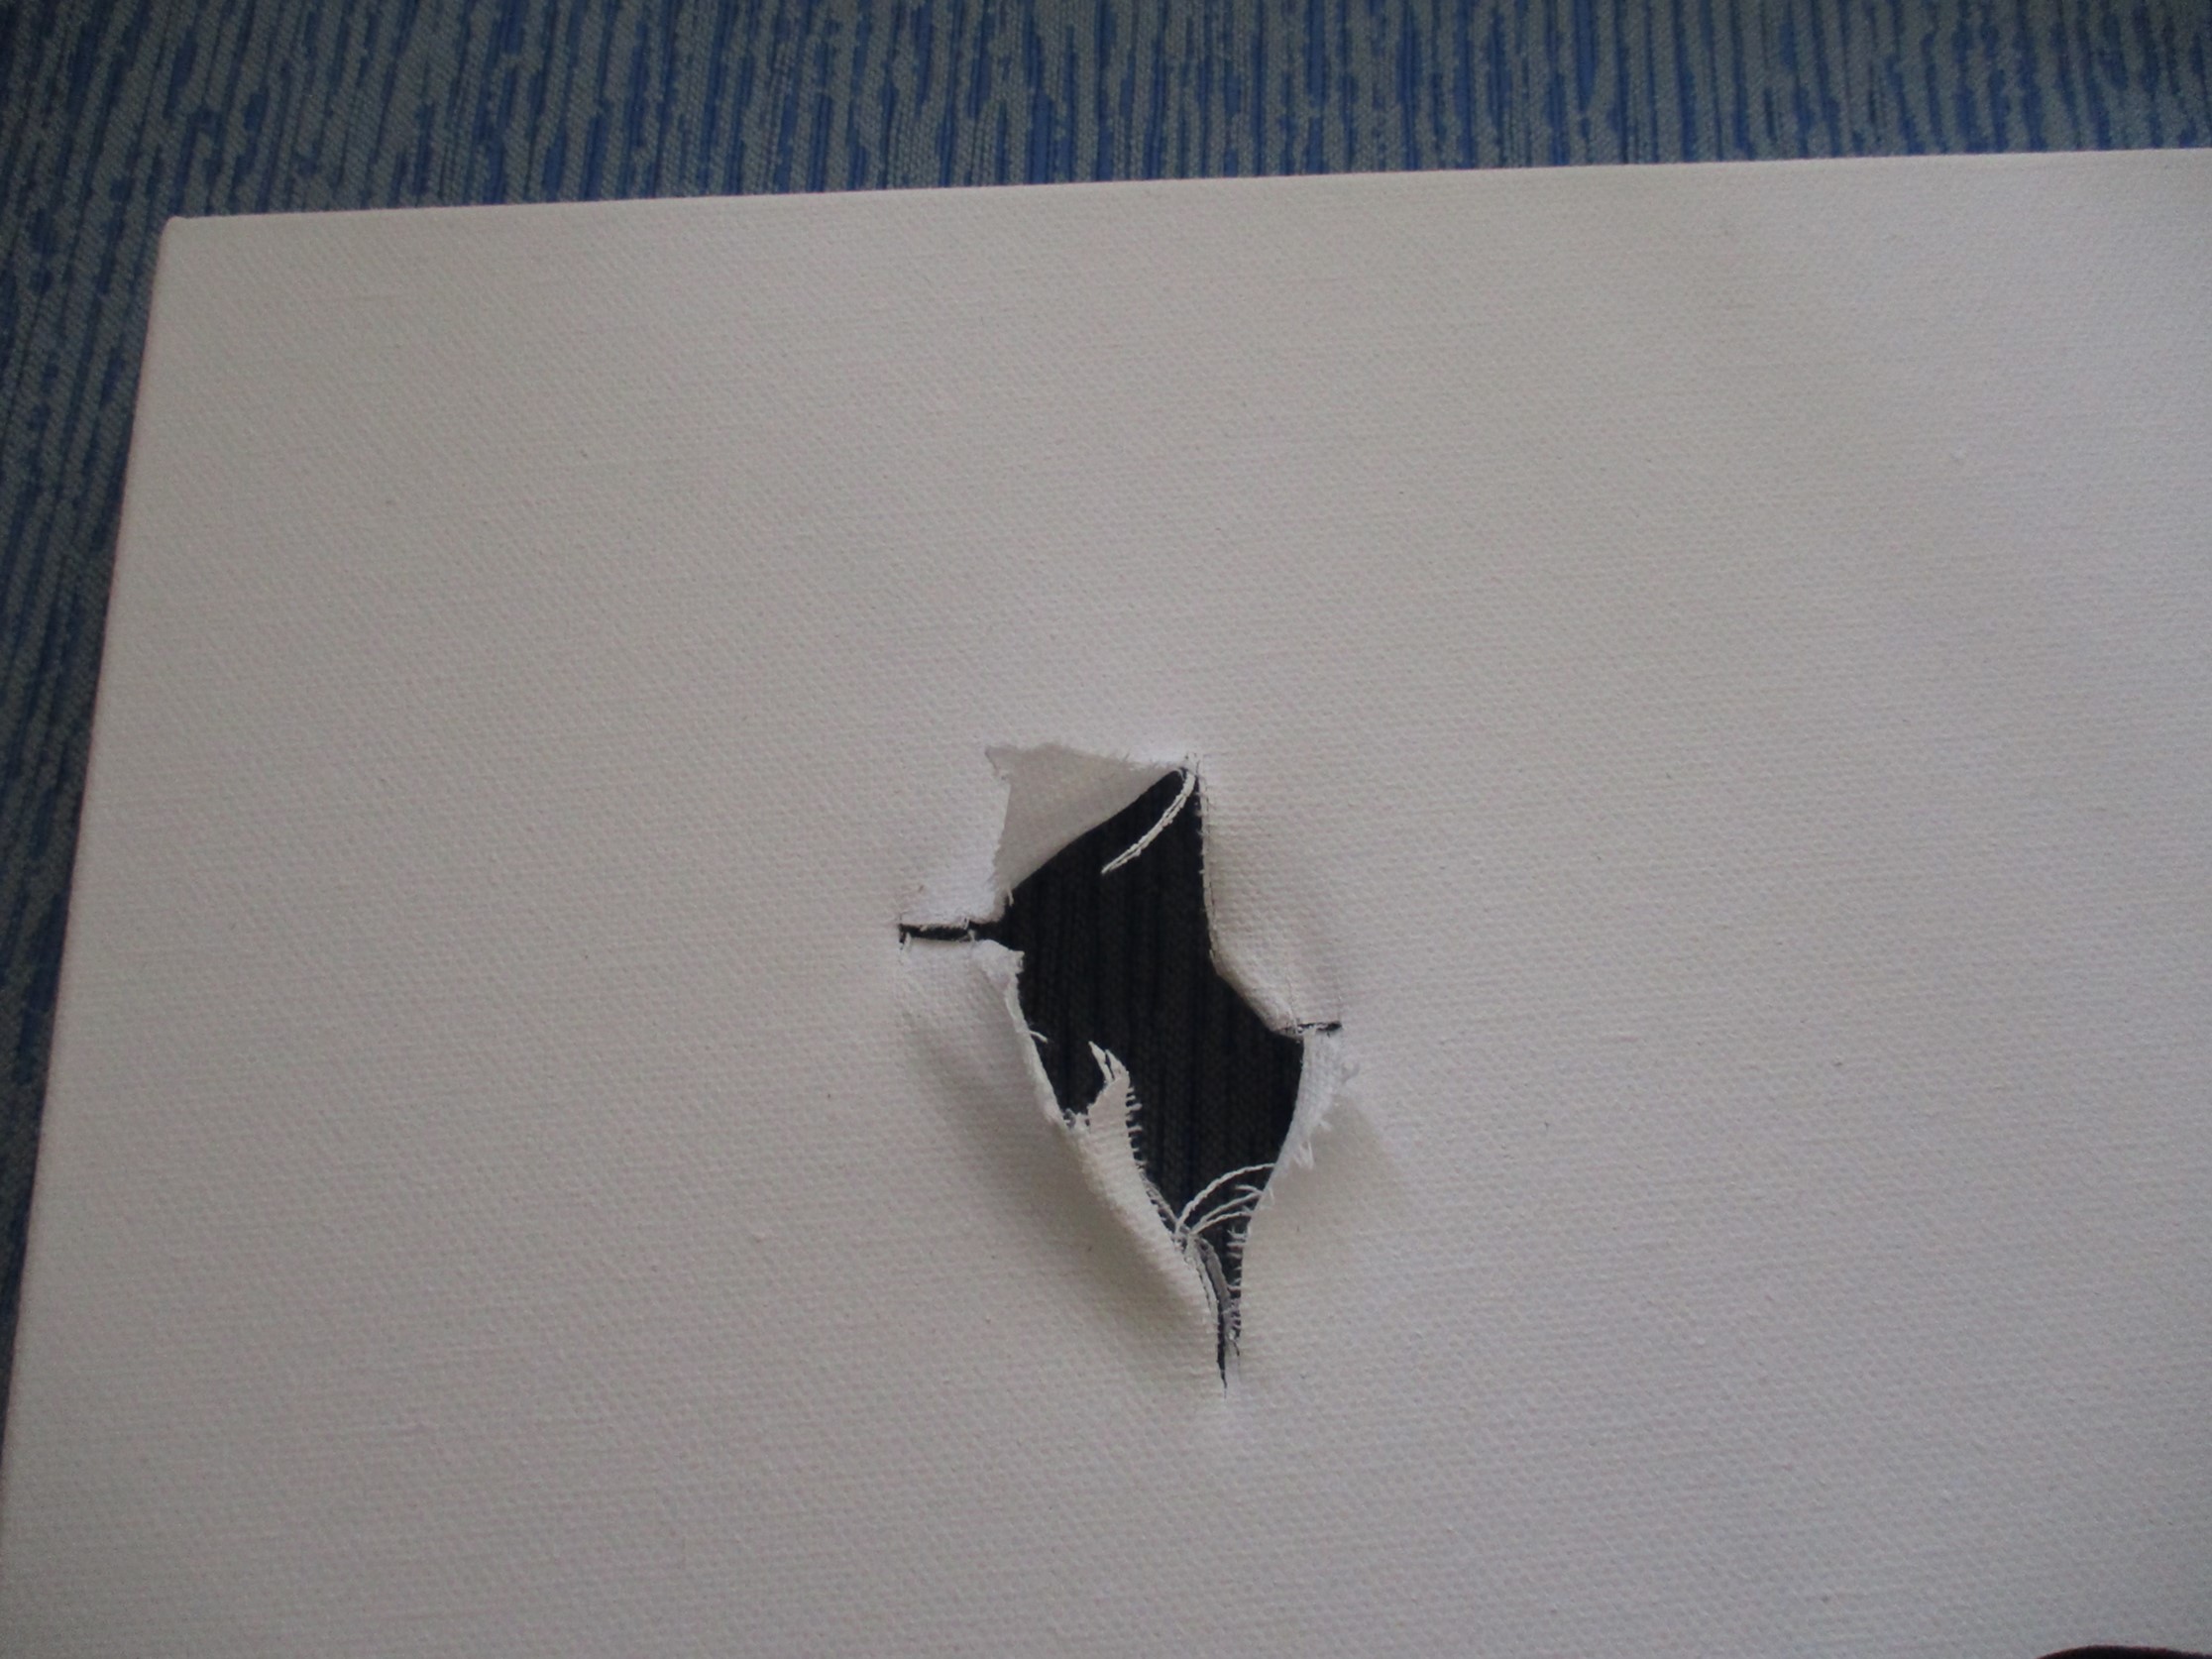
Although they’re the size of real house mice, they’re a bit more cartoon-like as I tried to give them little personalities. The canvas needed a backing (for obvious reasons) so I used bright red to add colour and to highlight the rips. The scariest part of the project was ripping the first hole into a perfectly good canvas! It’s been a fun project; it makes people smile, but no one wants it hanging on their wall!
The final ruined canvas!
Oh my canvas! V.2
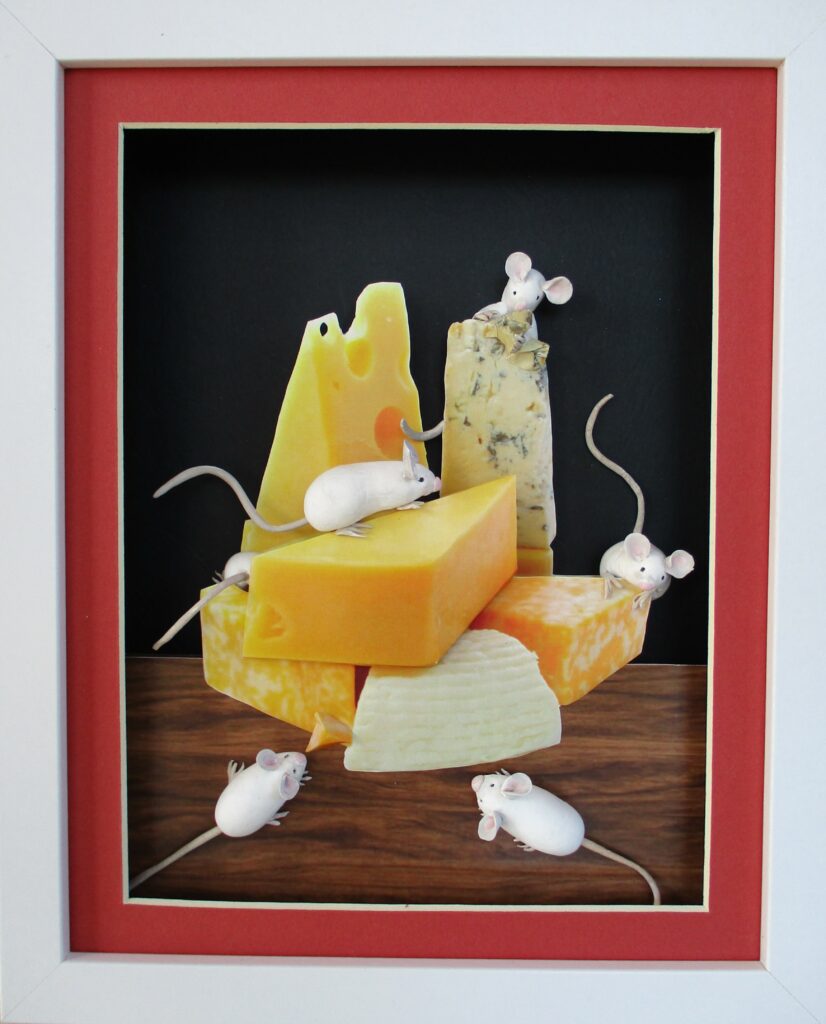
A year later and I’ve created this new, more ‘palatable’ version of my canvas destroyers! Smaller white mice are much cuter, and the partially painted still life including cheese gives them something to munch on.
This piece has been created as a “cautionary tale” of procrastination: What happens when unfinished artwork is stored and forgotten in a cupboard.
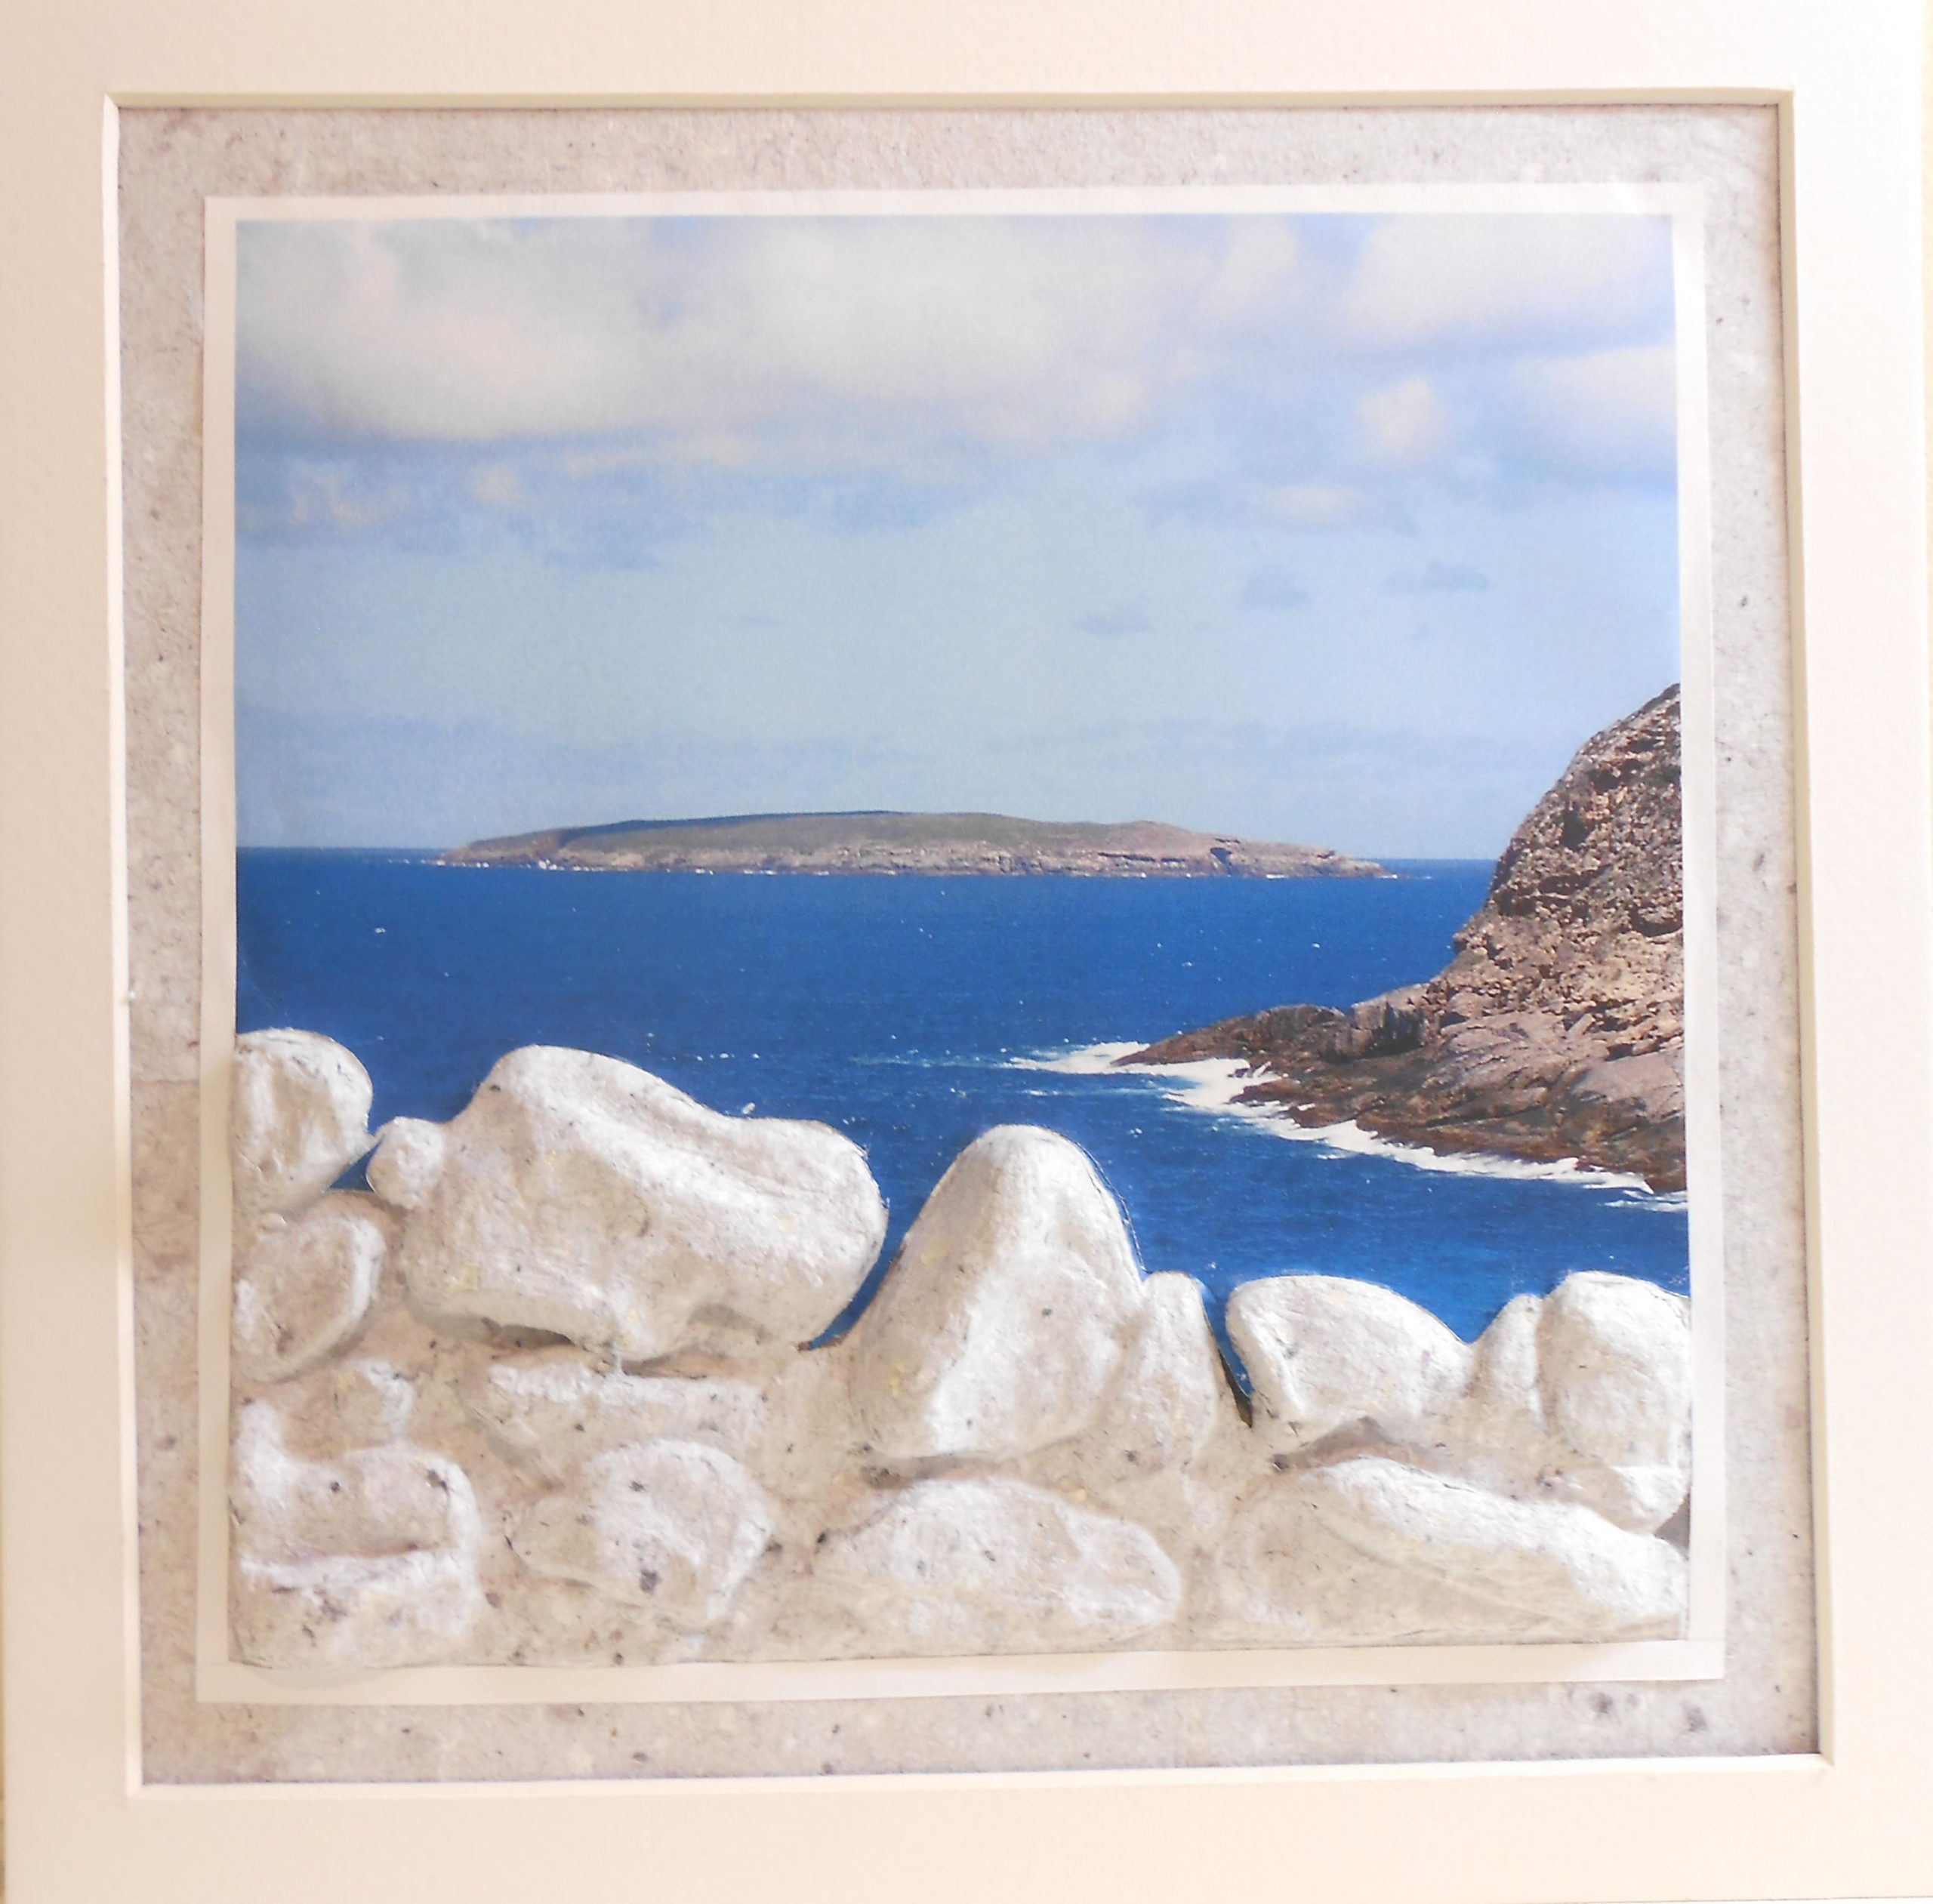
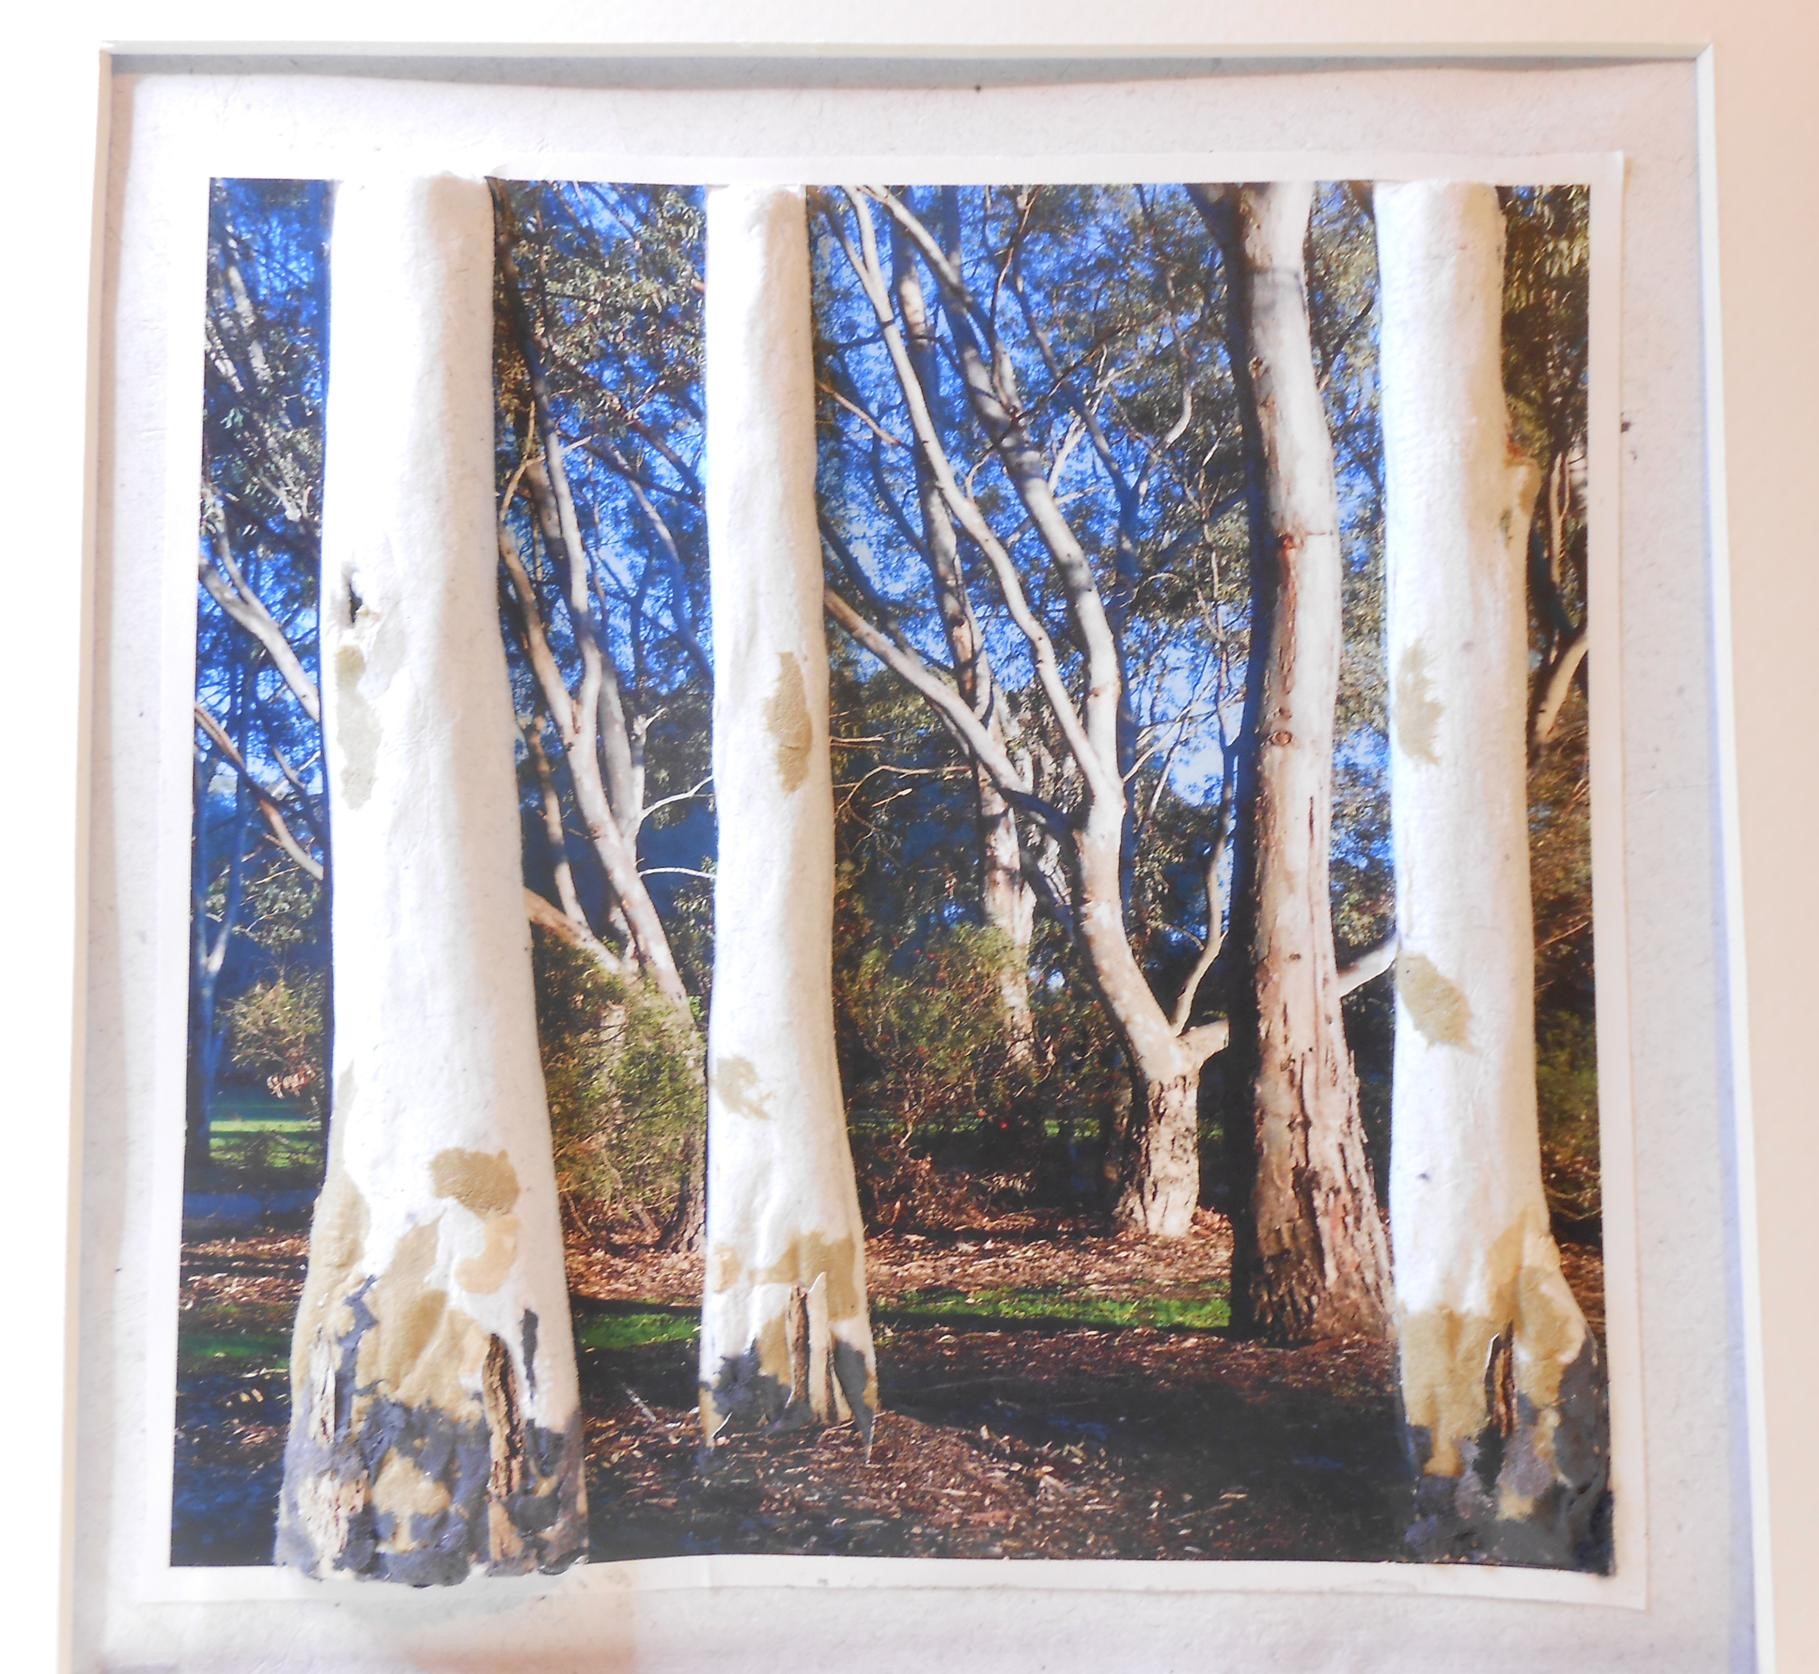
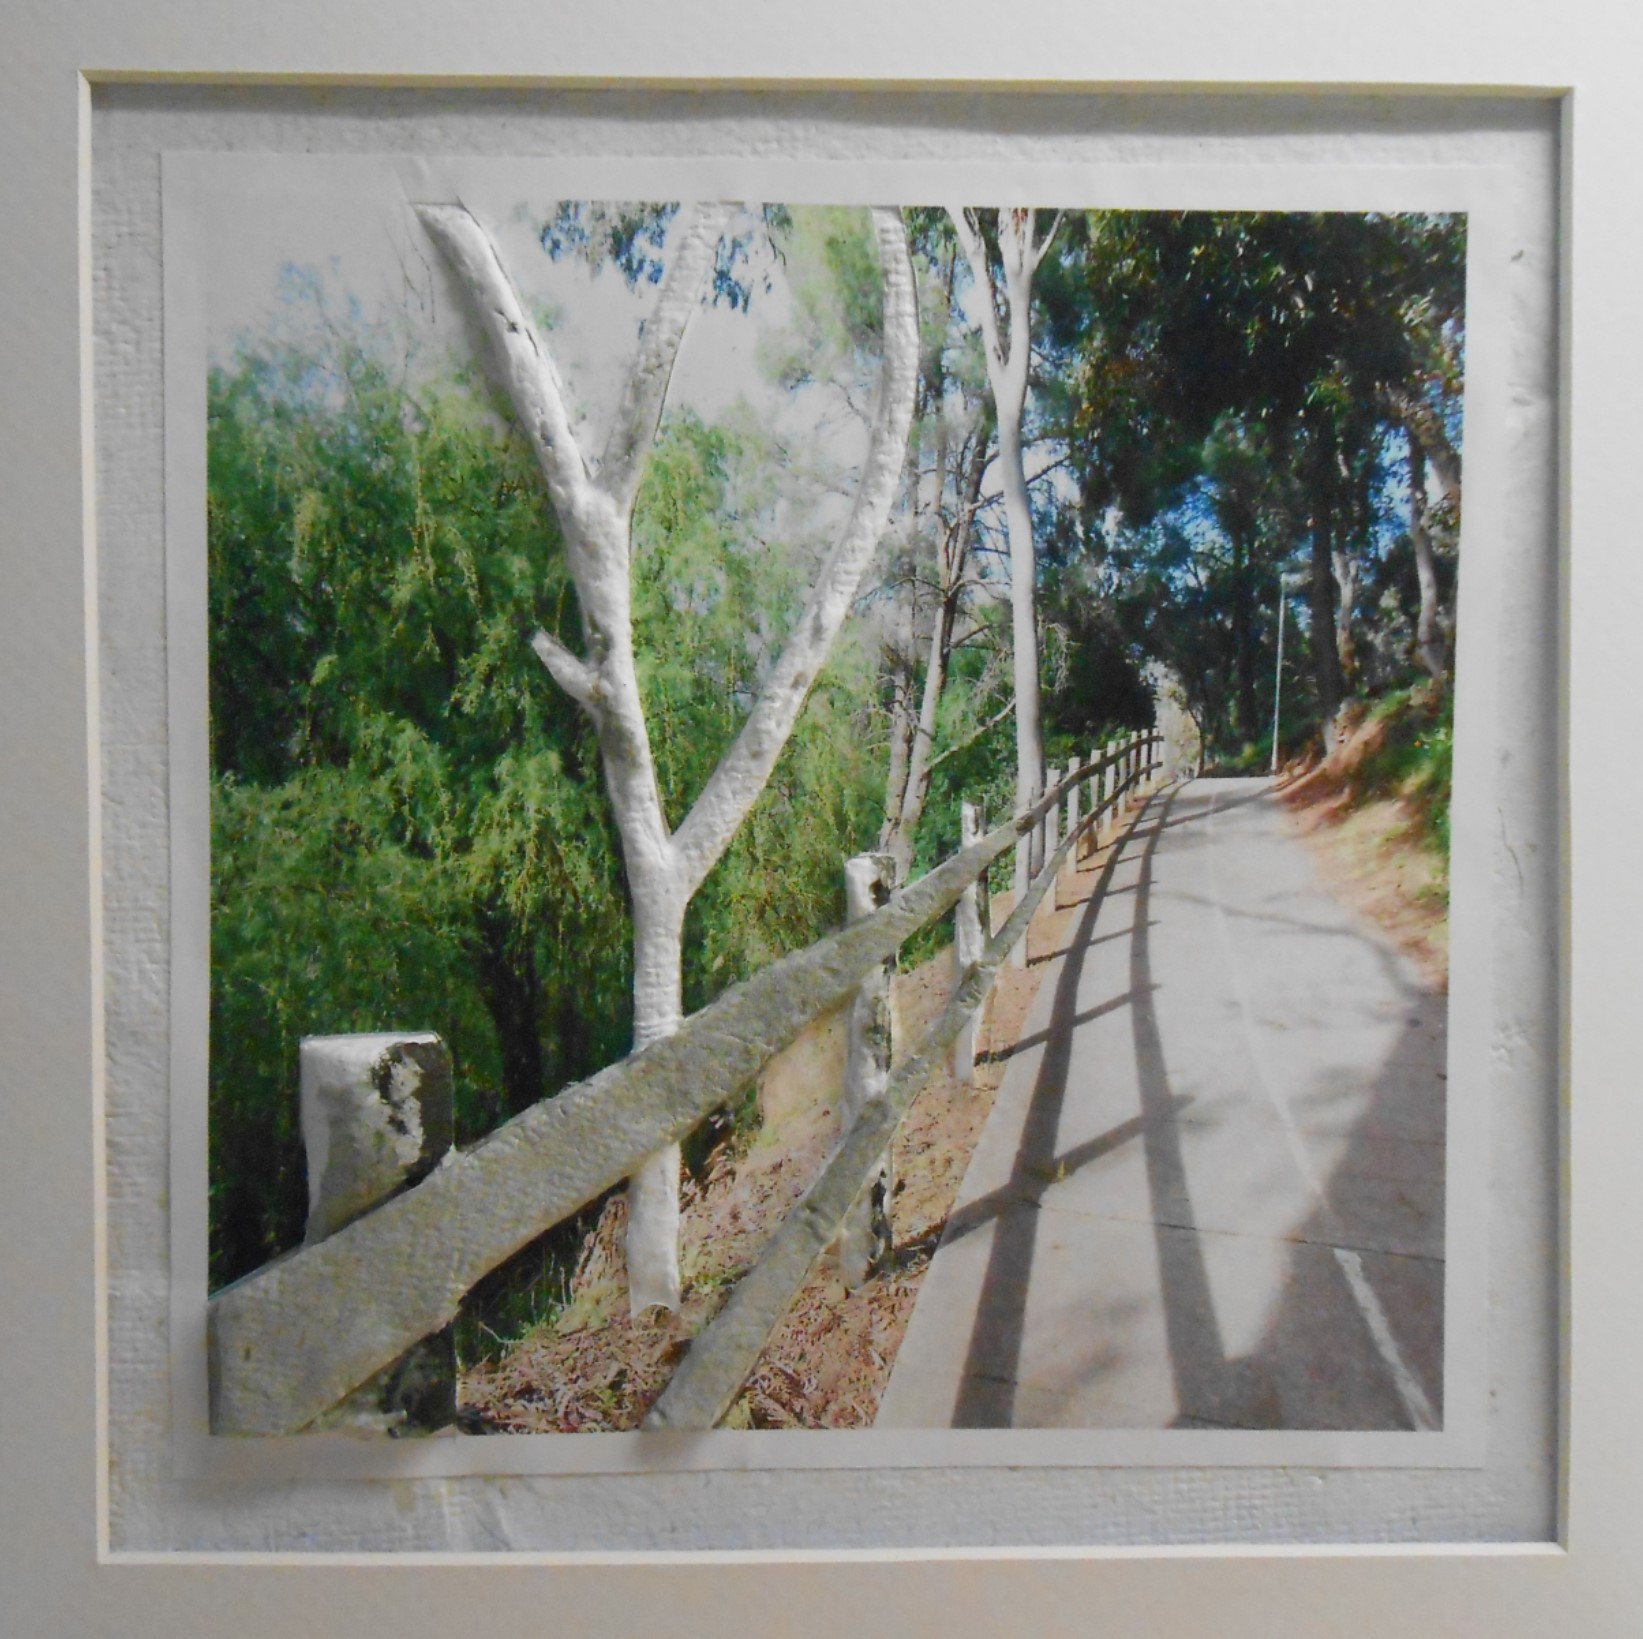
This experiment in three dimensional paper craft involves building up the foreground of a photograph in bas-relief with cast recycled paper. The result gives the photograph interest and depth and a ‘life like’ appearance.
Photos are taken that lend themselves to this technique. They need to have a prominent foreground focus and ideally, features where the bas-relief can ’blend back’ into the photo, for example, branches projecting from a tree trunk. Photos are edited to size and printed on matt paper.
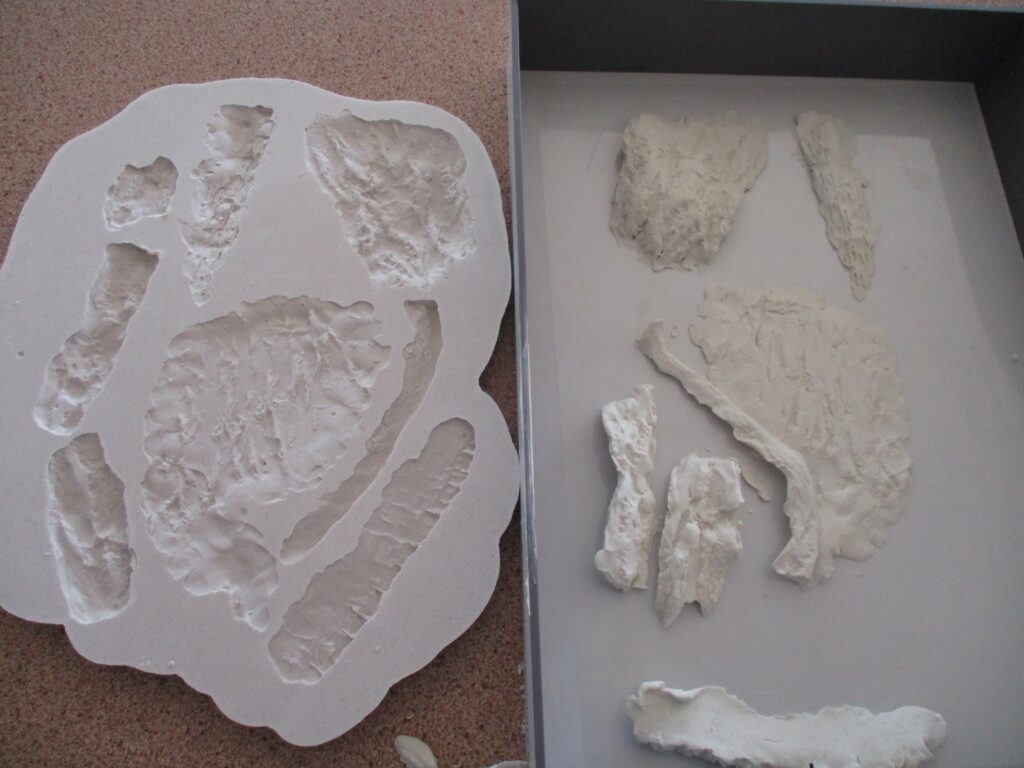
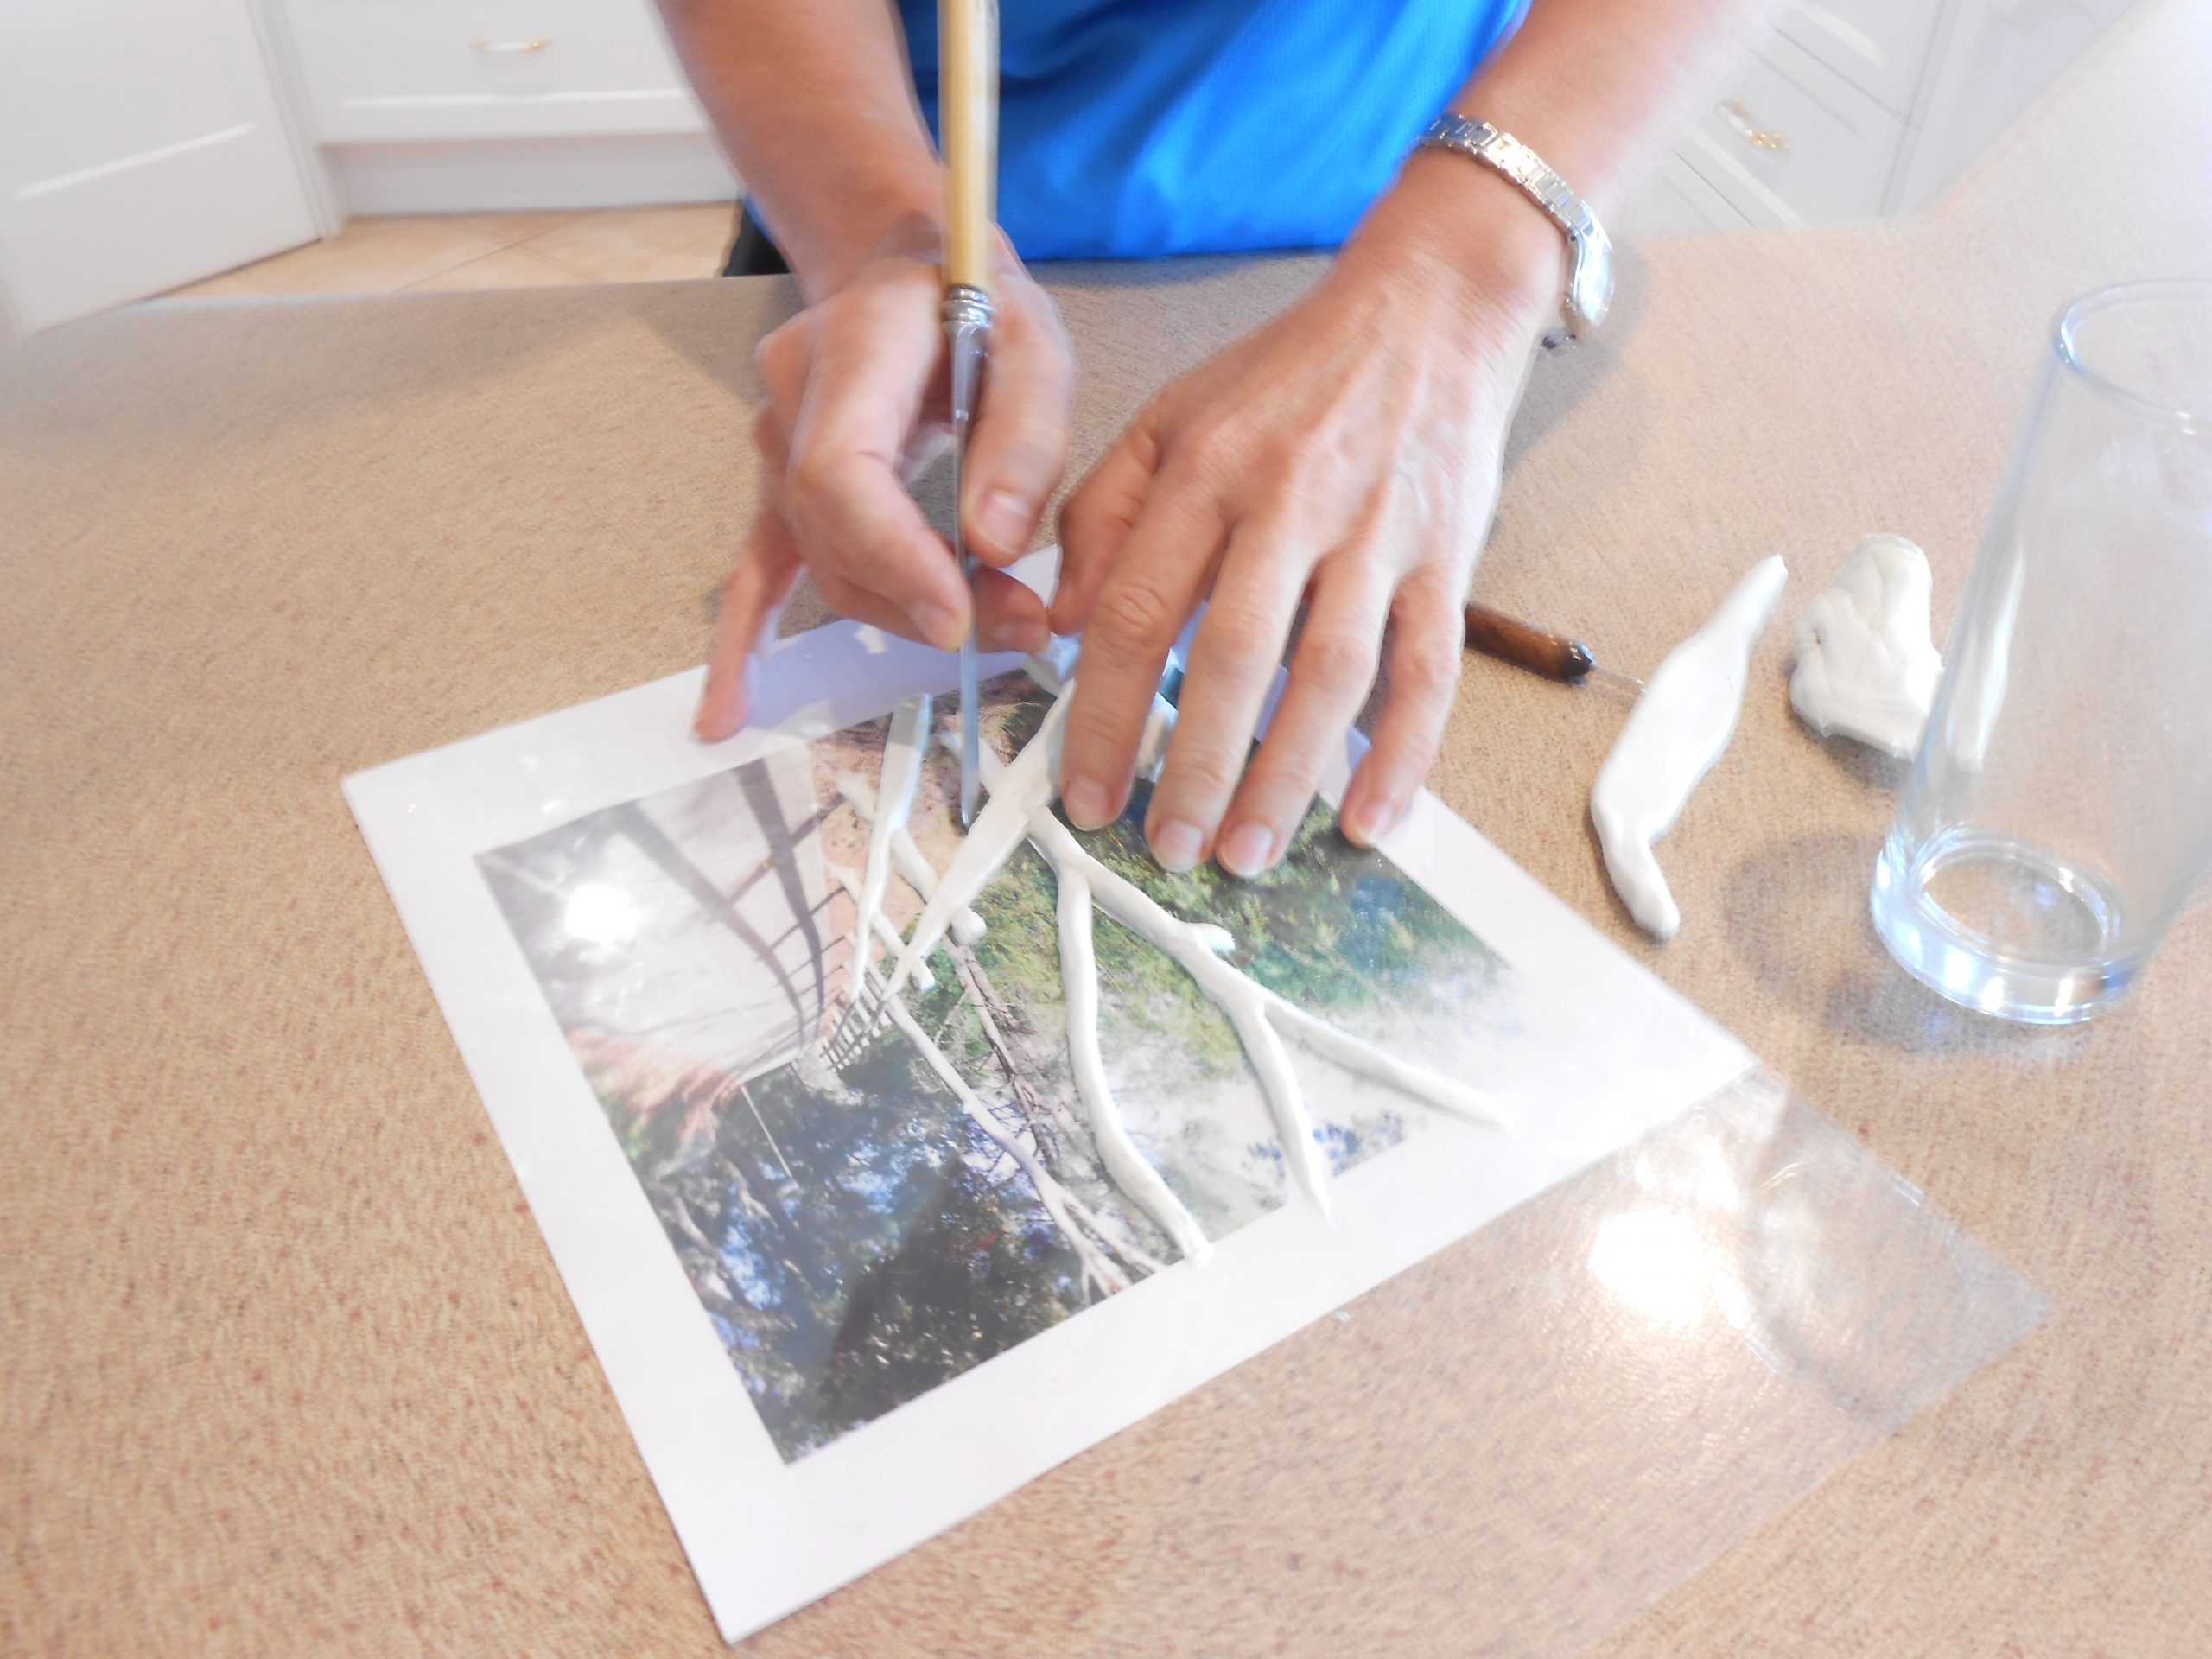
Moulding the image A bas-relief image of objects that are to stand out is created by moulding plasticine over the photograph.
This is done by placing a transparent sheet of acetate over the entire photograph. The acetate also creates a very smooth surface for the cast which aids in adhering the photo in the last stage.
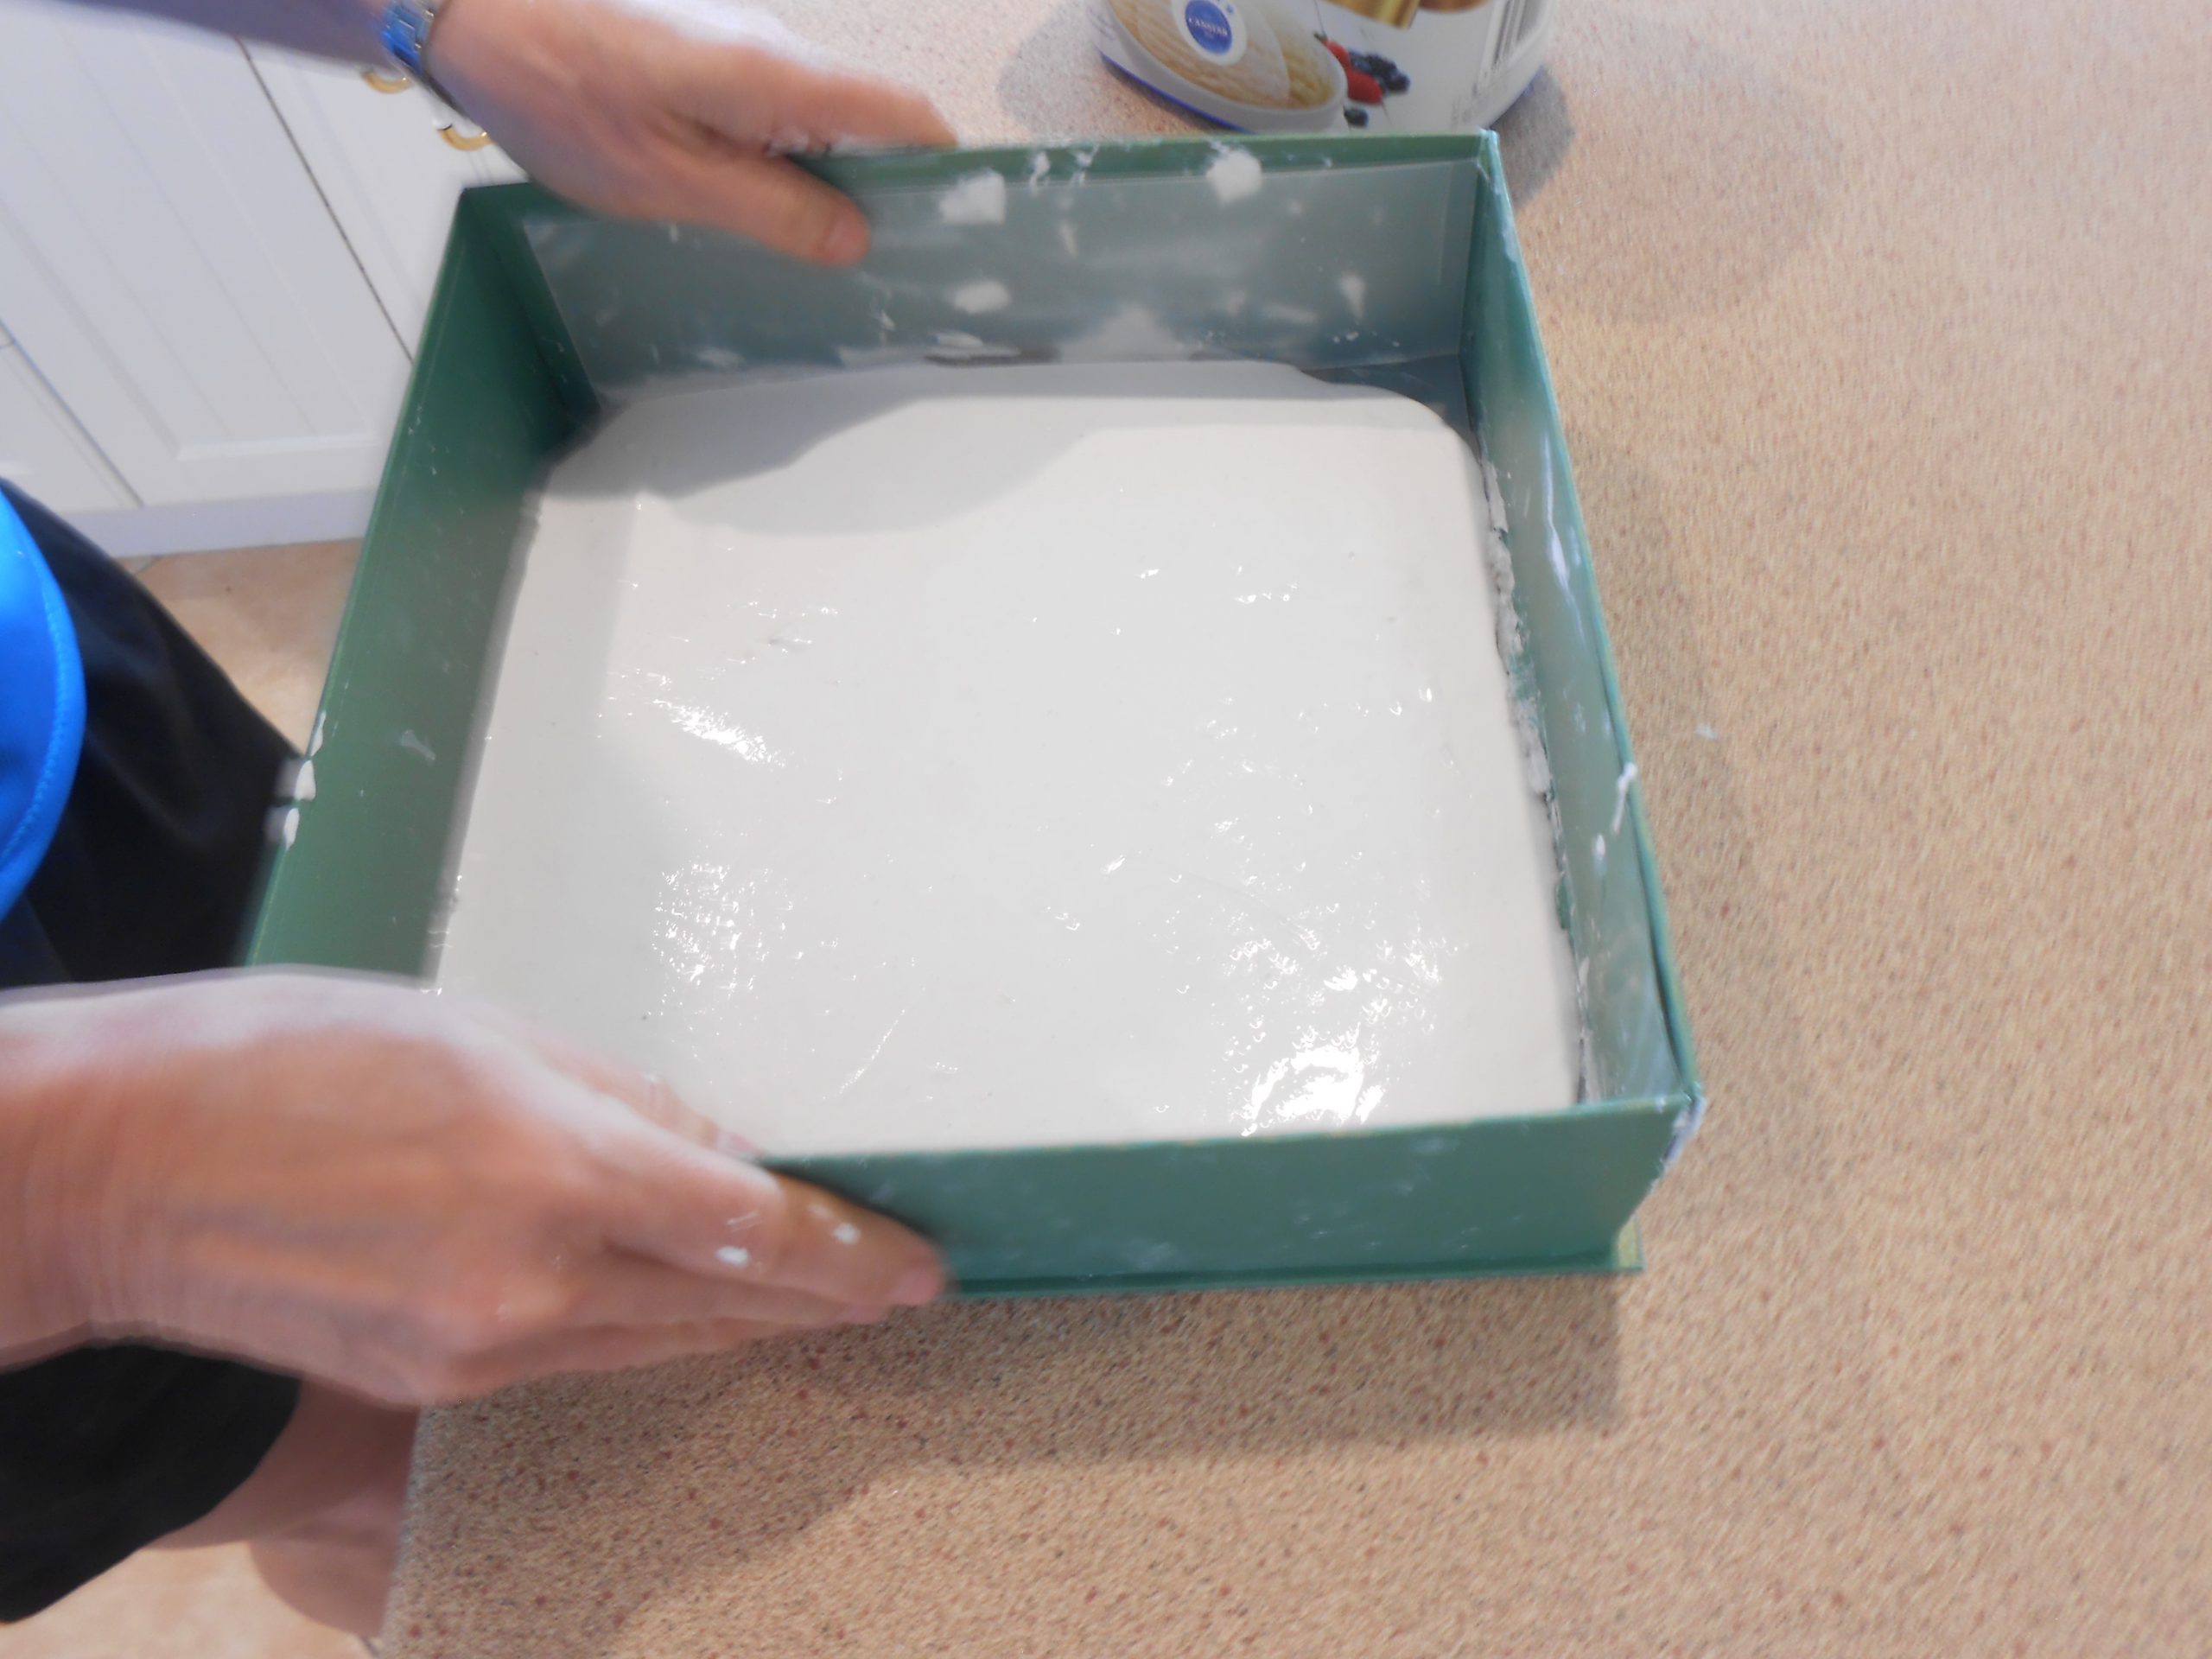
The acetate sheet with the plasticine bas-relief is then placed into a deep container, large enough to have a margin around the edges of the acetate.
2. Creating the Cast. Plaster of Paris is mixed to a pouring consistency and poured into the container. This can be done in stages, ensuring the container is jolted gently from time to time, to enable air bubbles to escape and the plaster to run into grooves in the mouldings. The image is covered to a depth at least 1cm above the plasticine, ensuring the top is relatively flat to prevent cracking during paper casting.
The container is then left in a dry place until the plaster is completely set.
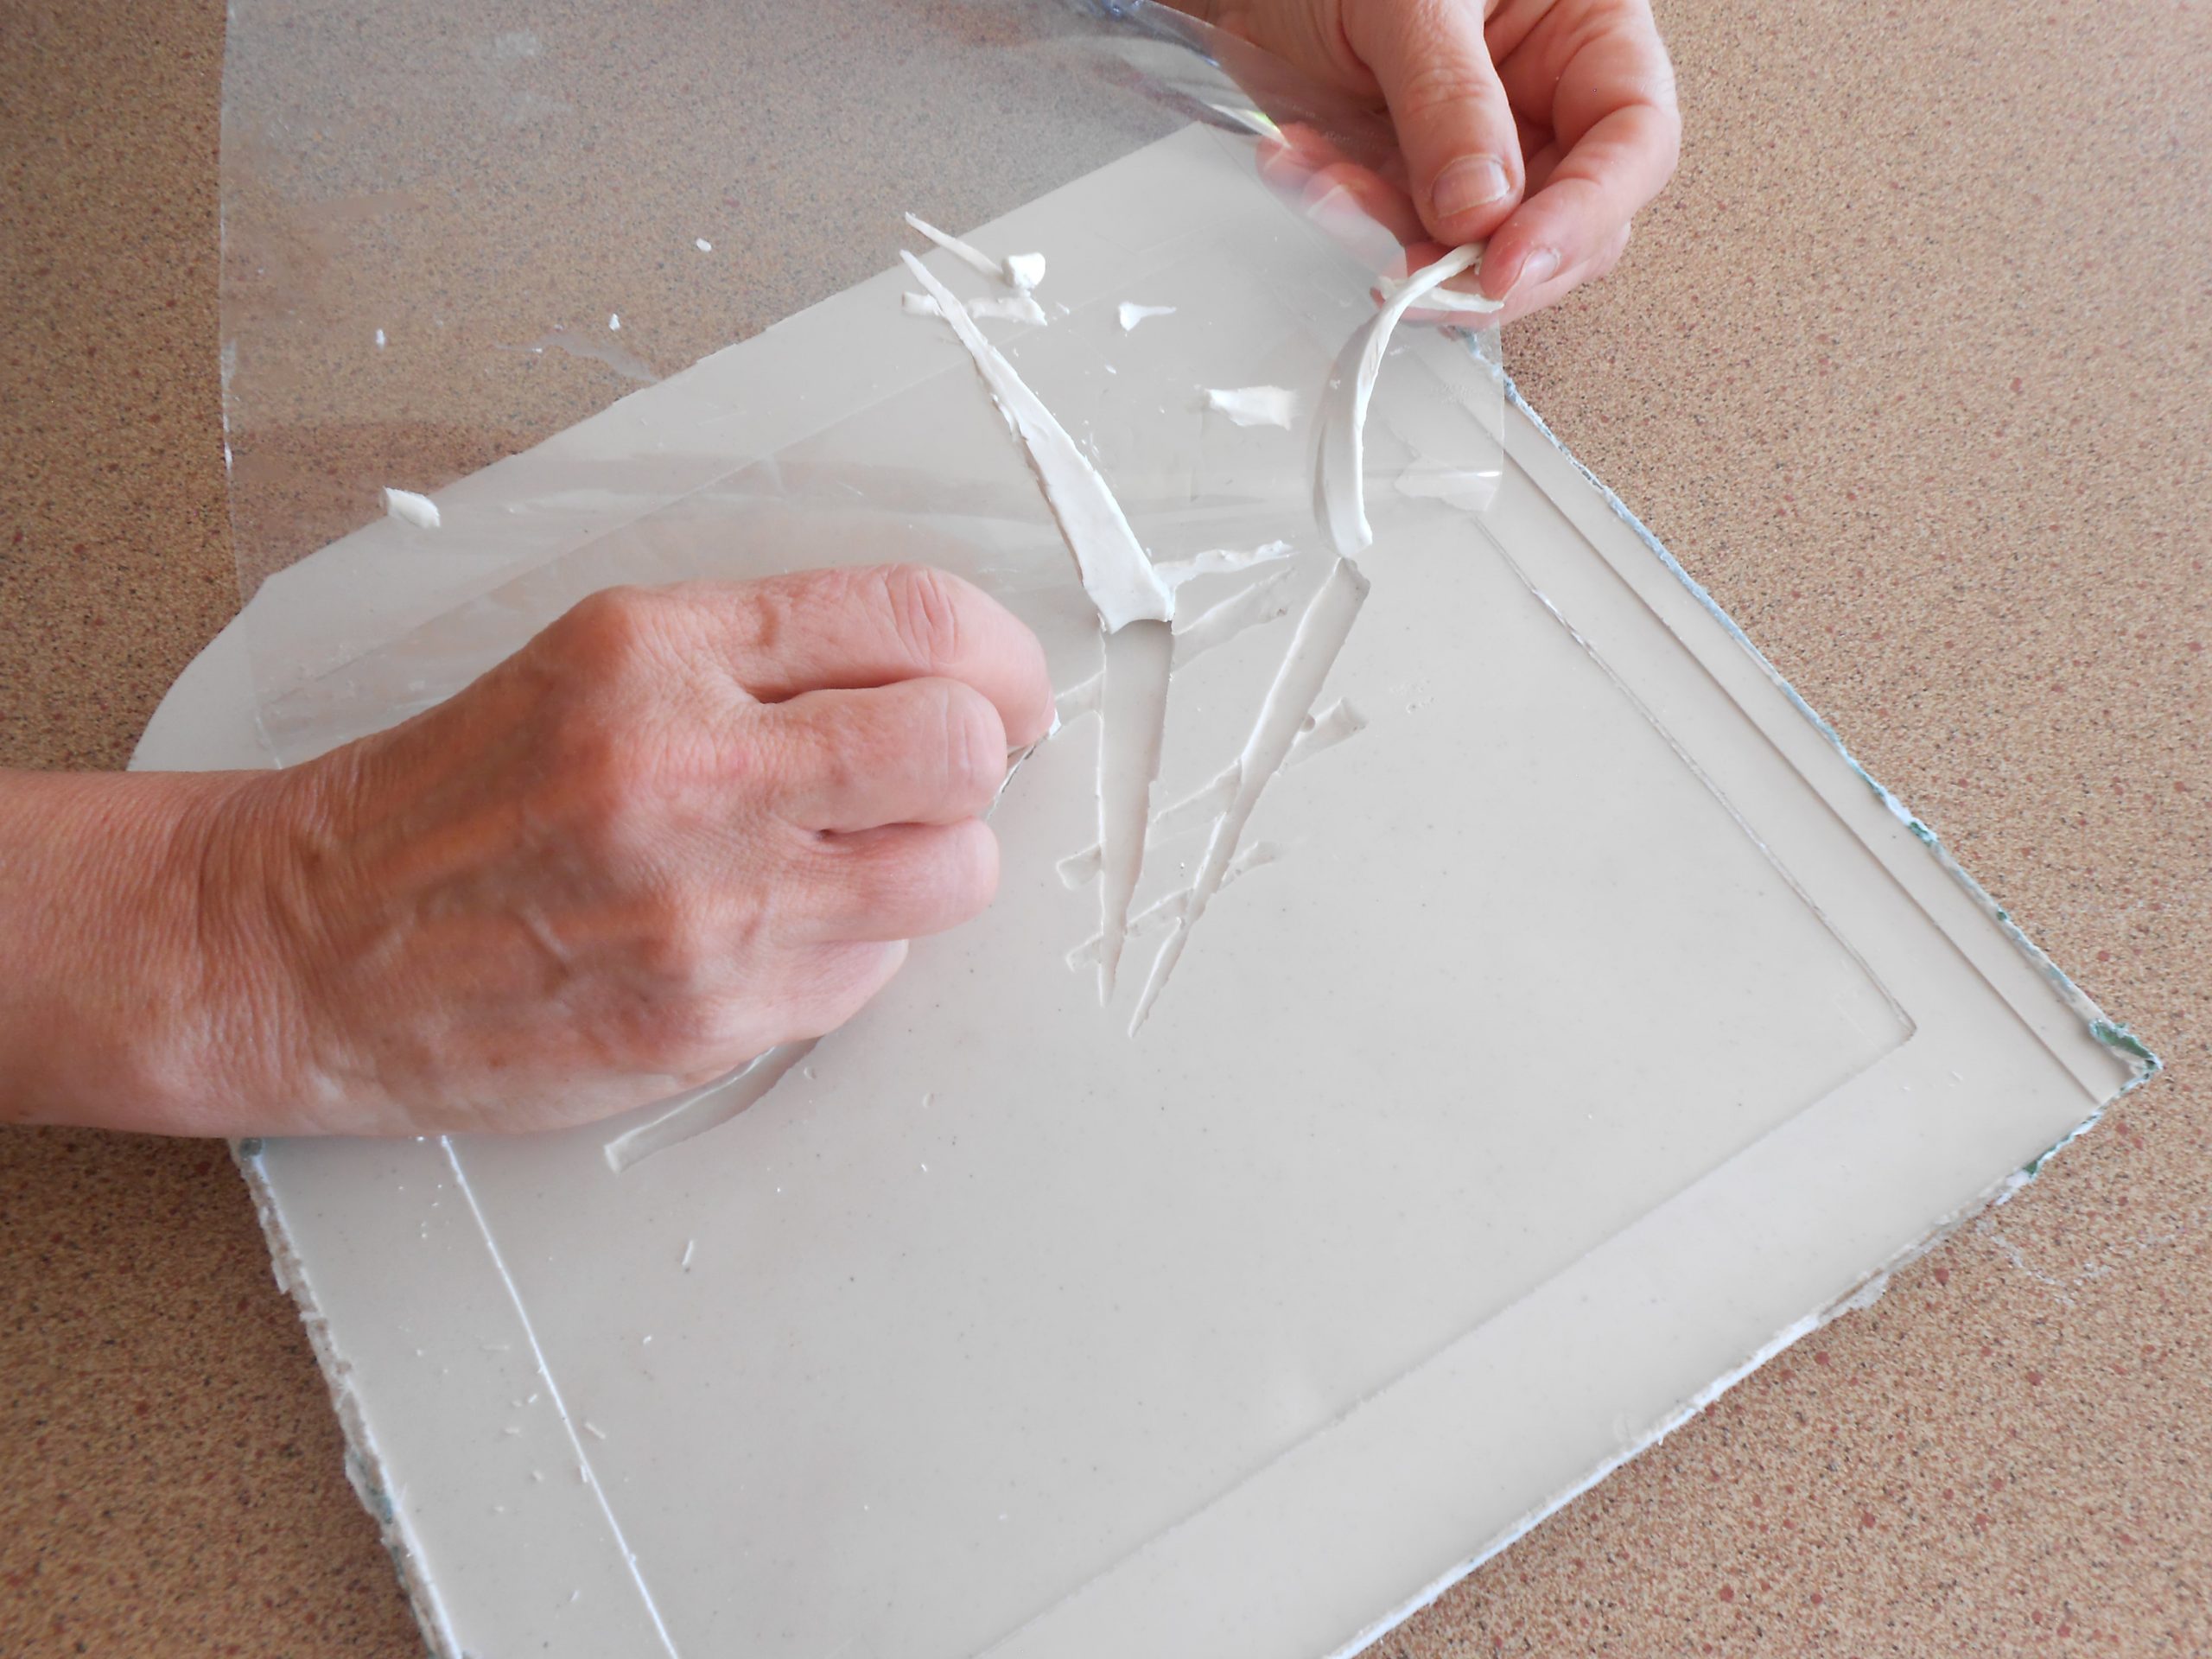
The plaster cast is removed from the container, and the acetate and plasticine is removed thoroughly from the plaster. It may be necessary to use a fine blade to neaten edges if plaster has under-run the plasticine in spots.
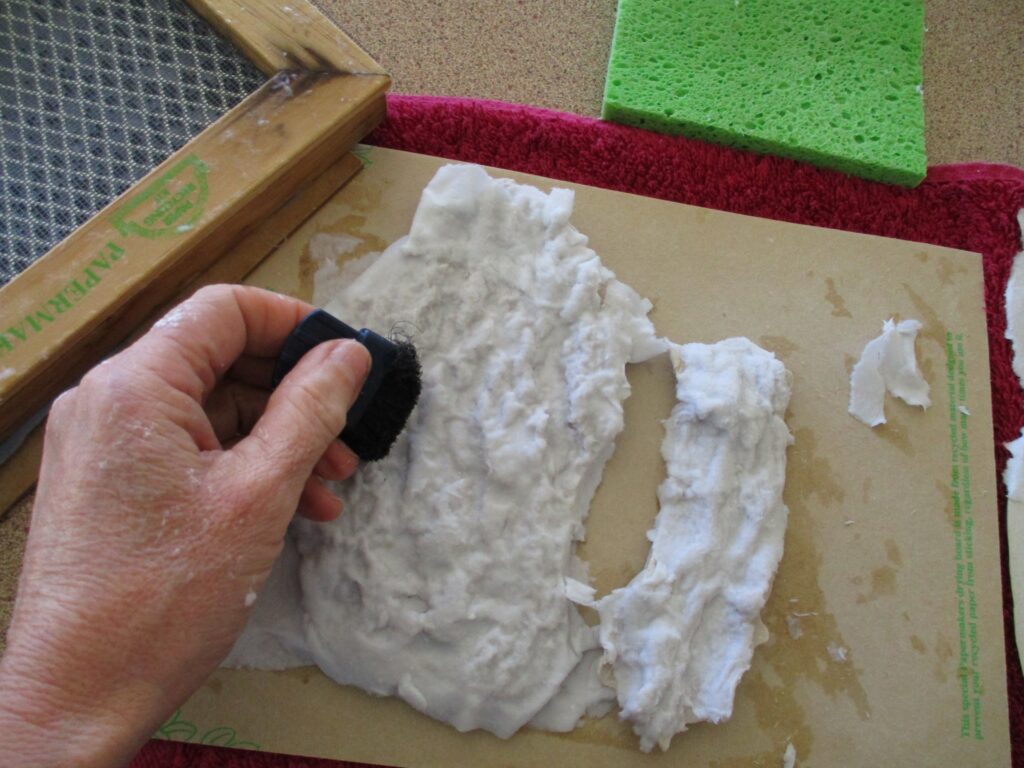
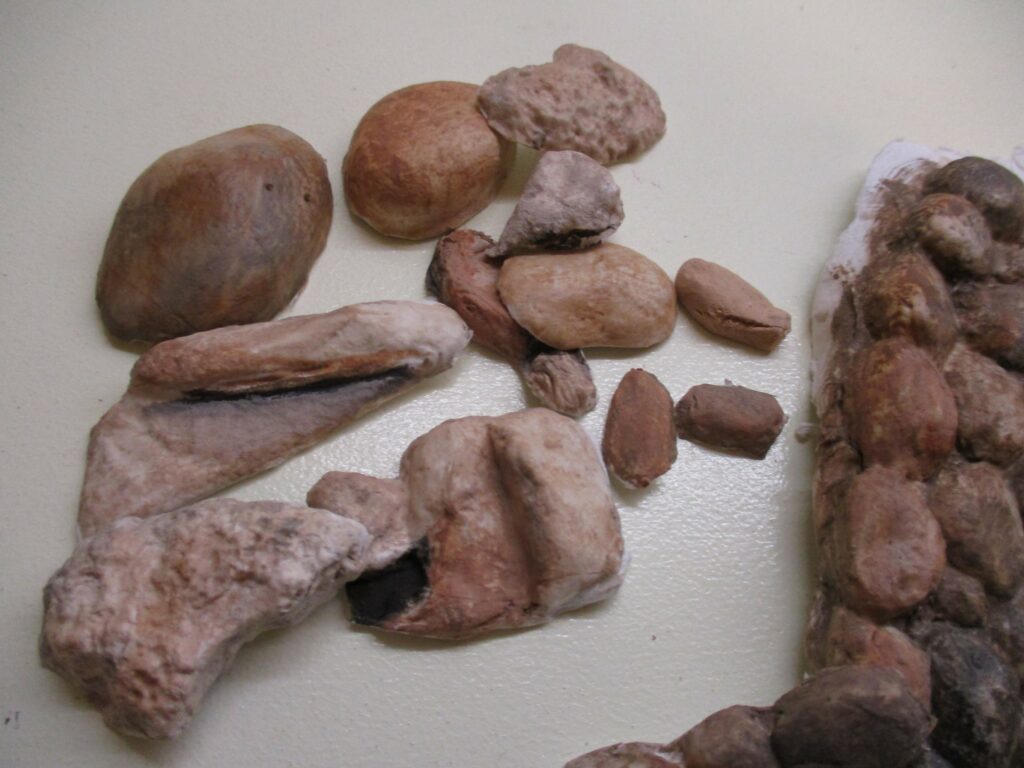
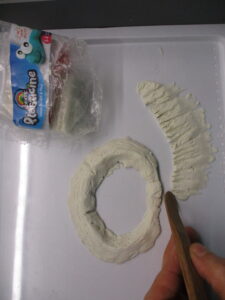
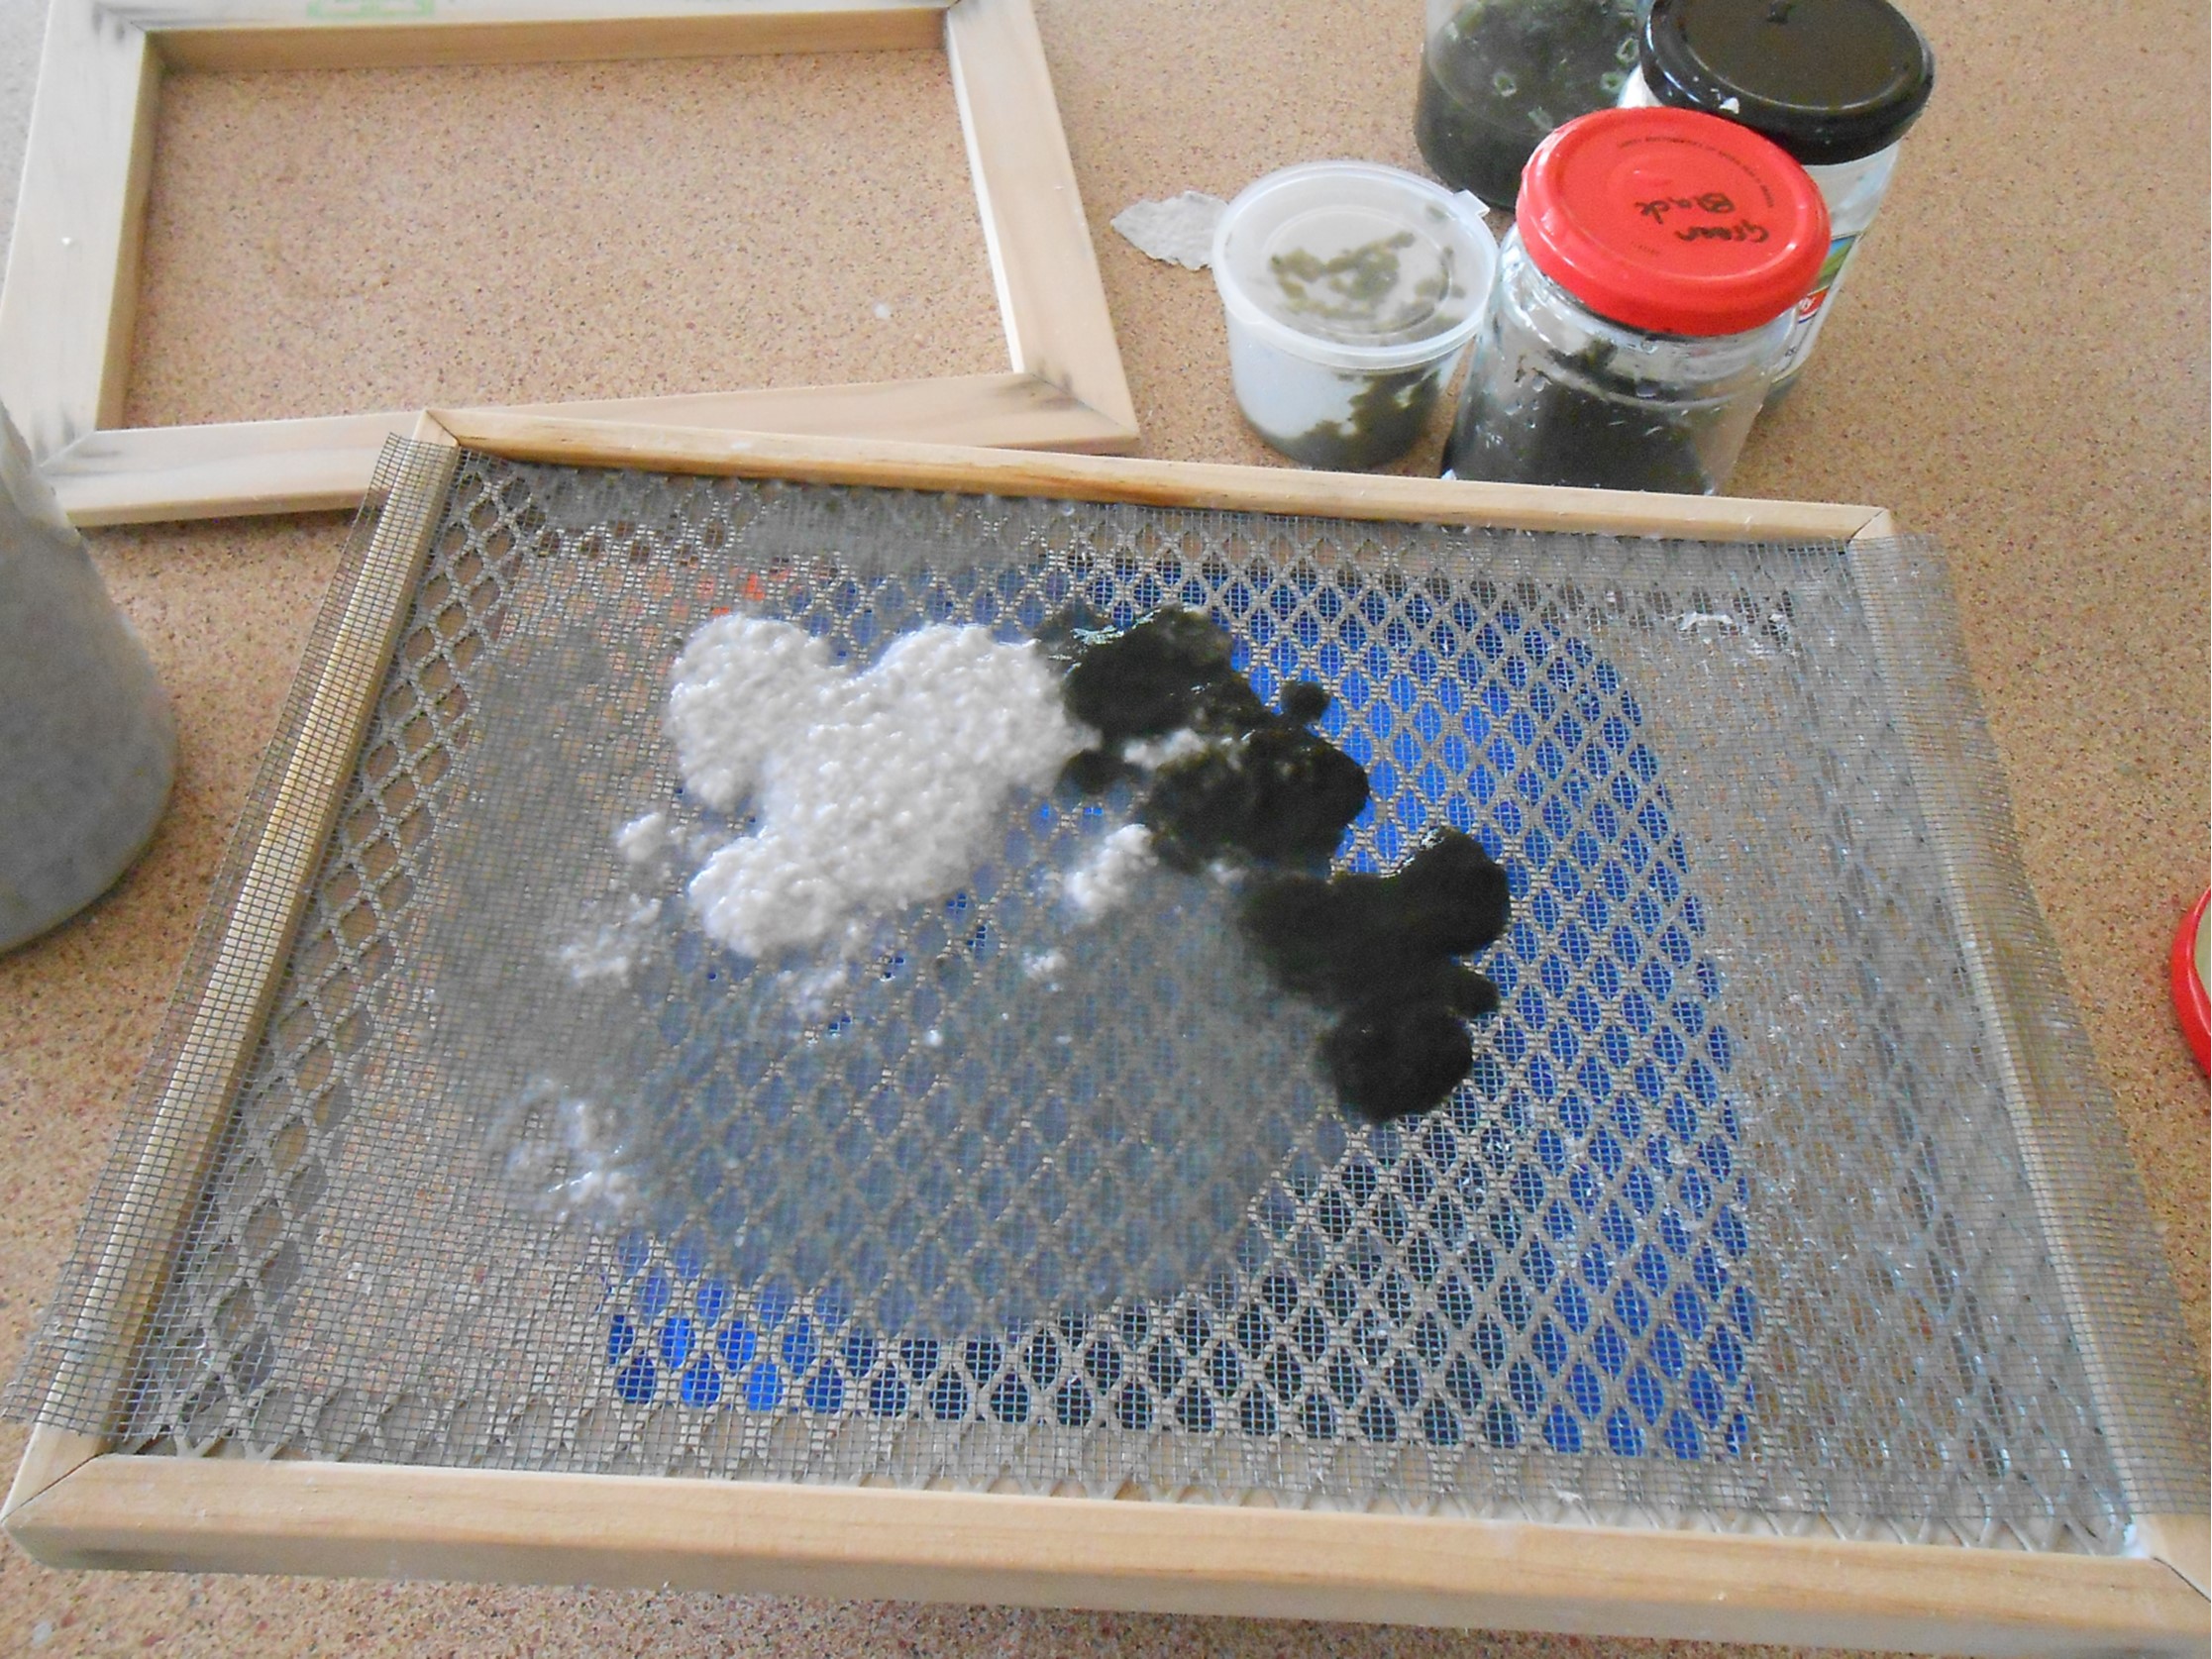
3. Making paper mulch Recycled paper is chosen to best match the colours in the photograph. Paper is torn or shredded into small pieces, soaked in water for one or two days, and blended into paper pulp.
Batches of paper in various colours can be made and blended together at this stage to best colour match the photo. To accurately replicate blended colours, a sample is blended and dried, as the dry result will appear lighter.
4. Casting the paper
The first step is to lay any surface contrast colour into the mould (e.g. tree bark) using small pieces of mulch and spraying with water to keep damp.
The main colour paper mulch is mixed with water in a deep basin or container. Dipping a paper-making frame and deckle, sheets of paper are created and placed directly into the plaster mould, overlapping as necessary to fill the mould to extend beyond the acetate edges.
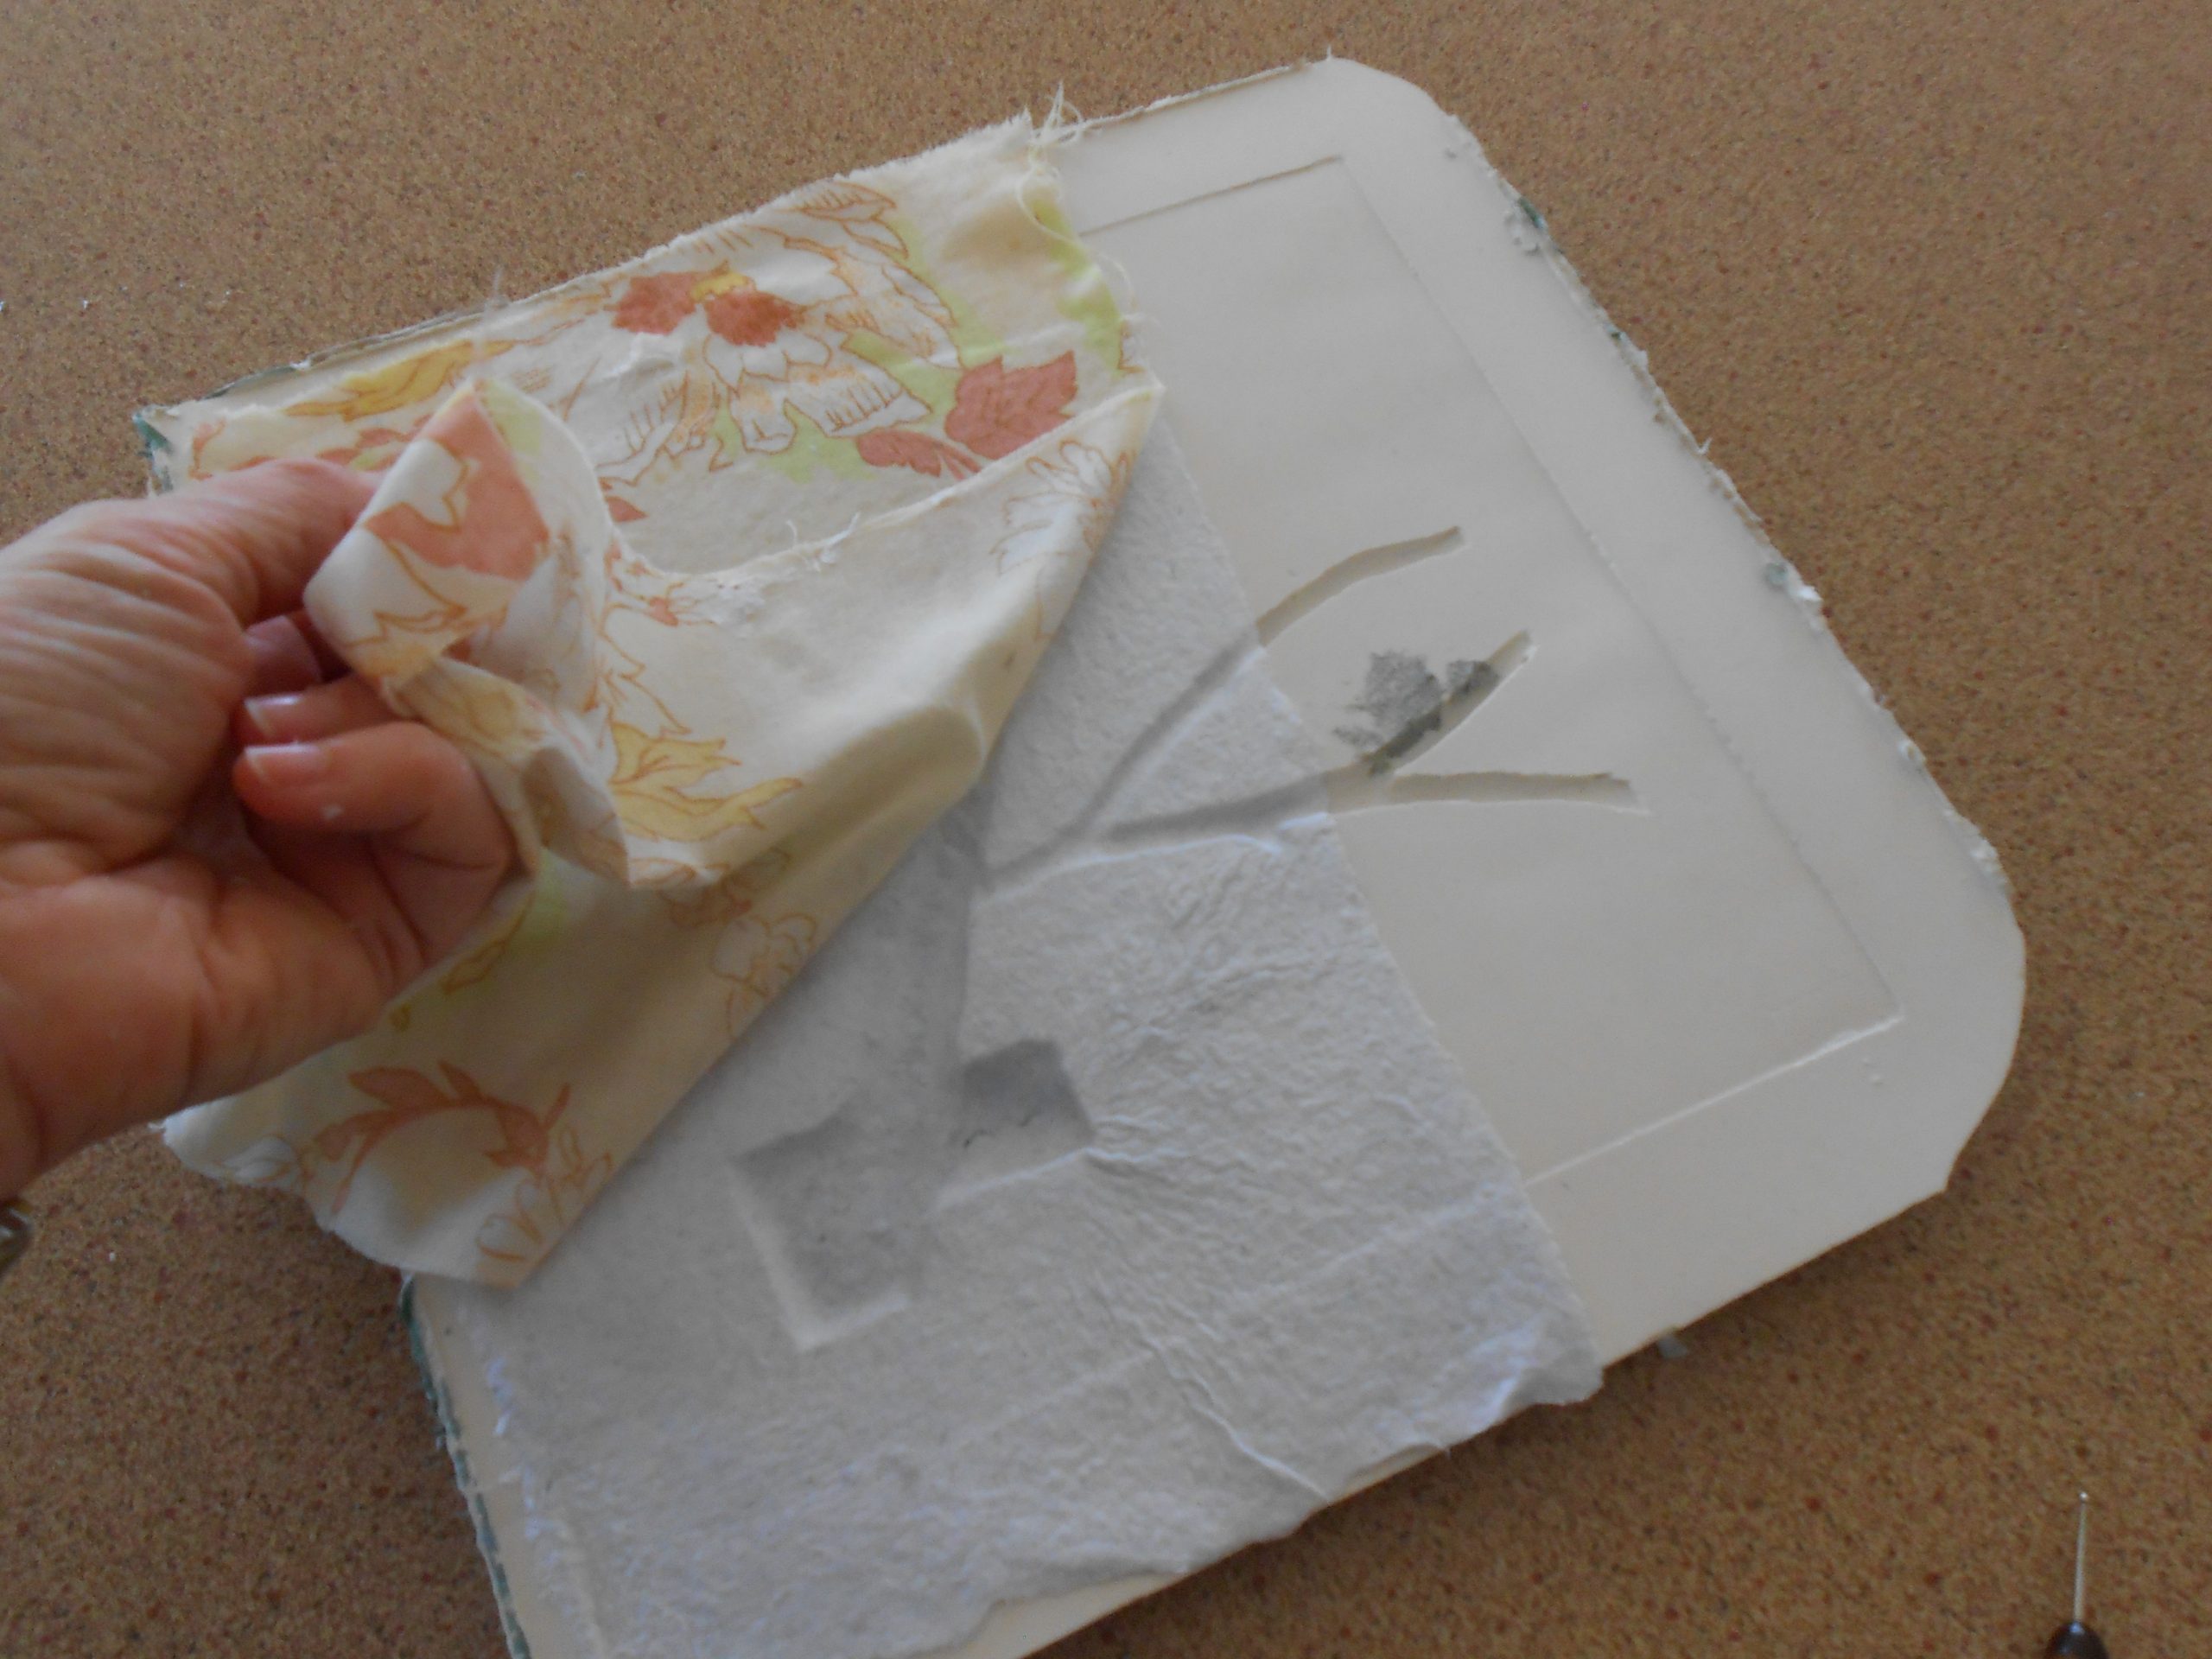
A small brush is used to work the paper carefully into the crevices and to blend together any overlaps of the wet paper sheets.
A substantial thickness needs to be built up to support the image, particularly in deep areas and on fragile edges, using a cloth or sponge to absorb as much moisture as possible between layers. The paper cast is set aside to thoroughly dry. Depending on the thickness and the weather, this can take several days.
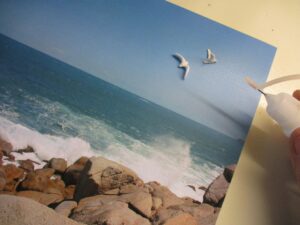
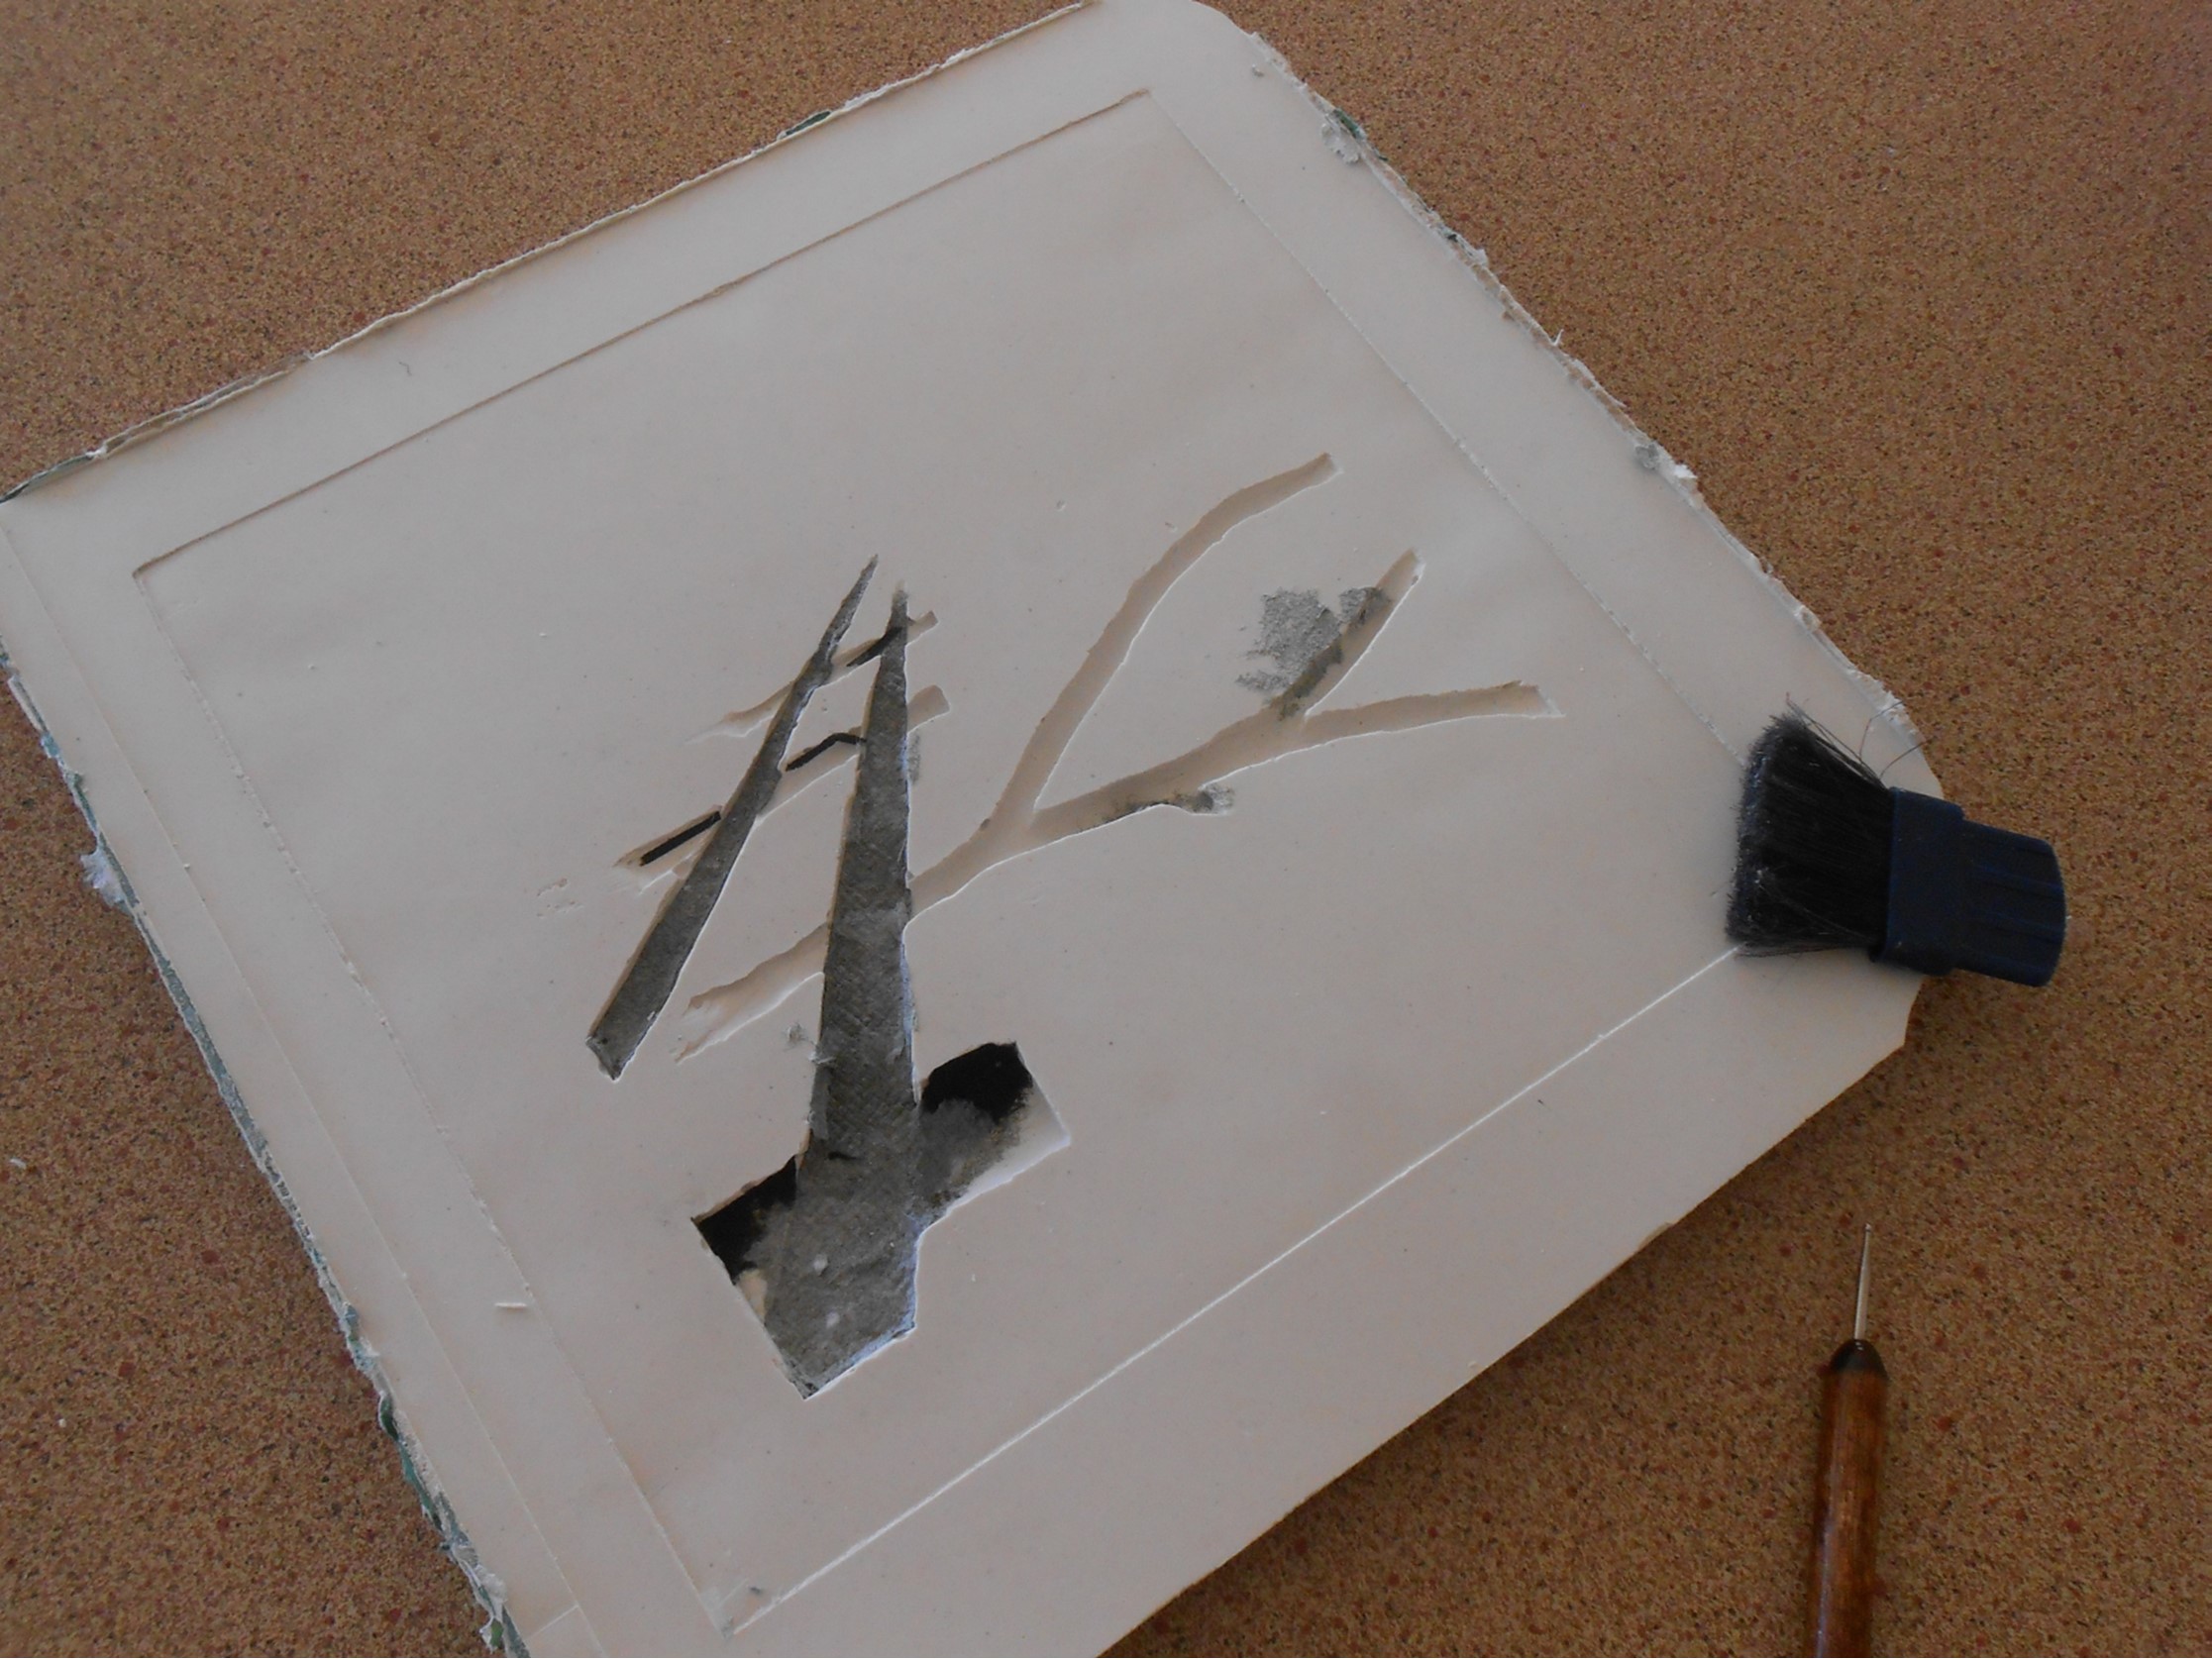
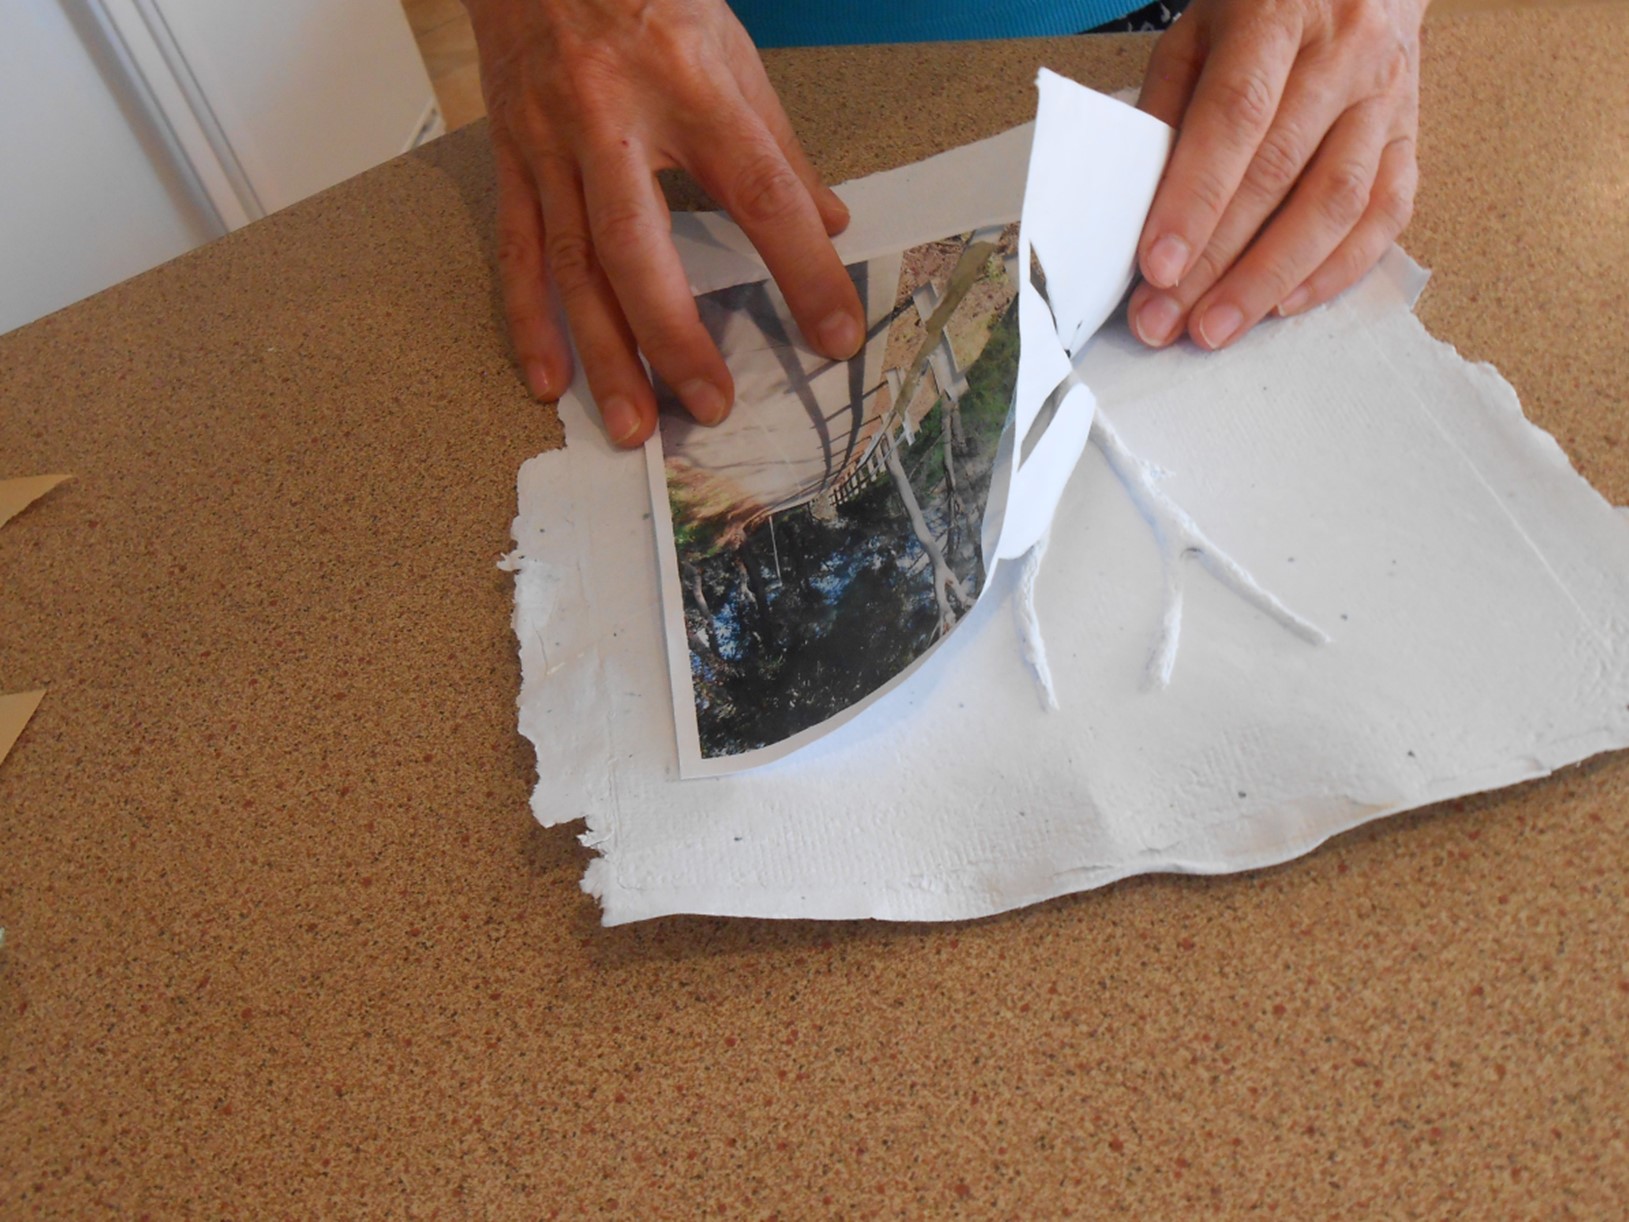
5. Applying the photograph to the cast
The paper cast is gently removed from the plaster mould. Any loose or fragile pieces that did not adhere completely can be secured with a clear paper glue at this stage.
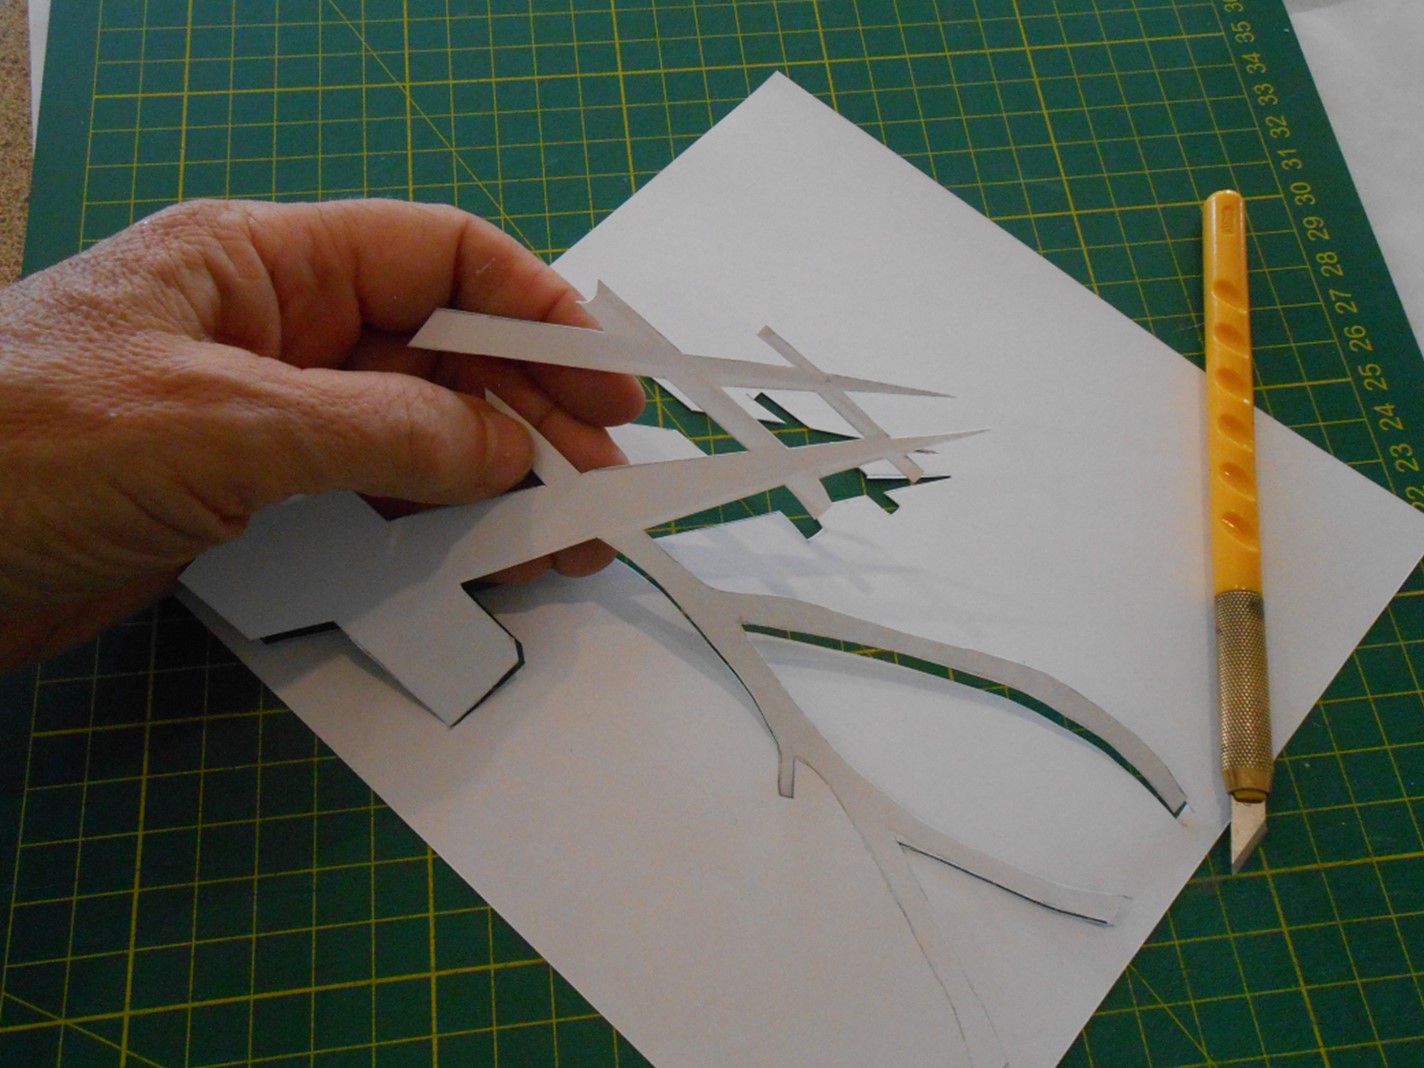
Using the plaster mould, a tracing is made of the bas-relief areas which is then transferred to the back of the photograph.
These sections are cut out. Pieces of the photo are placed around the bas-relief cast and glued to the paper mould. The edges are trimmed and the picture framed.