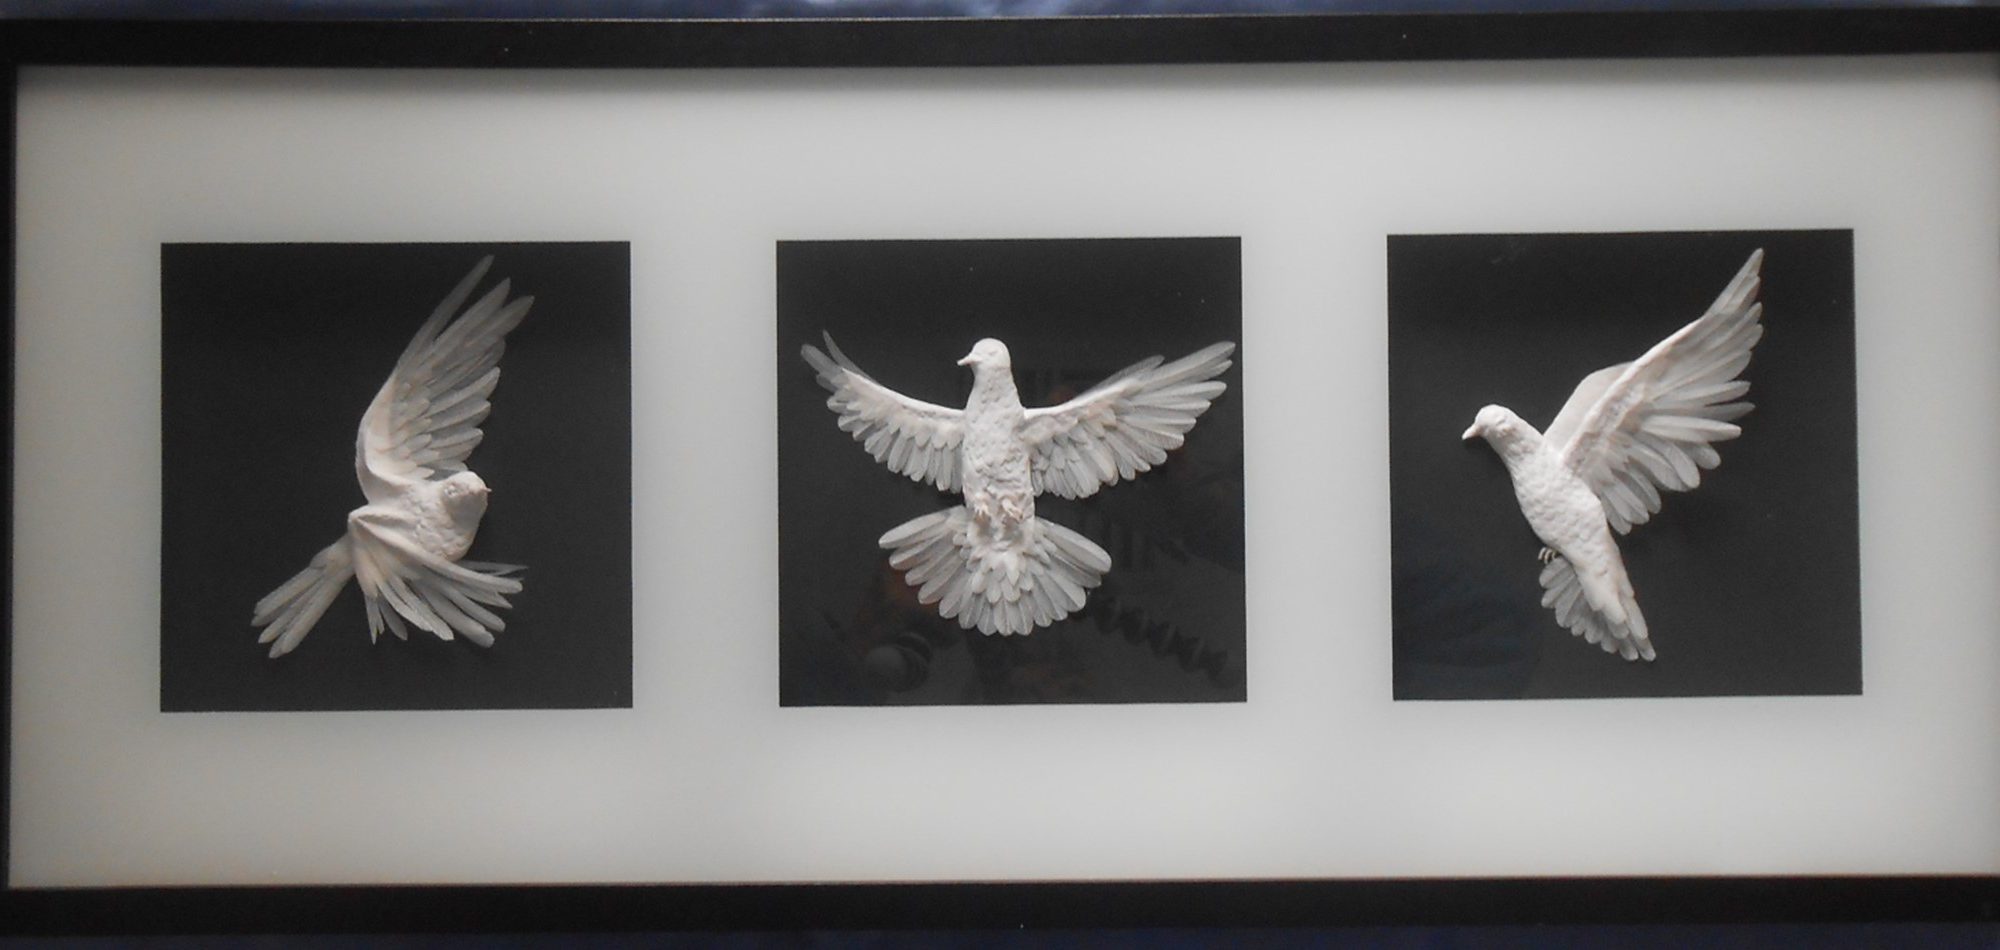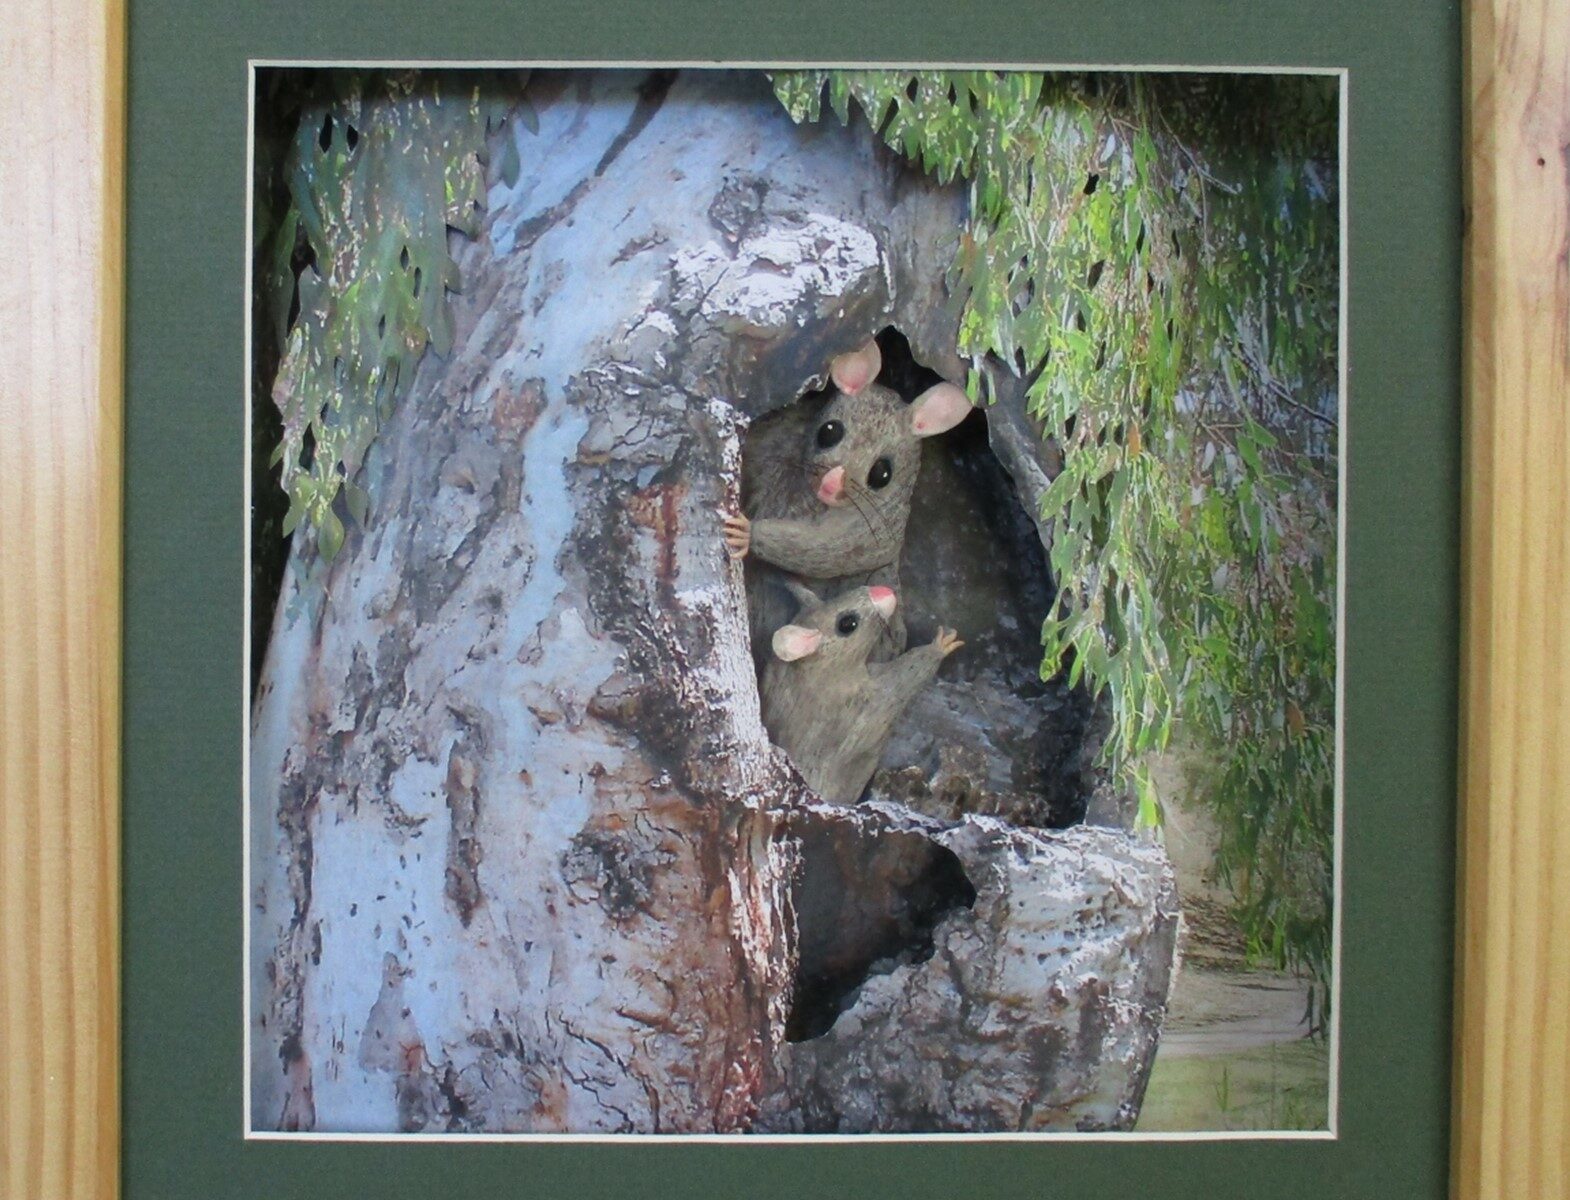
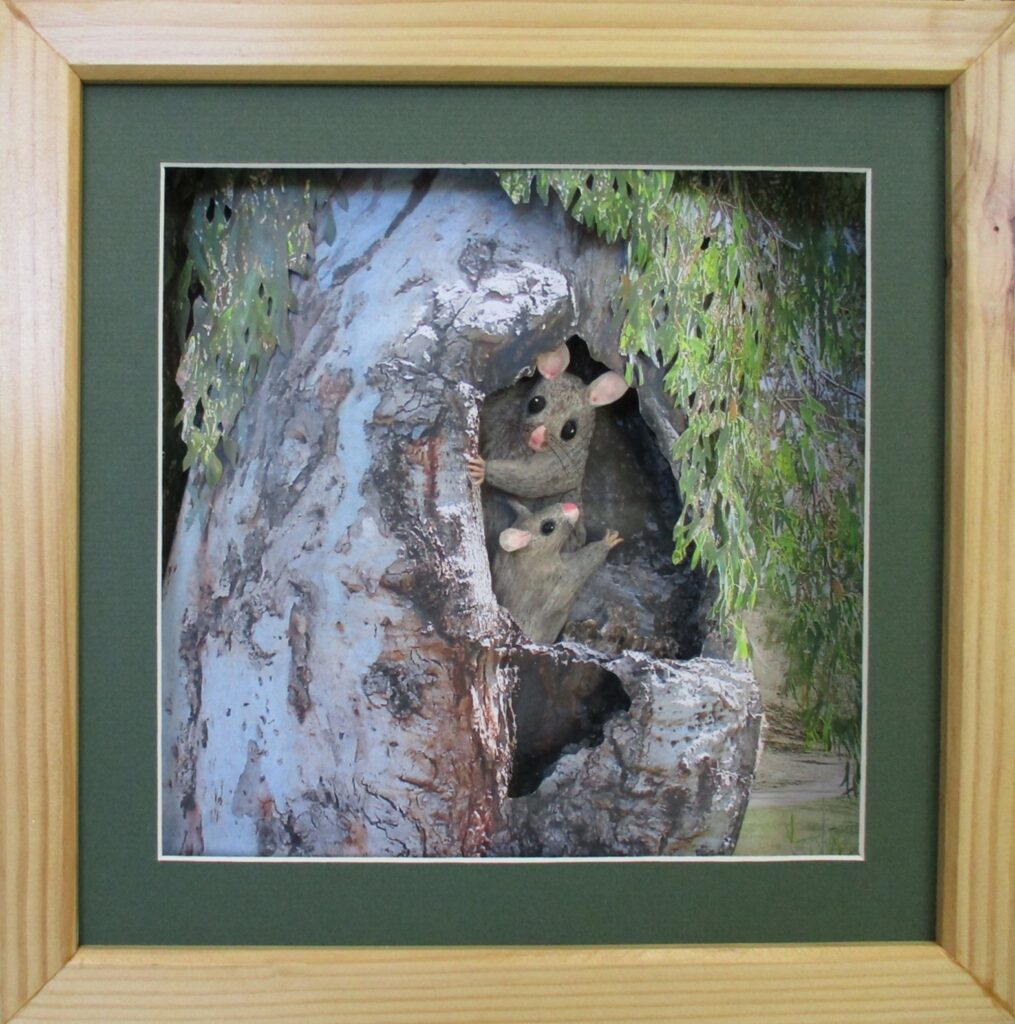
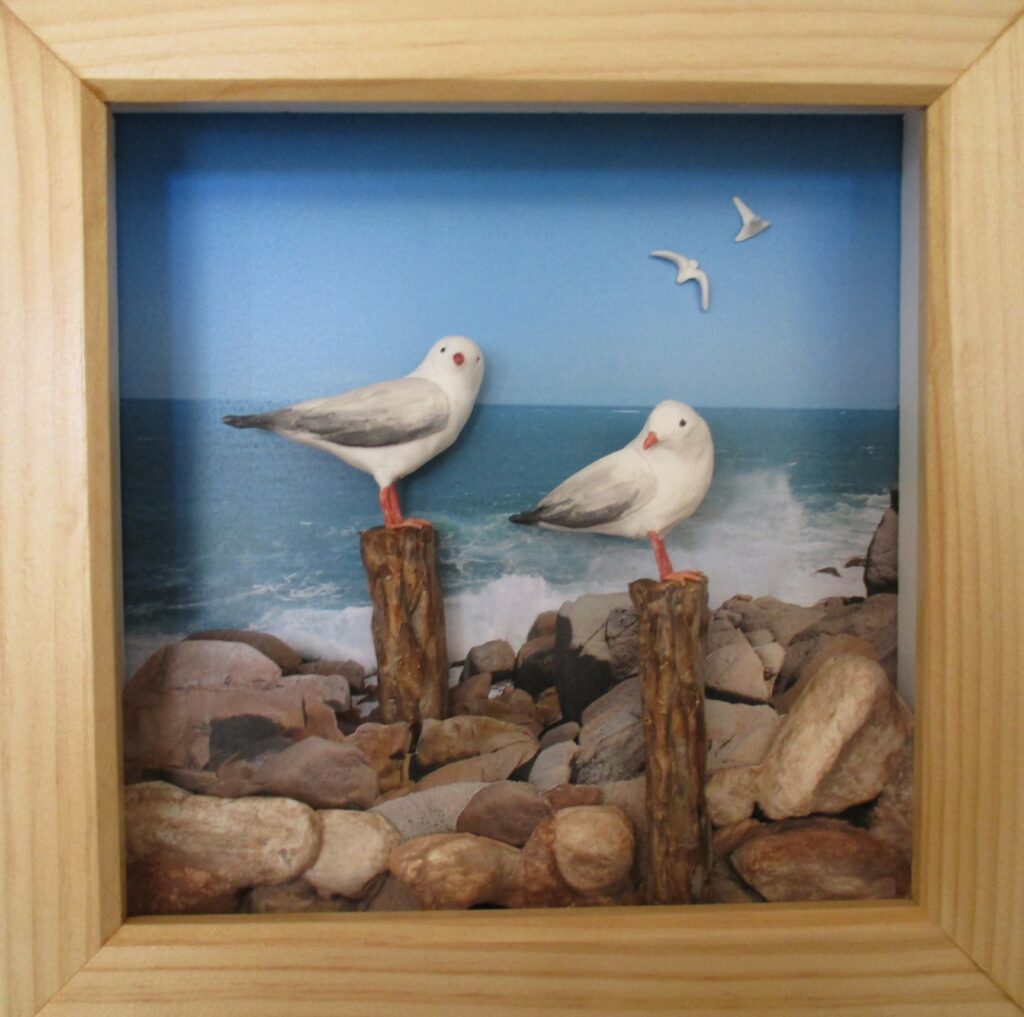
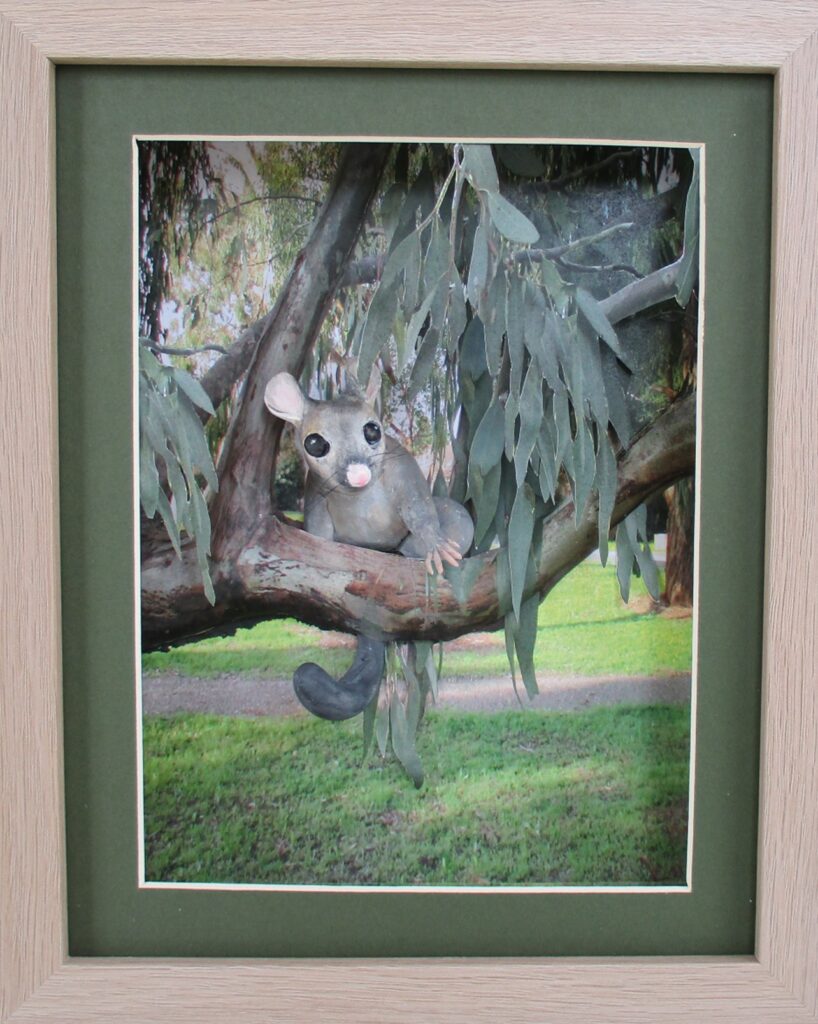
This set of 4 new paper sculptures began as photographs I took recently along walks near the river and sea.
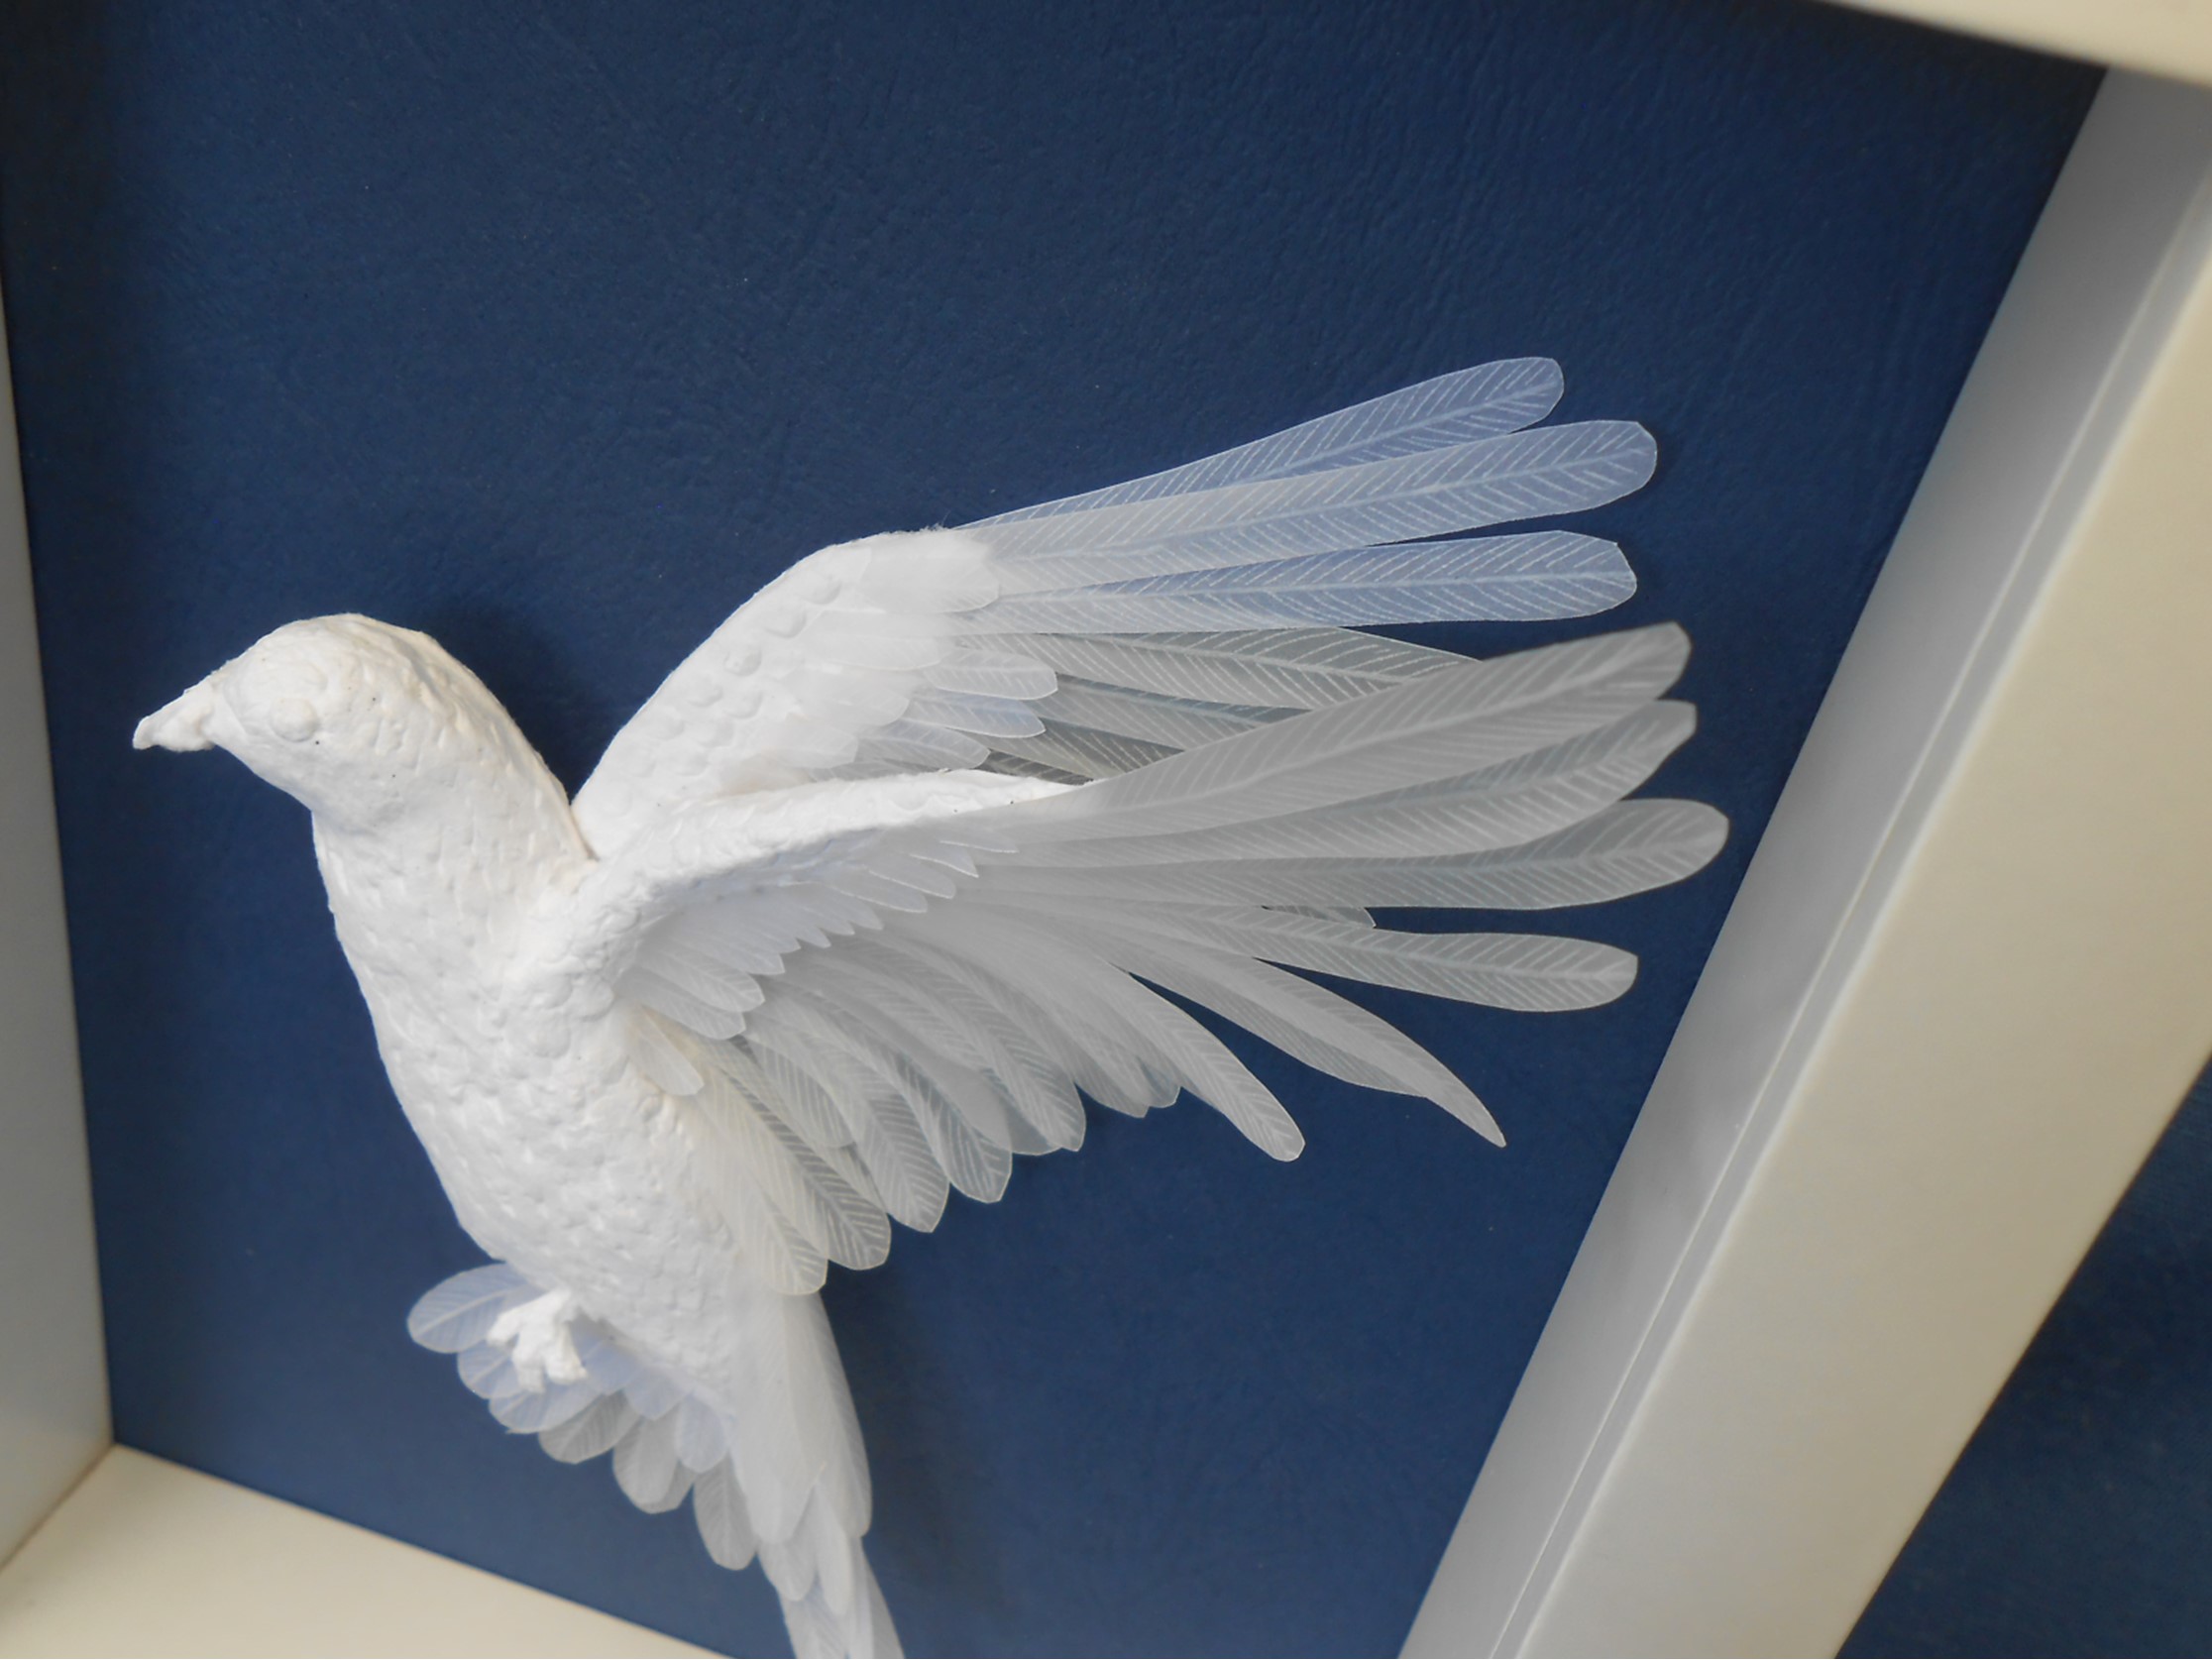
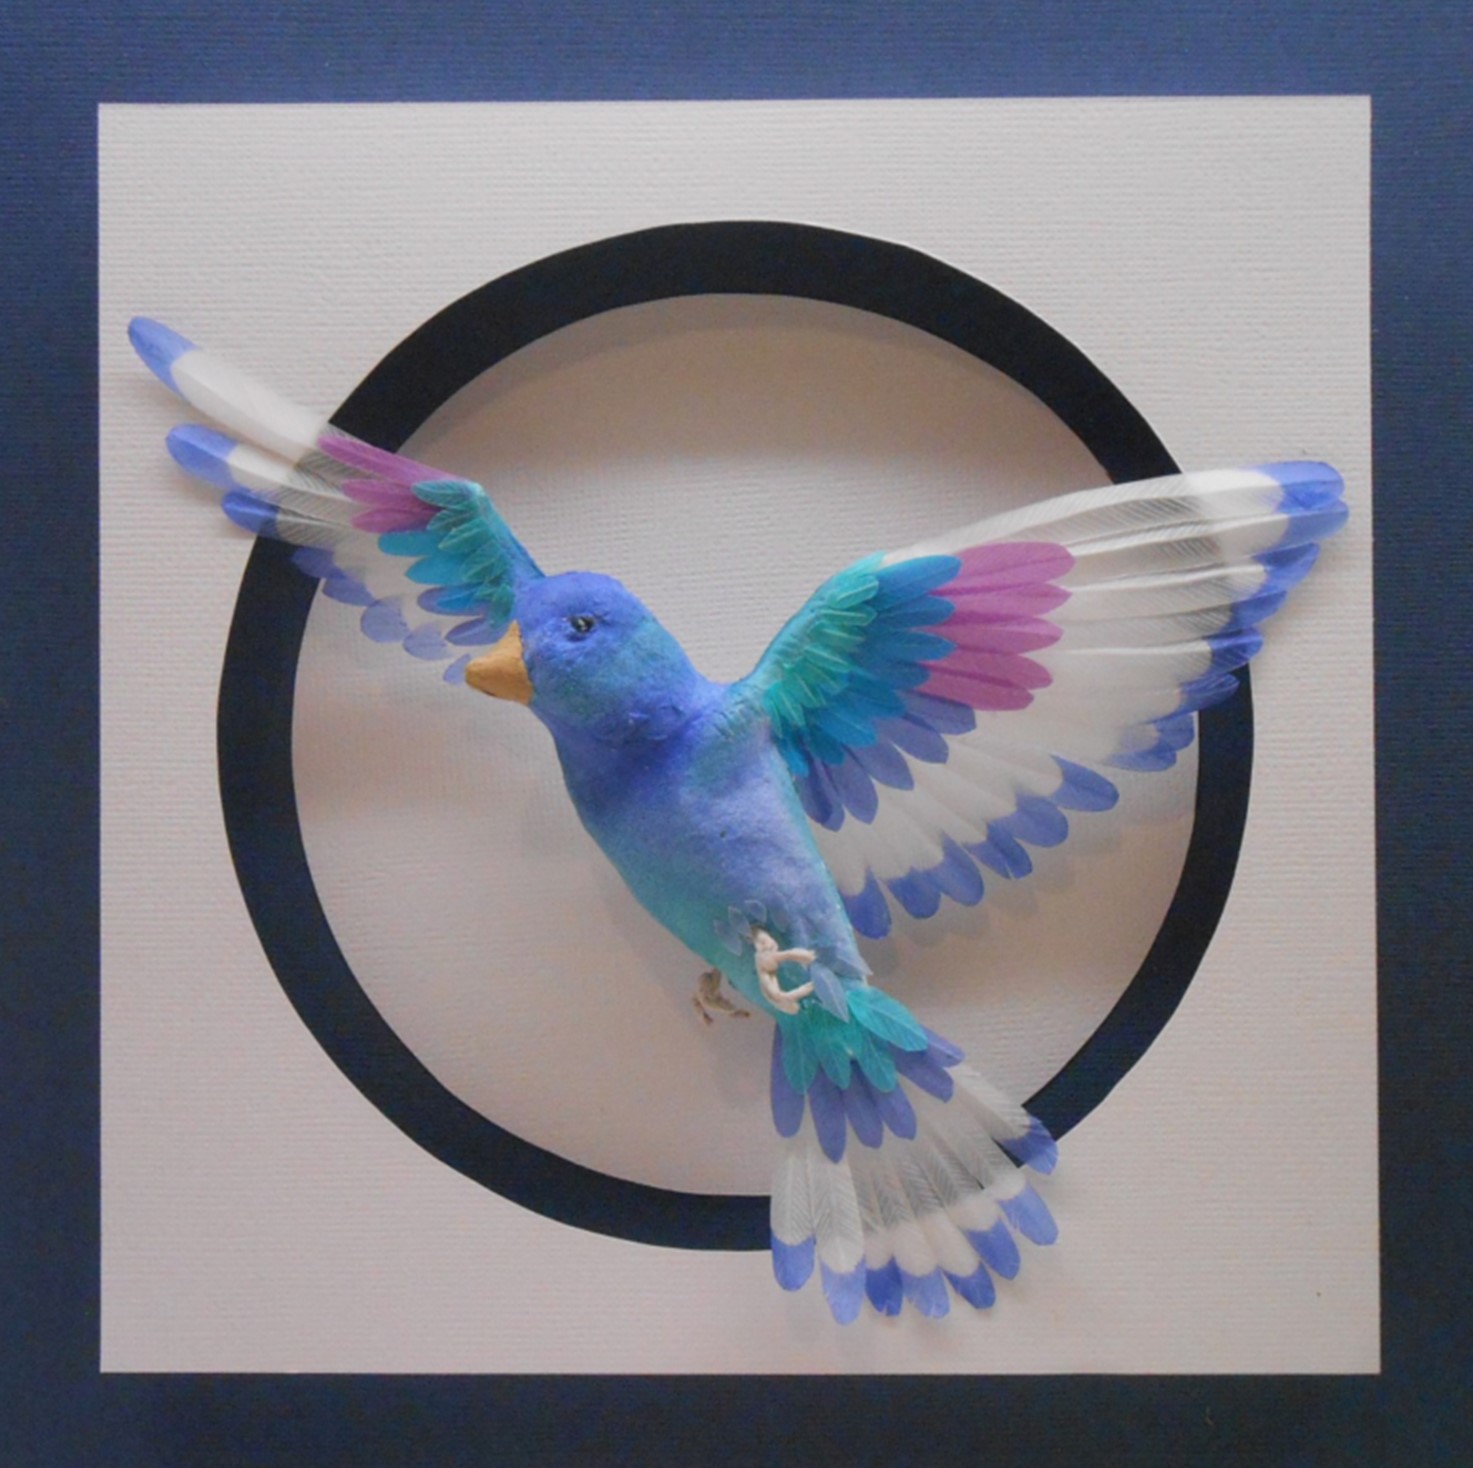
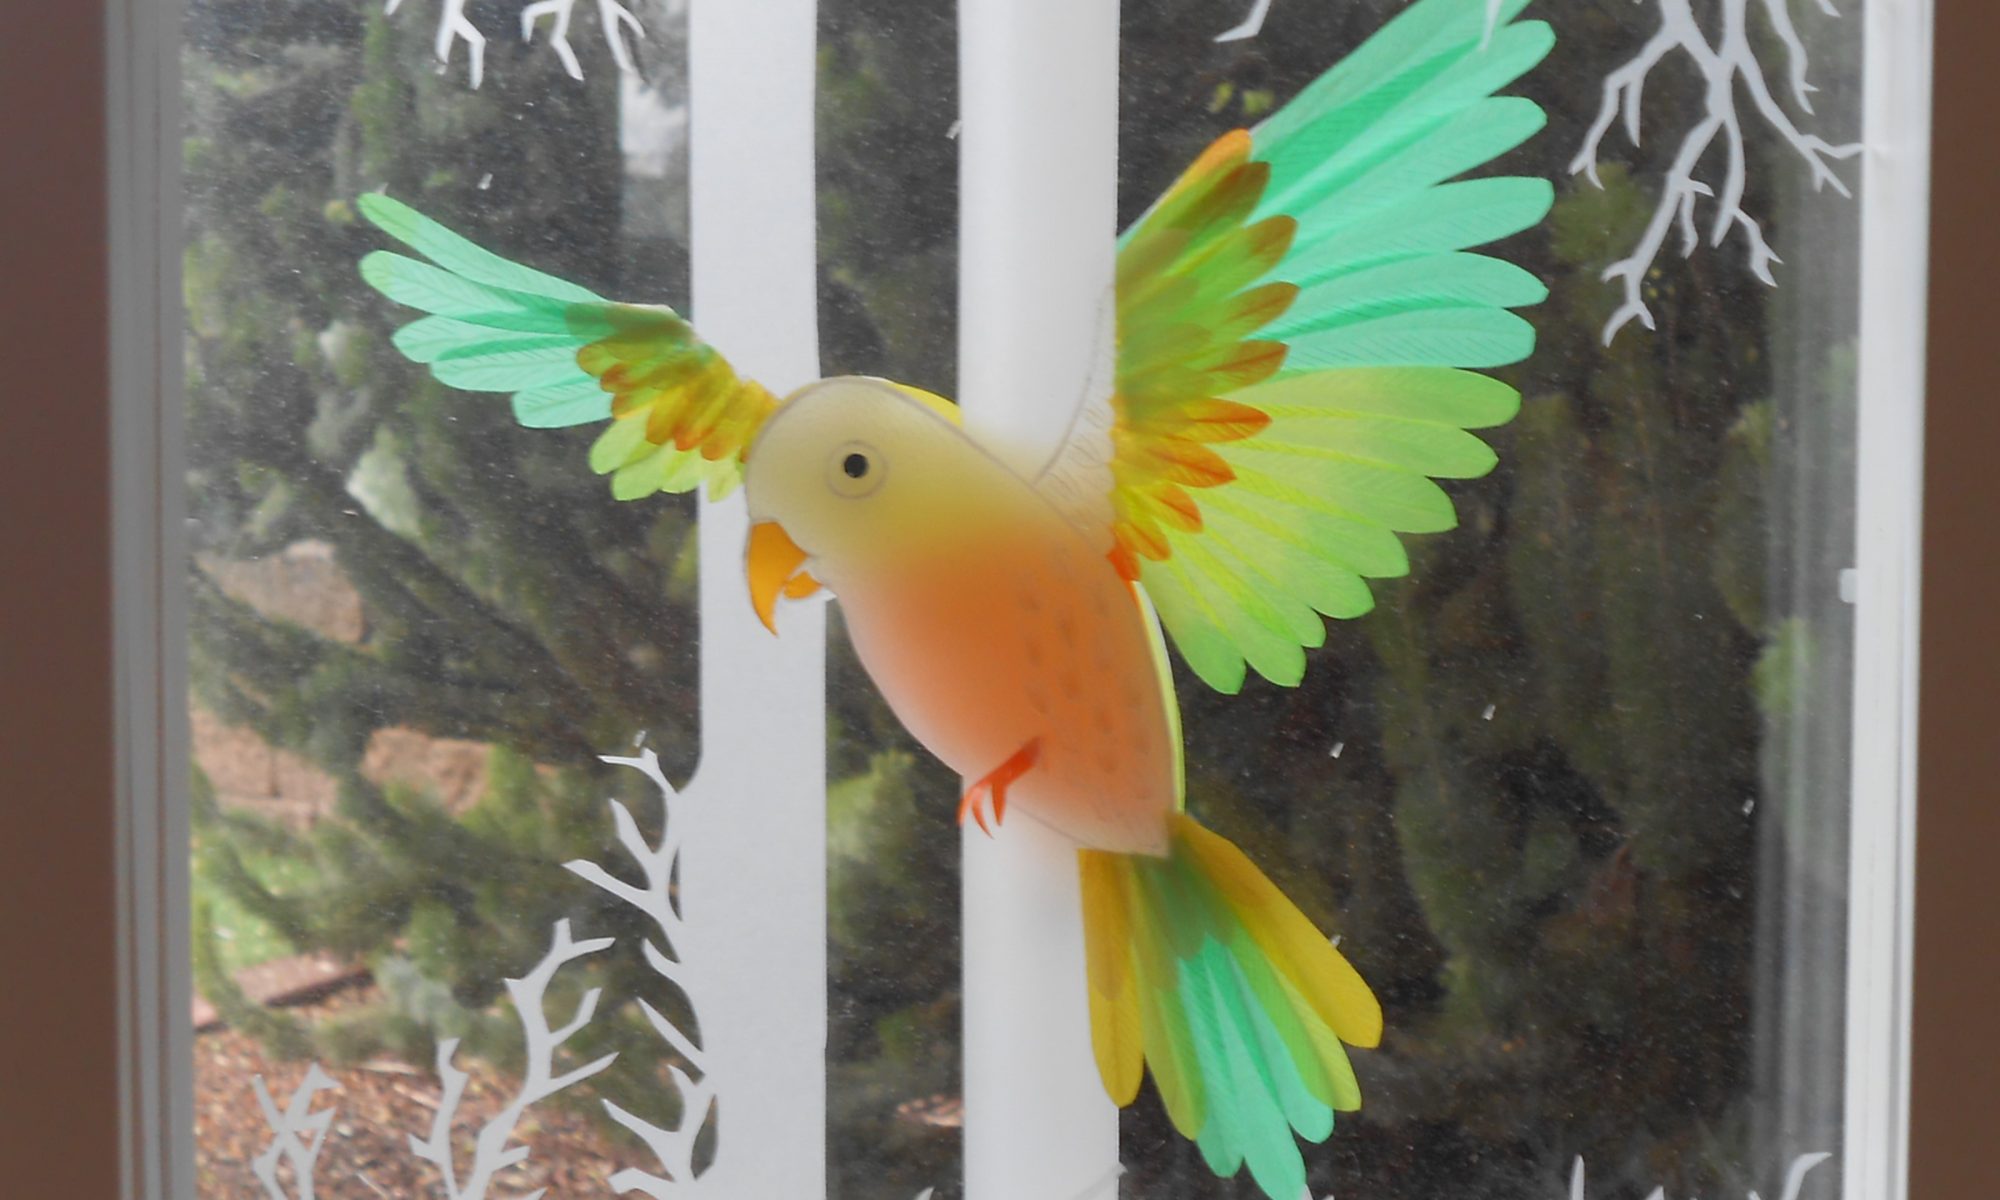
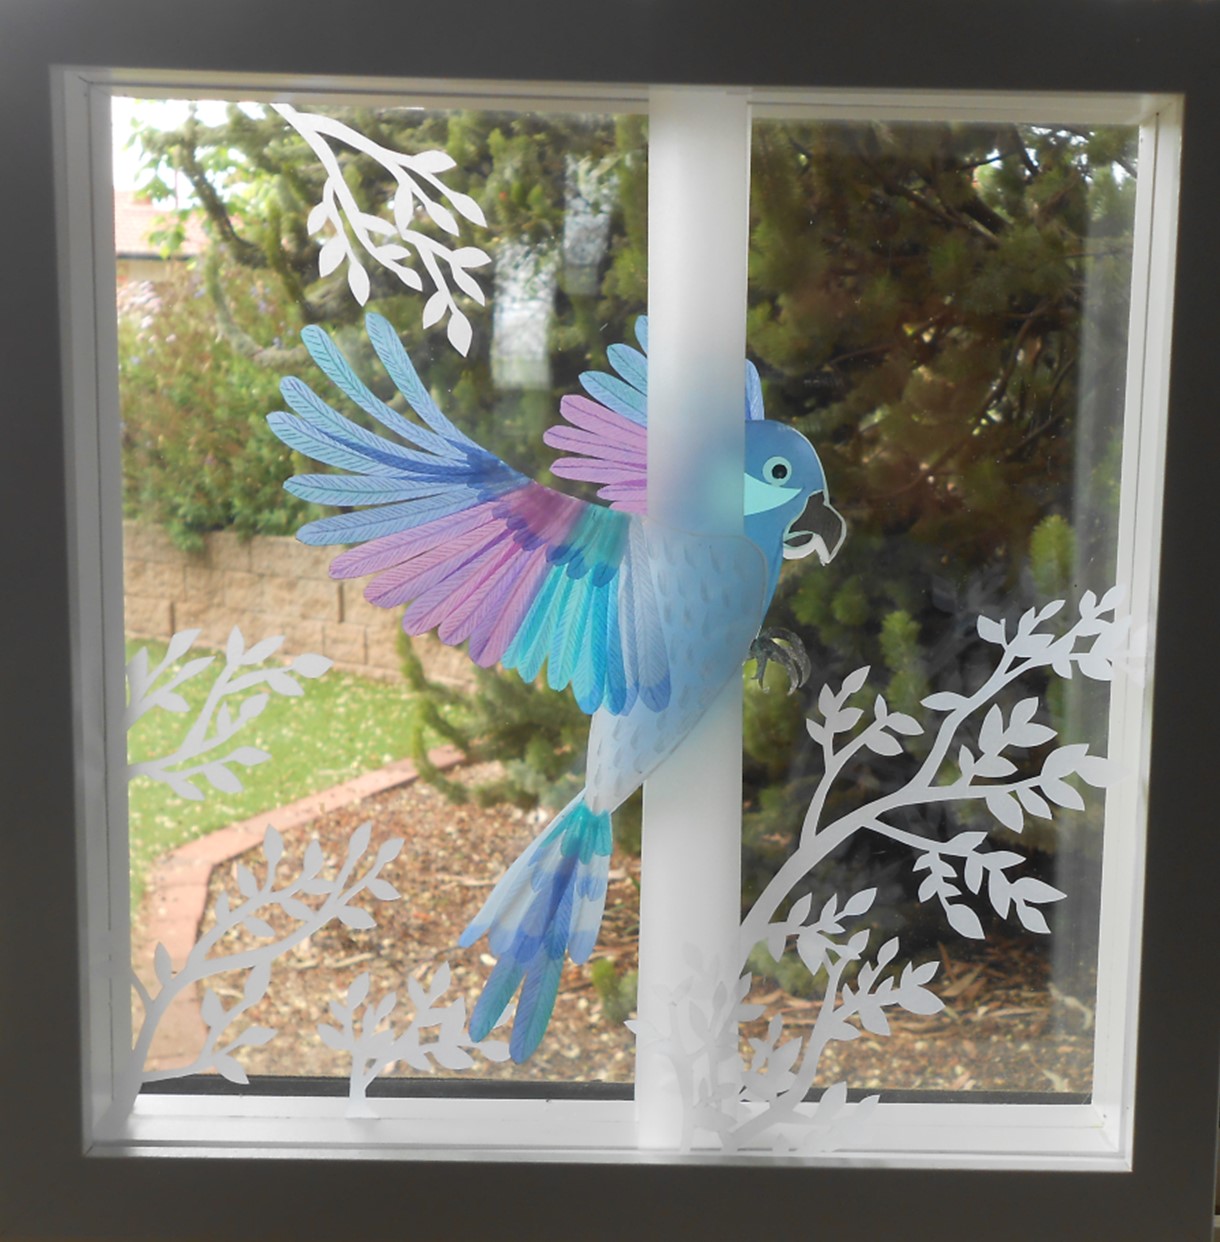
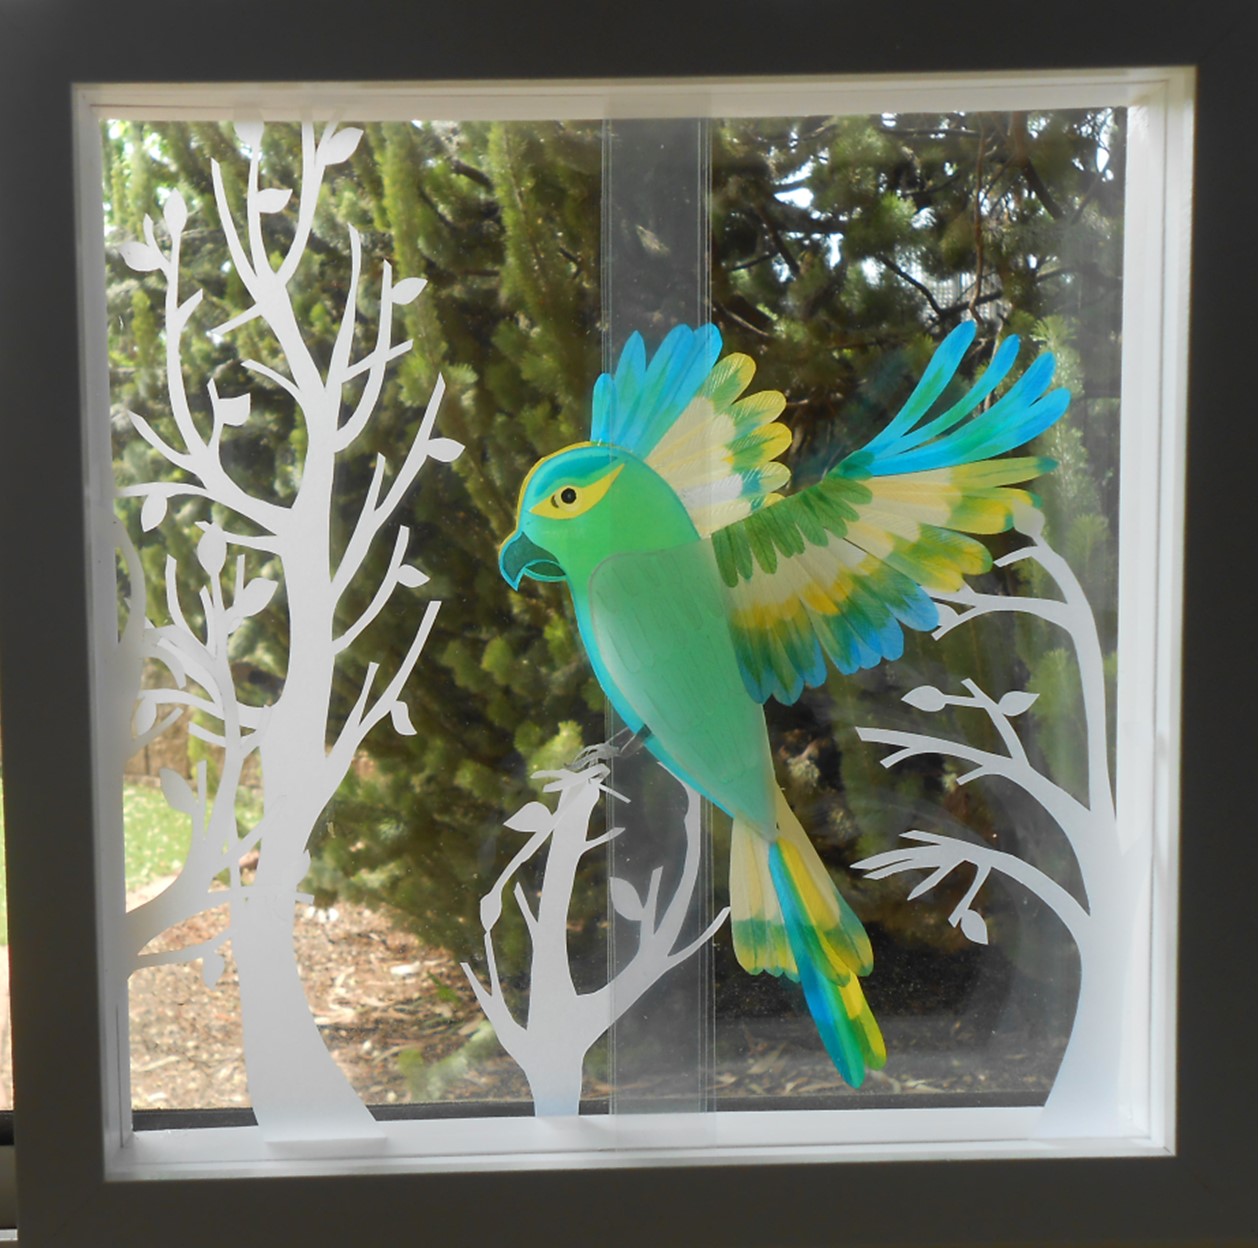
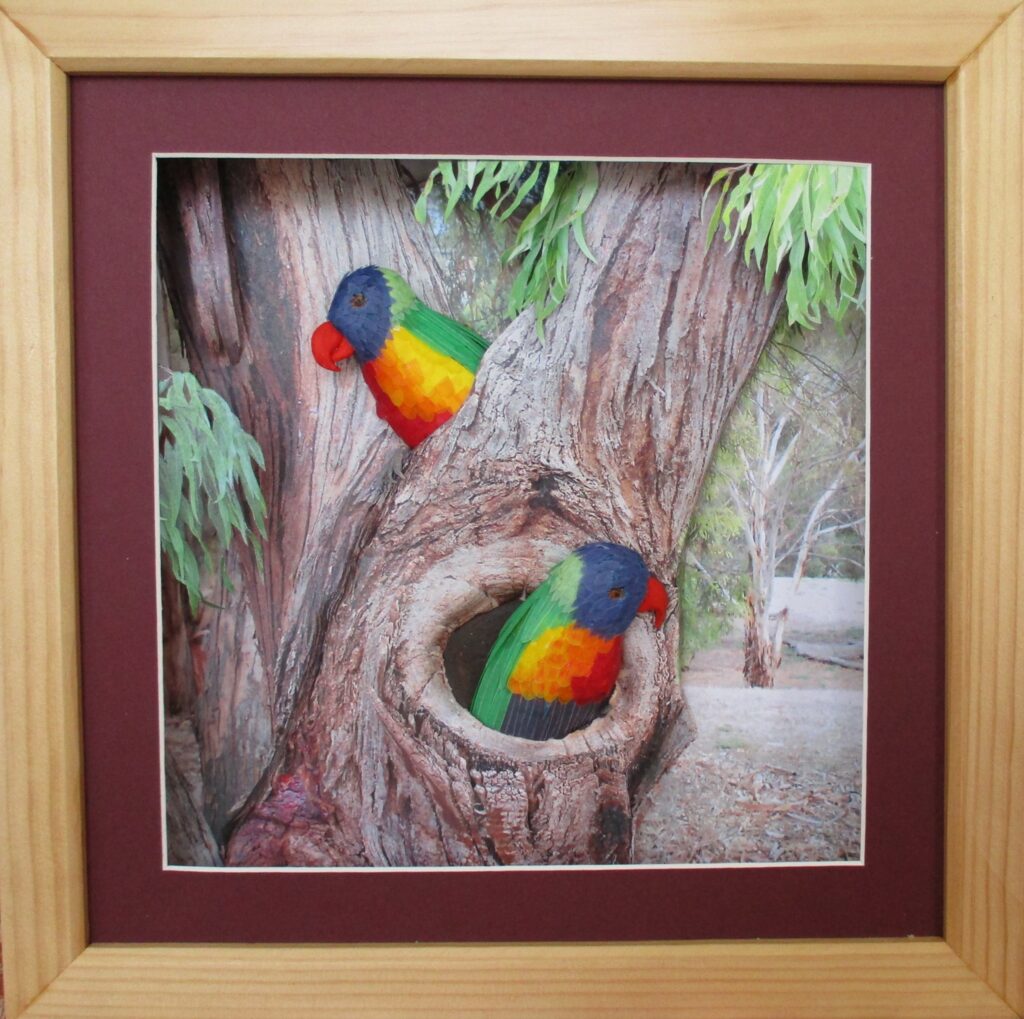
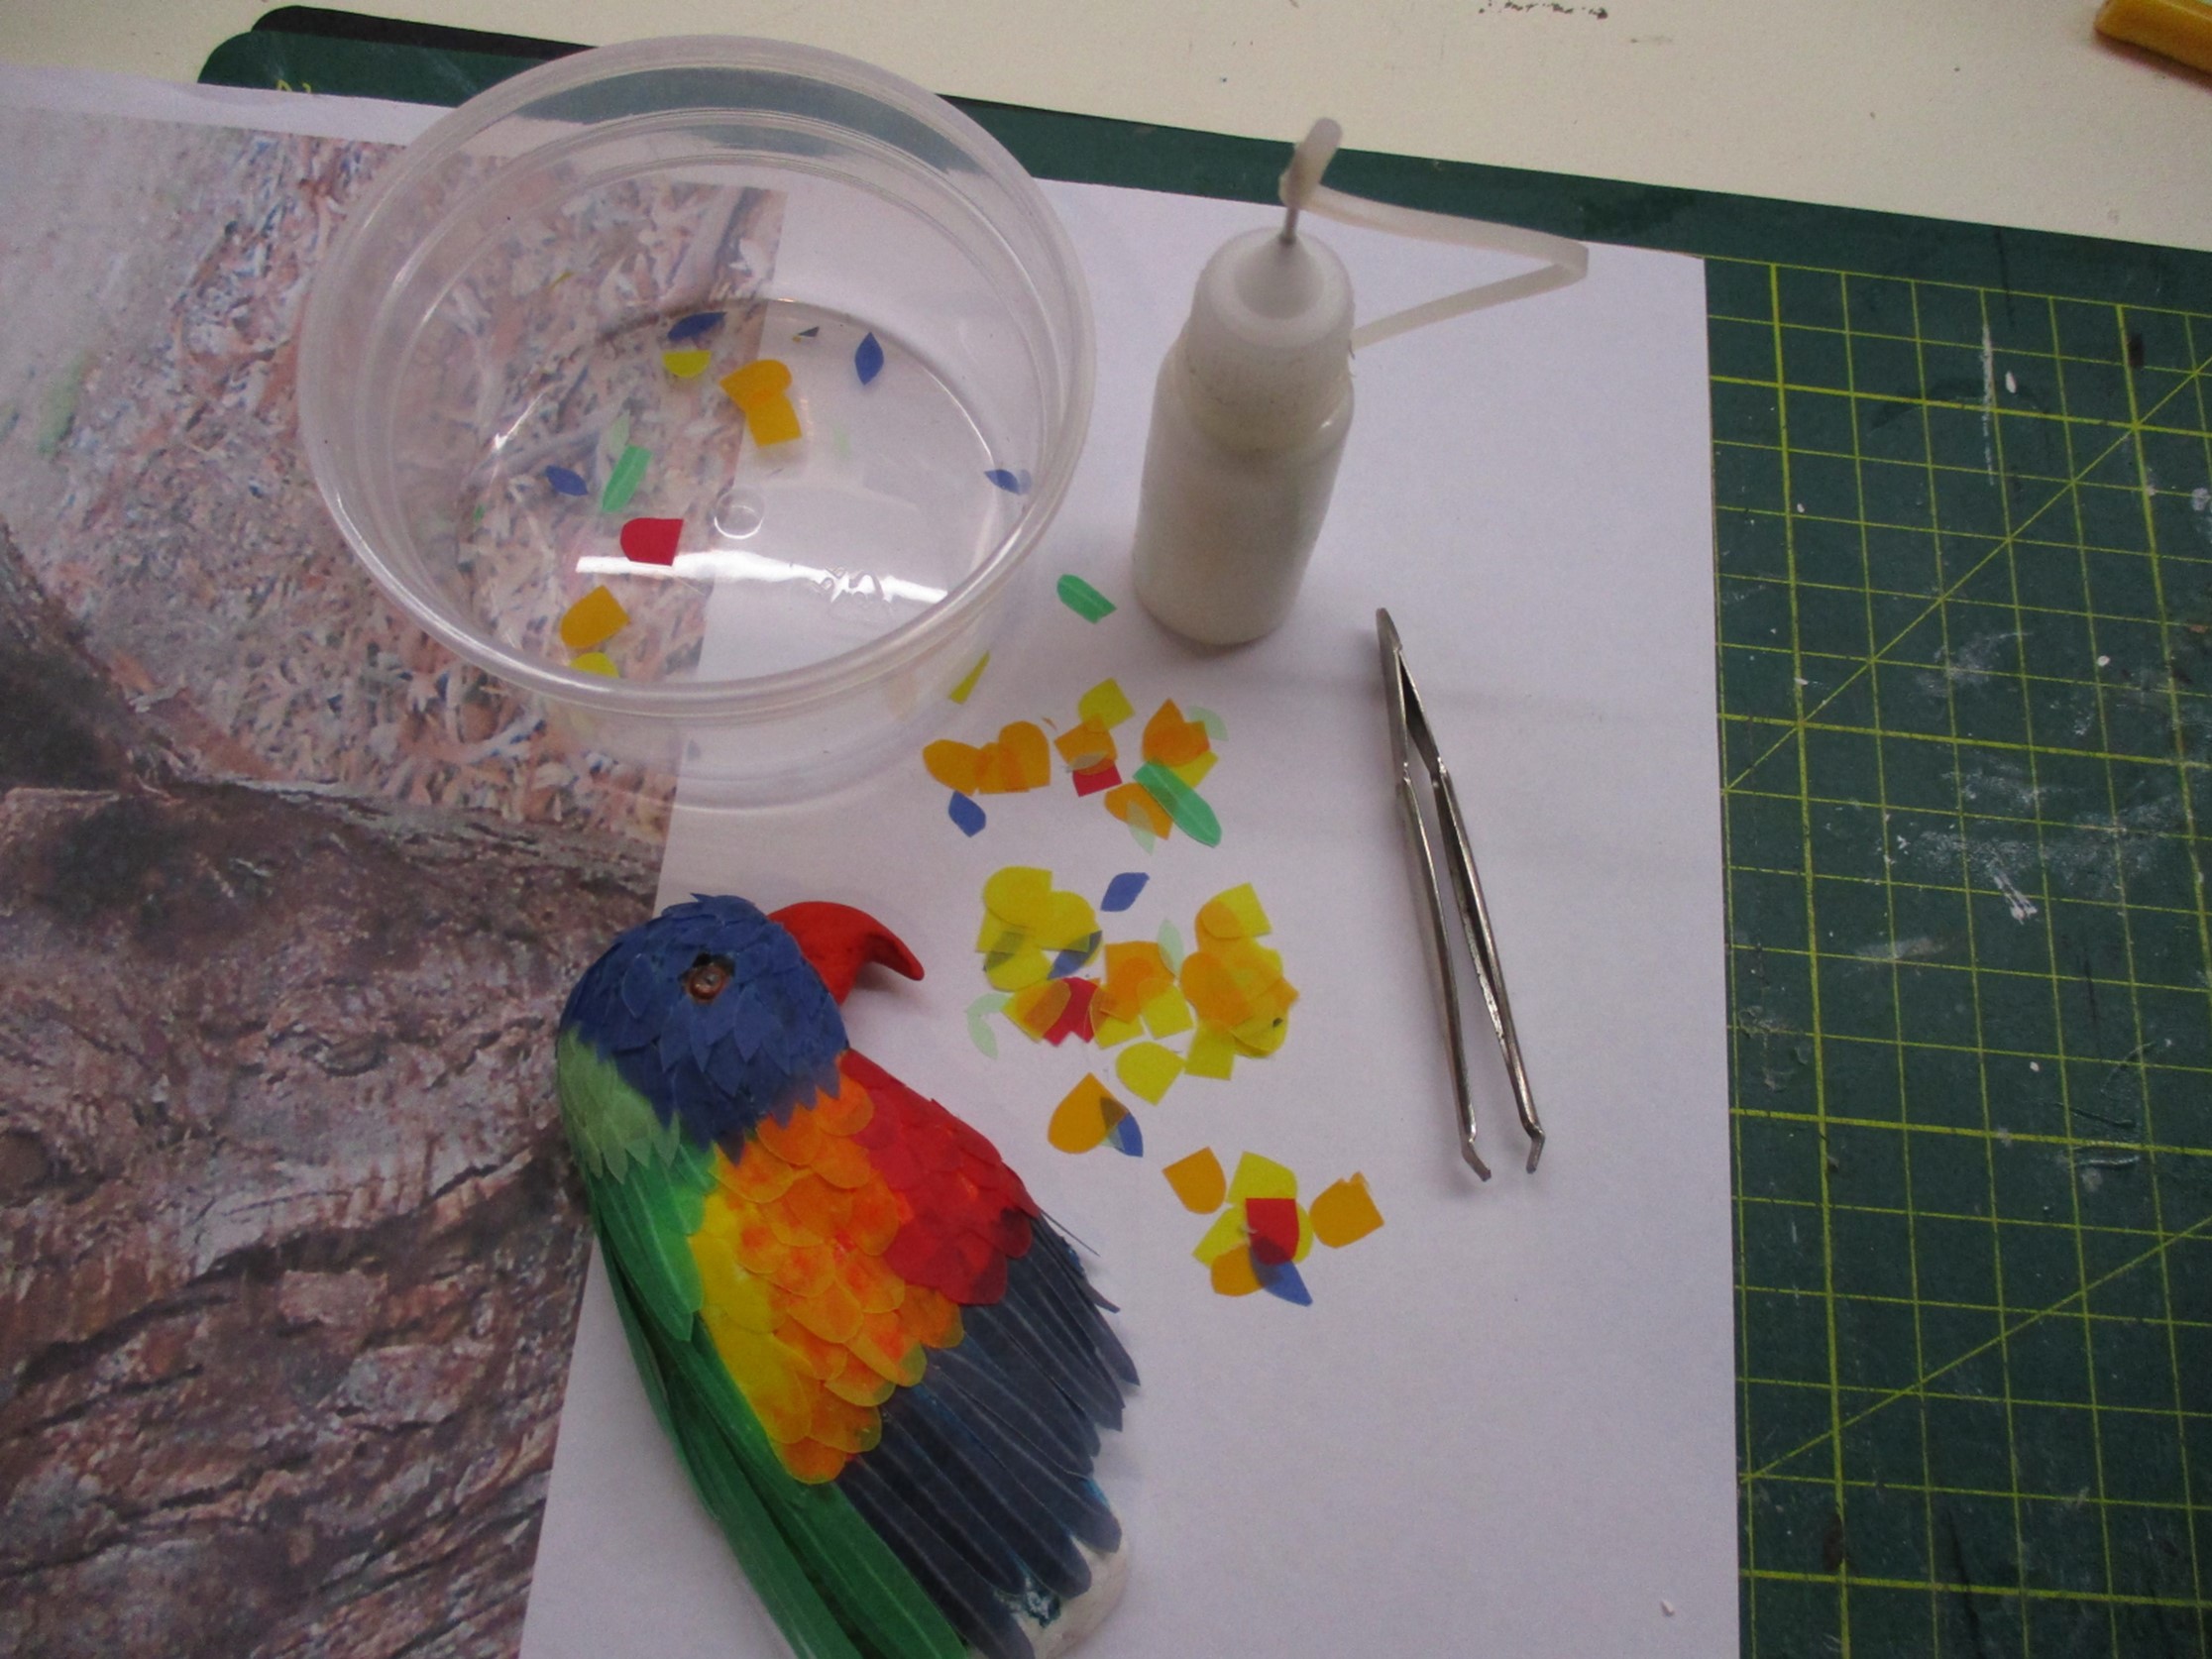
By layering and shaping prints of the photos and using cast paper mulch to build them out, I’ve created 3D settings for little creatures made from paper clay. The parts added to the photos (the paper mulch bark and stones, and paper clay creatures) are painted and sealed. As I wasn’t pleased with the painted results on the lorikeets, I finished them with tiny paper feathers. One of the most difficult aspects of these pieces is constructing the whole thing into a frame!
(Click near the top of the pictures below to enlarge)
Shy Possums
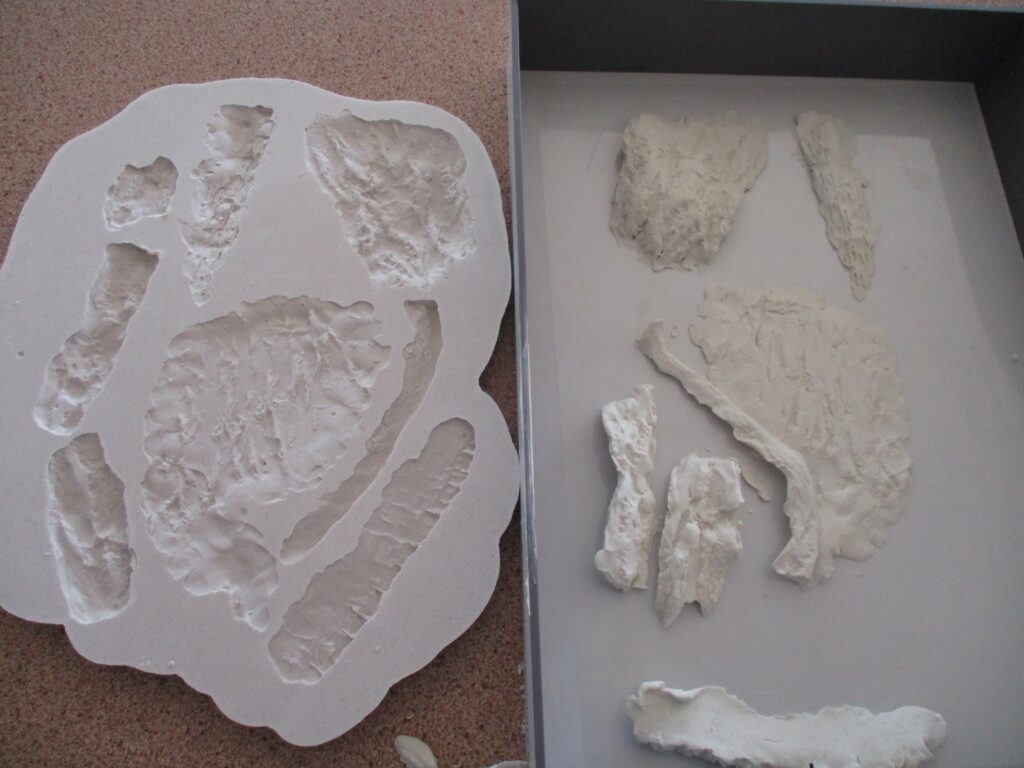
Casting paper mulch 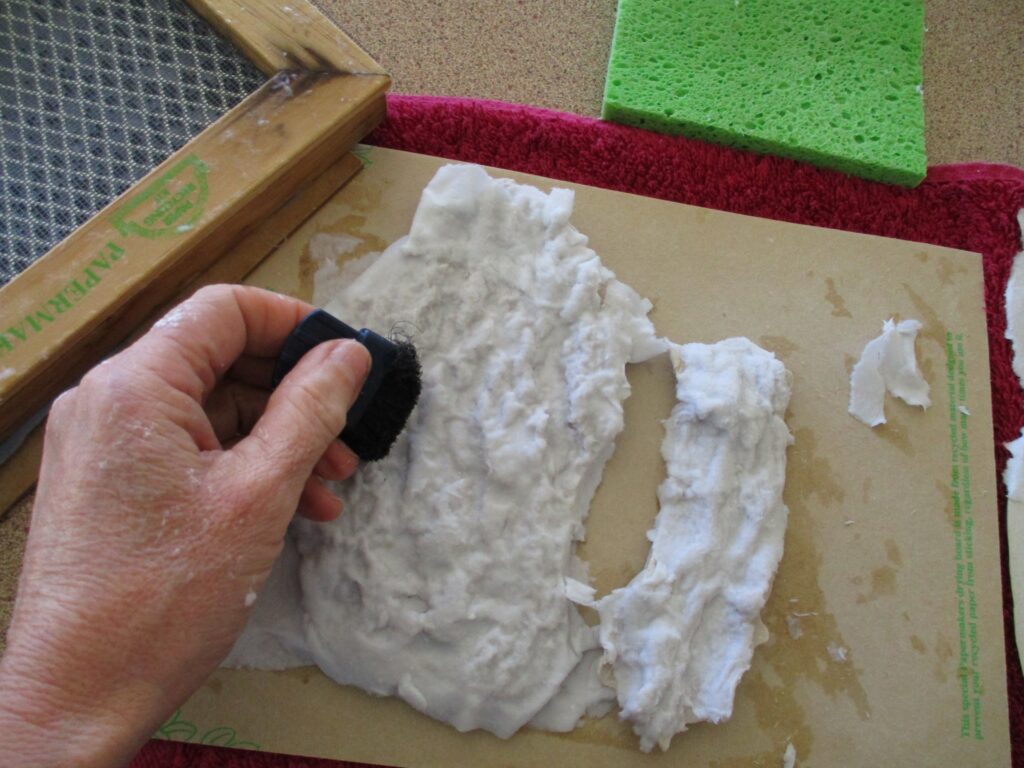
Texturing ‘bark’ 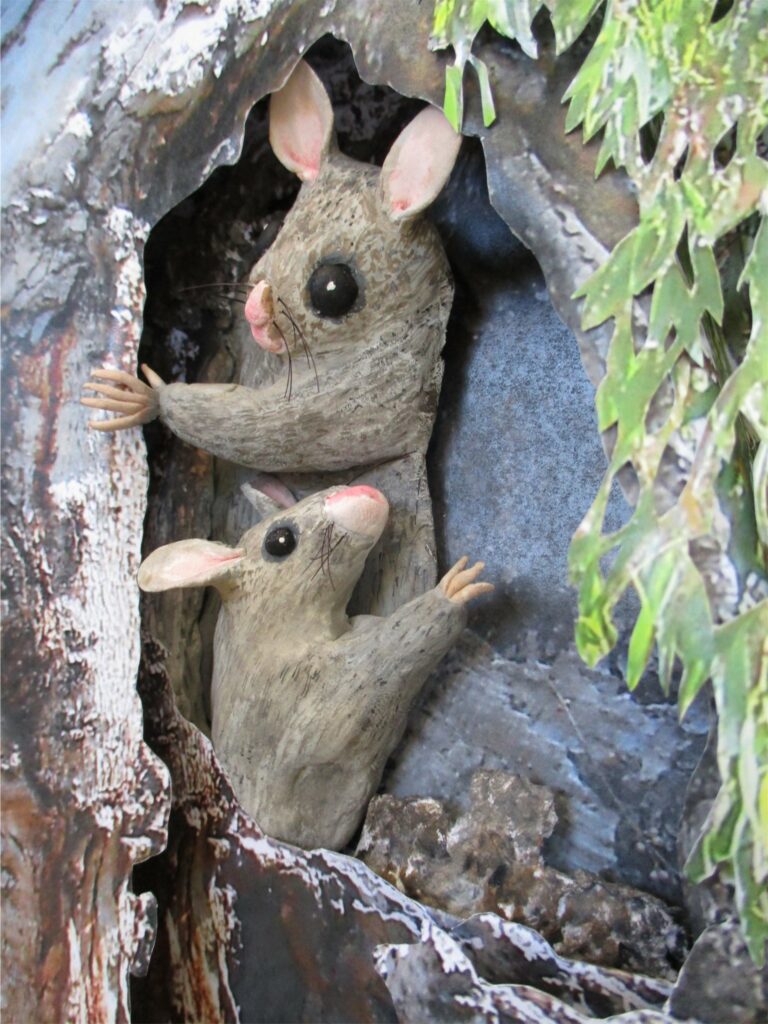
Possums
Seagull lookout
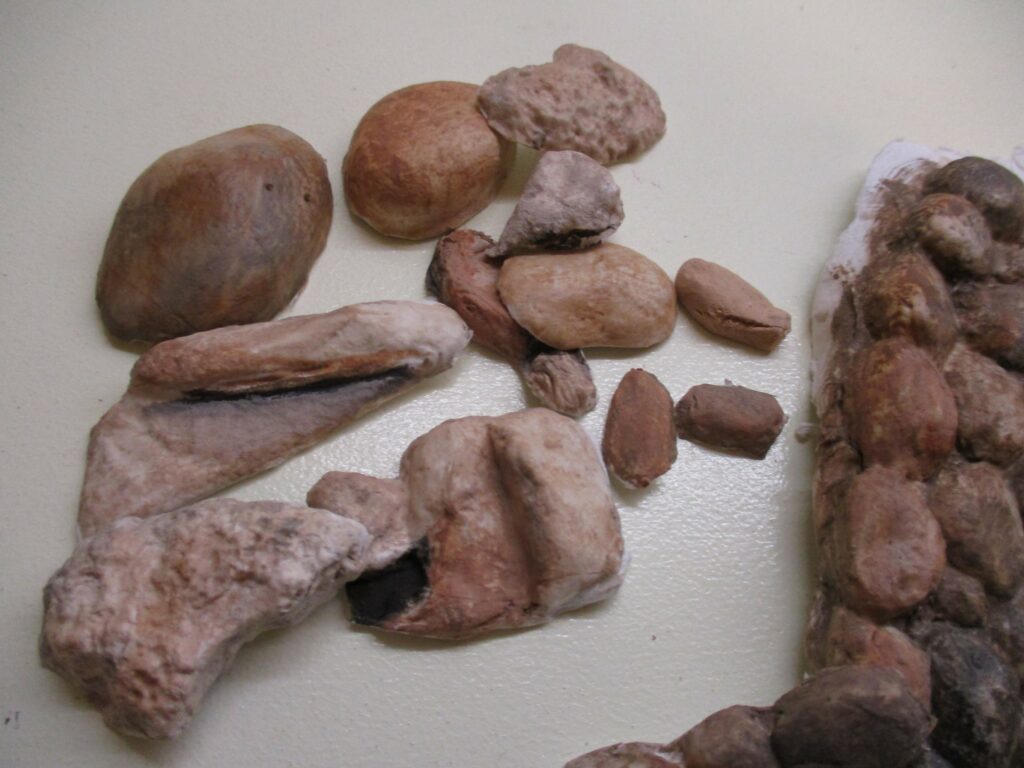
Moulded paper stones 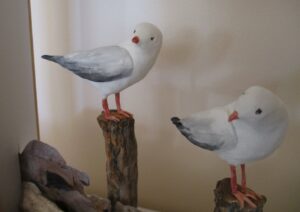
Paper clay seagulls 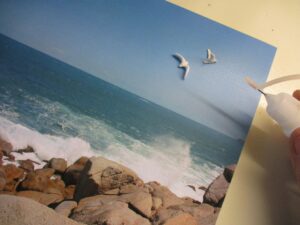
Gluing the flying gulls


Rainbow Lorikeets
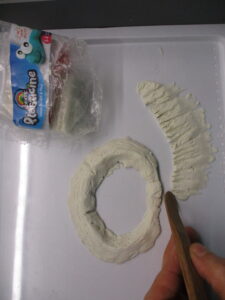
Sculpting the bark rings 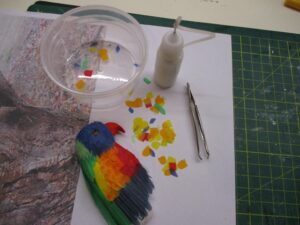
Gluing the feathers 
Finding a home
Brush-tailed Possum
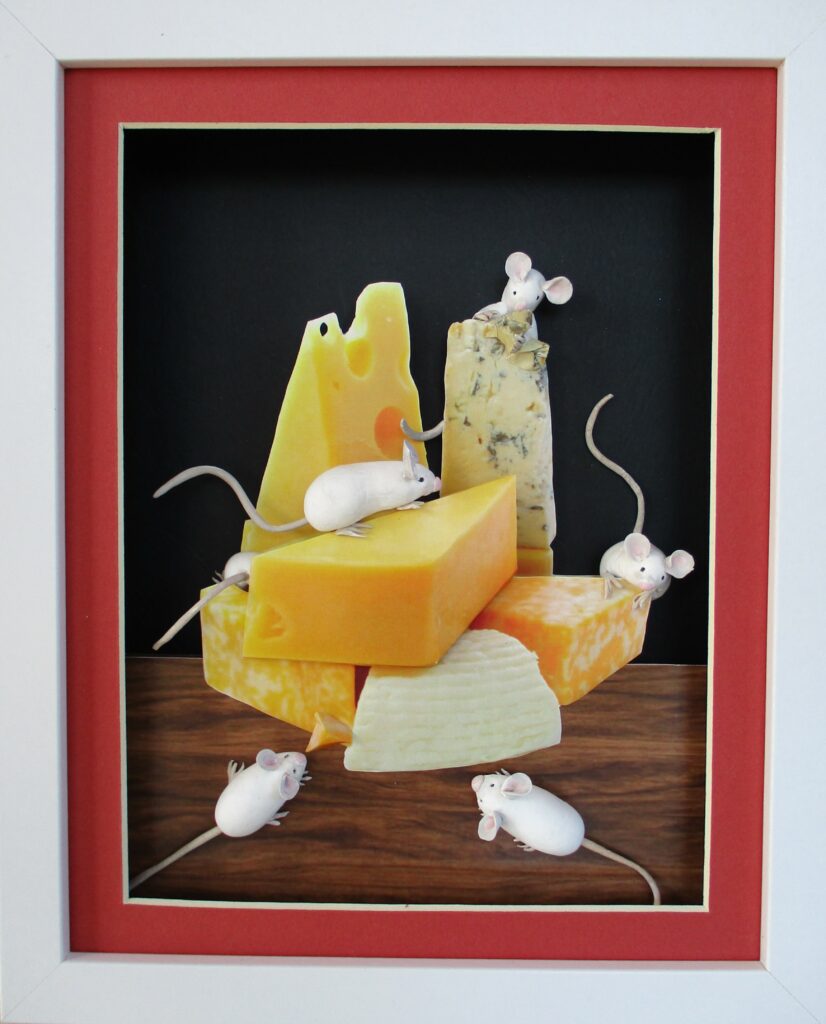
Mouse Heaven