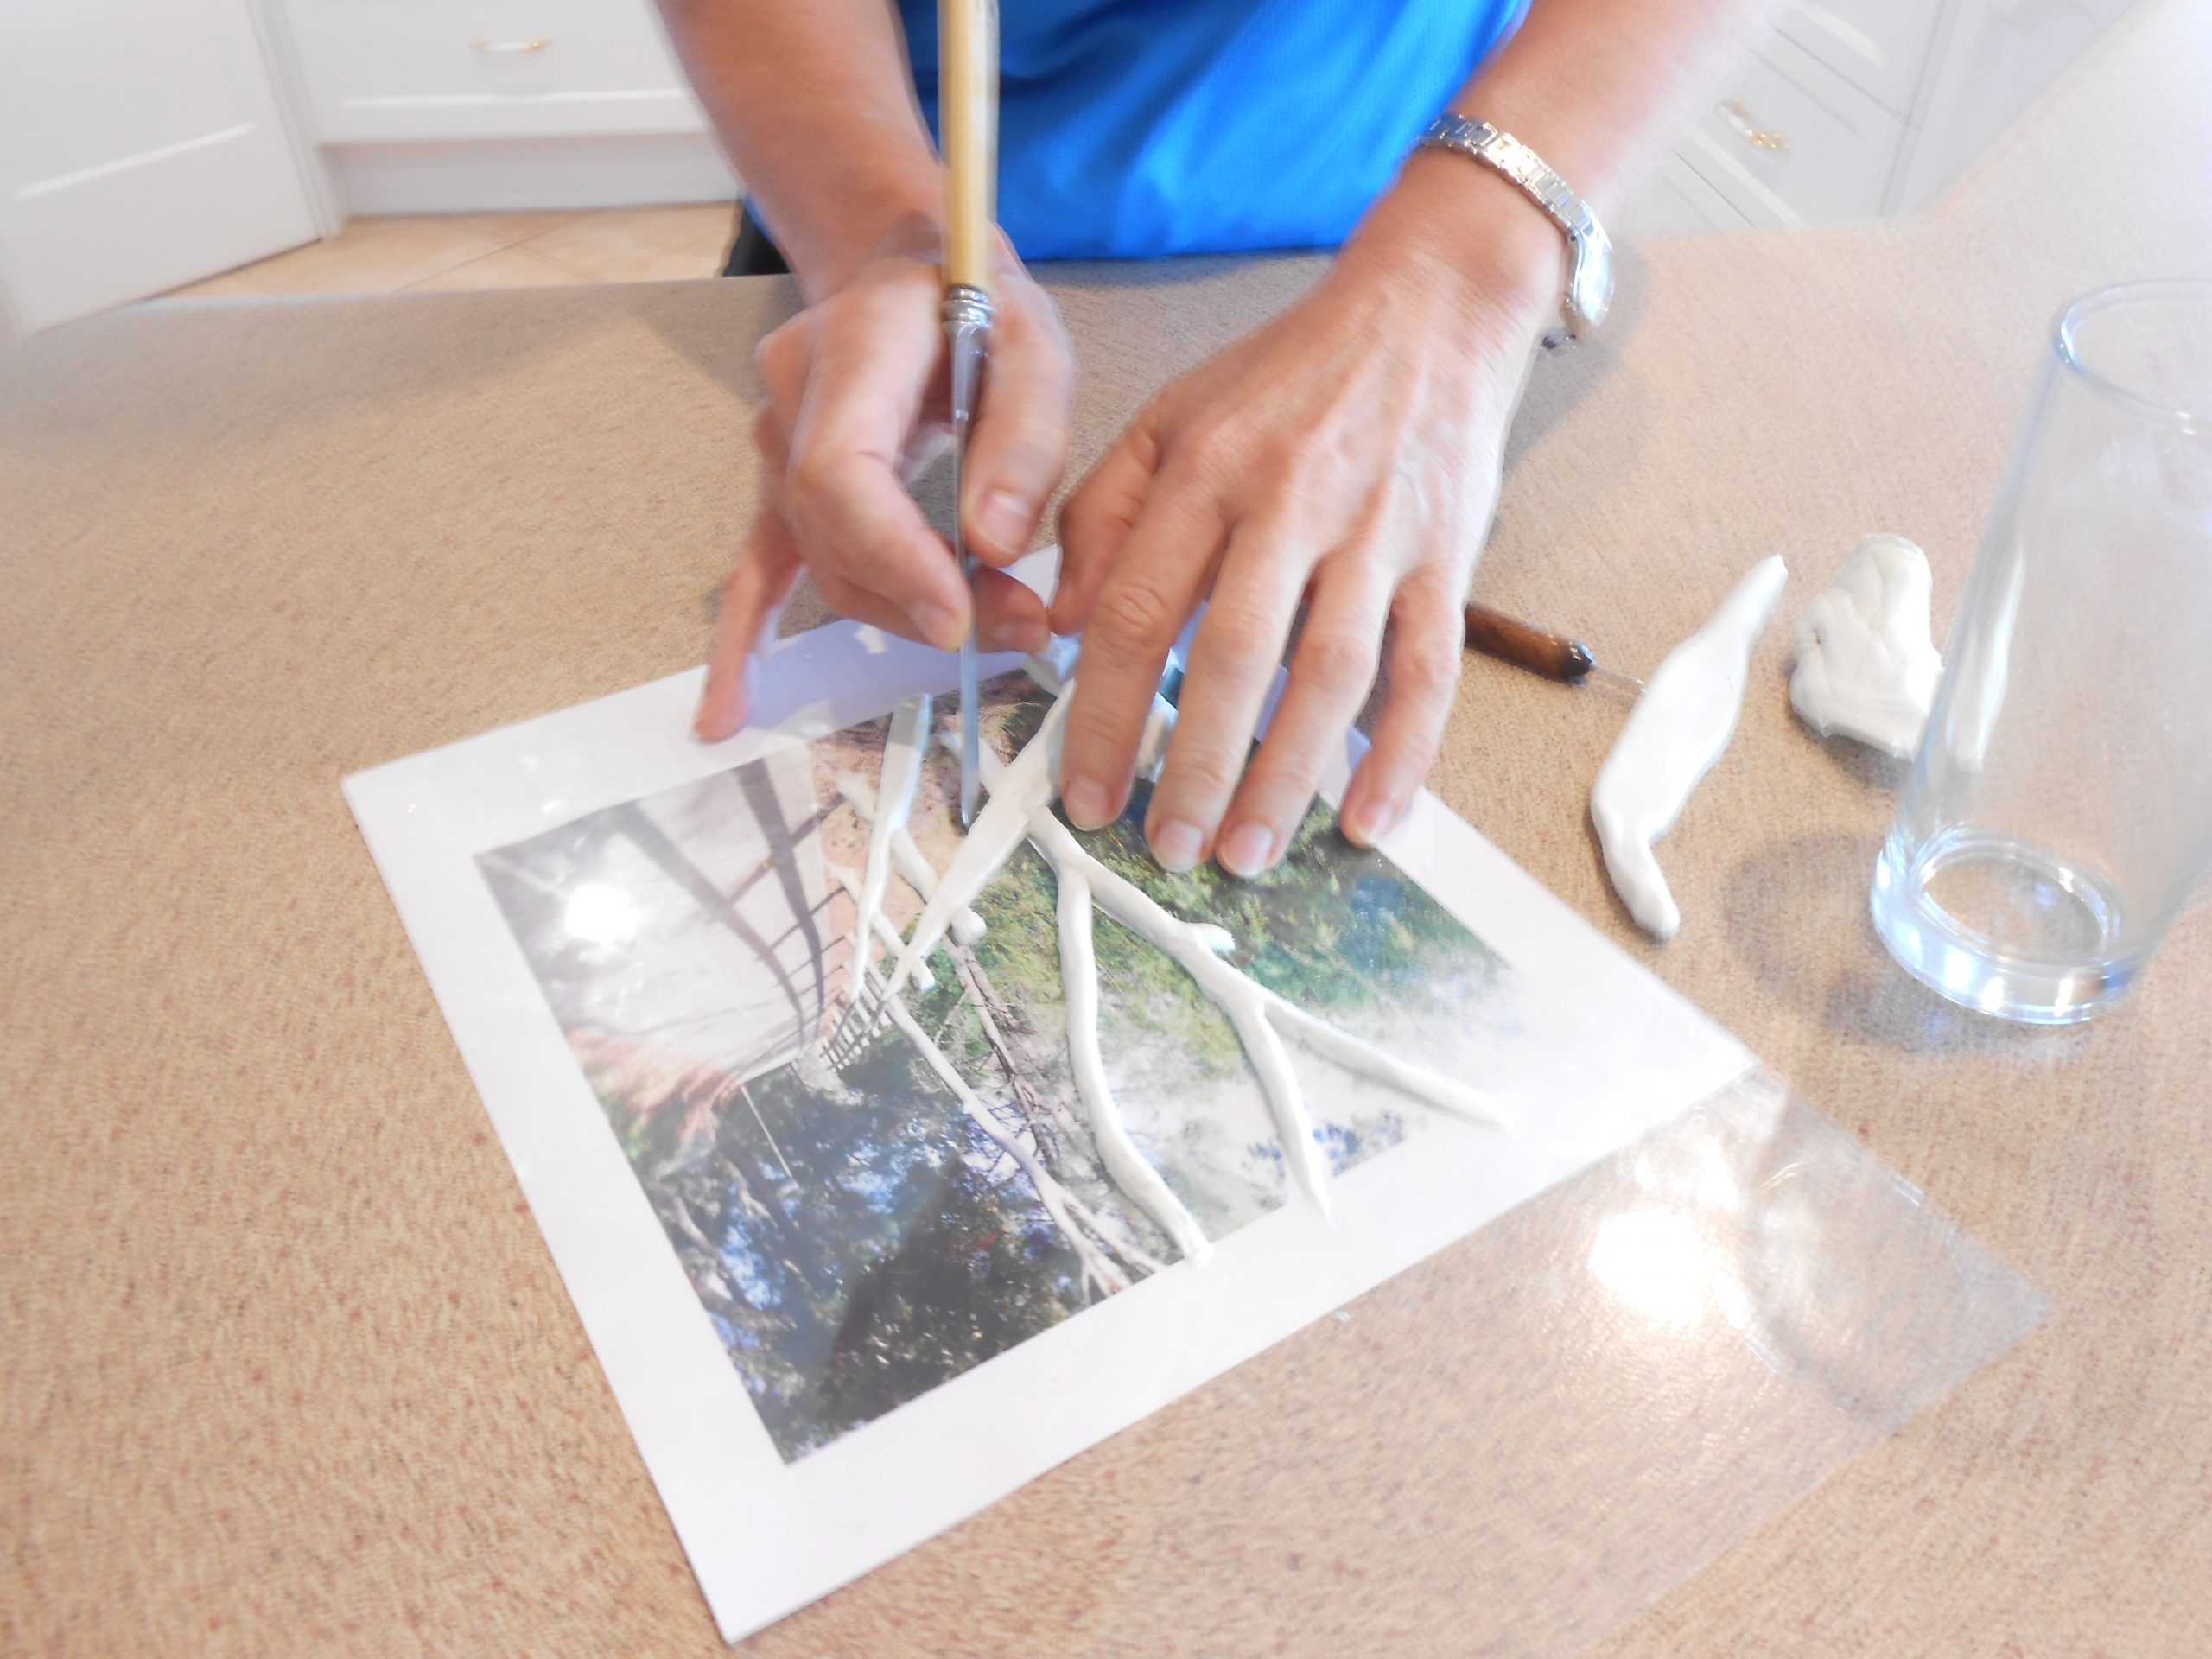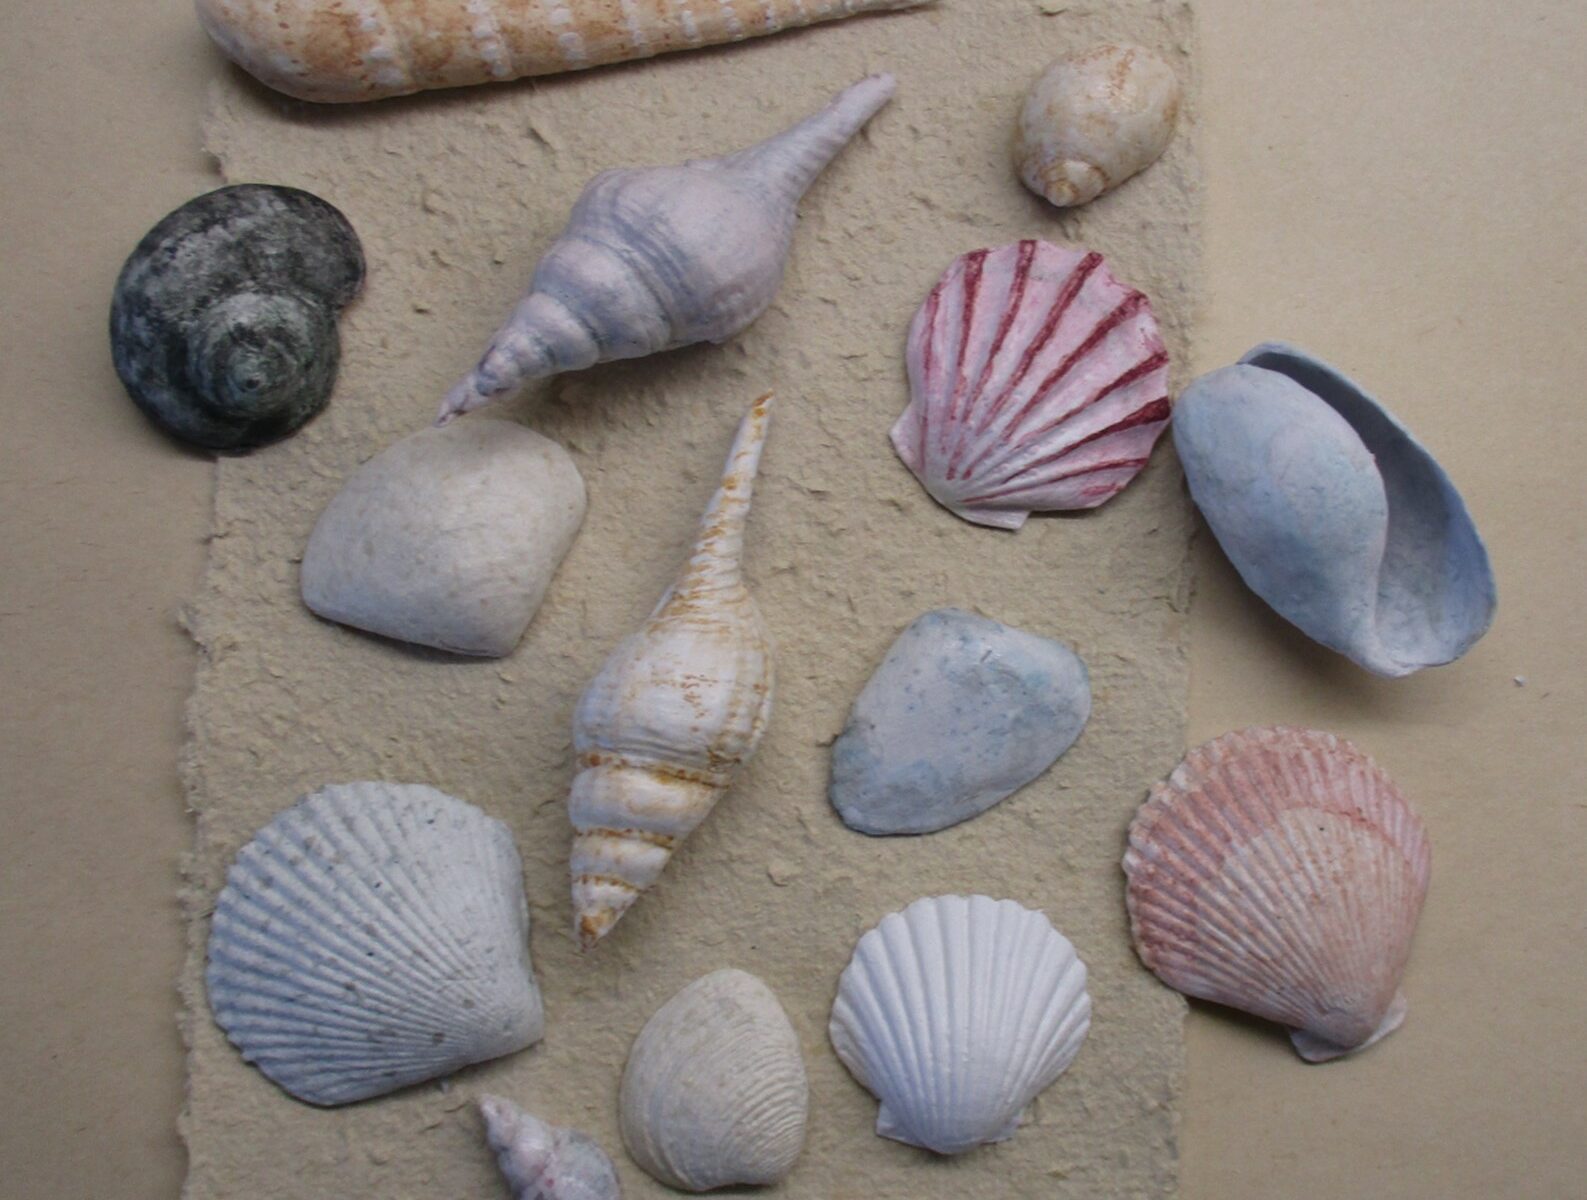
Over the years I’ve collected a number of shells and I’ve often wondered if they could be ReCreated in paper. Ultimately, my goal is to incorporate them into art pieces*, so this project is the first stage.
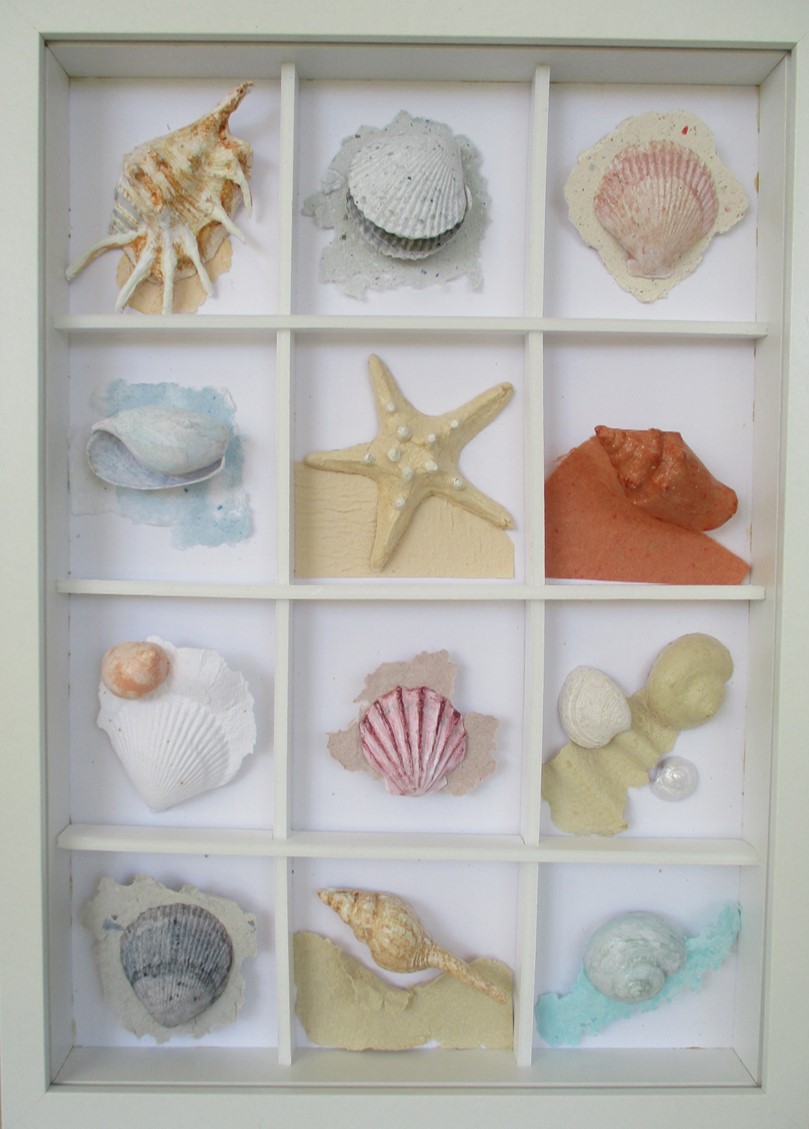
Q: Can you guess which of the shells in the image above are real and which are paper?
(Answer is at the end of this post!)
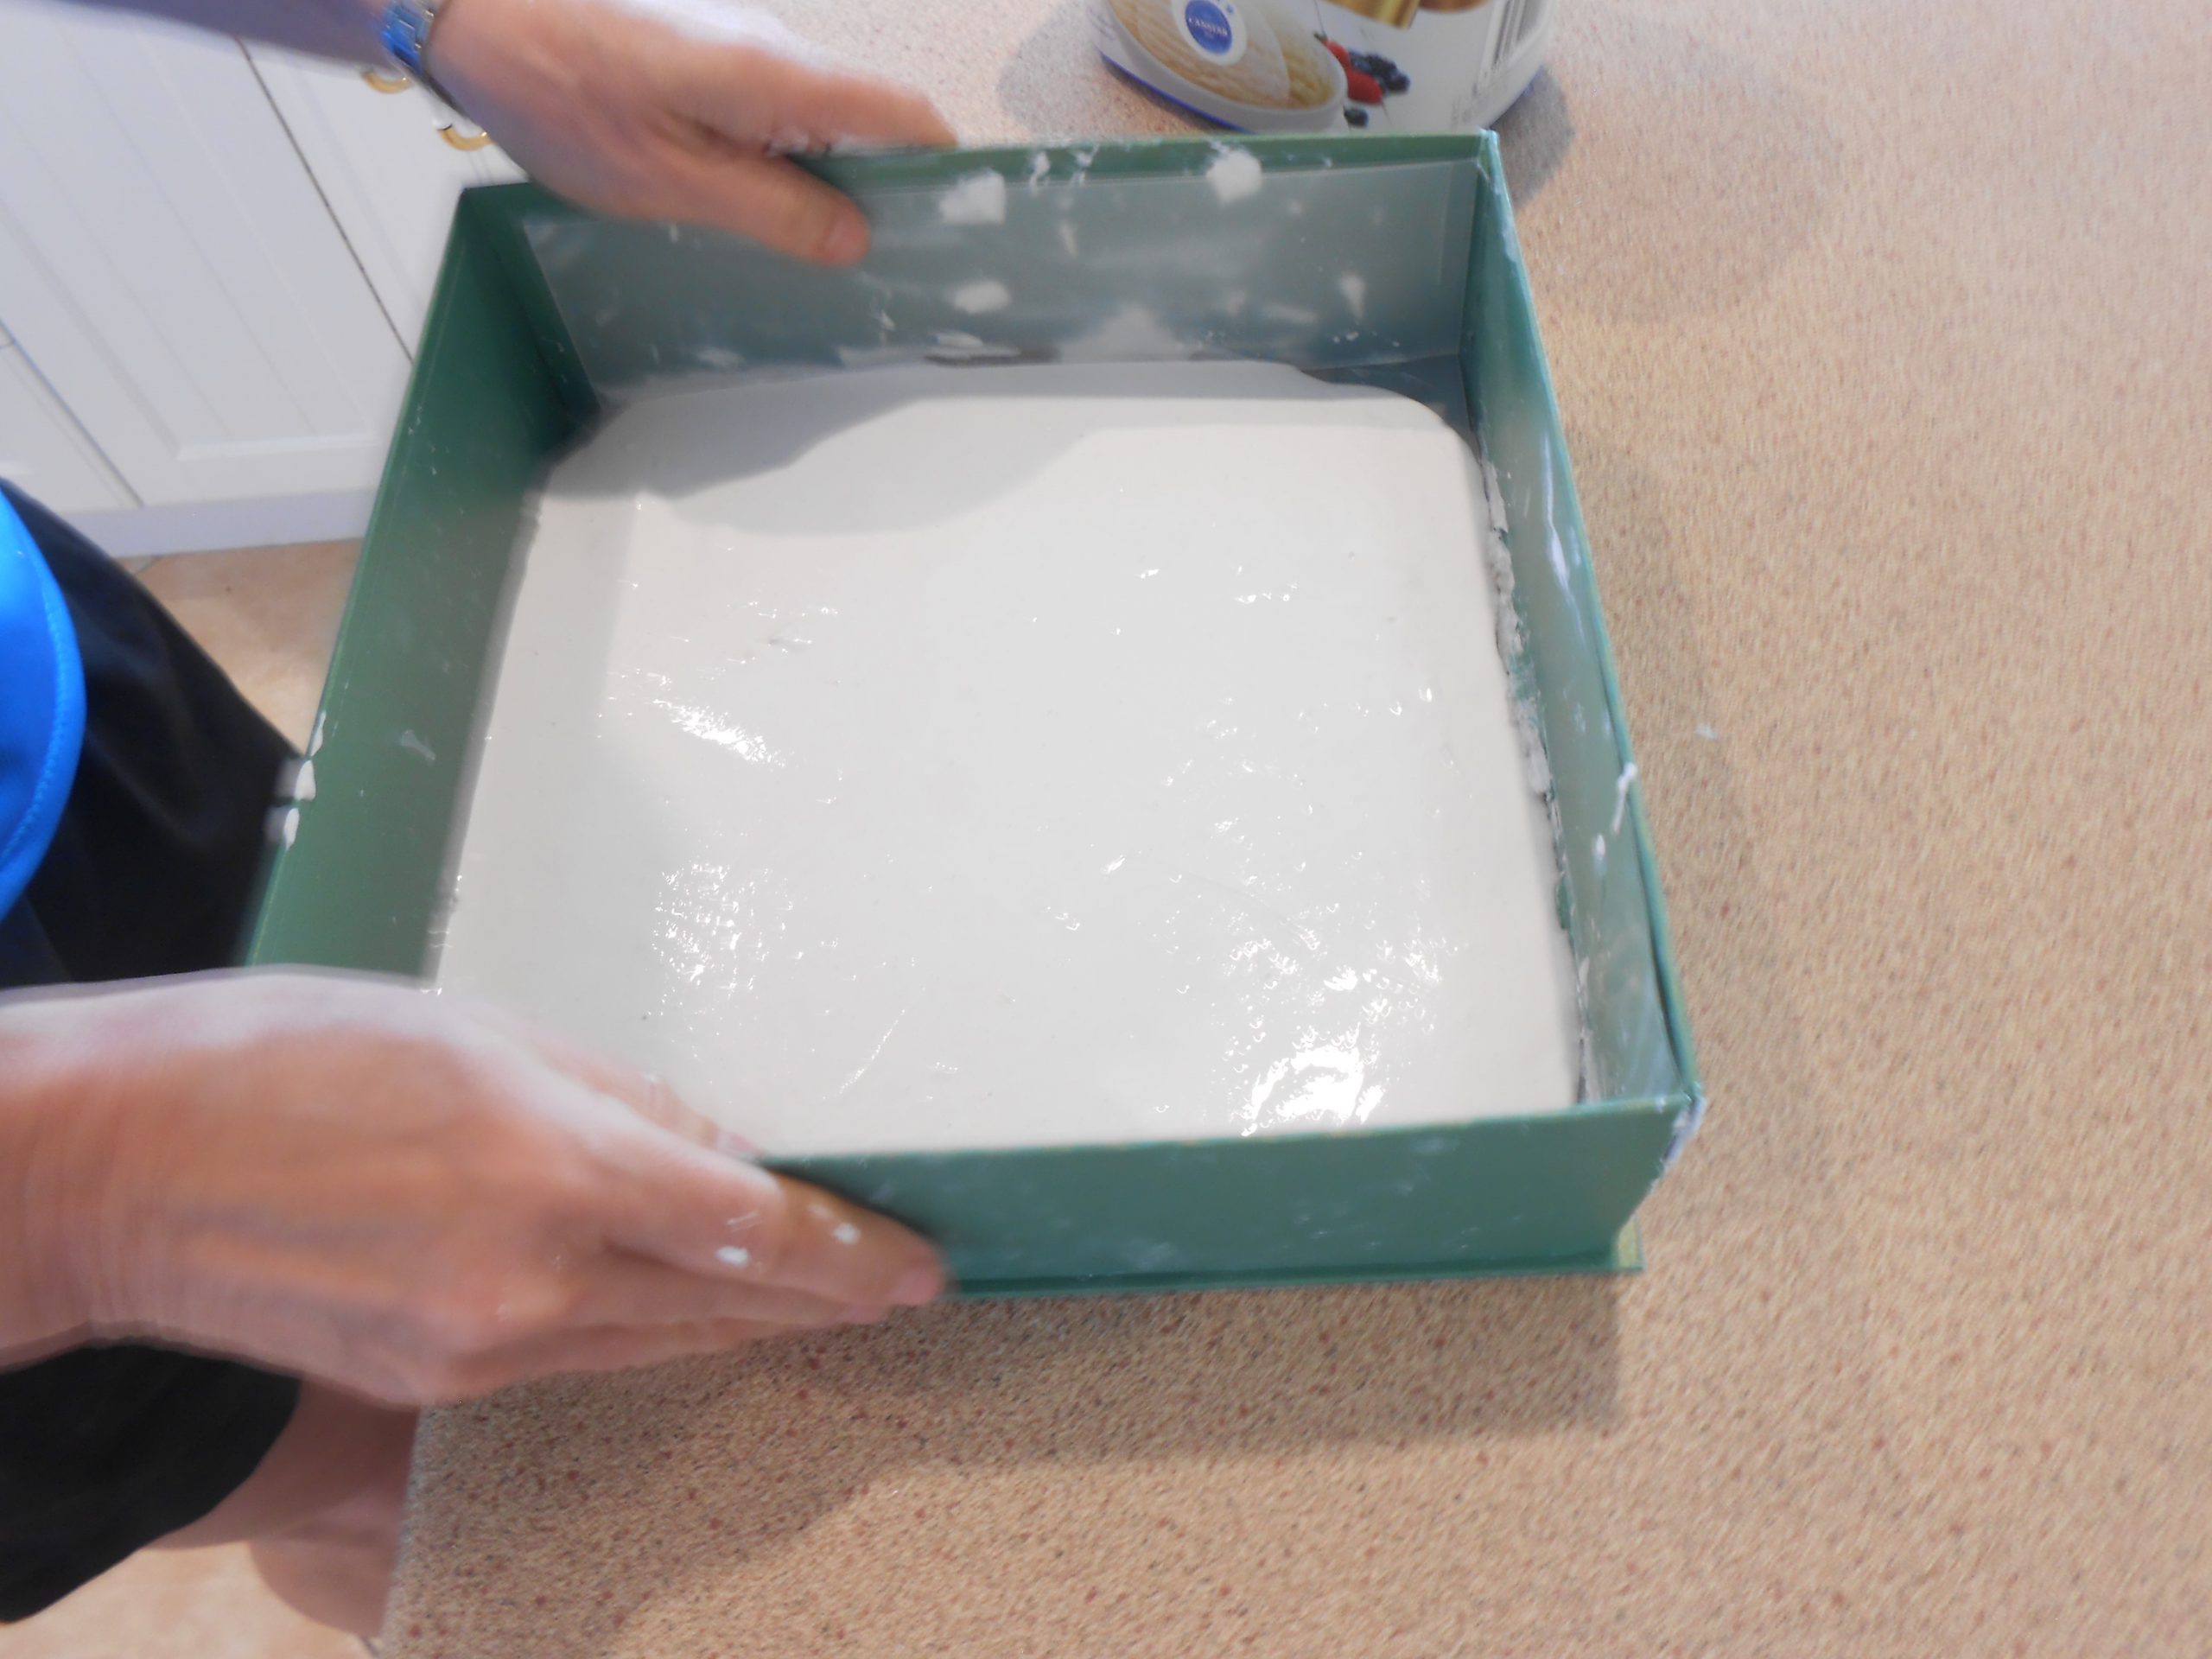
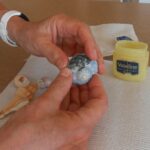
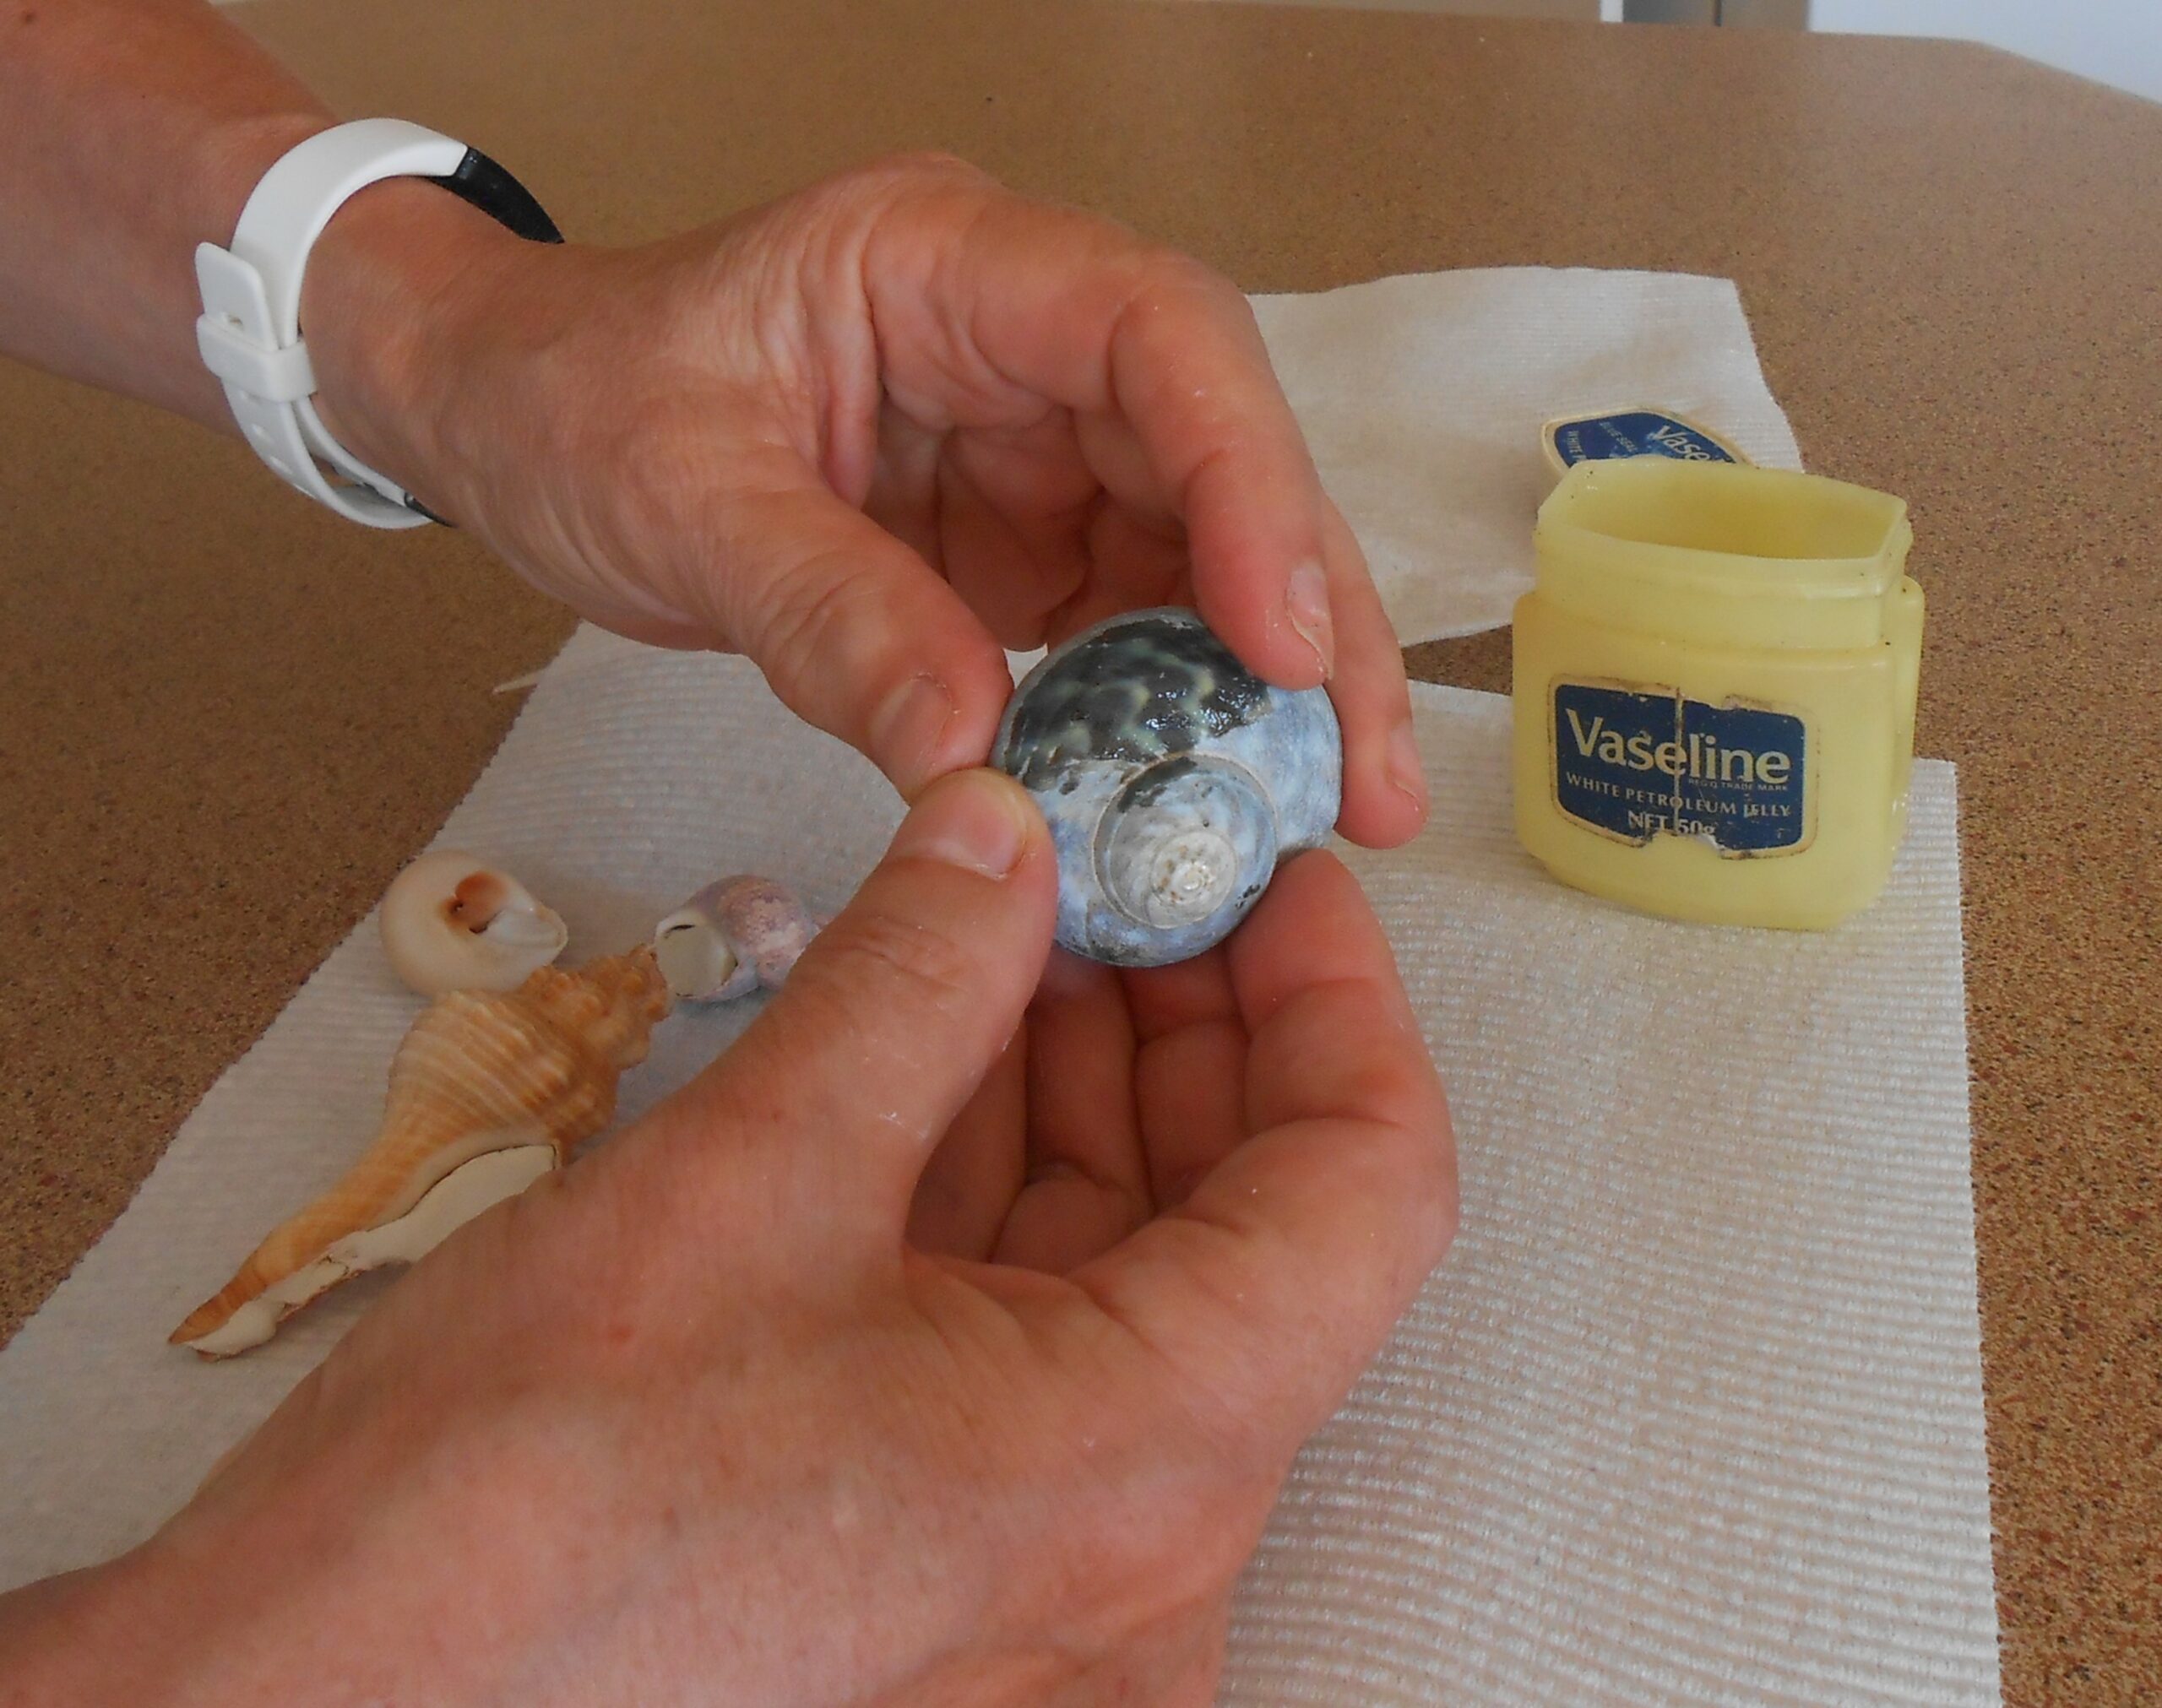
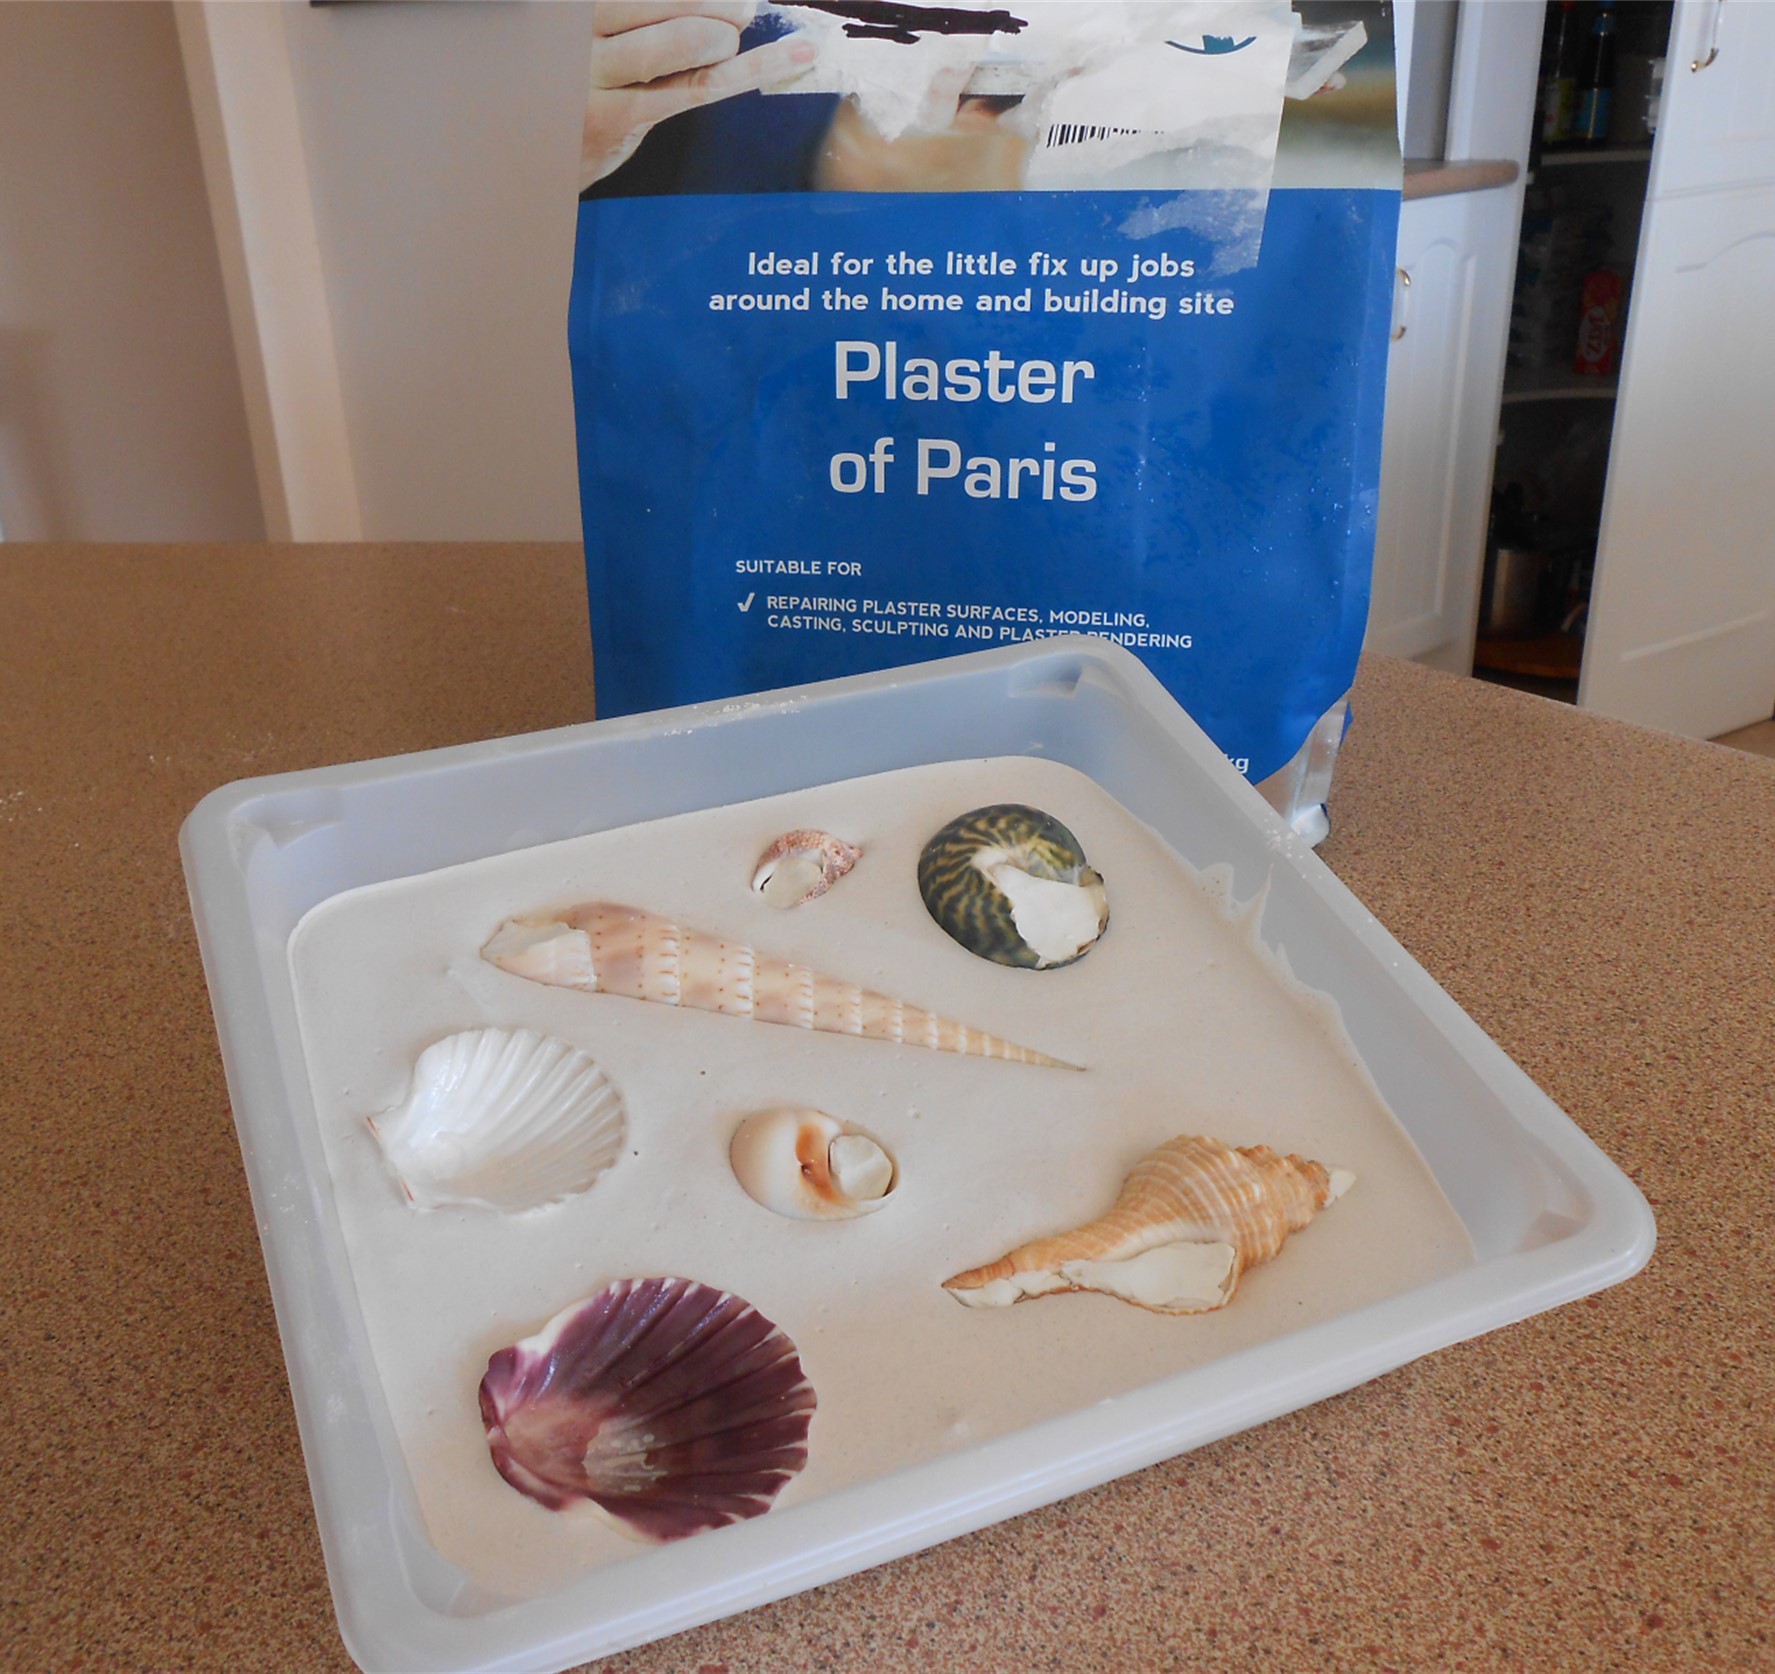
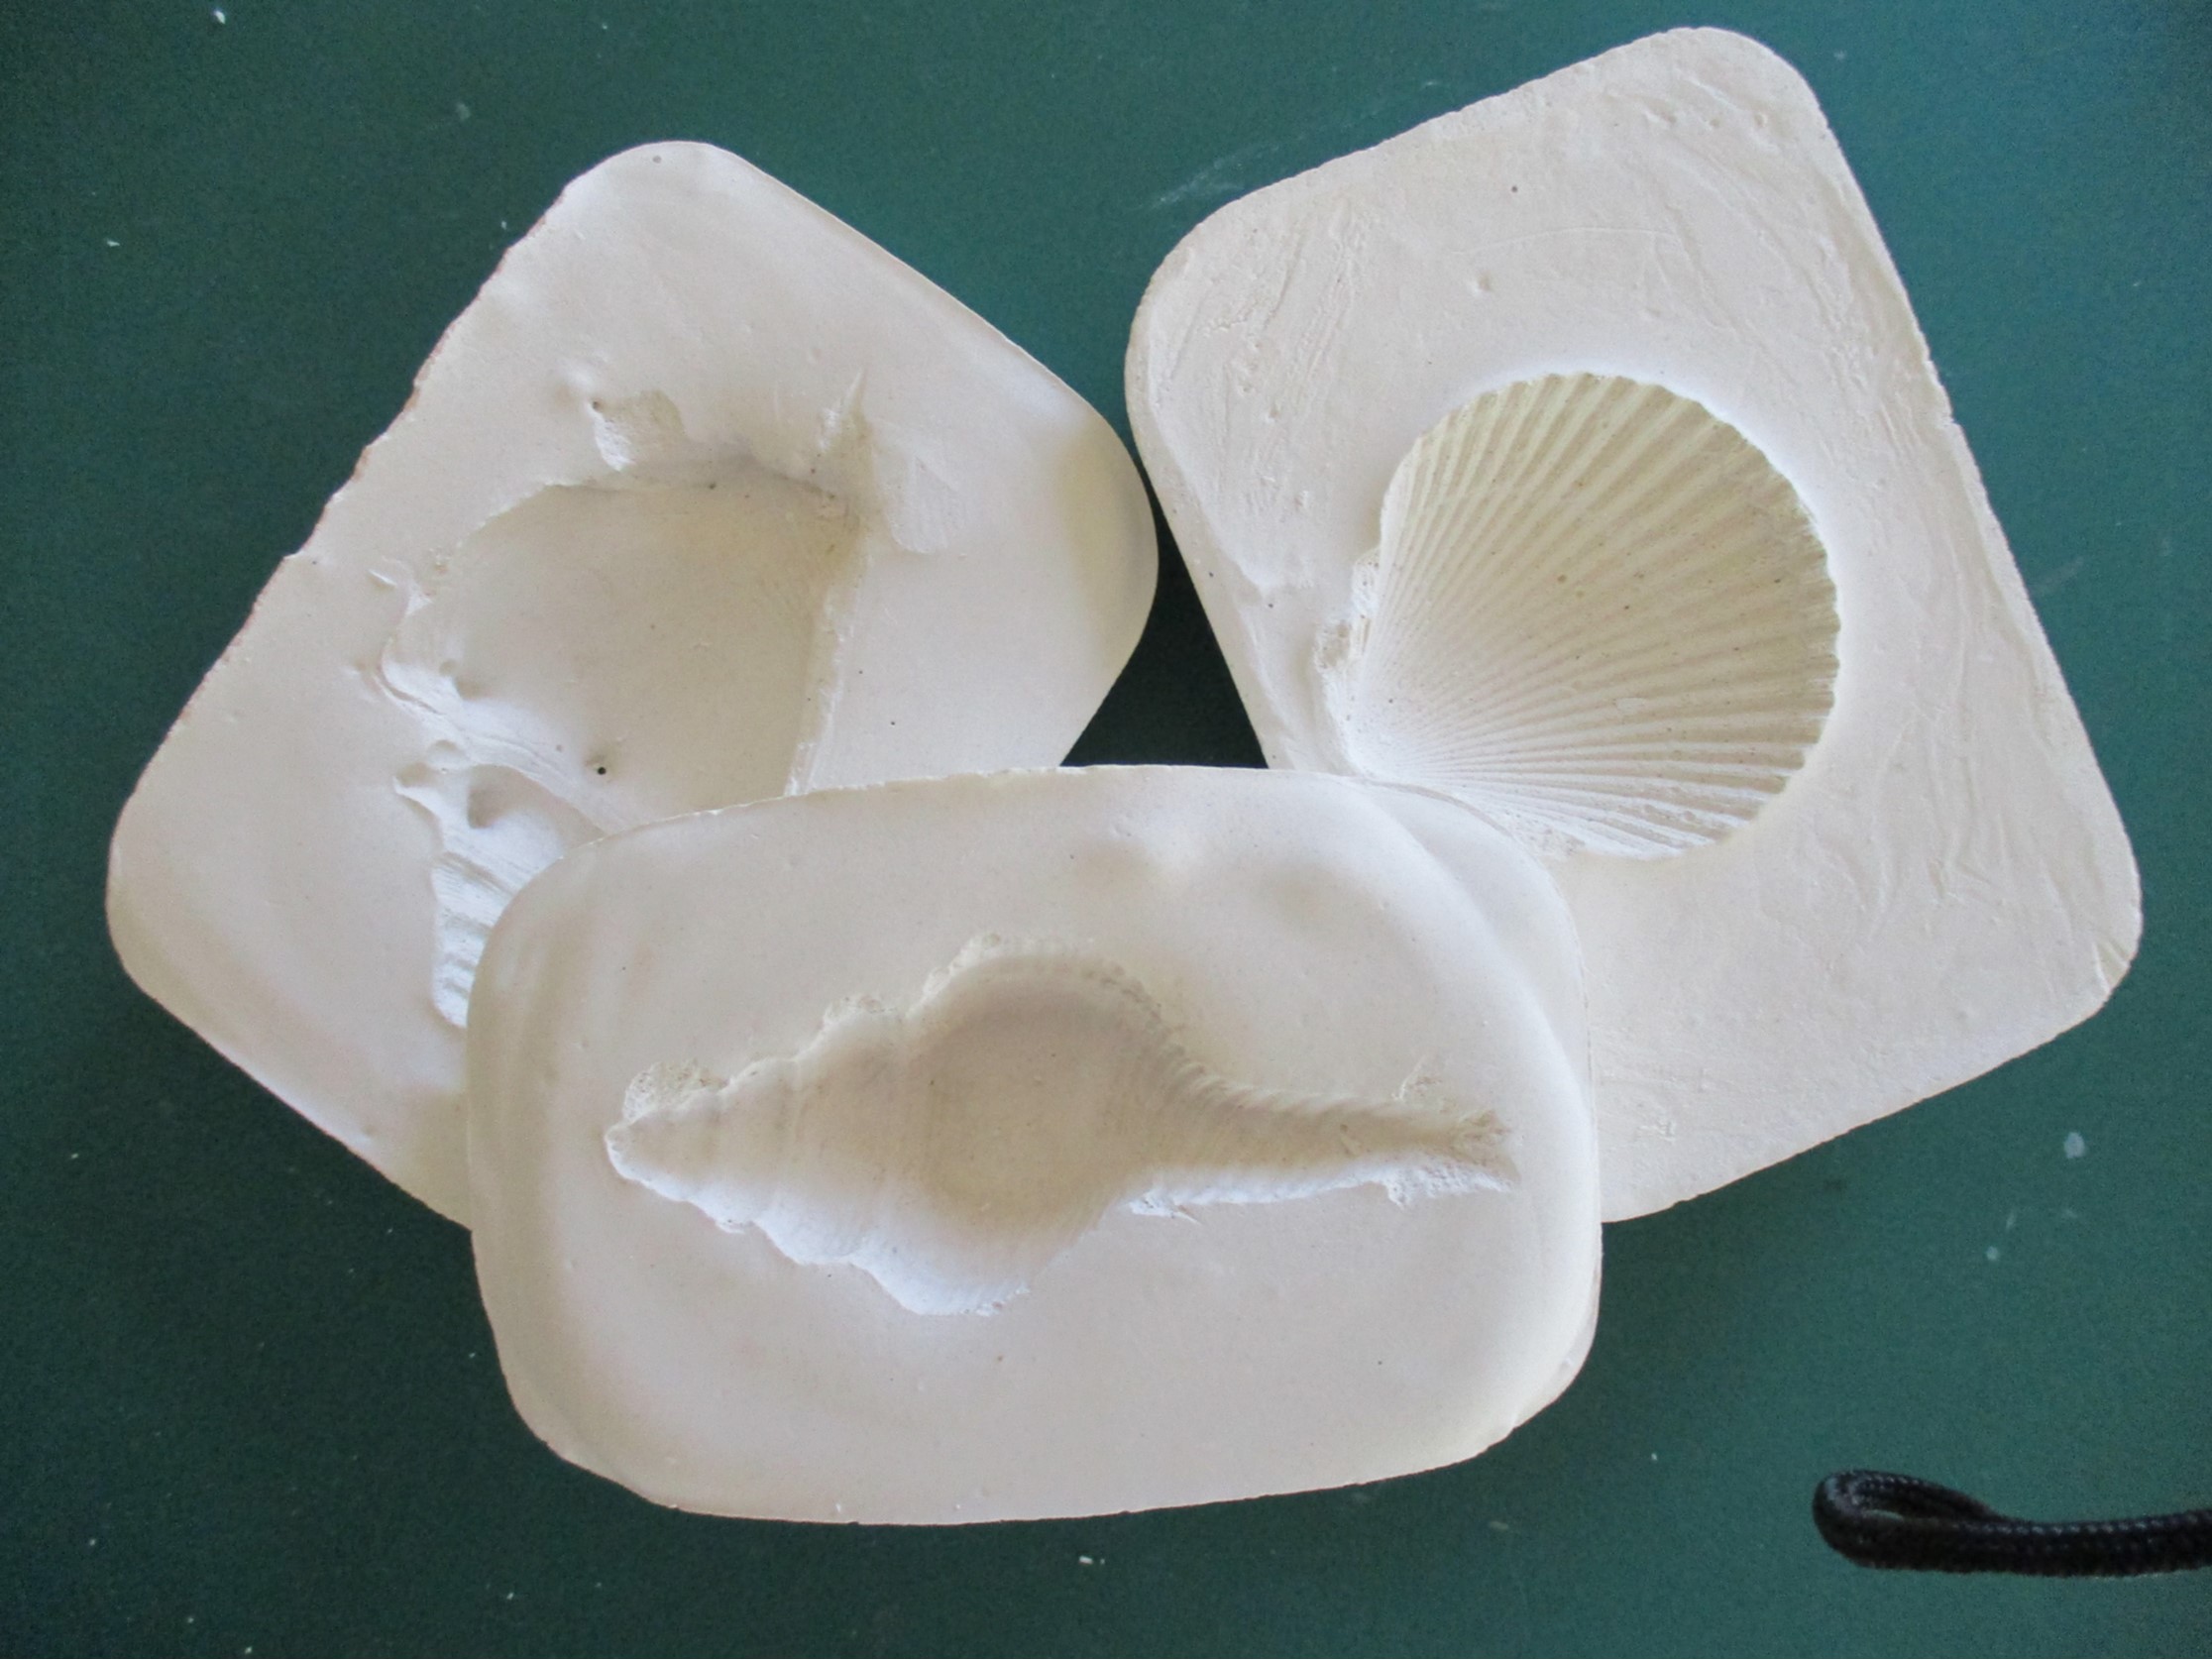
The shells are cast from recycled paper. I make a plaster cast by rubbing Vaseline over the surfaces of shells (cooking oil spray works too) and placing them into a bed of Plaster of Paris. It’s important to make the plaster thick enough so the shells don’t sink further than half way. It’s also important to choose shells that don’t have ridges or curves that will prevent the shell from being lifted when the plaster is dry. As a safeguard, I ‘plug’ the crevices where plaster may leak with plasticine – see image below.
Coating the shells 
Plugging crevices 
Creating the plaster cast

When the plaster is completely dry, the shells are gently lifted out.
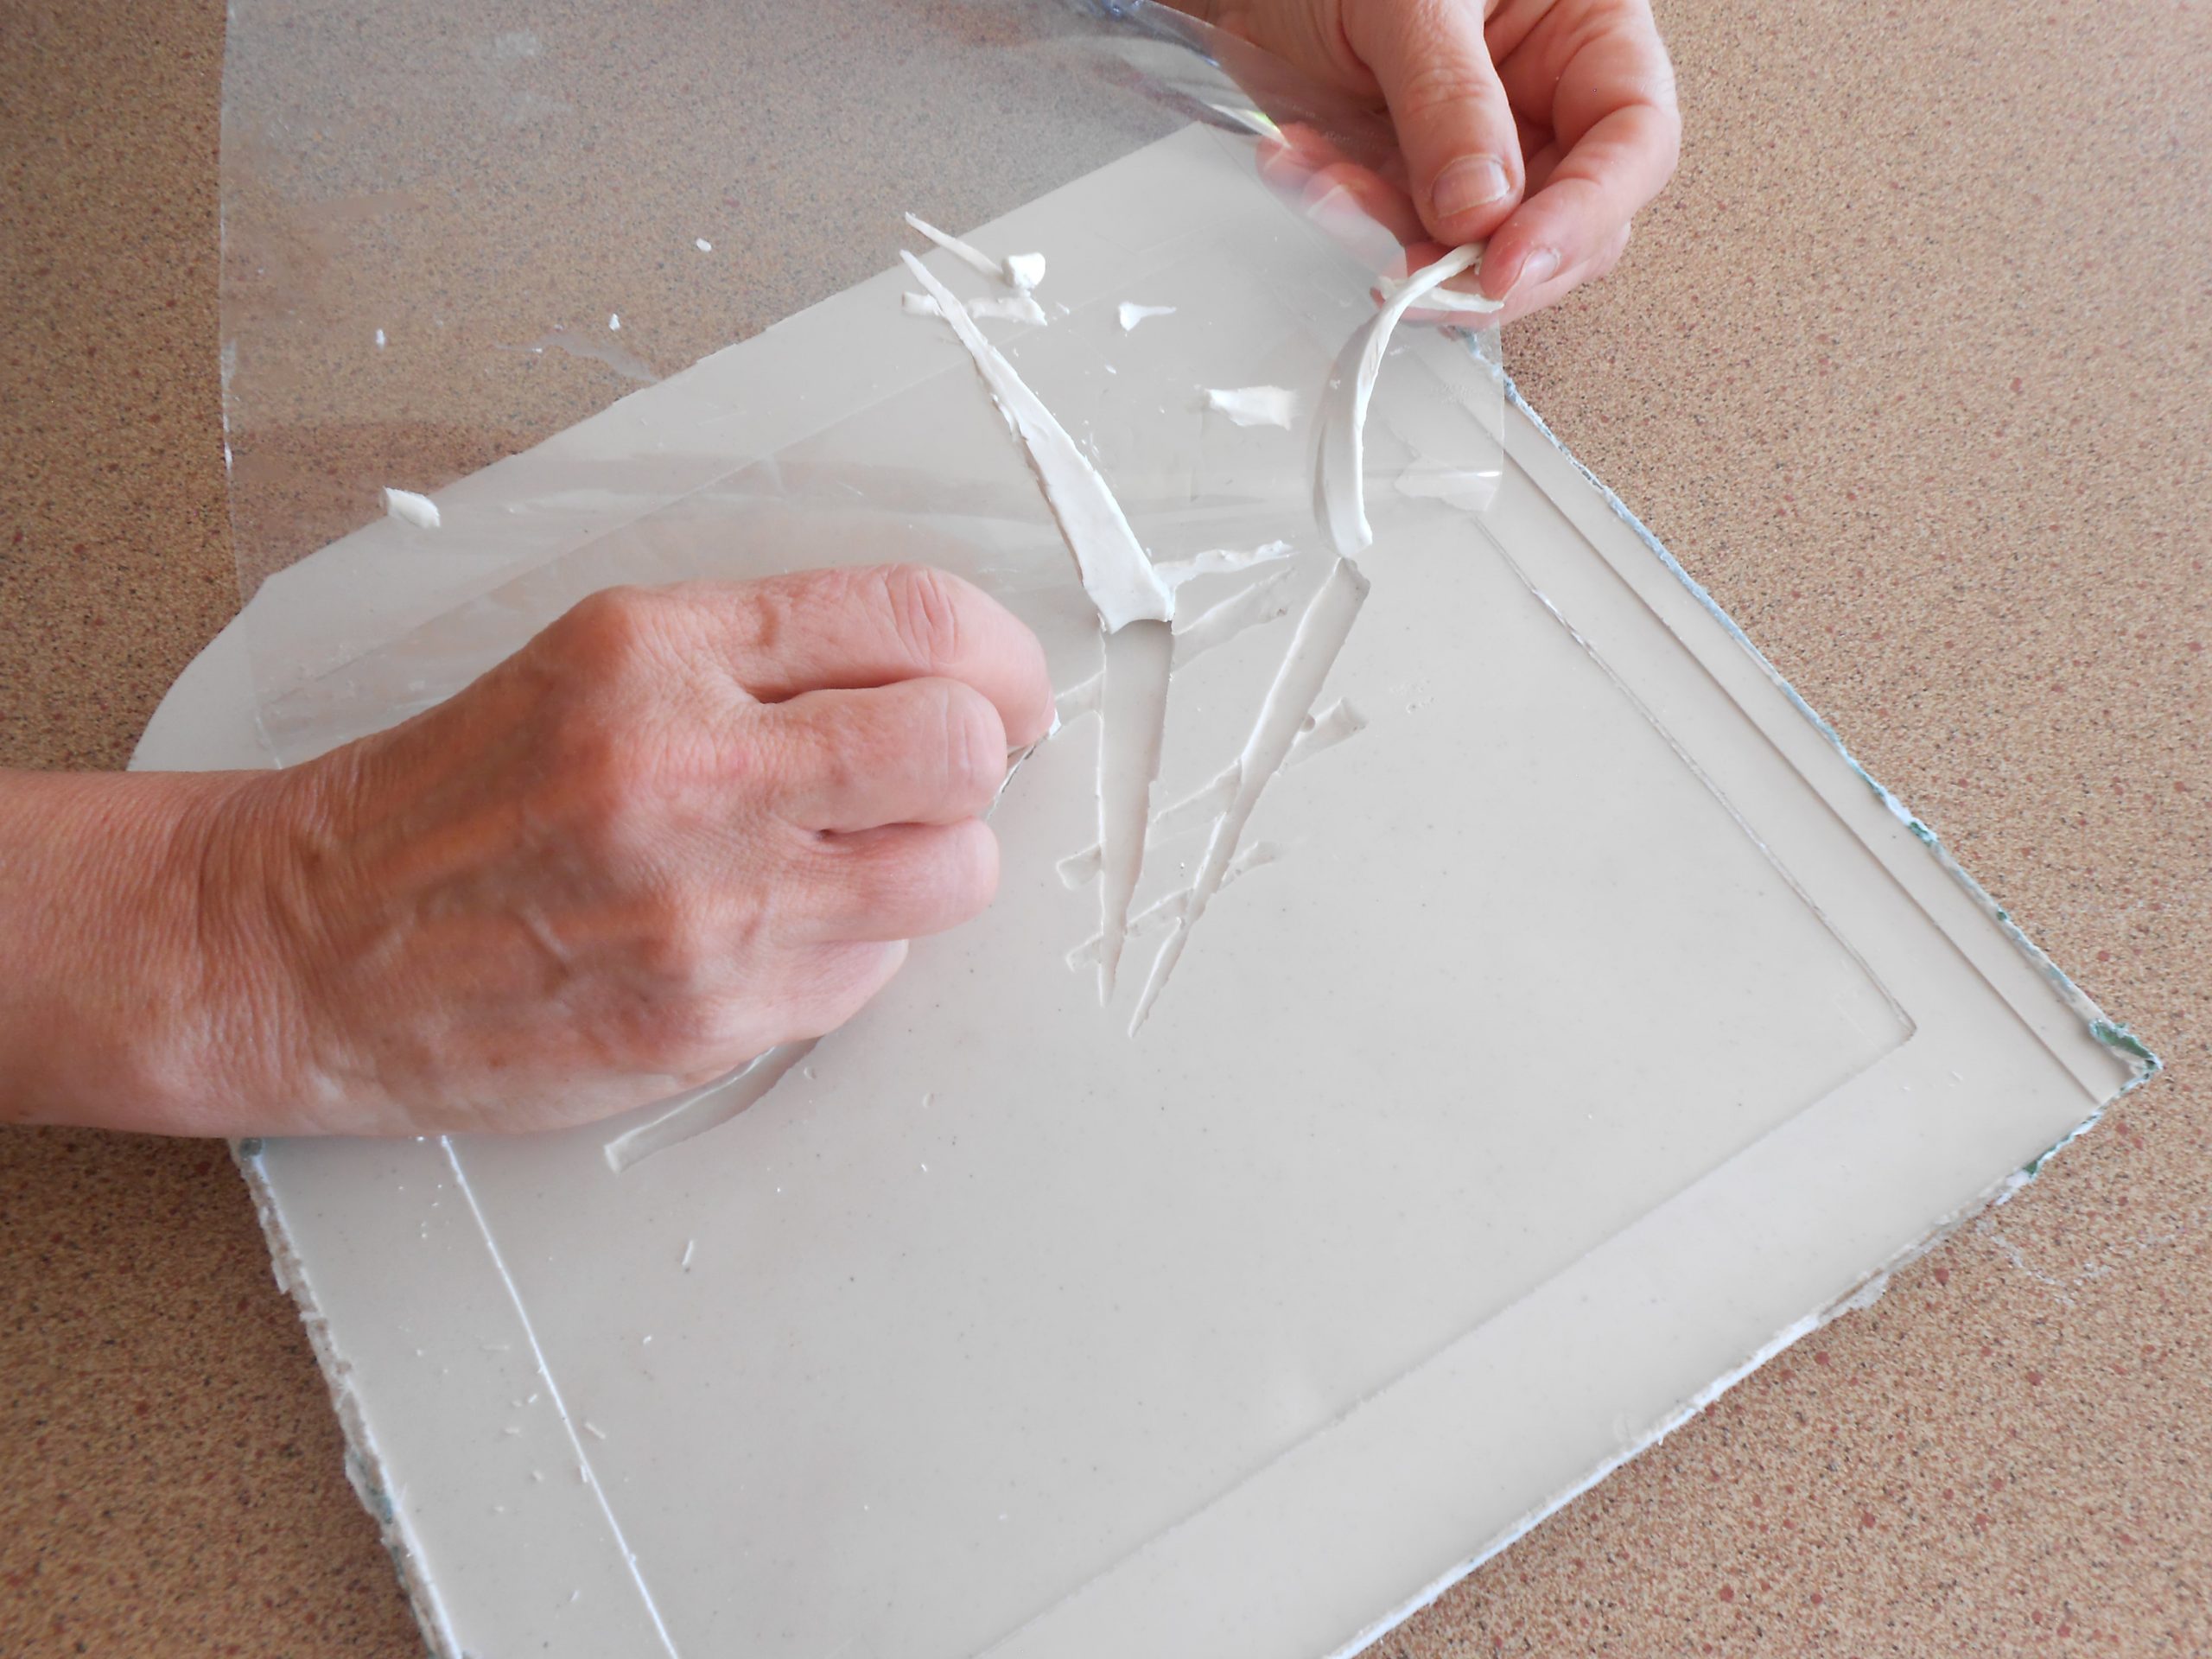
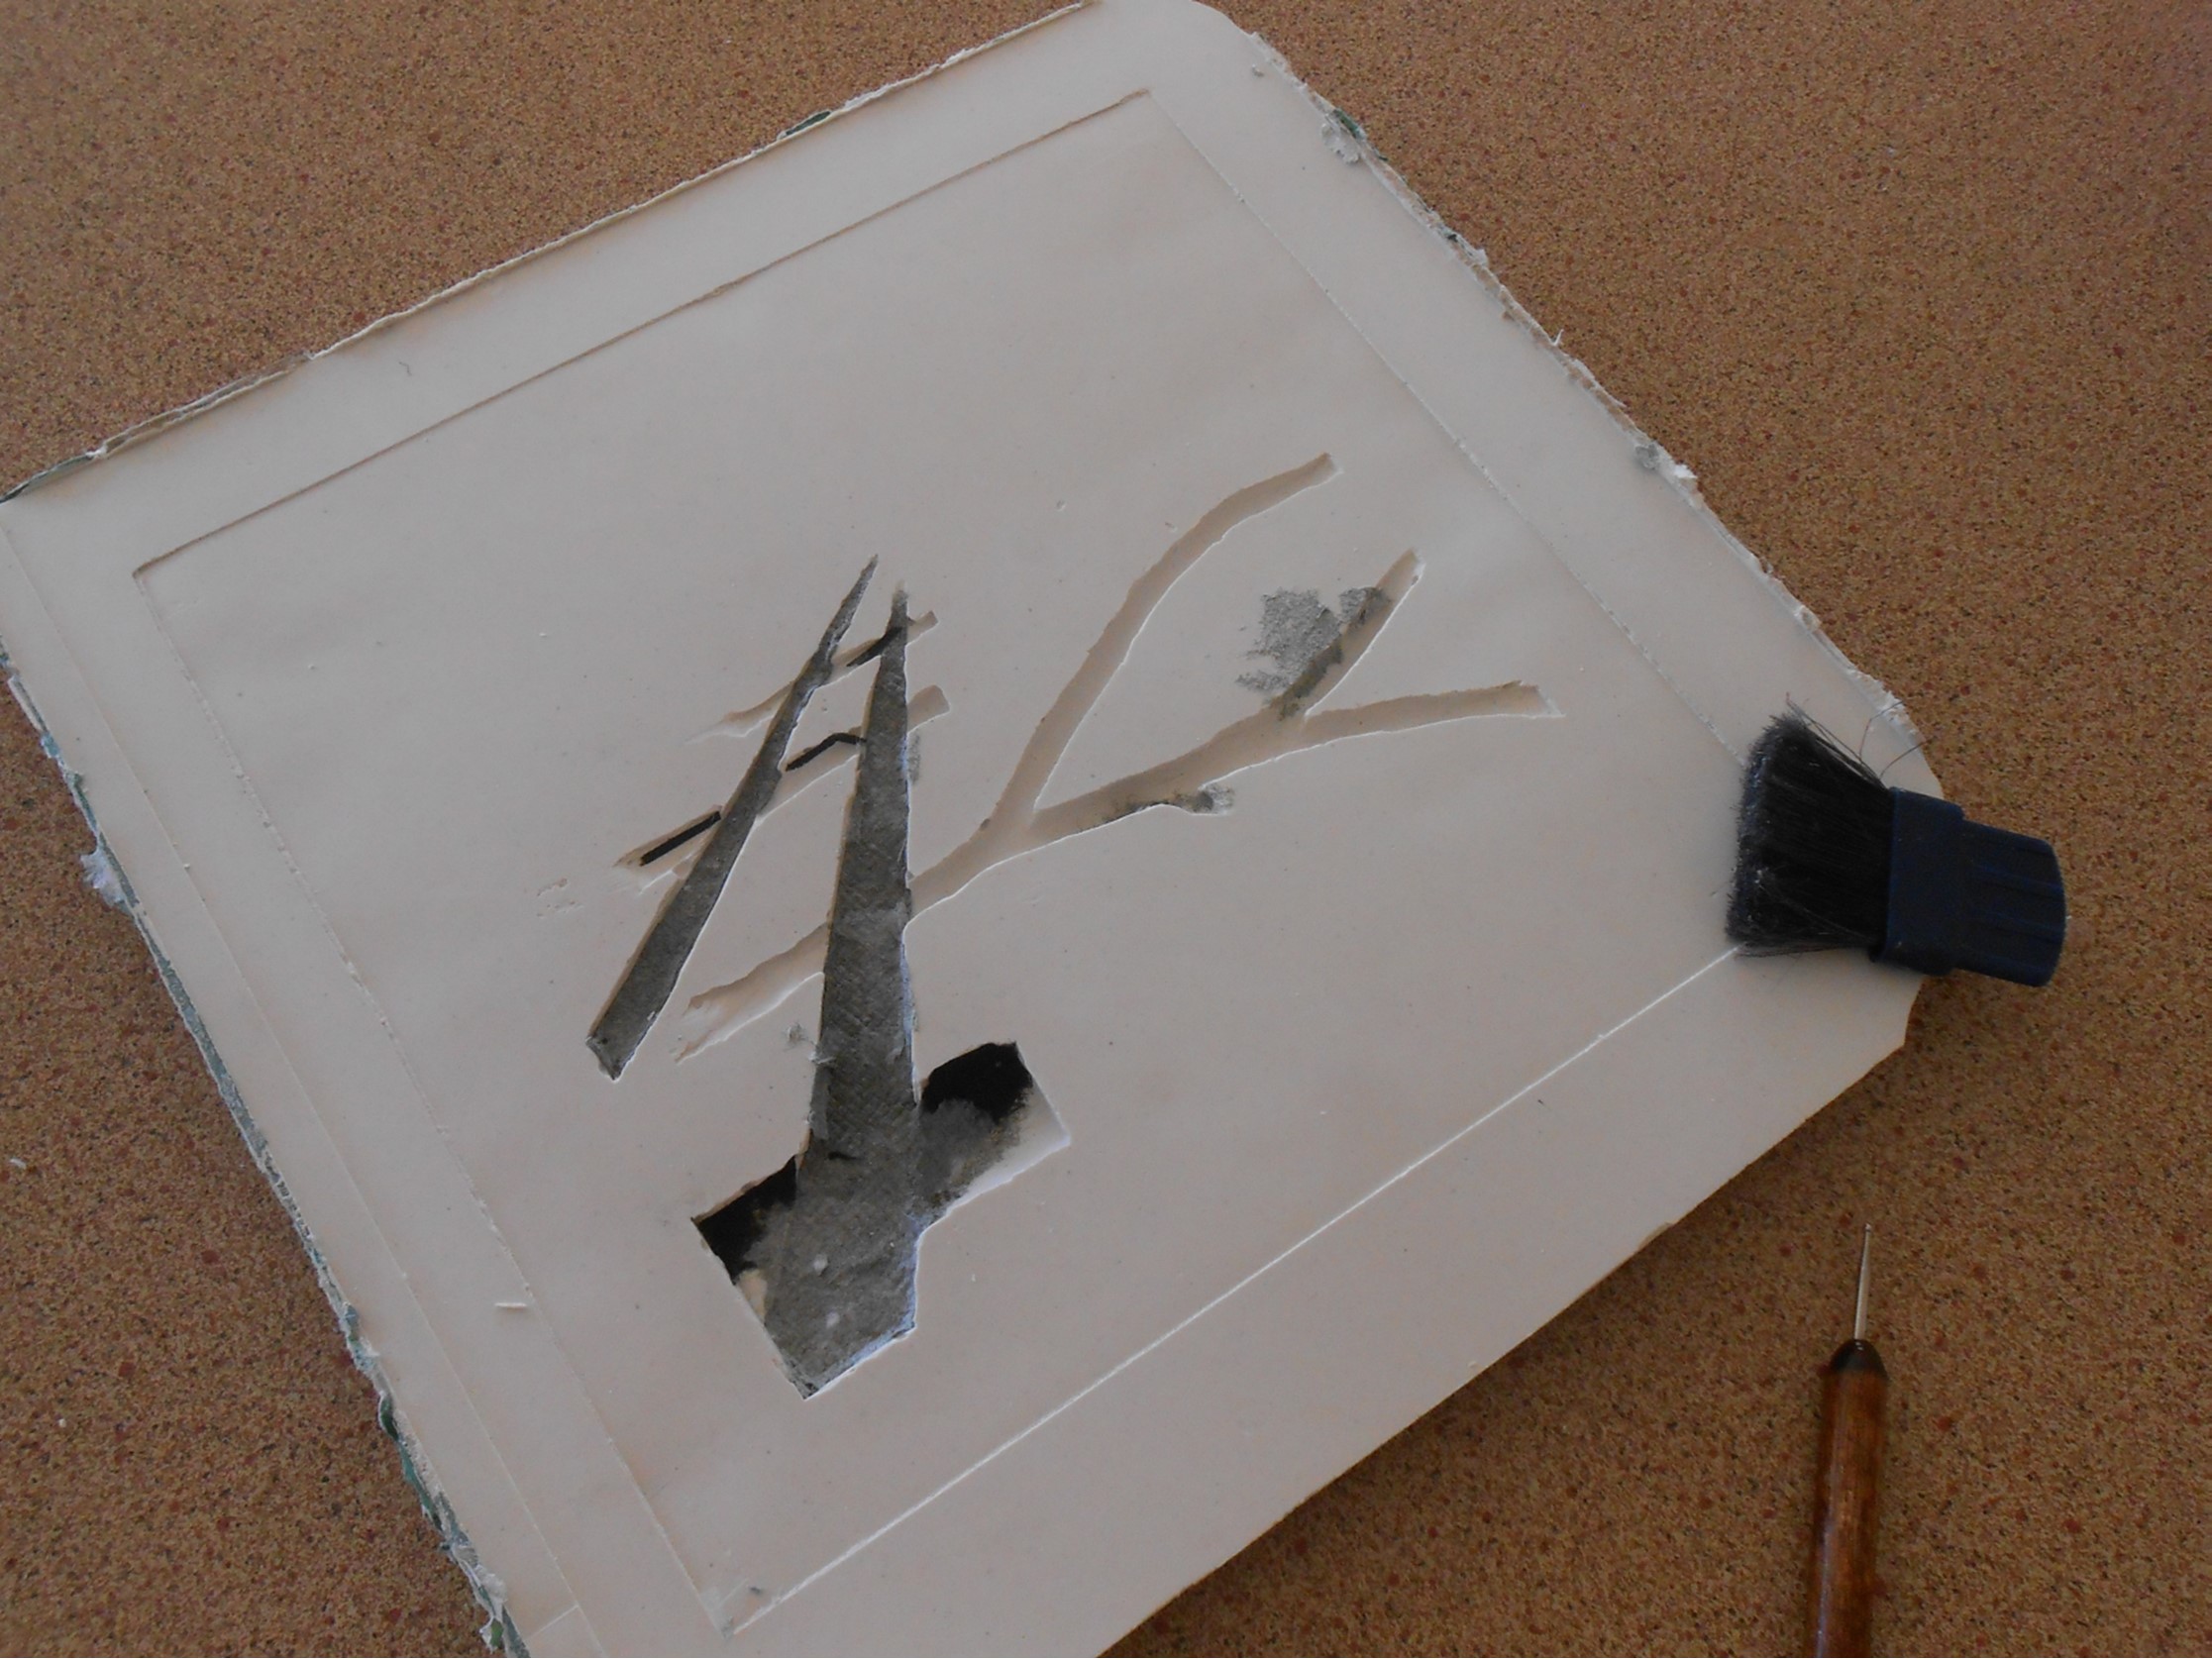
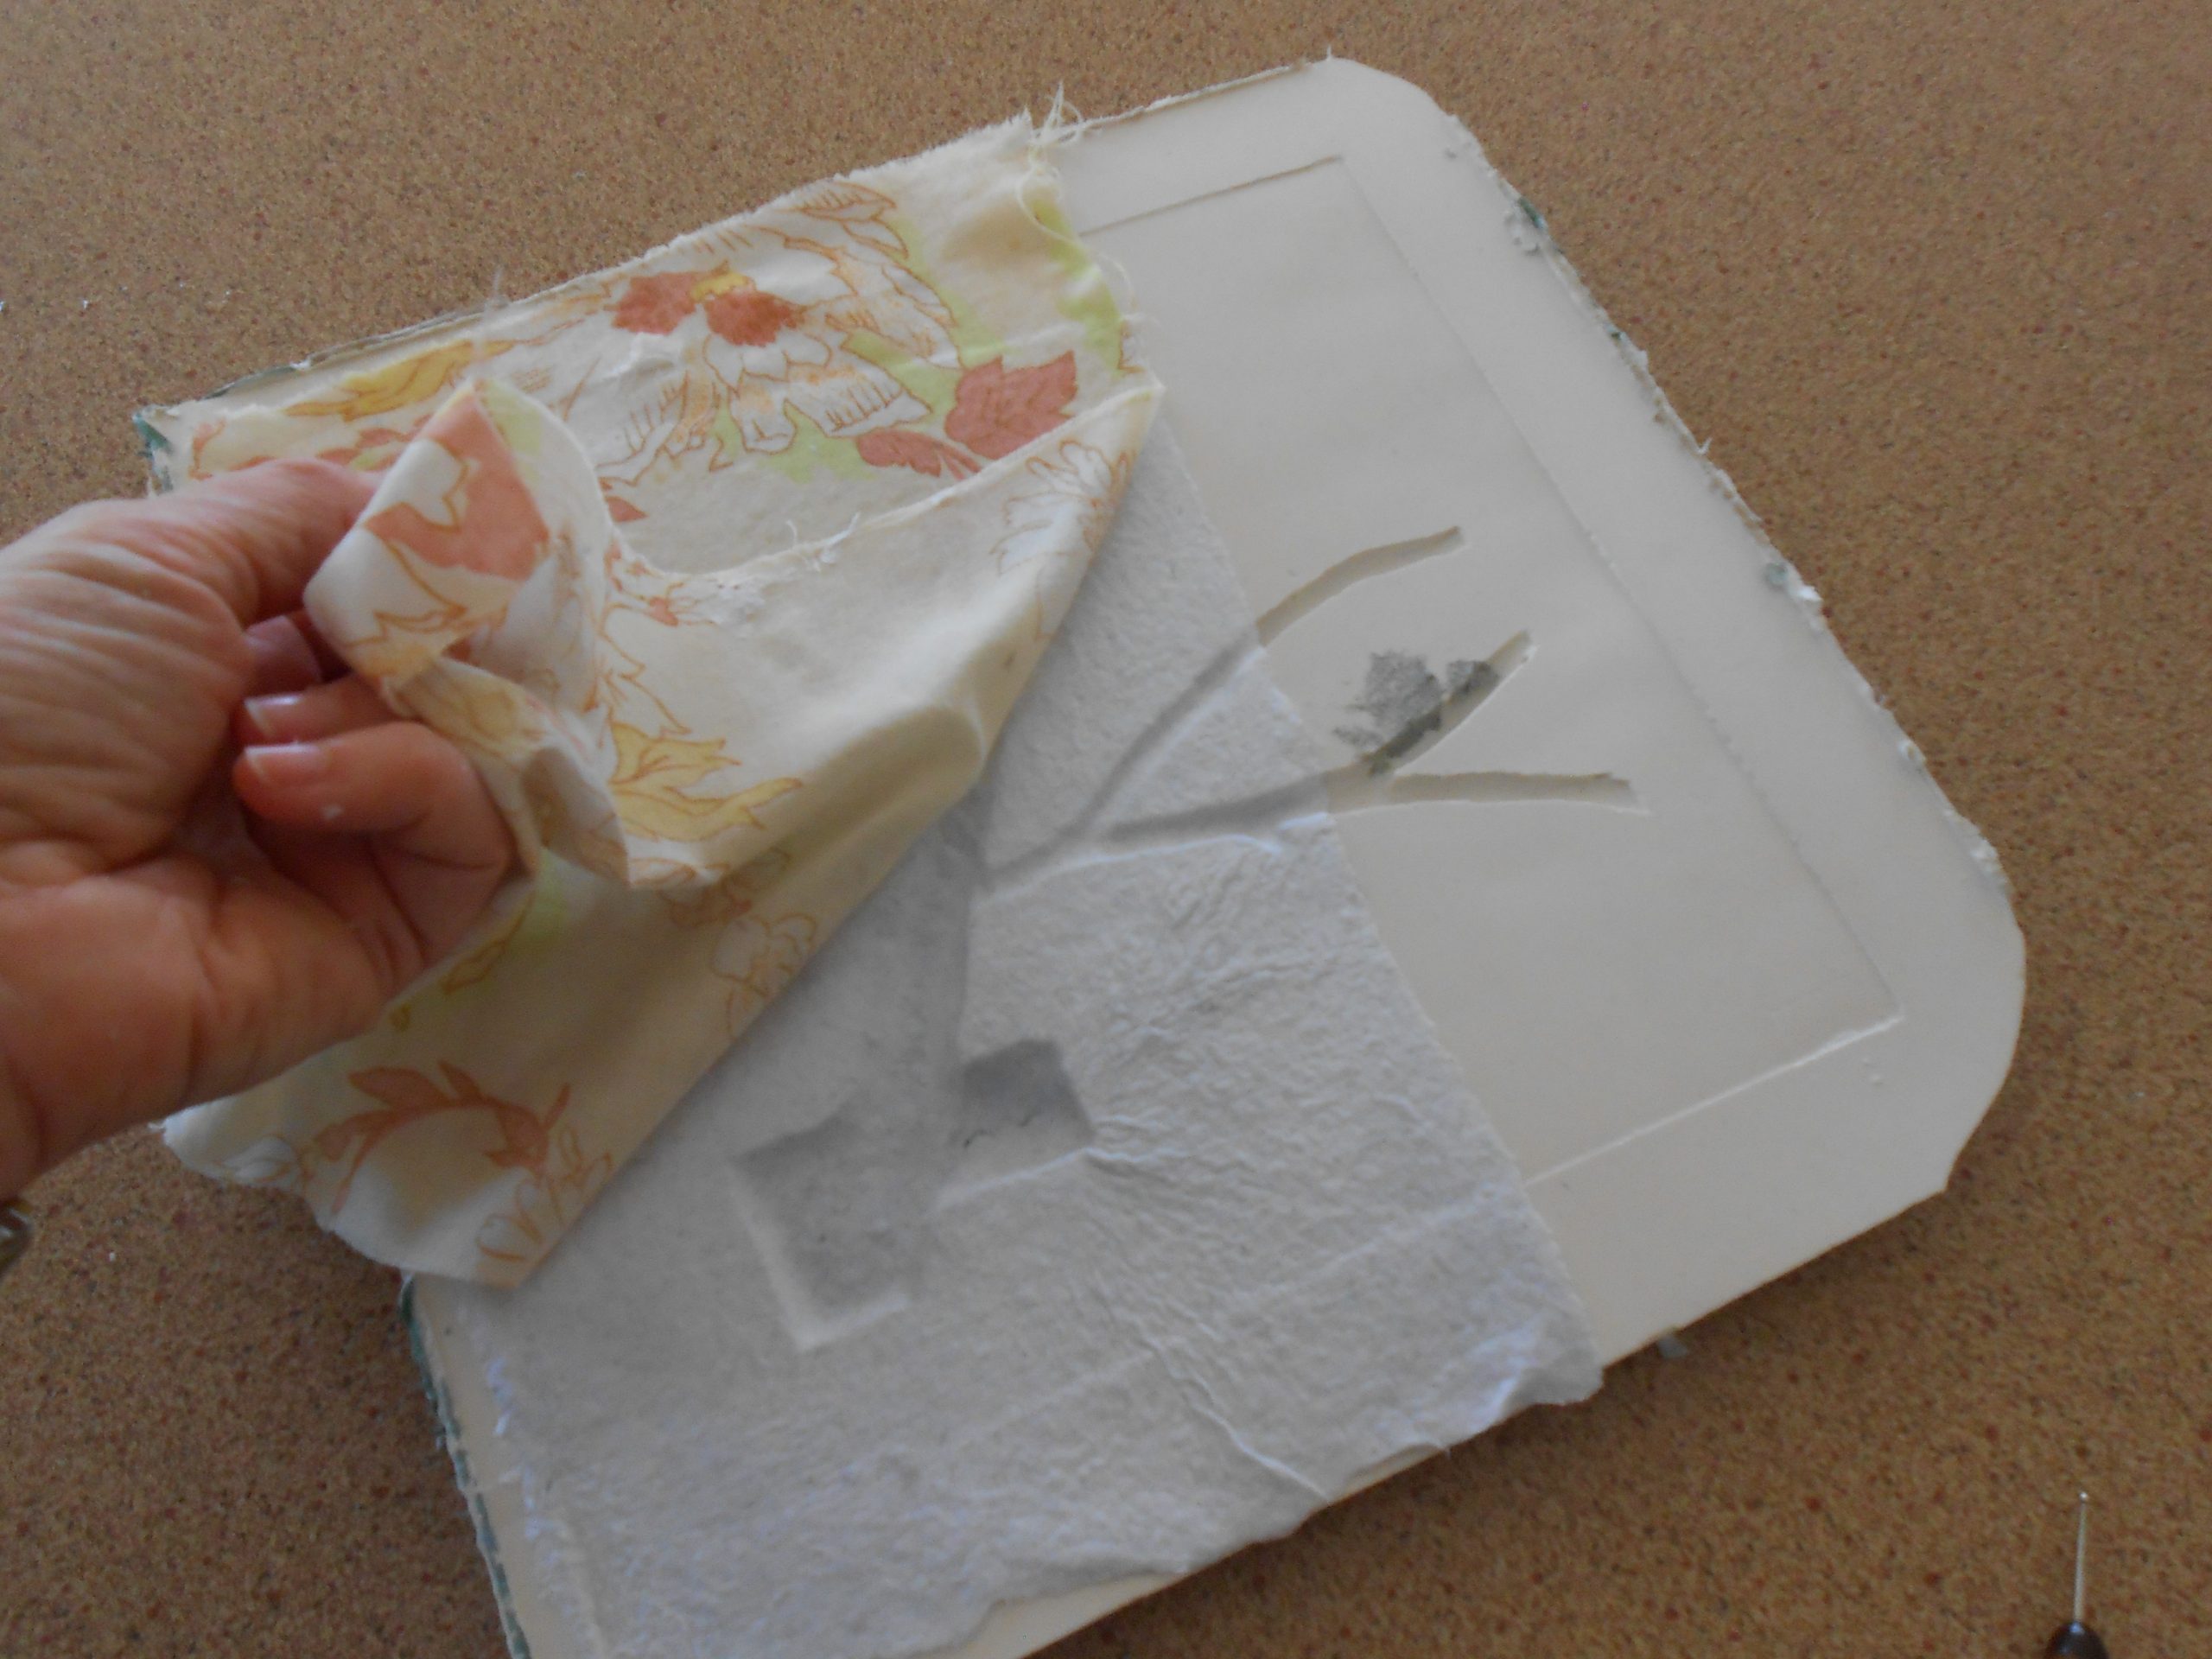
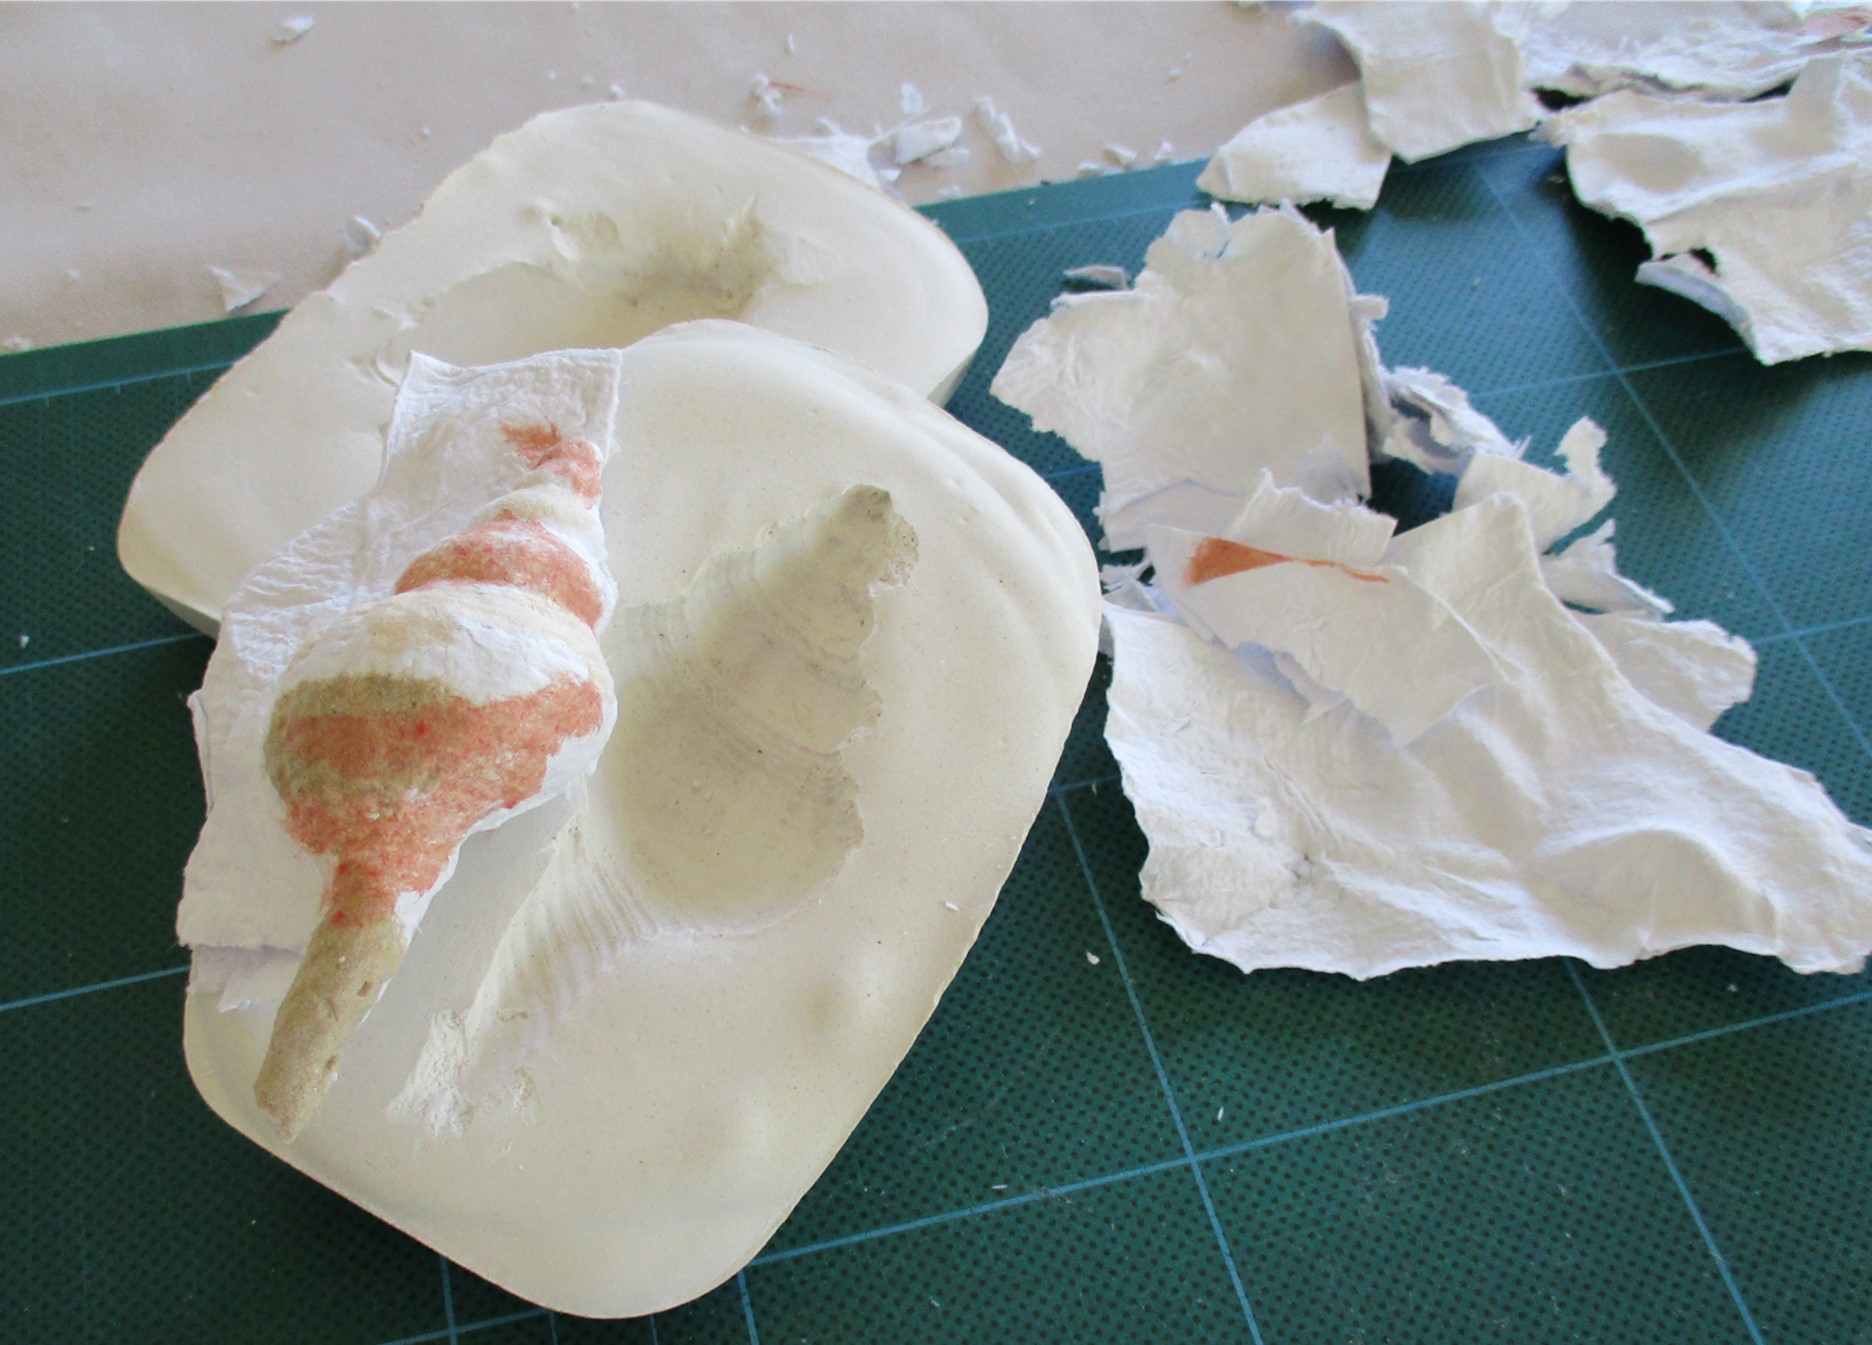
Recycled paper is is torn or shredded into small pieces, soaked in water for one or two days, and blended into paper pulp. Using a paper-making frame and deckle, sheets of paper are created and placed directly into the plaster mould, using a stiff brush to work the pulp into the crevices. The paper cast is set aside to thoroughly dry. Depending on the thickness and the weather, this can take several days. When dry, the paper can be gently prised out of the moulds.
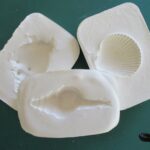
The plaster moulds 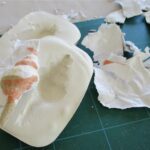
Removing the shell 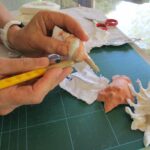
Trimming edges.
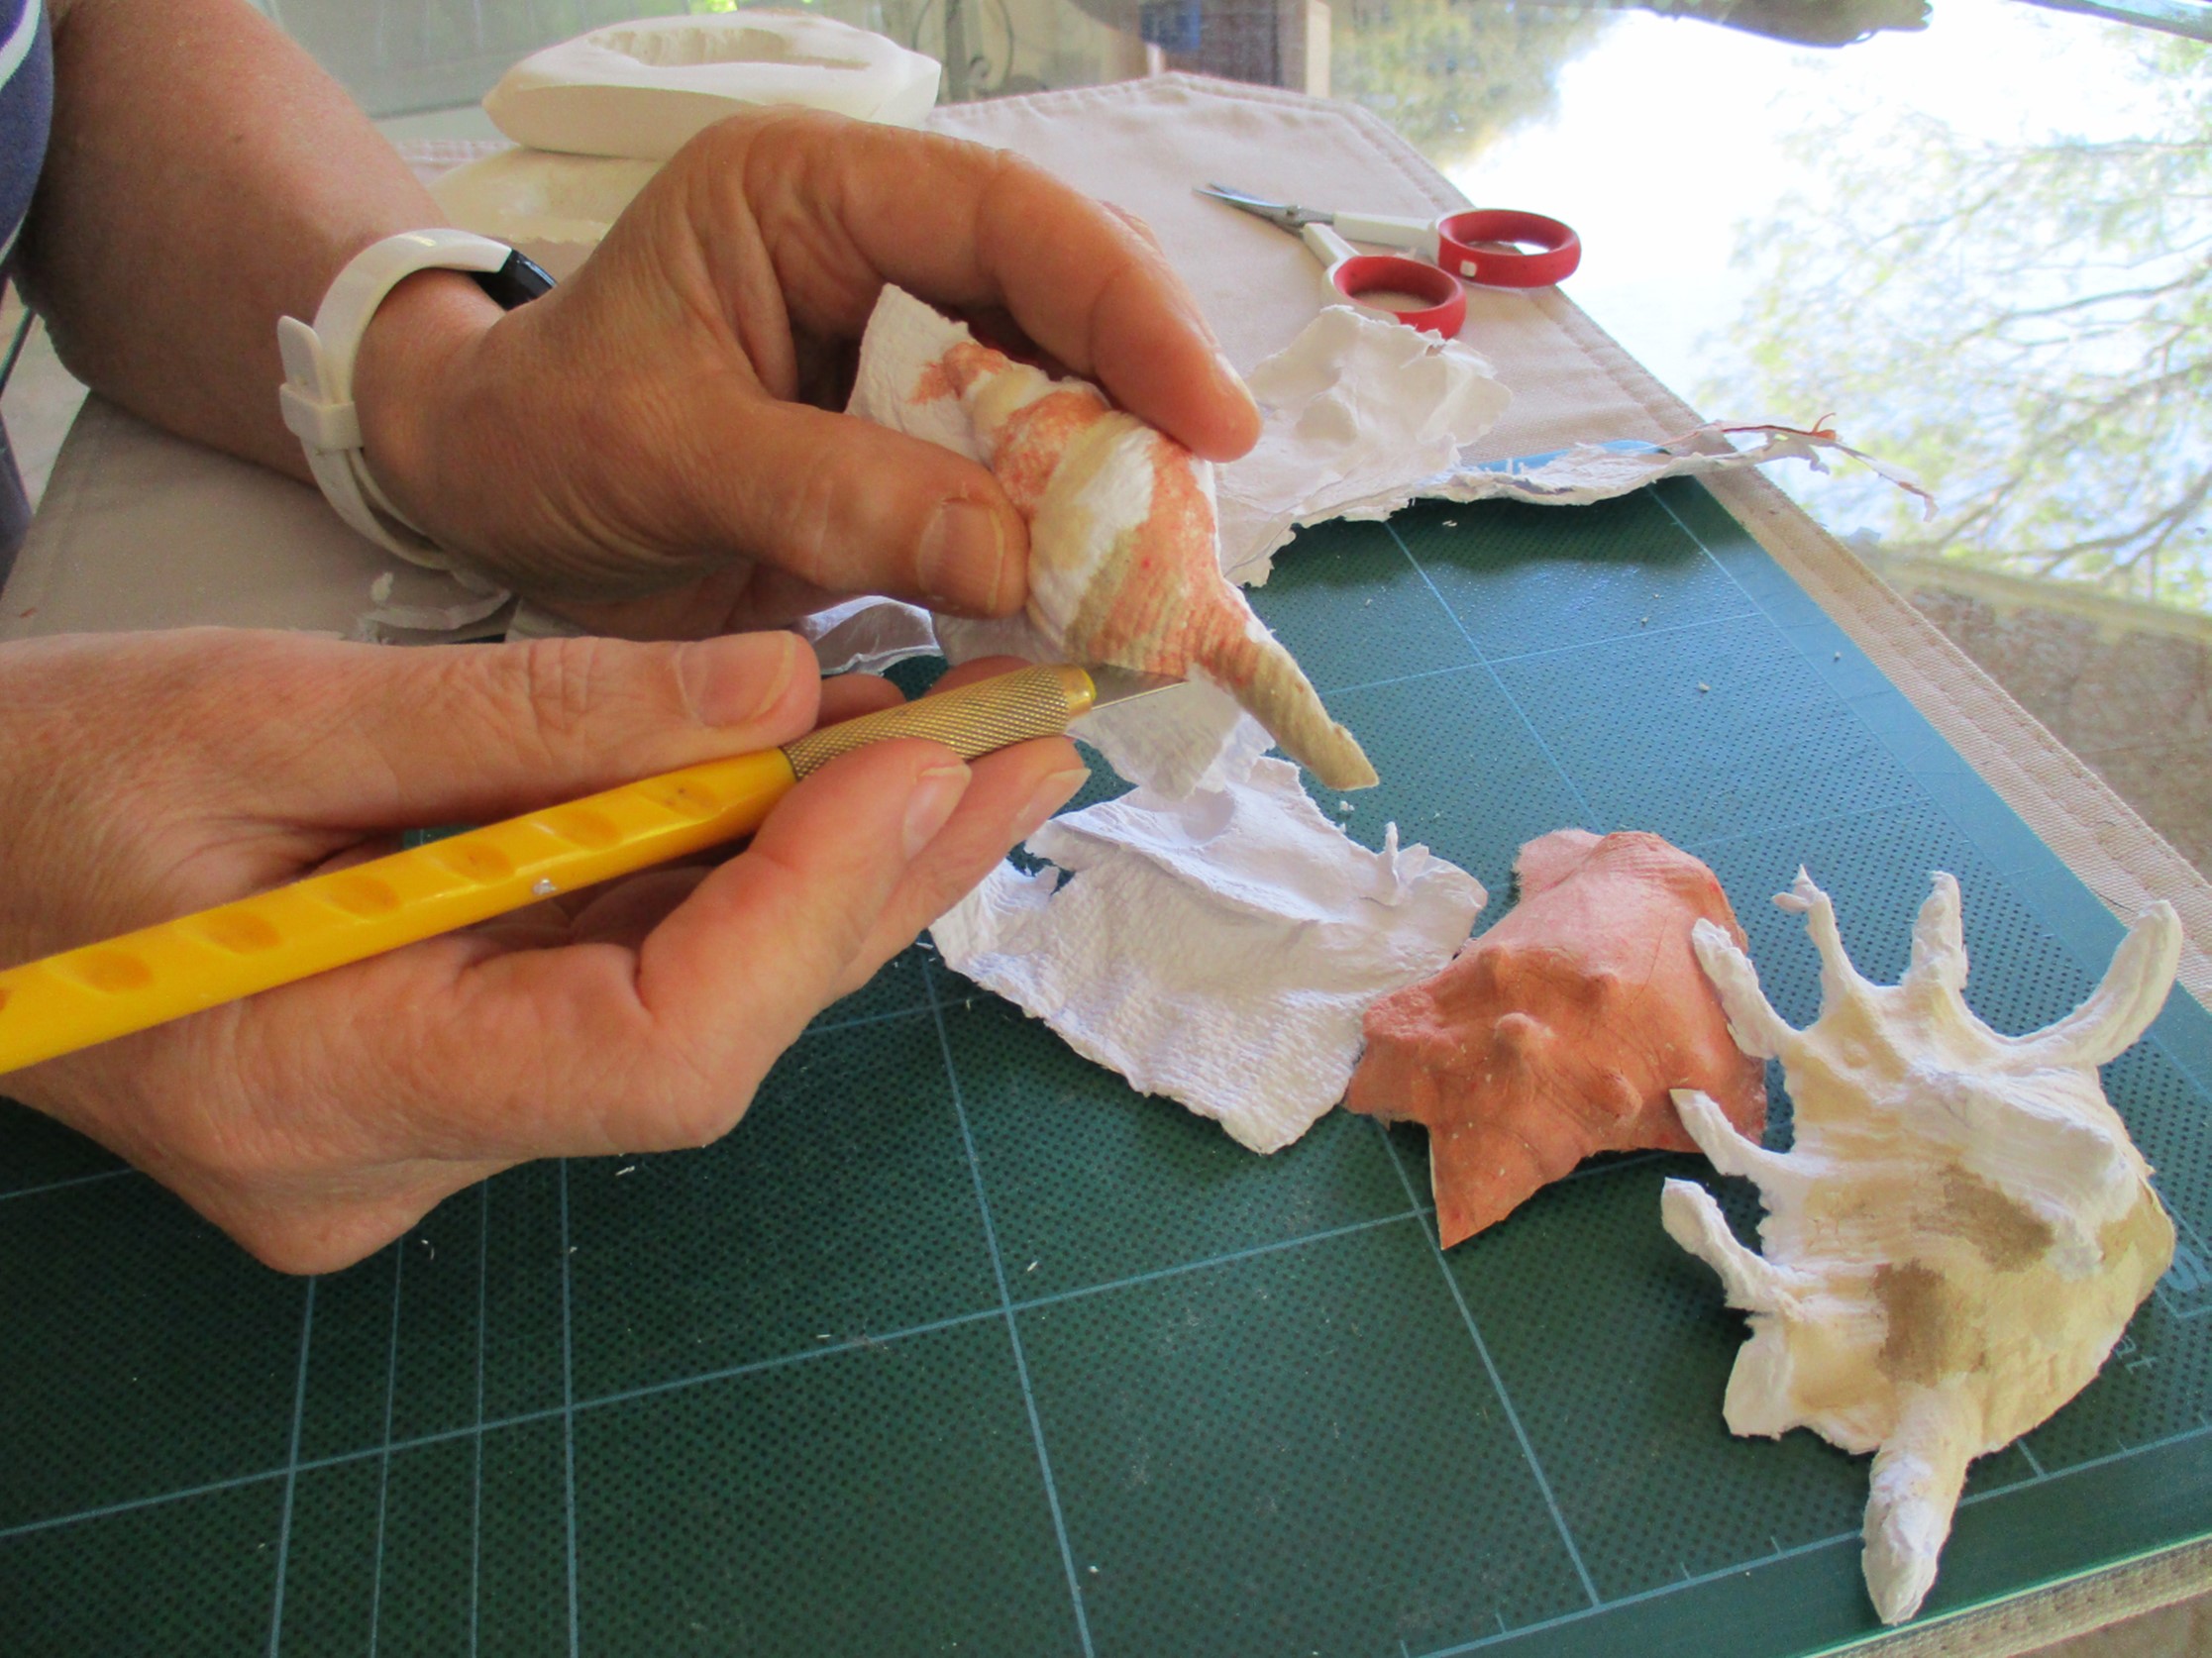
Paper overlap at the edges of the shells is carefully cut away with a small scissors or blade. If the paper layers separate in places at the edges, a very thin layer of glue can secure them.
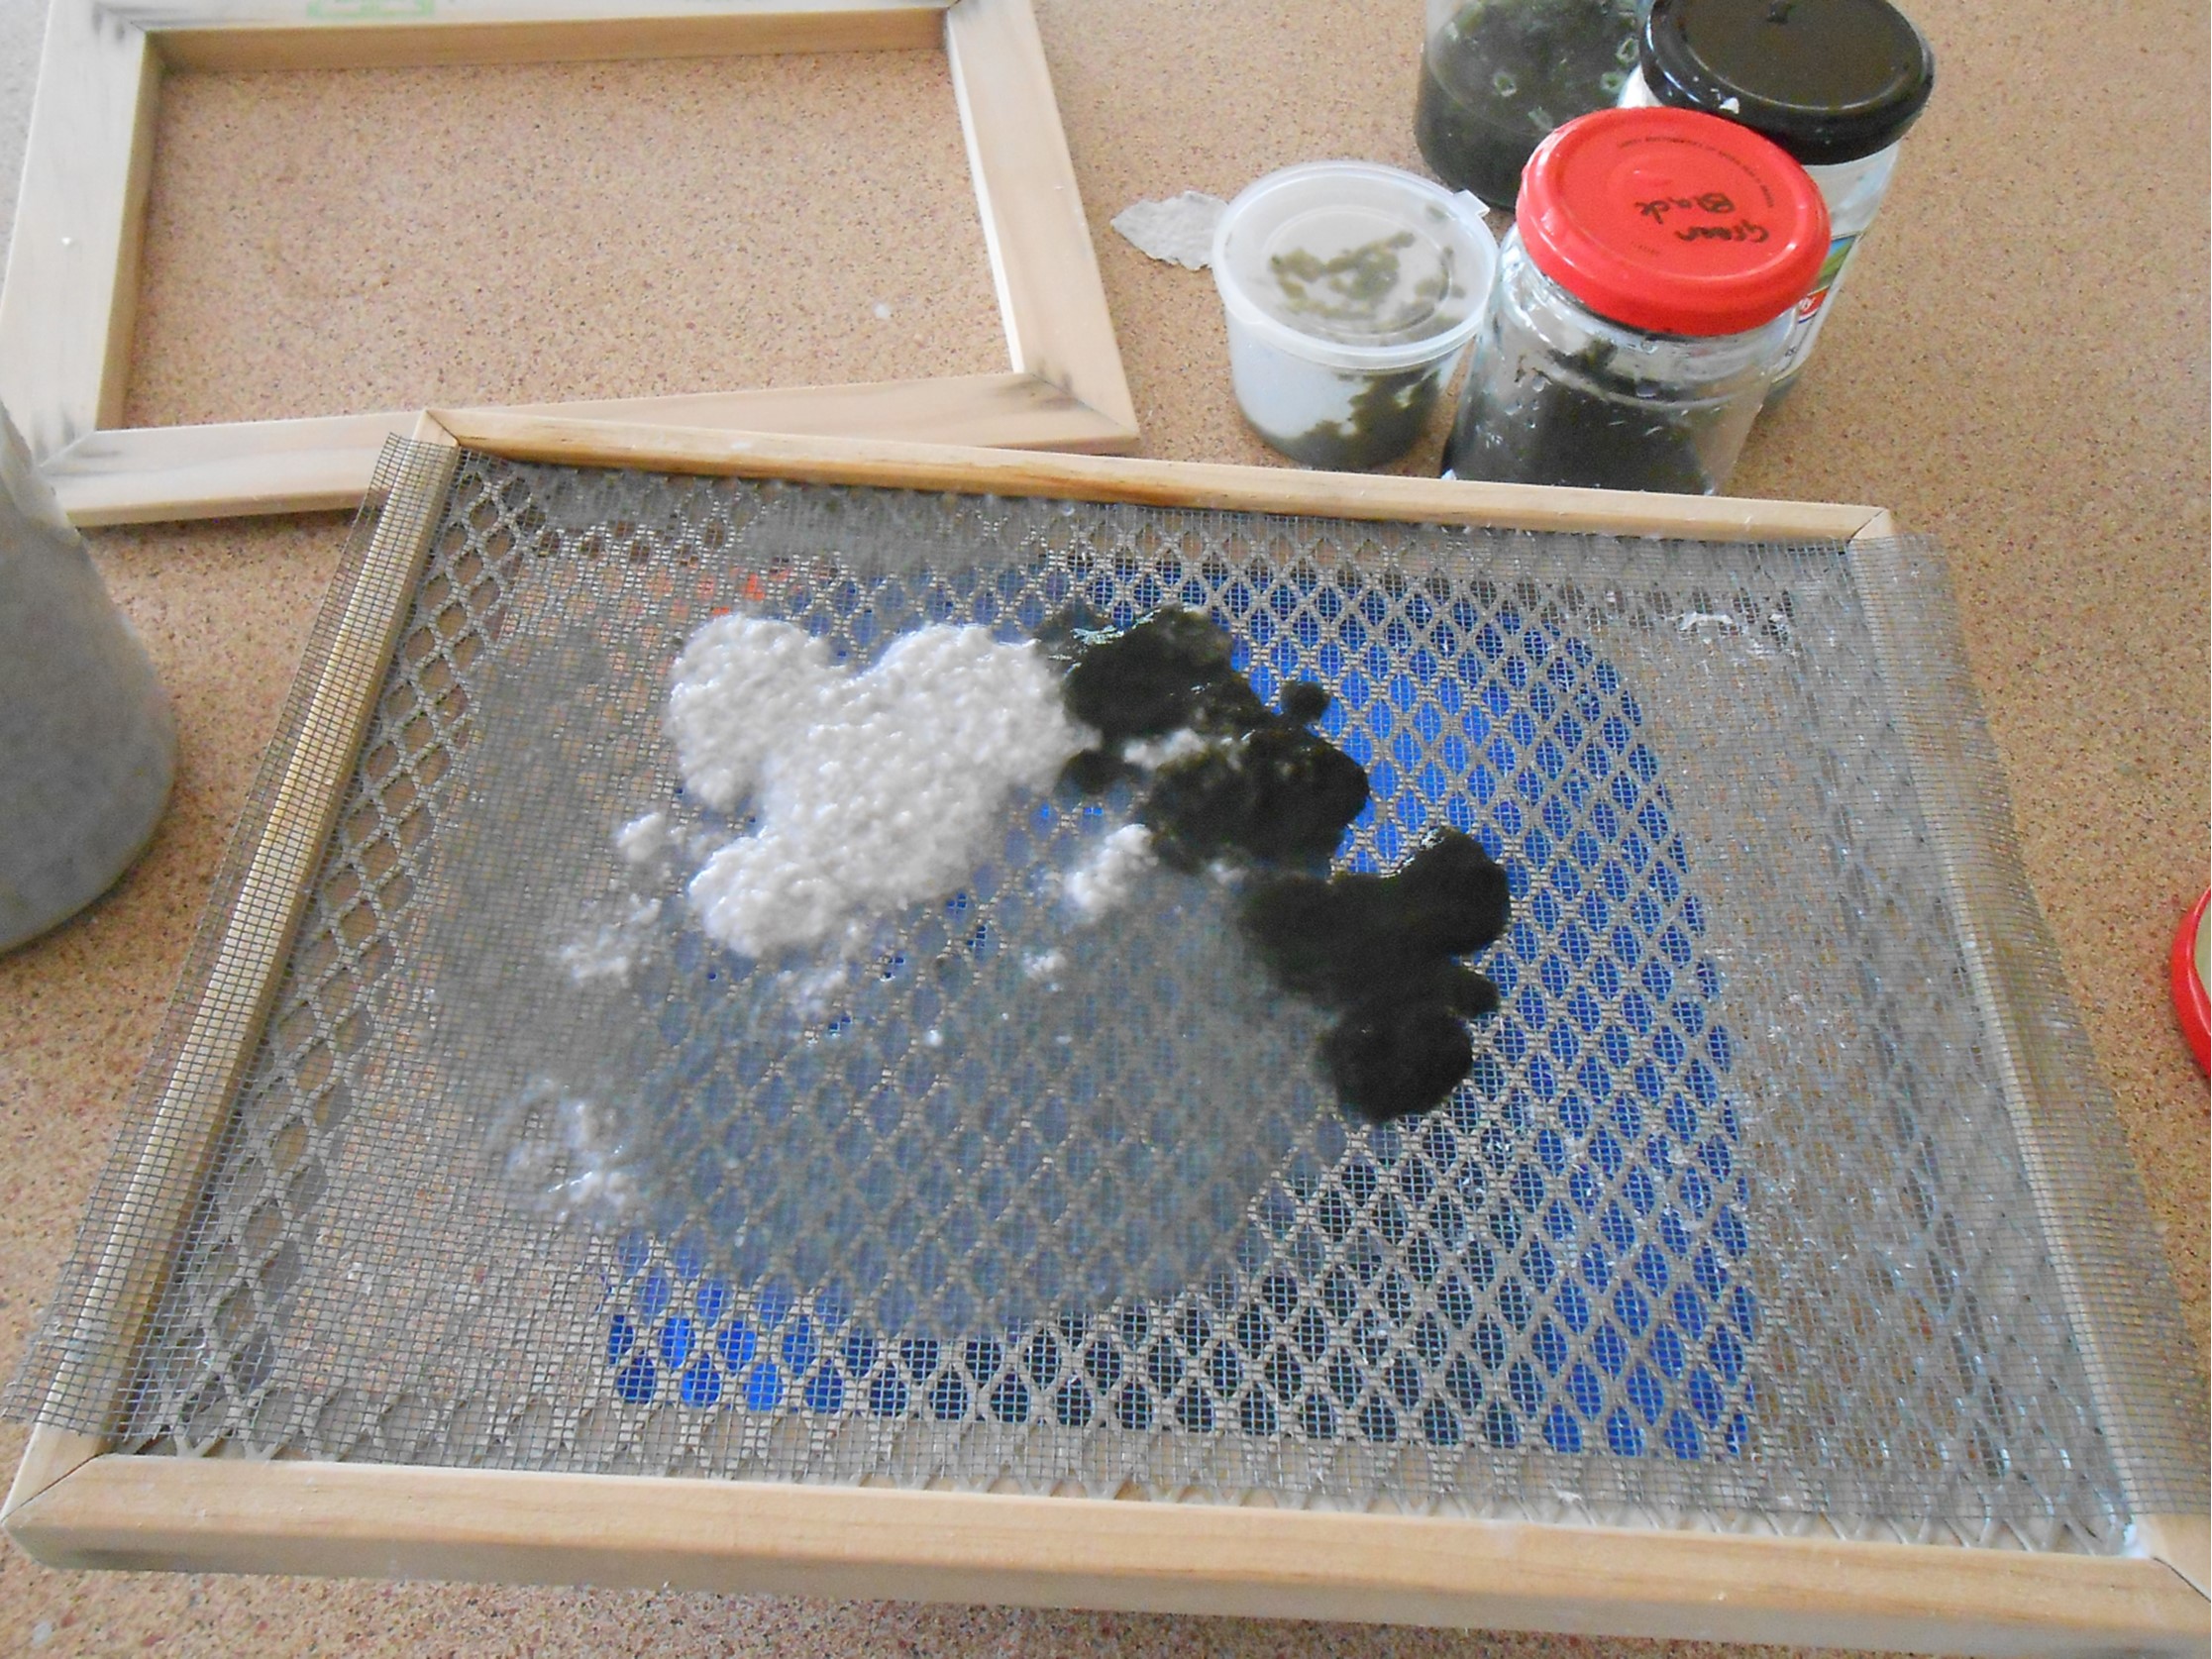
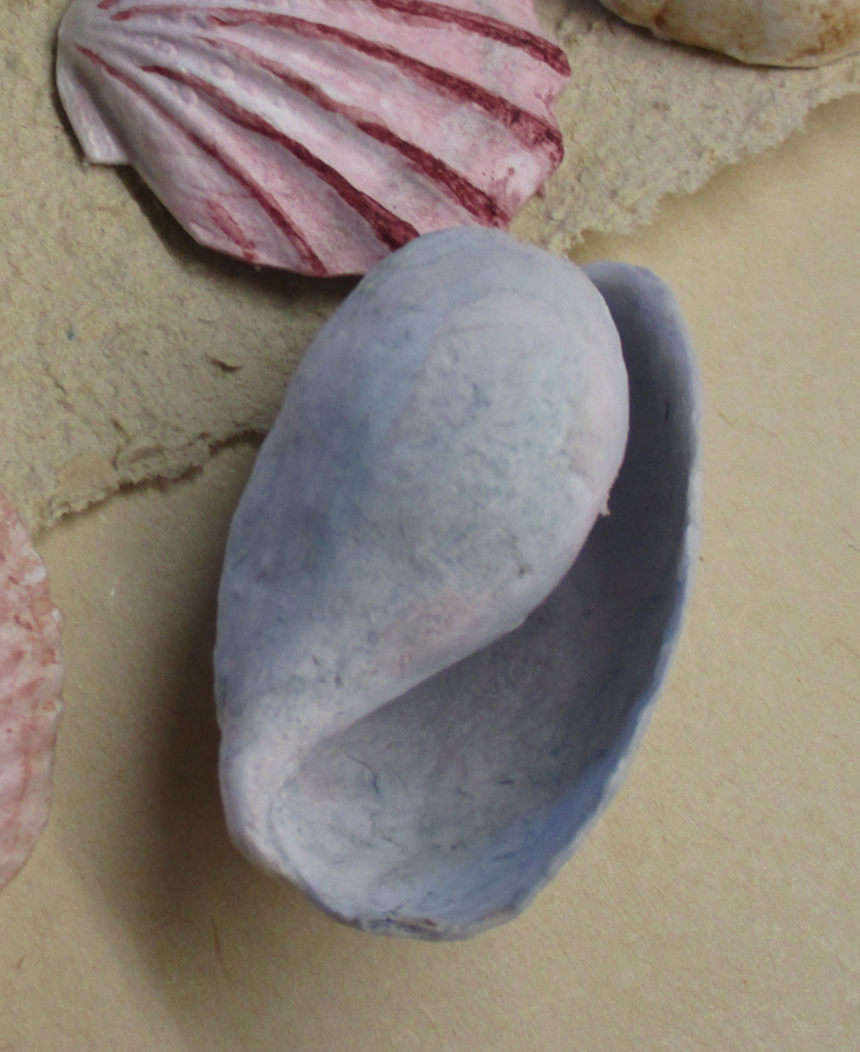
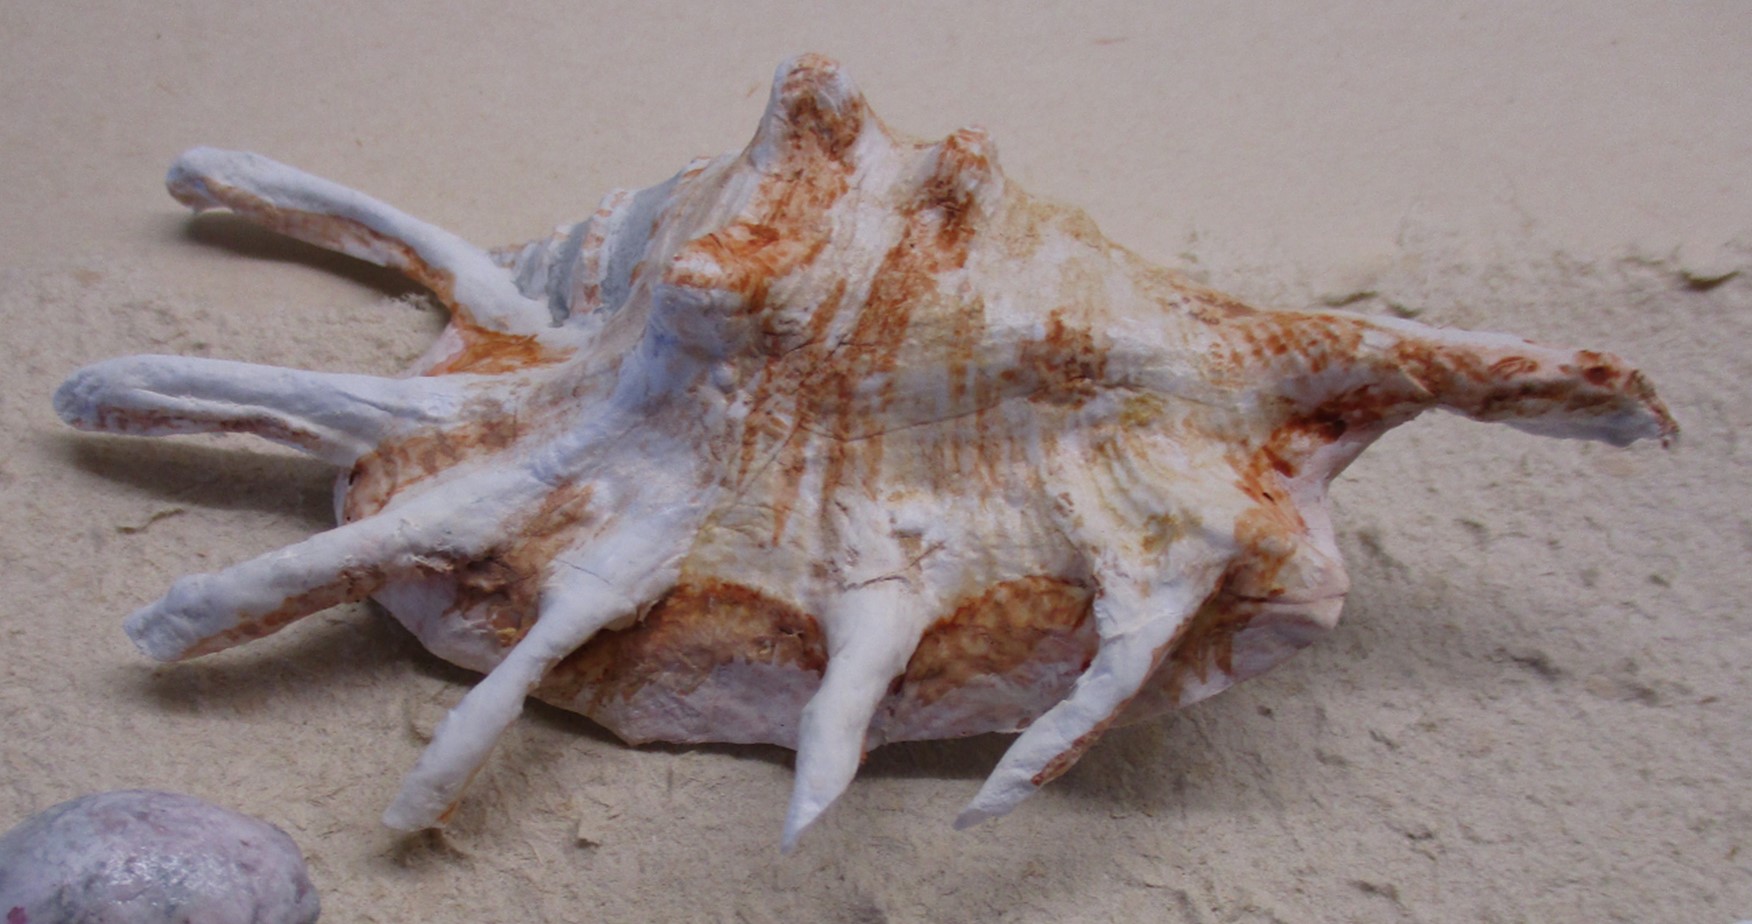
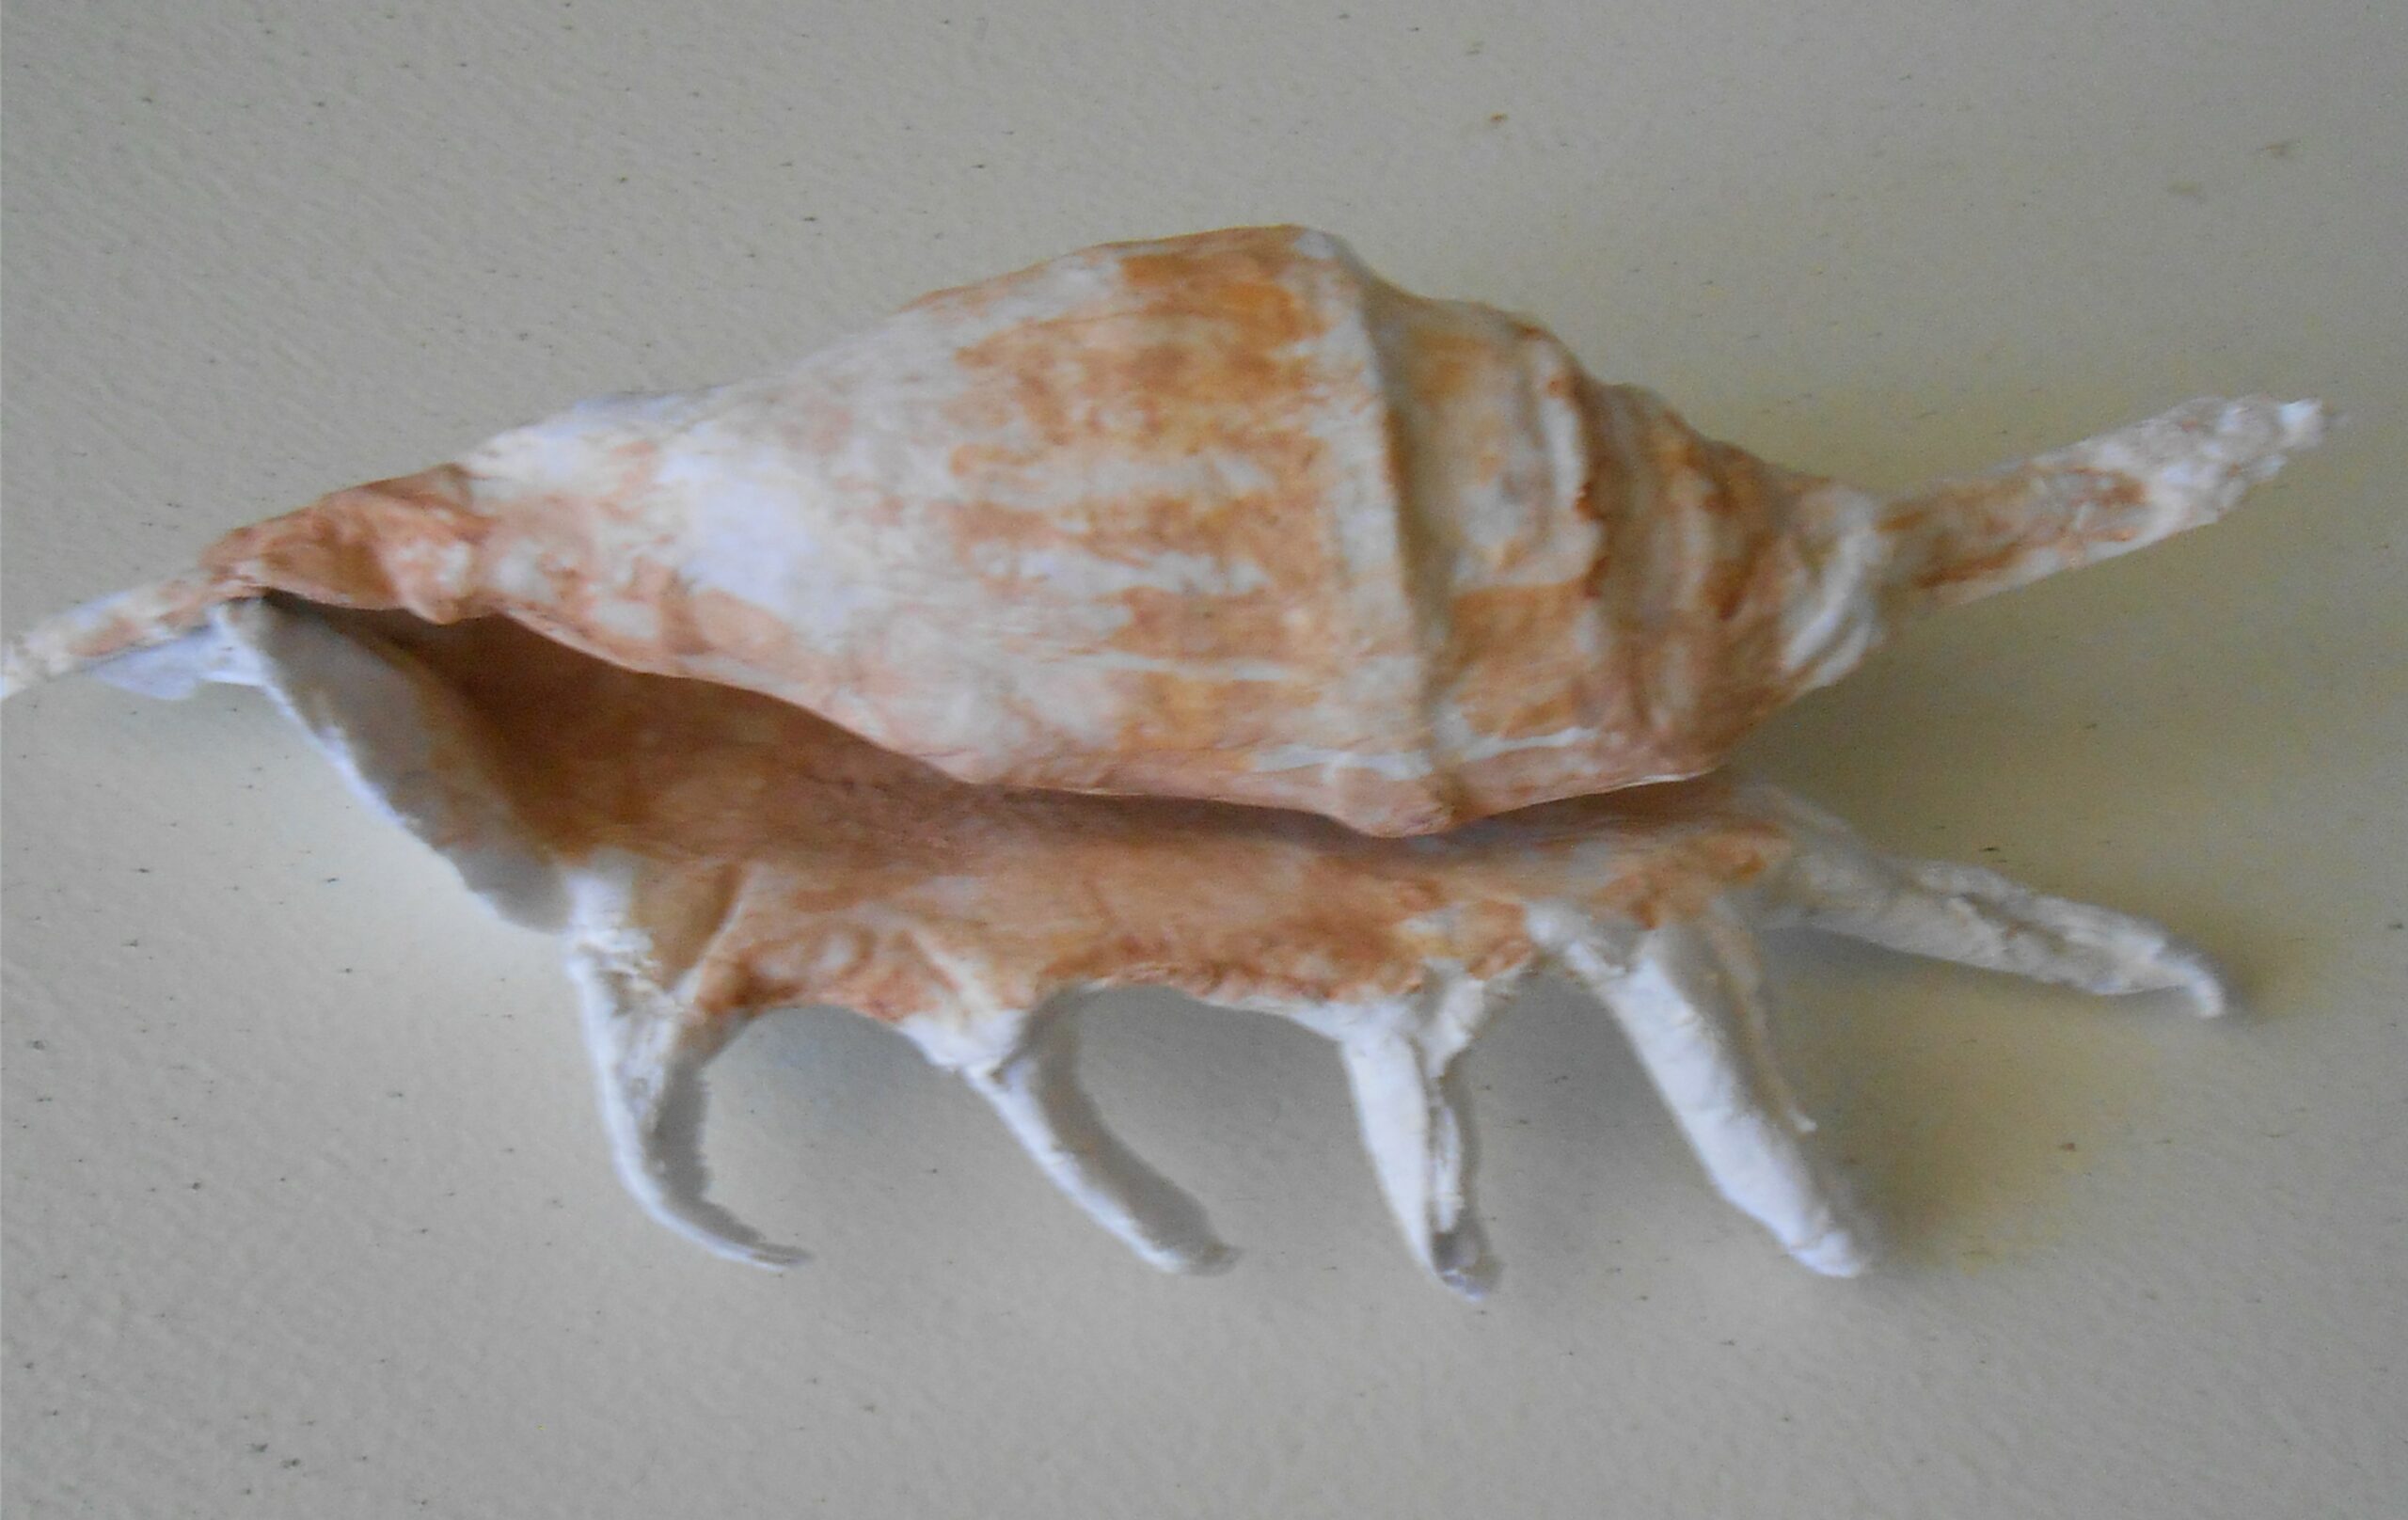
Coloured paper mulch can be used in the casting process (as in the image above) but most shells I’ve cast in white paper and painted. The best method for painting them is to coat them in a sealer (e.g. Mod Podge) and allow to dry. I’ve used diluted watercolour paint over the sealer to pick out natural colours.
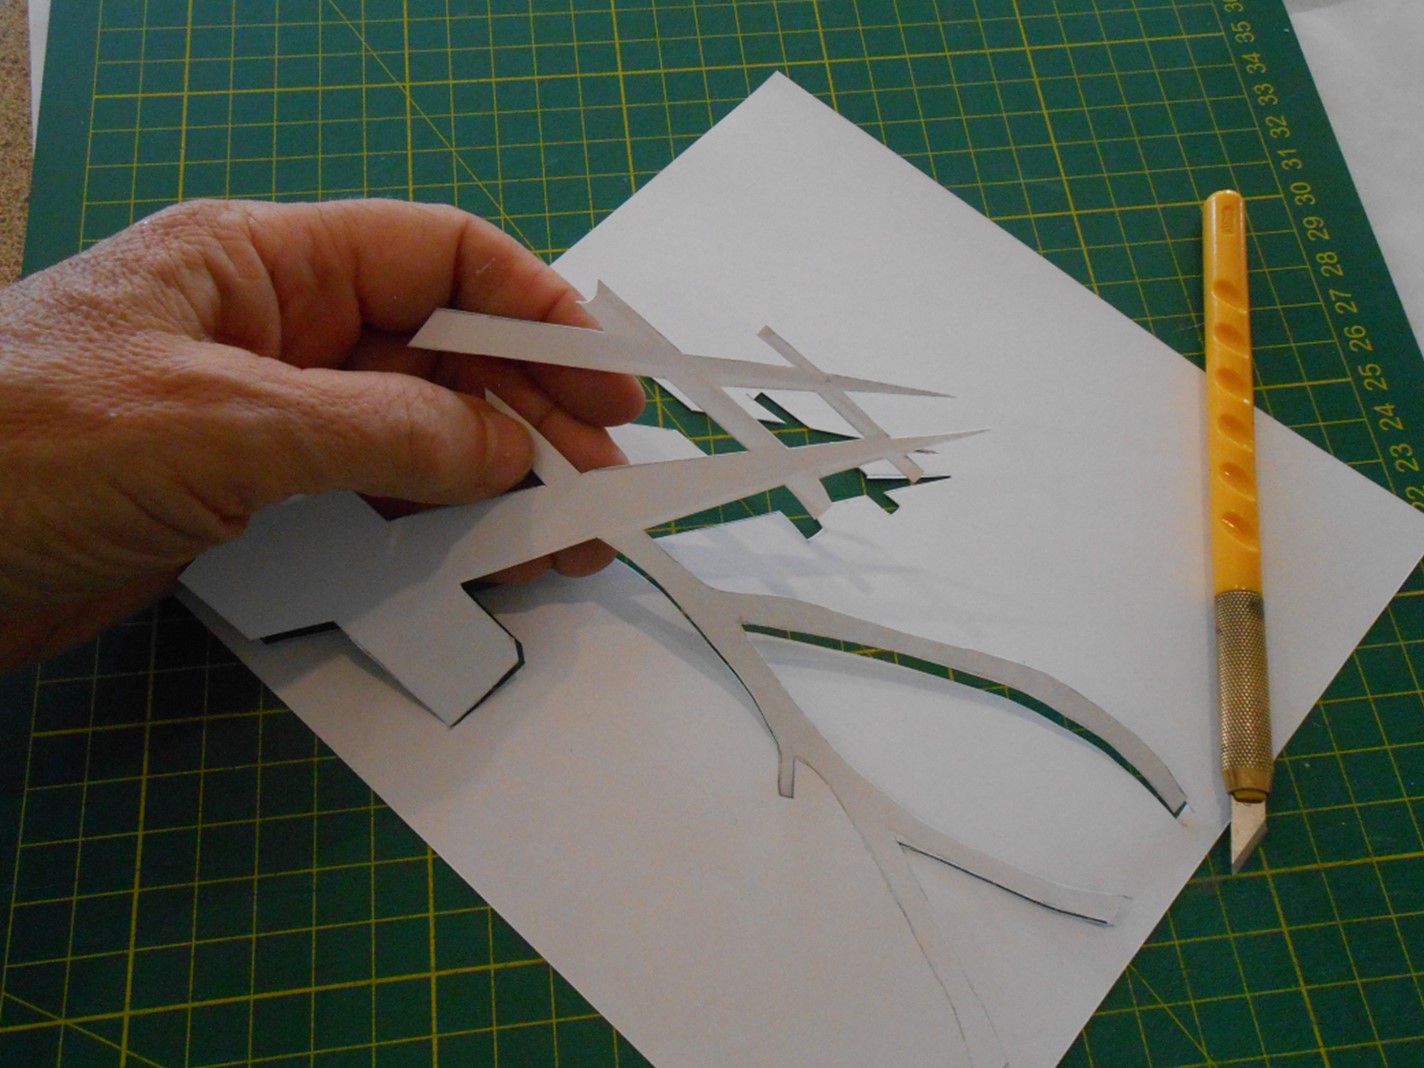
After making a few flat shells, I experimented with creating a full 3D shell, using a cast of both sides. I had some success, but need to practise and develop this further. Examples of my first tries are below.
A: All the shells in the top image are paper.
——————————————————————————————————
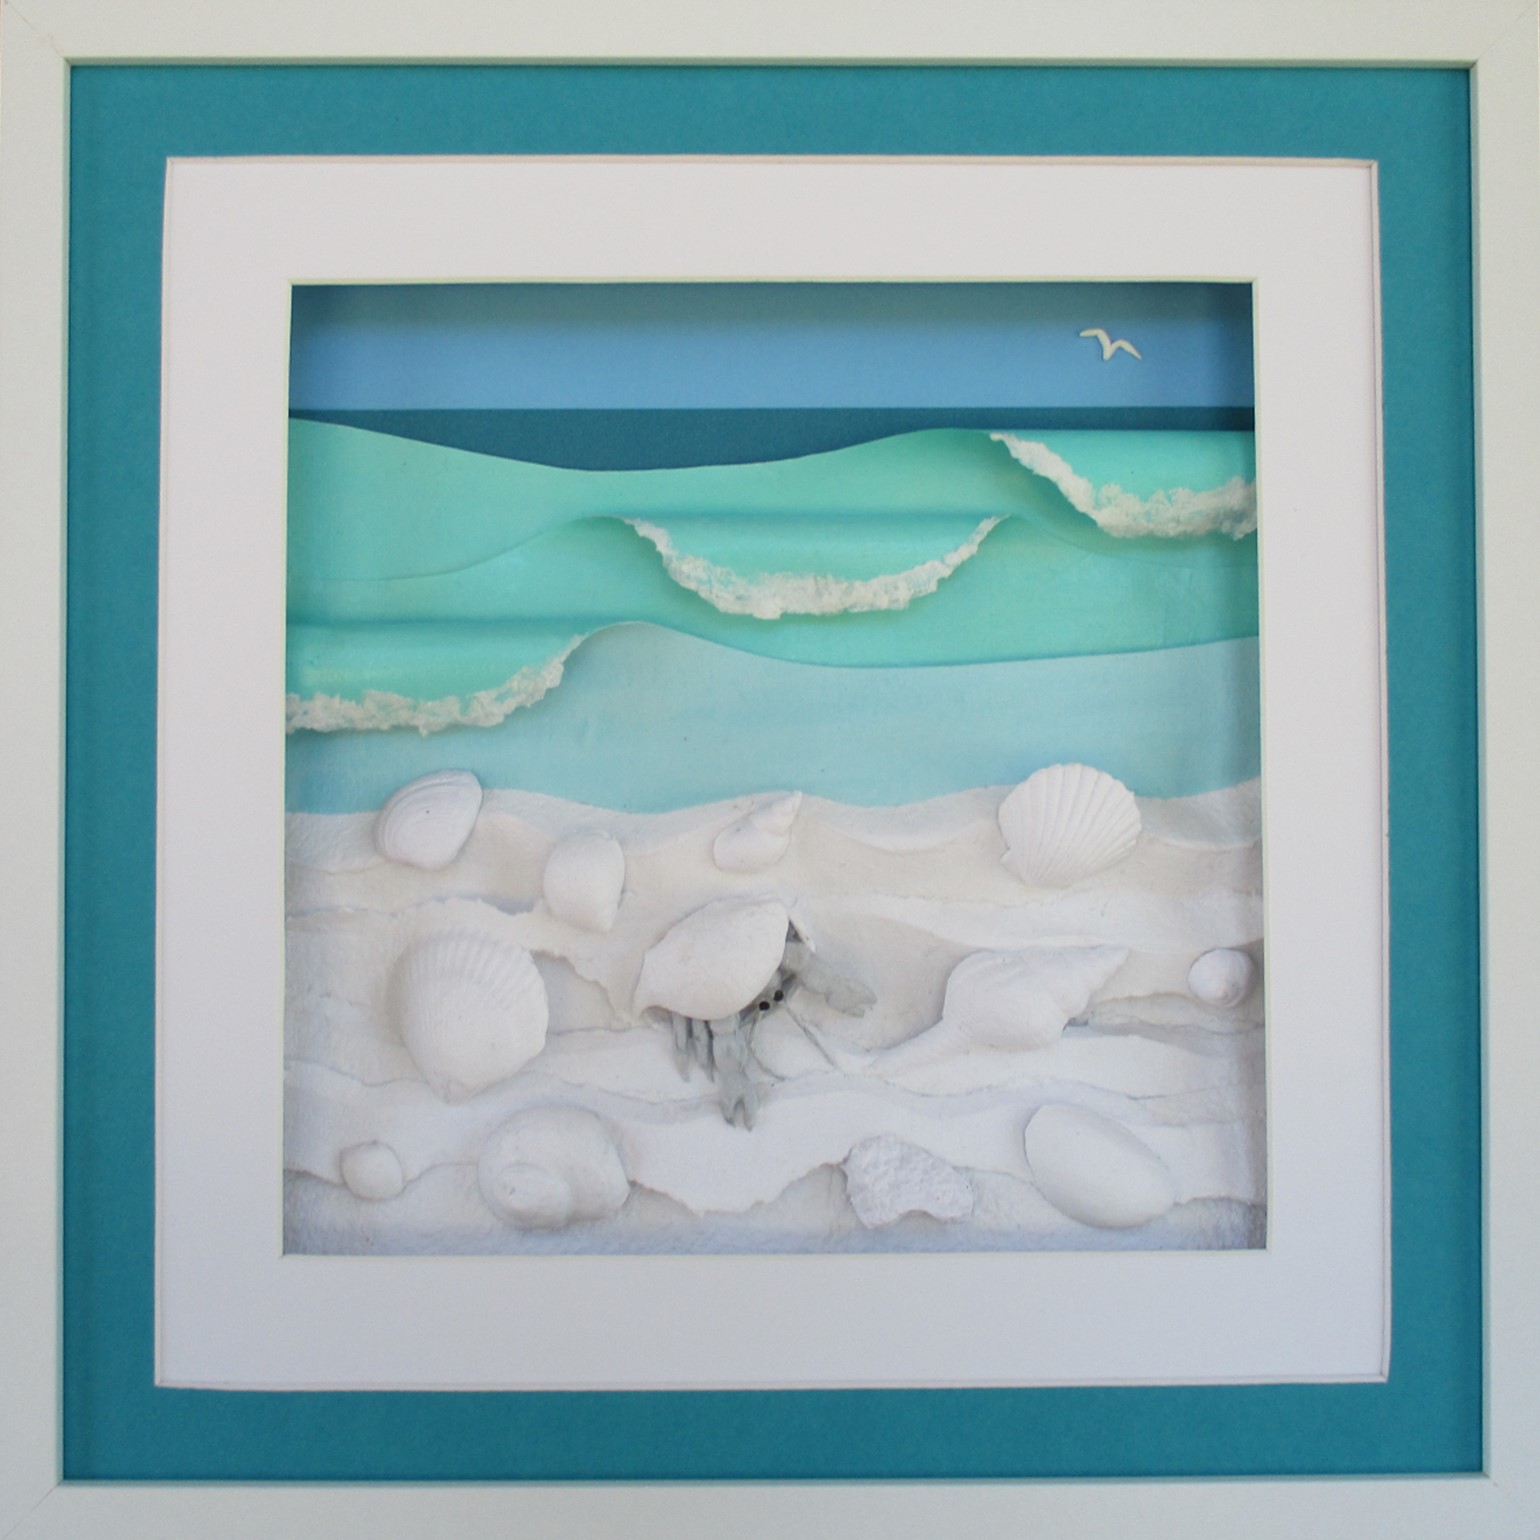
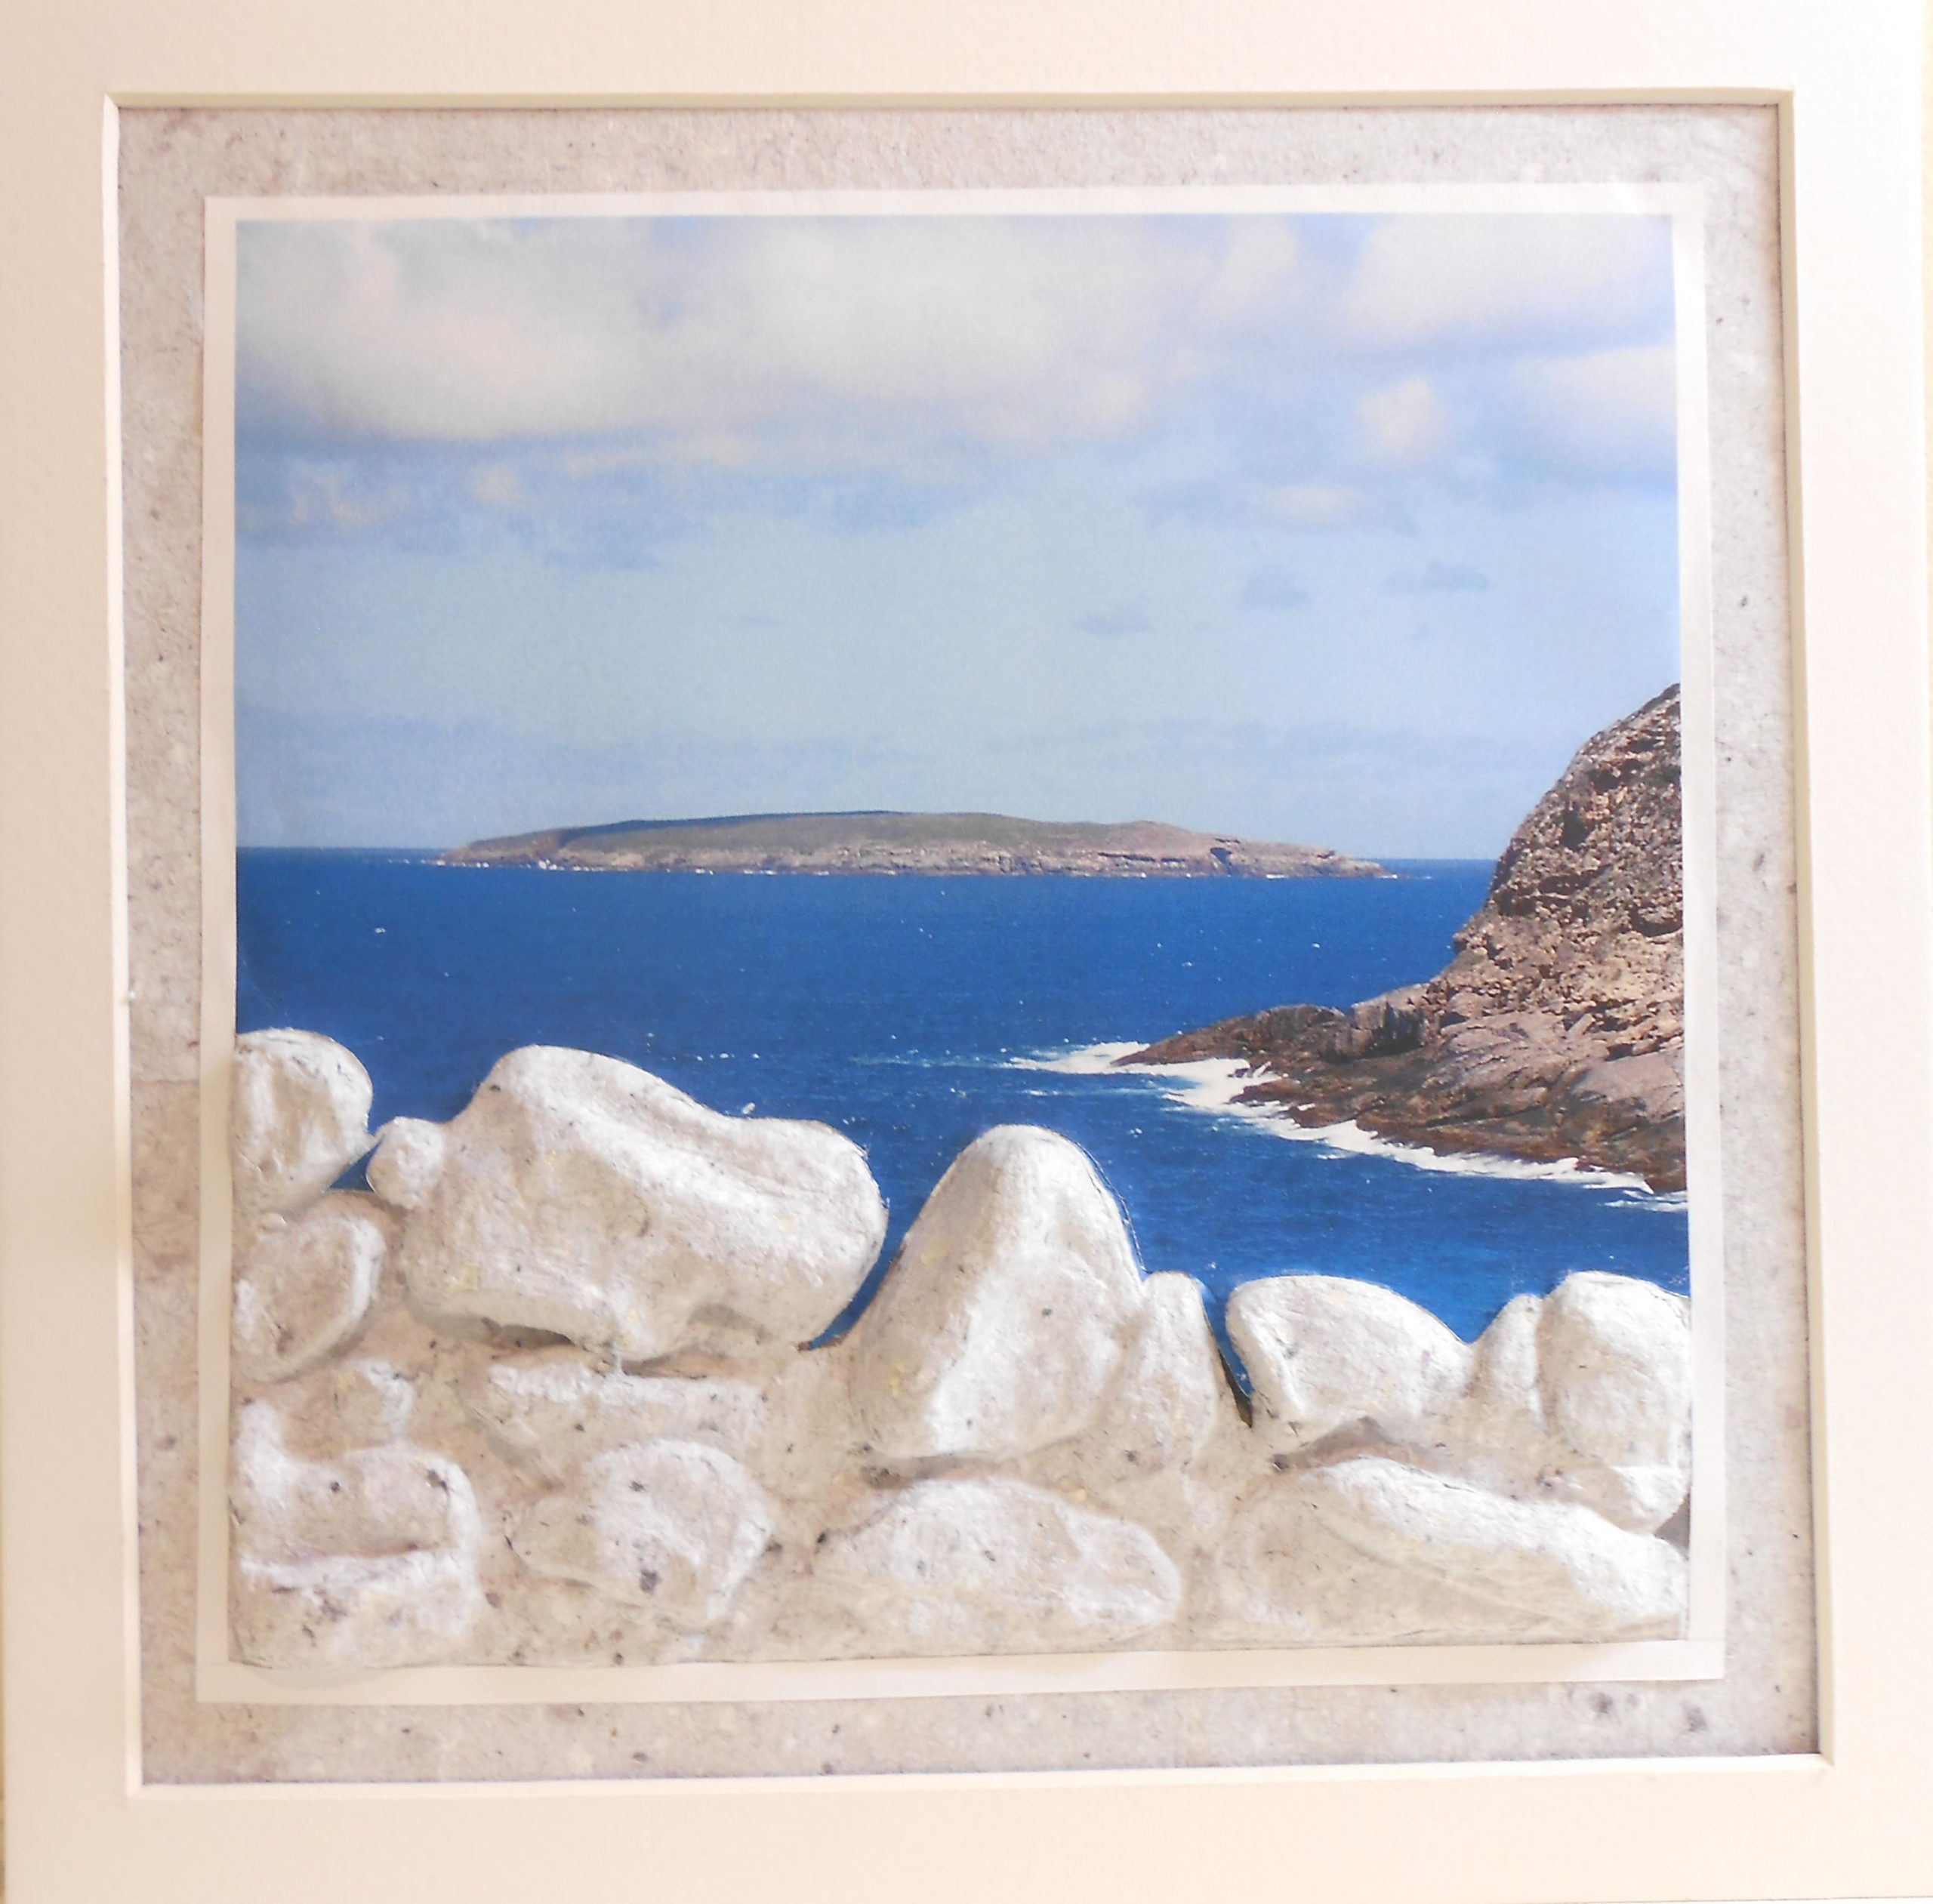
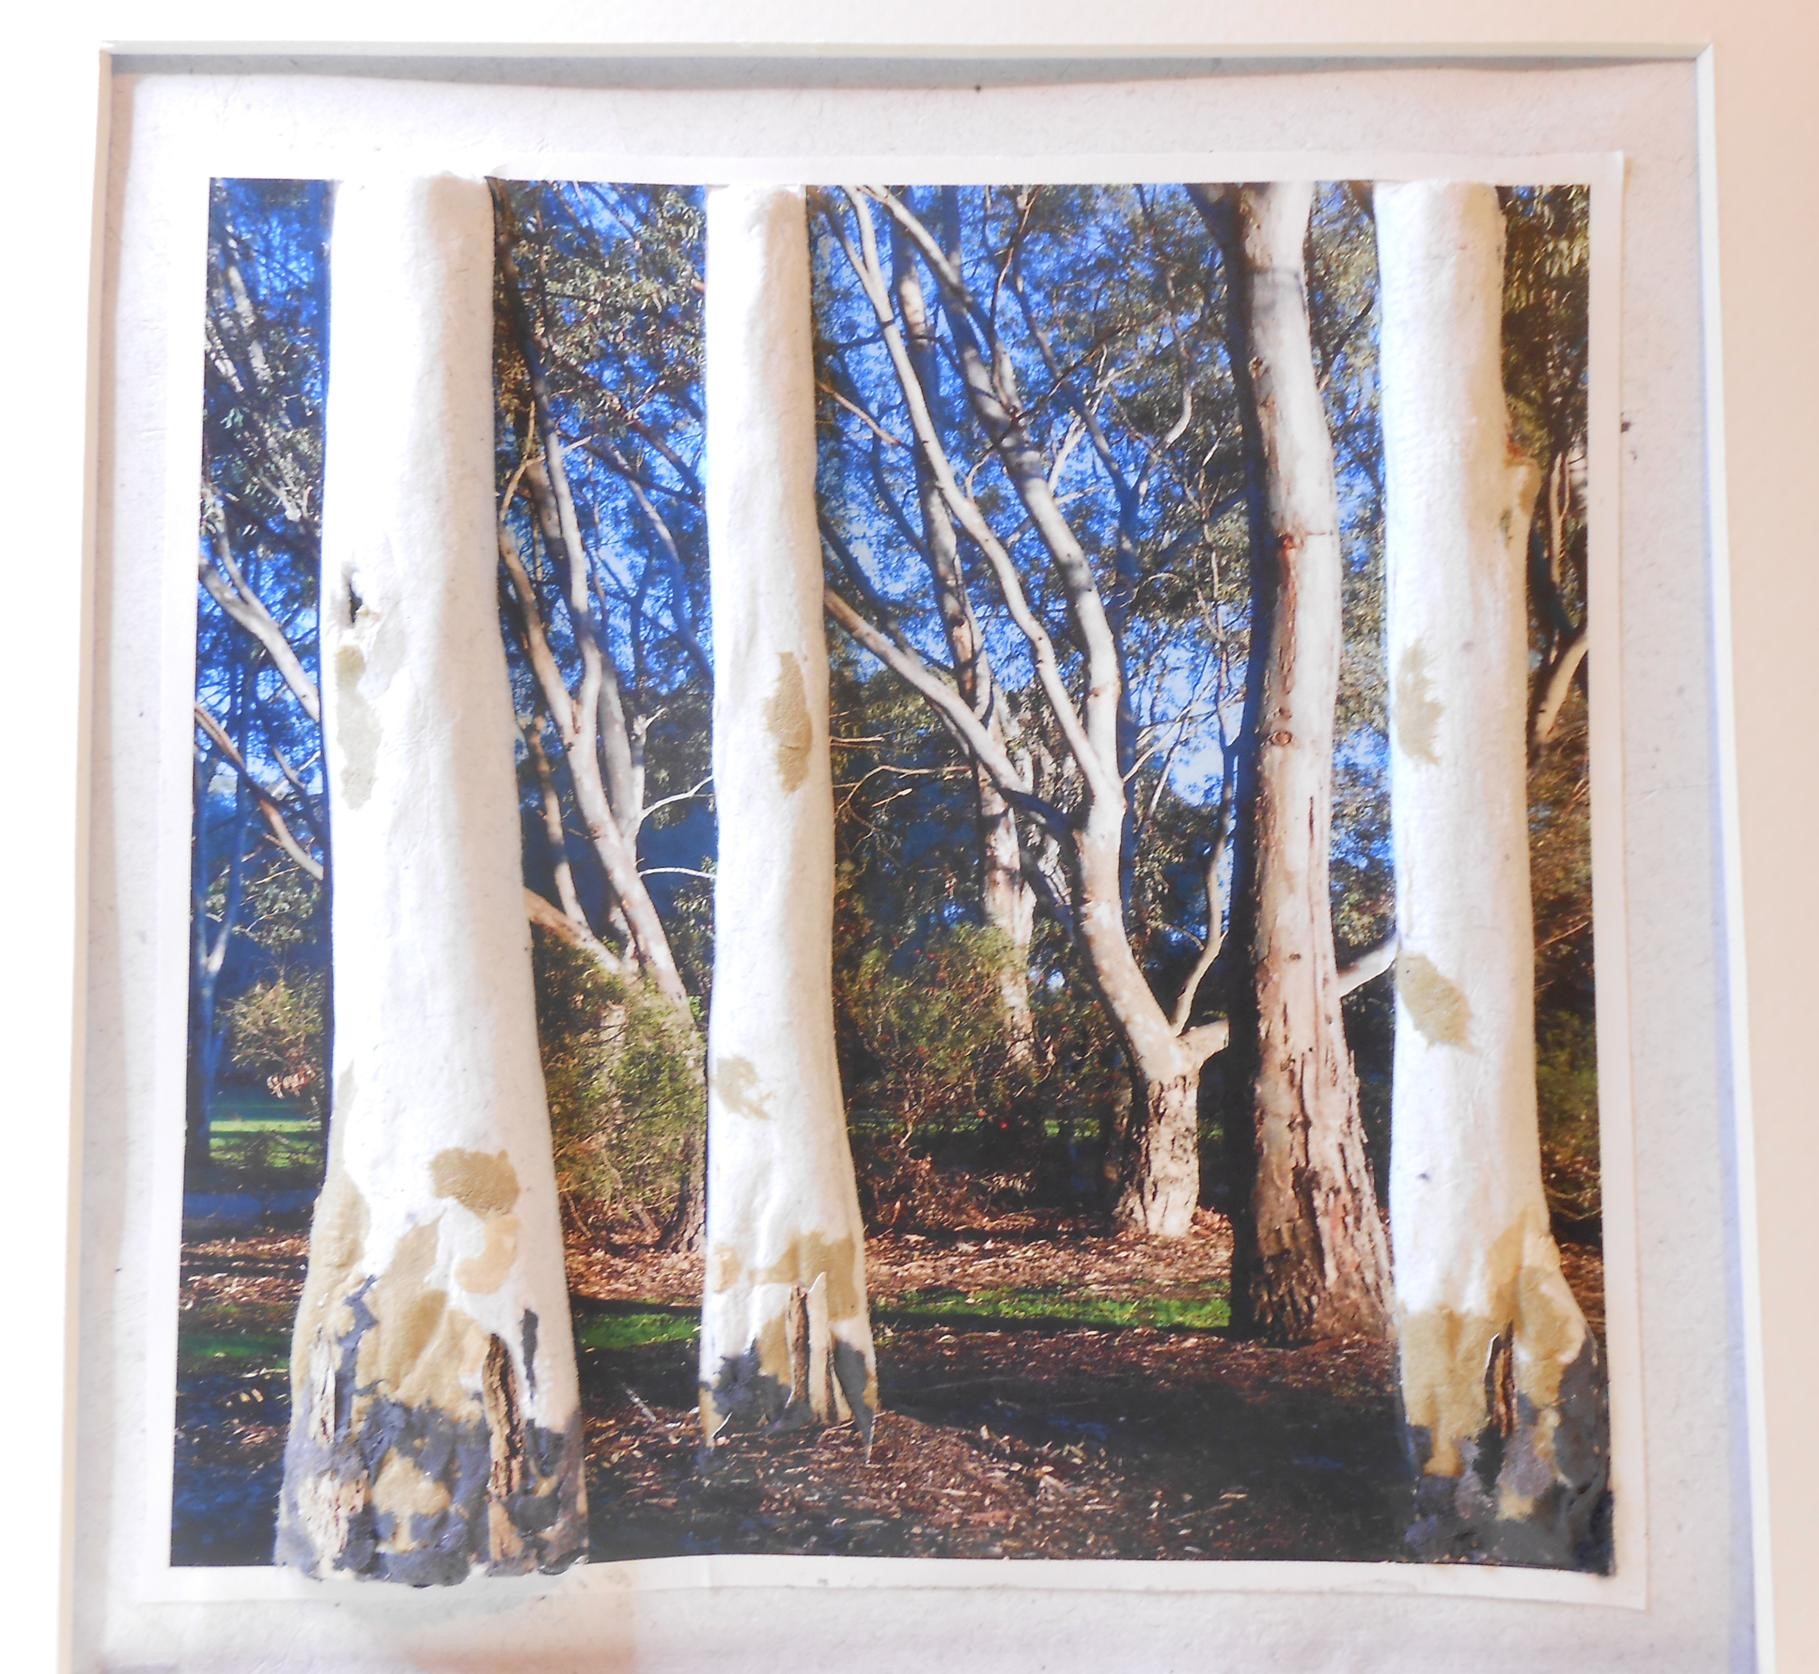
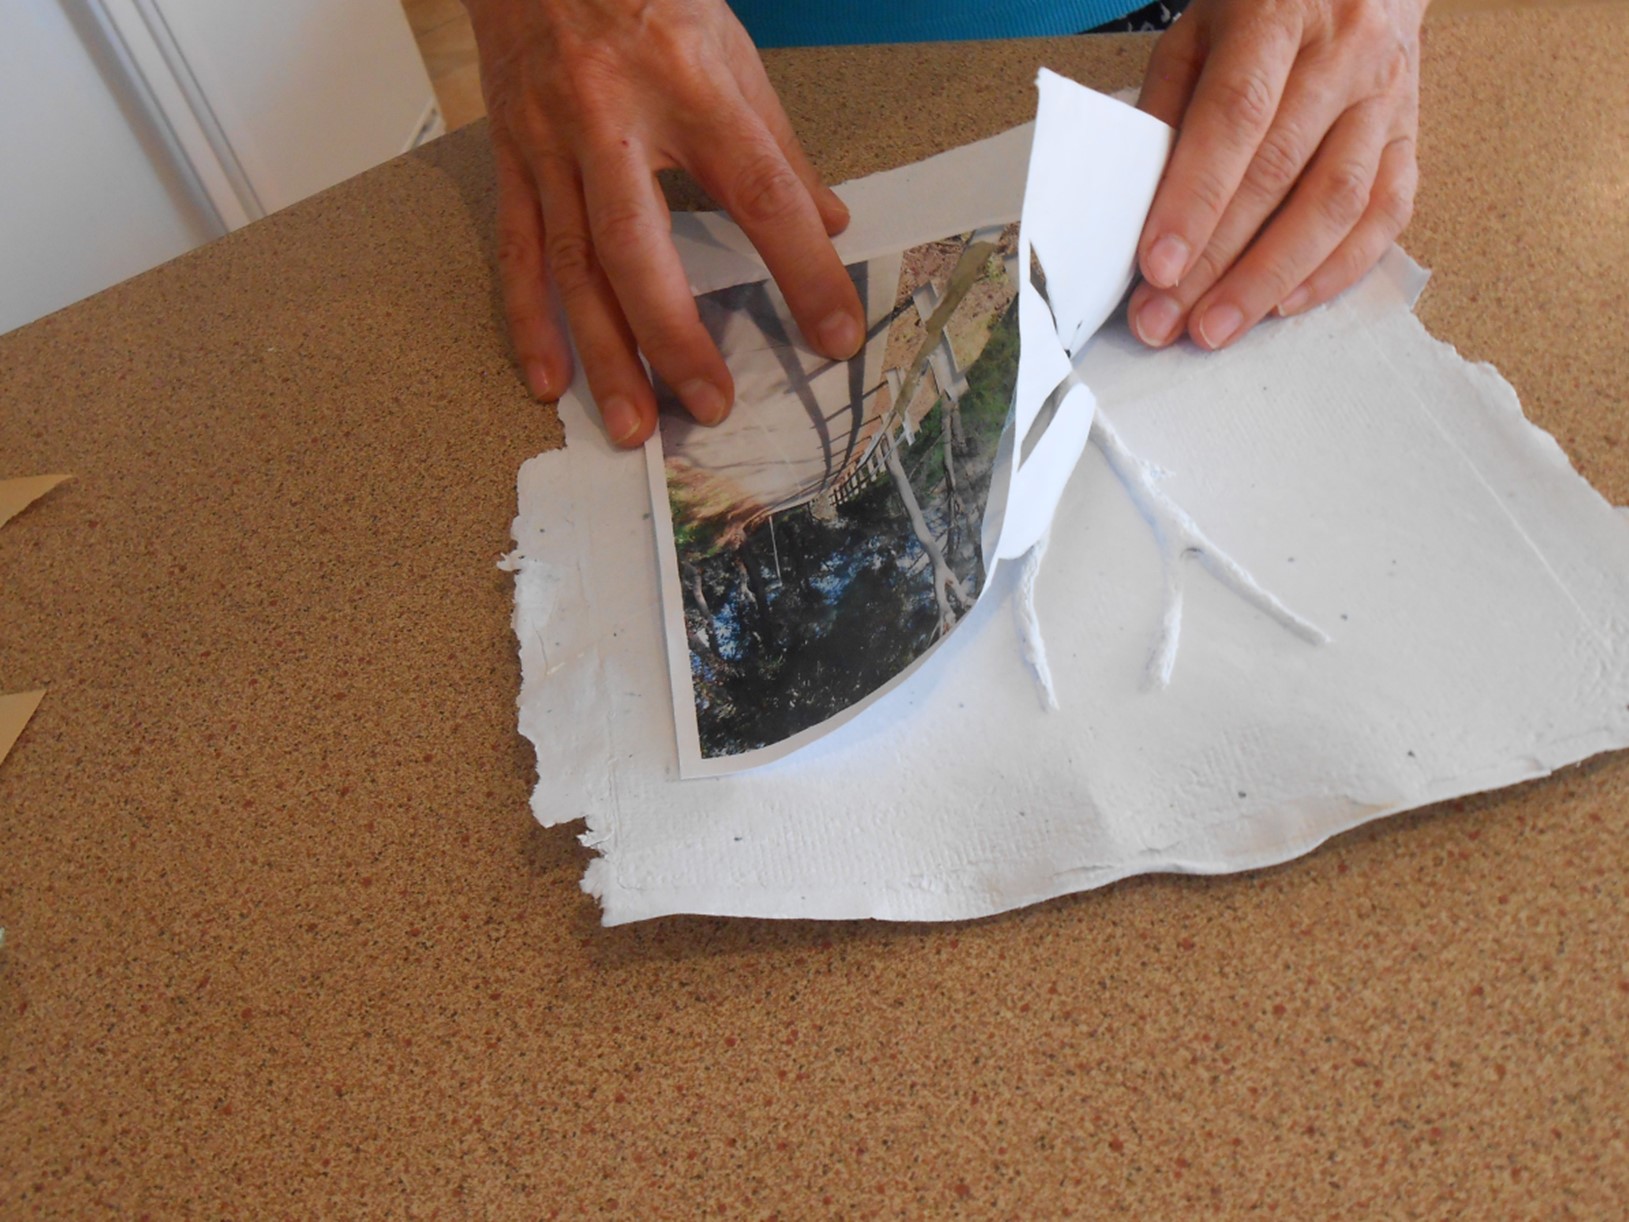
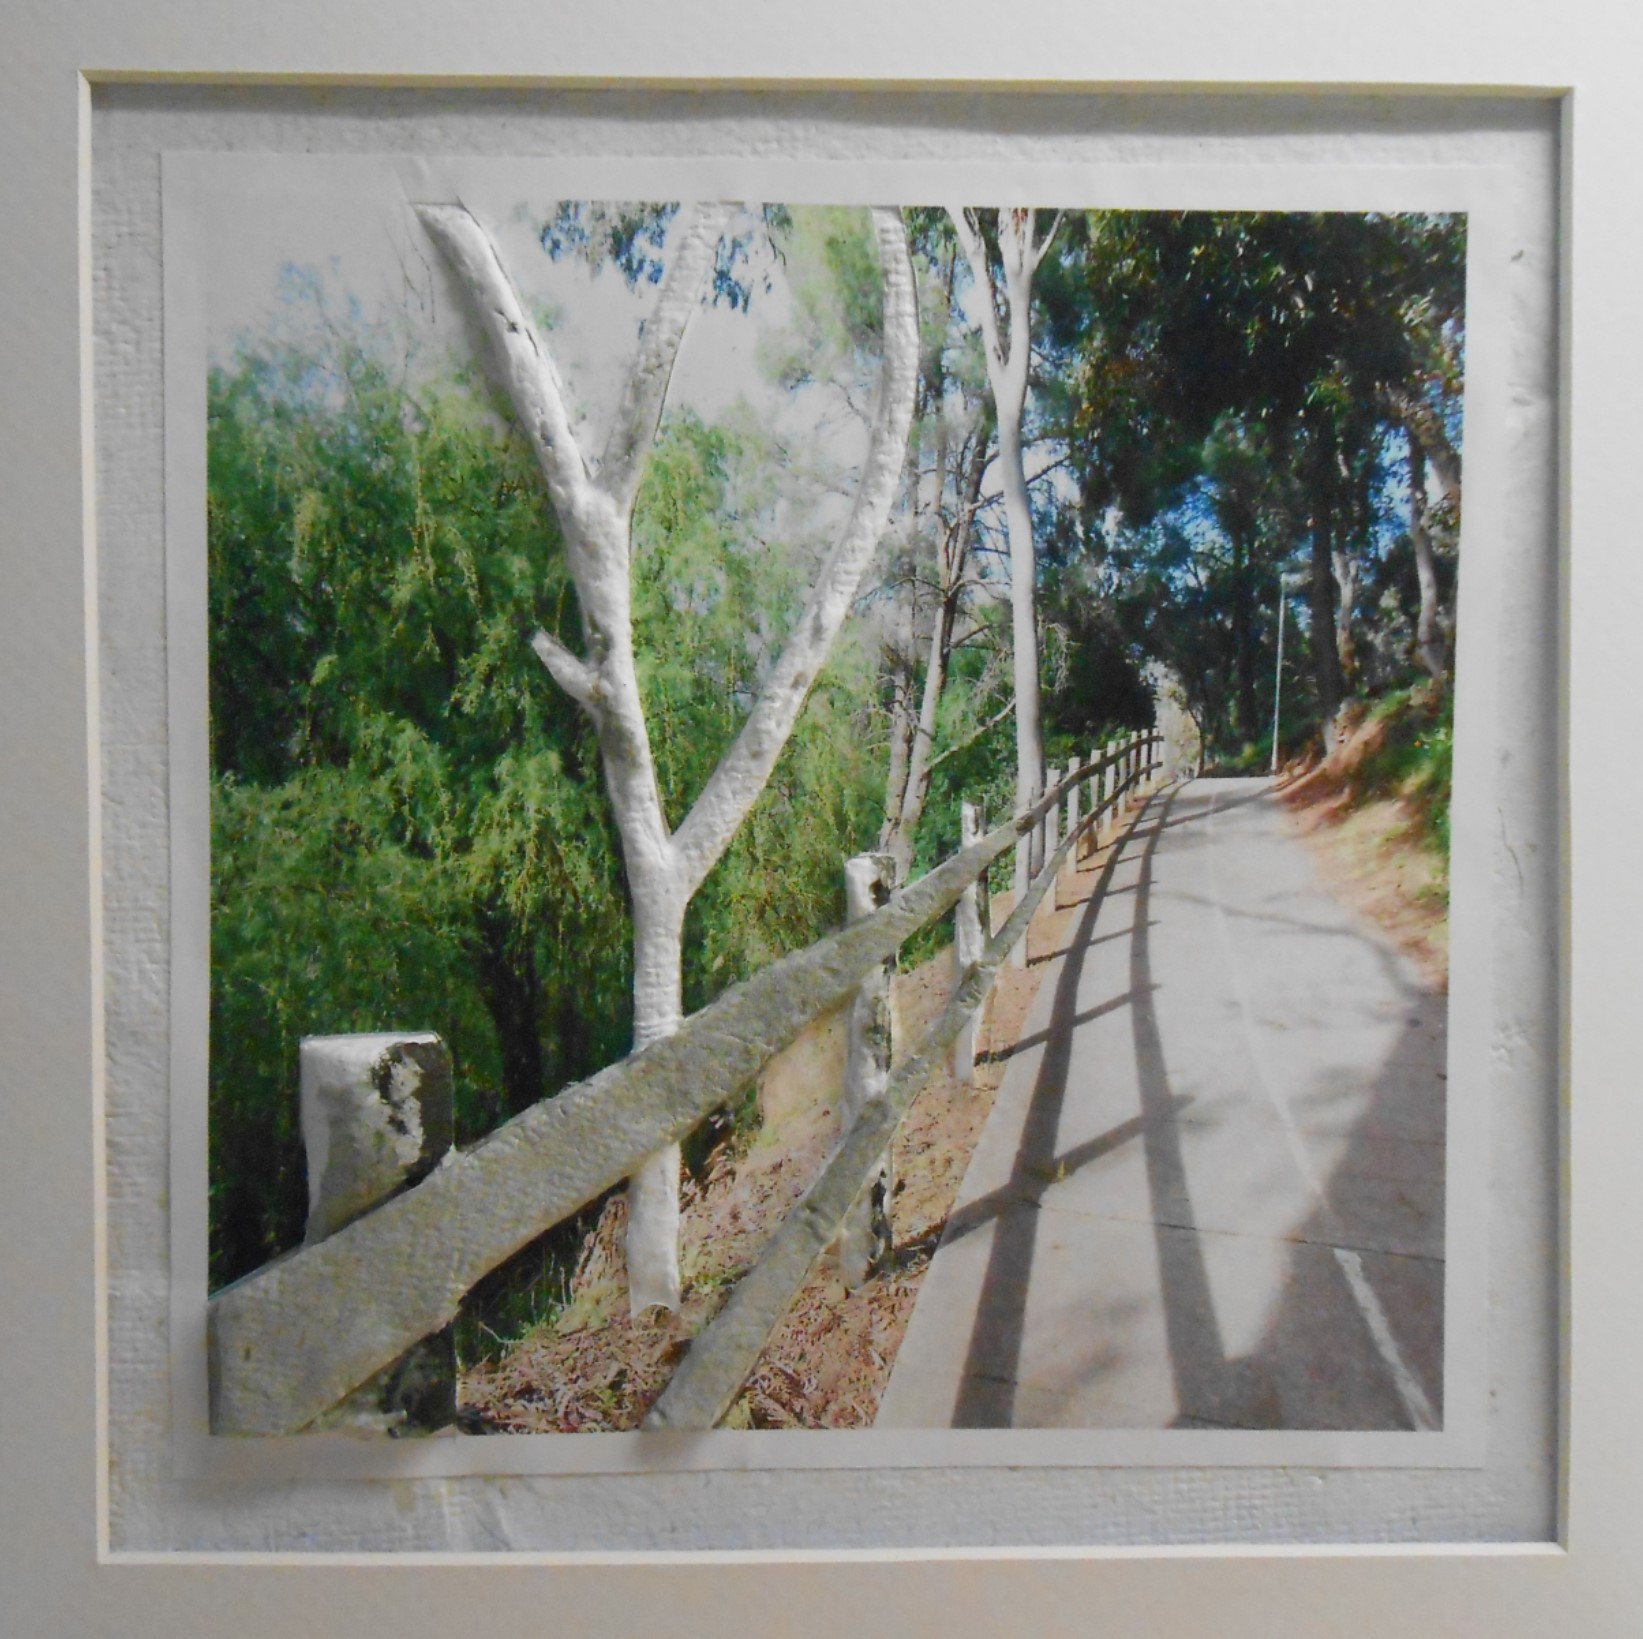
After nearly 2 years of experiments I finally put my shells into pictures. These pictures were on display at the Pepper Street Arts Centre SALA ‘Remake’ Exhibition during August 2023.
Click the images below to enlarge.
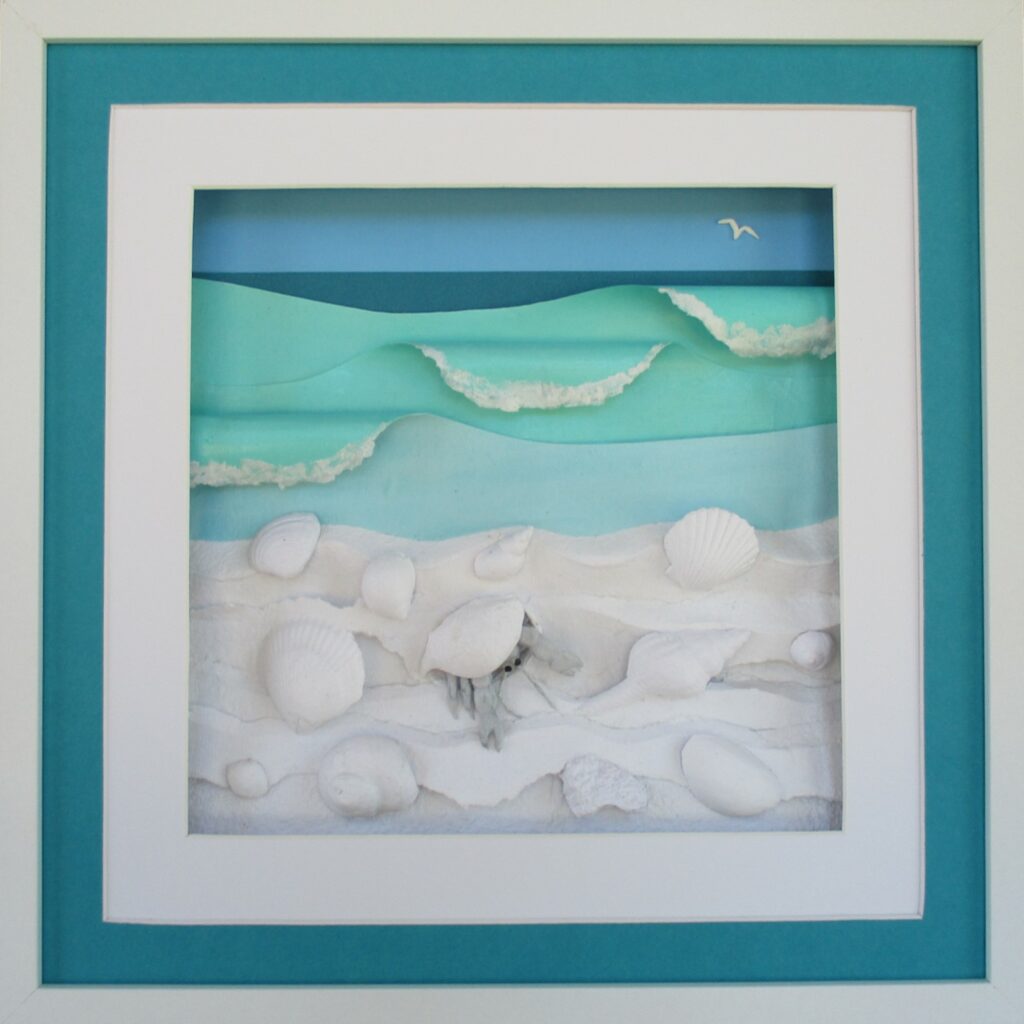
Surf and Sand 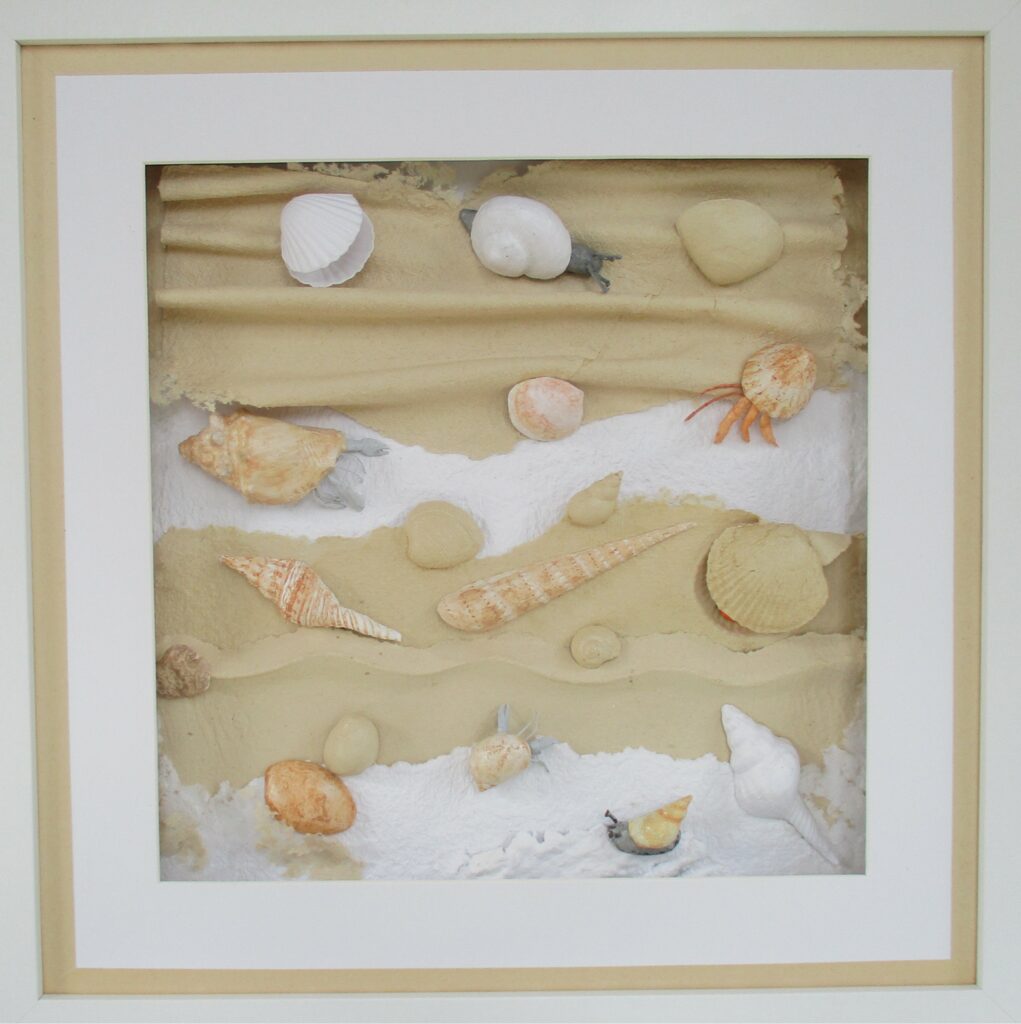
Beachcombing 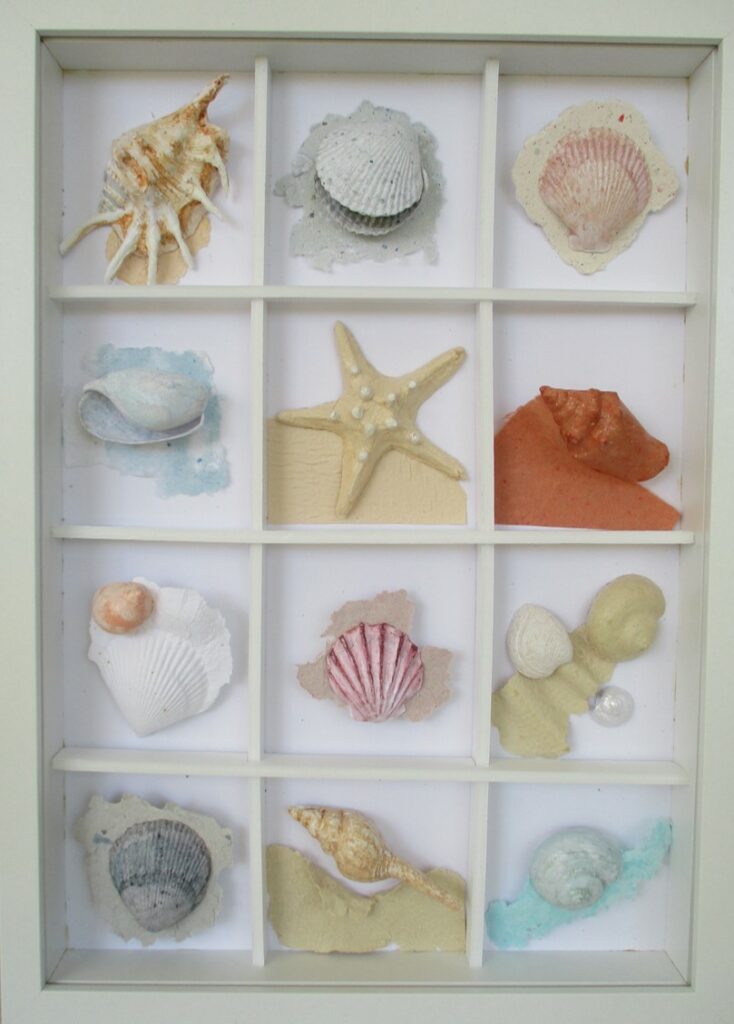
Paper shell collection